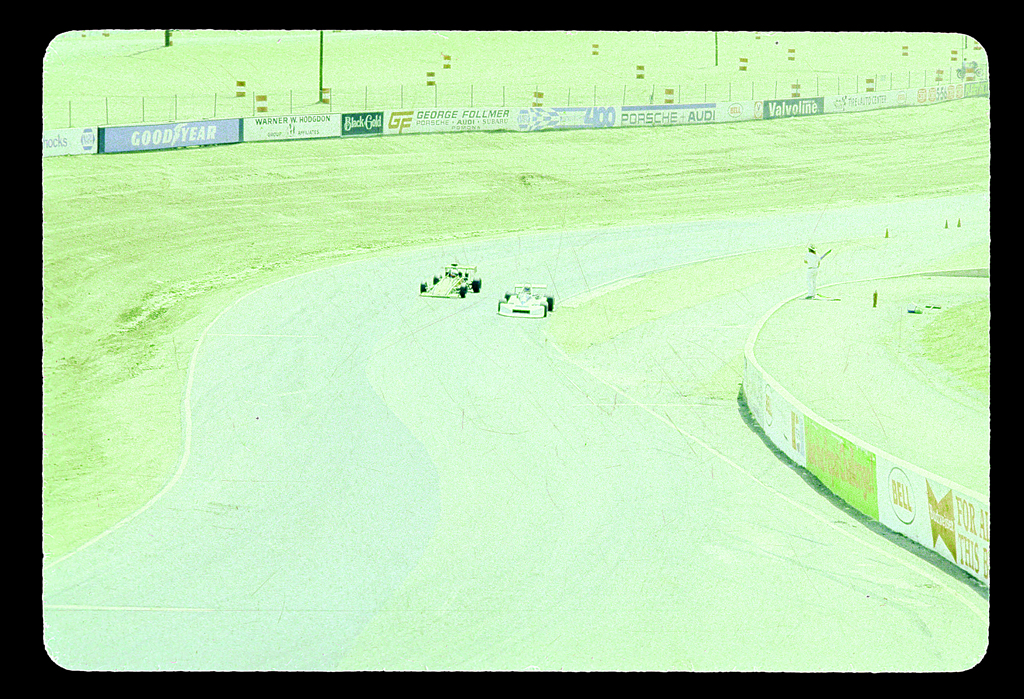
Become a MacRumors Supporter for $50/year with no ads, ability to filter front page stories, and private forums.

Lovesong

macrumors 65816
Original poster
Hey party people,
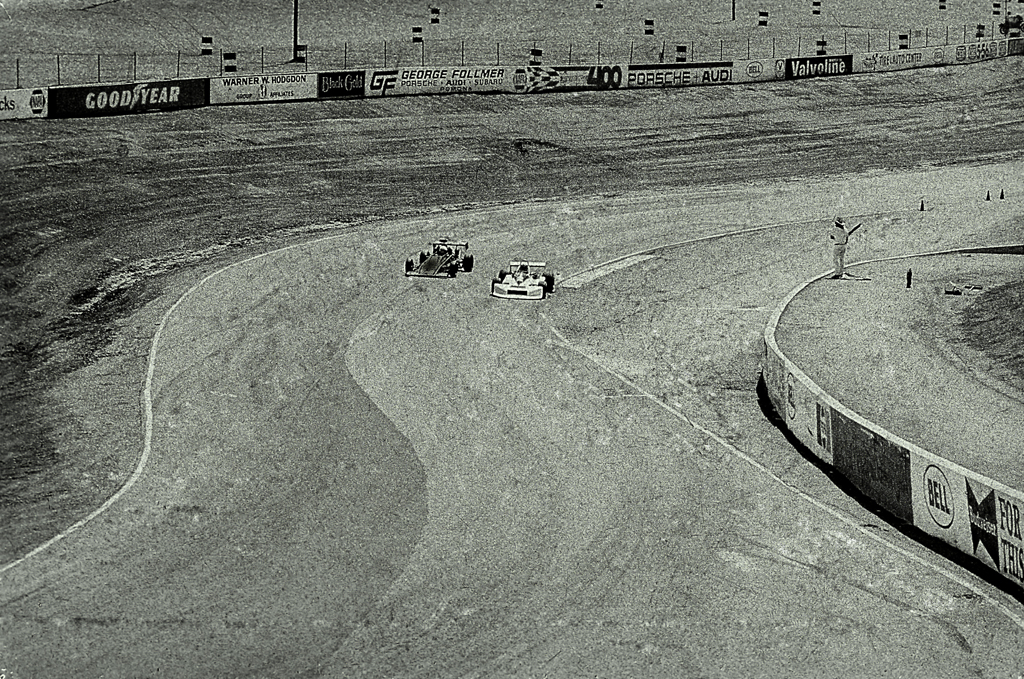
I'm currently in the process of scanning some slides from the late 70's that have been heavily abused. We're talking color fades, mold, dust, poor exposures to begin with... in other words: hell.

I've been having some issues with this one in particular. For some reason I just can't get the colors right. Any curves adjustments I do seem to throw the sucker into magenta (understandable given the ghastly green cast), but even when I try for finer adjustments using selective color, I can't seem to get the thing right, without altering the road (usually turns to lovely blue).

Basically I have pretty much given up the ghost on this one, and am thinking about a retro B&W. What do you guys think? Any suggestions on getting the colors, or should I stick with the grayscale?

1122758314_f2384571f7_o.jpg


1121916249_3915ec1d7f_o.jpg
 

thr33face

macrumors 6502
May 28, 2006
381
0
I guess you are probably using something like Photoshhop or one of it's competitors for editing your images.

By looking at the colour-channels in Photoshop one can see that the green-channel is highly overexposed.
Now to get rid of the green-cast we have to 'pull' the green channel.
You can do that by selecting the green-channel in Photoshop and then saying 'Image->Adjustements->Curves'. As a starting point pull the top right-point of the curve down. This should decrease the green-cast. From there you can go on and tweak that curve untill it suits you.
Keep in mind that this only removes the green-cast. The image will still be generally overexposed/too bright. To fix that select all colour-channels again and follow your regular Post-Processing routine.

If you are using Adobe Lightroom, the quick fix settings for me/on my screen are: WB: +4/+81.

I played around with your image for a minute in Lightroom and ended up with this:


Keep in mind that I did some quick adjustements and nothing more. I resized the image to a size so that other people cannot use it for anything.

/edit: To get rid of the blueish road, you can use the Photoshop feature 'Image->Adjustements->Replace Colour'. There you can pick on some place in your image and it shows you what gets selected. The parts that are selected get altered by playing with the sliders.

Hope I could help. have a nice day.
 

whiteyanderson

macrumors 6502
Aug 12, 2007
378
0
Hollywood, California
should be pretty fixable if you invest the time. like the above poster i took very little time (5 minutes if even that), to see that there is potential to clean it up. i think it looks better in color BUT, if you cleaned it up and adjusted it and then converted it to black and white it would look much better than the straight to B&W conversion you have posted. the above b&w is way too noisy as is.


1122758314_f2384571f7_o.jpg


try using the image- adjust- levels sliders in PS to first set your light levels in RBG, then use the drop downs to adust the greens and blues. once you get it "close" go back and do some heavier - color replacement, desaturations, adjust shadows, sharpen edges, fade sharpen, etc. i think if you spend some time- you can get it good. didn't mess with the scuffs on the slide but, if you create another duplicate layer you can probably clean those up a bit too.

if i had a few hours to work on it...
 

MacUserSince87

macrumors member
Aug 18, 2007
74
0
Northern Virginia, USA
Try Lab mode to edit...

The problem is that there isn't much RGB data to work with. But if you change mode to Lab its relatively easy to restore it somewhat.

1) Change mode to Lab
2) Open Levels
3) Select the a channel
4) Move center indicator to the center of the bell curve
5) Select the b channel
6) Move center indicator to the center of the bell curve
7) Select the L channel
8) Adjust the middle, highlight and shadow sliders by eye to adjust overall contrast. Adjust output shadow slider to lighten dark shadows
9) Change mode back to RGB
10) Dupe the background layer
11) Change mode of dupe layer to Multiply. Adjust opacity slider to taste.

Chuck Gardner
 
Register on MacRumors! This sidebar will go away, and you'll see fewer ads.