Got a tip for us?
Let us know
Become a MacRumors Supporter for $50/year with no ads, ability to filter front page stories, and private forums.
DELETED MACINTOSH? HELP
- Thread starter Lmoriginals
- Start date
- Sort by reaction score
You are using an out of date browser. It may not display this or other websites correctly.
You should upgrade or use an alternative browser.
You should upgrade or use an alternative browser.
This probably shouldn’t be in the developer forums.
But if you were trying to reset it anyway no harm done. Remake a gpt, format, install macOS
But if you were trying to reset it anyway no harm done. Remake a gpt, format, install macOS
thanks for replying. How would I make a gbt
GPT = GUID Partition Table
In the View Menu of Disk Utility make sure it is set to show all drives and volumes, not just volumes. Select your disk and hit erase. Select GUID Partition Table/GPT for the partition Map and name the first partition Macintosh HD (or anything else for that matter) and format it with APFS.
After that is done you can reinstall macOS to it.
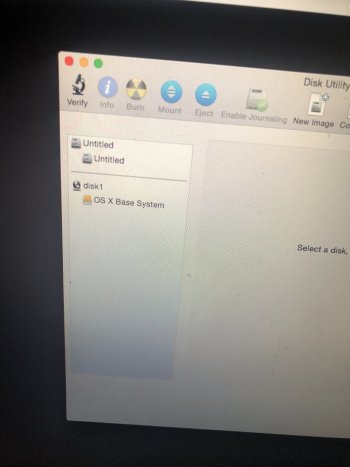
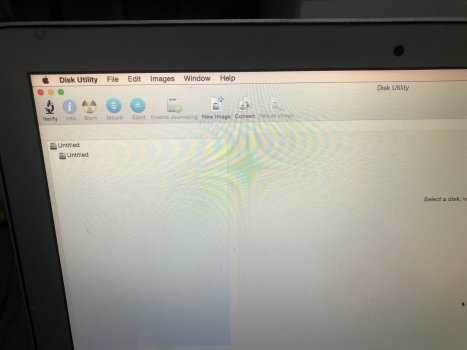
So I’ve tried this and saw this online but I wasn’t even able to access a view menu in disk utility to show all drives
Attachments
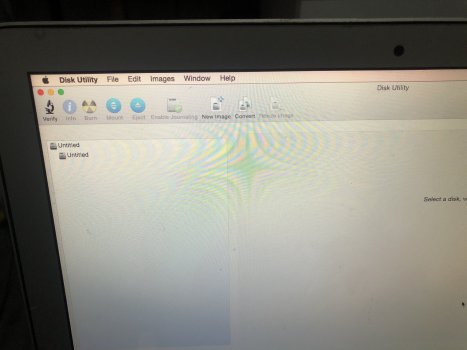
Version of Disk Utility is just sufficiently old that it's not relevant. It's always on Show All Devices, so just ignore that part and operate on your Untitled diskSo I’ve tried this and saw this online but I wasn’t even able to access a view menu in disk utility to show all drives
Which version of Recovery are you in? Yosemite?
Yea Yosemite the partition keeps failing. “Couldn’t open disk”
Try doing this from Internet Recovery instead of local recovery.
Or use the Terminal command diskutil to erase the disk. - it might produce more detailed diagnostics if nothing else.
A Macbook air 7.2 is a 2017, right? (in America, we generally use the year of manufacture, not "the number").
1. Boot to INTERNET recovery (NOT to the "recovery partition")
Command-OPTION-R
at boot.
KEEP HOLDING THOSE KEYS DOWN until it asks for wifi password, then enter it.
2. Once the internet utilities are loaded, open disk utility.
VERY IMPORTANT -- go to the view menu and choose "show all devices".
3. Look at the list on the left. The "topmost" item should be the internal drive.
ERASE IT to APFS, GUID partition format.
4. When the erase is done, quit disk utility and open the OS installer.
It should offer you "Monterey".
Start clicking through. The Mac will reboot one or more times, and the screen will go dark for a minute or more without any other activity, just be patient.
5. When the install is done, you should see the initial setup screen (choose your language).
Start clicking through. If you have a backup, connect it now.
6. If you are going to migrate from a backup (sounds like you're not), setup assistant will ask you to "point the way" to the external drive. Give SA time to digest things, then it will present you with a list of stuff to migrate. I would "migrate it all" and let SA do its thing.
7. If you ARE NOT migrating, just set up a new account. You can skip email, etc. for now if you wish. You really just need a user name and password to "get to the finder", and then go on from there.
When you format the drive, You can name the drive something (other than leaving it named "Untitled")
And, you can name it "Macintosh HD", which is what Apple used.
Or, something completely different. I have used "The Abyss" as my hard drive name ever since that incident on my old Quadra 605, where the hard drive hid away a paper that I was working on, never to be found
And, you can name it "Macintosh HD", which is what Apple used.
Or, something completely different. I have used "The Abyss" as my hard drive name ever since that incident on my old Quadra 605, where the hard drive hid away a paper that I was working on, never to be found
Mine is currently called rescueOS. I broke my main installation with a bad beta build and installed a secondary OS to a different volume. Intending it to be temporary while I fixed the main install. It eventually just became my main install because of the permanence of temporary solutions that work so now I run rescueOSWhen you format the drive, You can name the drive something (other than leaving it named "Untitled")
And, you can name it "Macintosh HD", which is what Apple used.
Or, something completely different. I have used "The Abyss" as my hard drive name ever since that incident on my old Quadra 605, where the hard drive hid away a paper that I was working on, never to be found
Thanks for the replies. Ok guys I can’t erase the old drive for a format it’s not clickable. If there is anyone that could help me quickly can you send me a message I can share my screen with u
The only drive (and that's the only drive that is available to you) that you should click on, is the one named "Untitled", the one at the top of the list.
THAT'S your hard drive, and your next step is to erase, using that top-of-the-list item. Name it something else, so you know that it is a successful erase.
THAT'S your hard drive, and your next step is to erase, using that top-of-the-list item. Name it something else, so you know that it is a successful erase.
Keep in mind that if you plan to sell or transfer the MacBook, unless you used data encryption like FileVault previously, simply reformatting the drive is insufficient to destroy your private data stored there. There are ways to perform a secure erase, but these are somewhat technical, much more than formatting like we are trying to do here.
Disk utility has secure erase options in there where it can shove random bits all over the drive repeatedly or just fill it with 0s repeatedly. Any modern Mac T2 and beyond always had encryption enabled for the internal drive even if no password or file vault is used.Keep in mind that if you plan to sell or transfer the MacBook, unless you used data encryption like FileVault previously, simply reformatting the drive is insufficient to destroy your private data stored there. There are ways to perform a secure erase, but these are somewhat technical, much more than formatting like we are trying to do here.
While this may suffice in a pinch (or where technical knowledge is limited), this method is more suitable for hard drives than for solid state drives (as in this case here). What you end up with is your SSD allocating 100% of its primary storage blocks (to store nothing), leaving only the overprovisioned area for functions like garbage collection and wear leveling. In this state, the SSD will be much more aggressive with erases and writes (accelerating wear on the drive), and performance will be degraded.Disk utility has secure erase options in there where it can shove random bits all over the drive repeatedly or just fill it with 0s repeatedly. Any modern Mac T2 and beyond always had encryption enabled for the internal drive even if no password or file vault is used.
Supposedly Disk Utility first aid will TRIM all unused blocks, which should restore the drive to a more ideal working state afterwards. However, the way to securely erase an (unencrypted) SSD is using the ATA secure erase function, which is possible in Linux and maybe Windows but not in macOS unfortunately (at least not with tools built in to the OS).
Register on MacRumors! This sidebar will go away, and you'll see fewer ads.


