Become a MacRumors Supporter for $50/year with no ads, ability to filter front page stories, and private forums.

sinval

macrumors newbie
Original poster
Jun 15, 2025
5
0
Hi everyone!


This is my first post here. I've been browsing for a while and found a lot of helpful information, but some of the answers I’ve seen about upgrading storage in the iMac A2115 (2019) model seem a bit outdated. So I thought I’d ask directly and hopefully get some up-to-date guidance.


I own a 27" iMac A2115 (2019) with a 1TB Fusion Drive and 64GB of RAM. The machine still serves me well, but the disk performance is clearly the weakest link. It's time for an upgrade.


I'm also about to replace the power supply, and since I’ll be opening the iMac anyway, I figured this is the perfect opportunity to upgrade the internal storage. I’m considering a power unit from Ycheda (available online), but I’d love to hear if anyone has experience with this brand. Is it trustworthy, or should I look for an alternative?


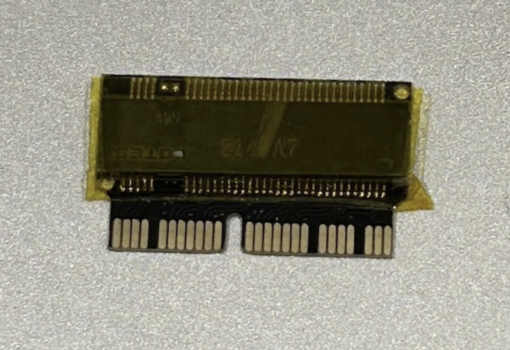
1. What’s the best internal drive upgrade option for this model? NVMe SSD in the blade slot? SATA SSD?
2. Any specific brands or models you’d recommend for performance and compatibility?
3. Will I need any adapters, thermal sensors, or mounting tools for the disk upgrade?
4. Anything to keep in mind when removing or replacing the Fusion Drive components?
5. Any thoughts on Ycheda power supplies? Alternatives welcome.

I’m aiming for a significant speed boost (especially in boot times and app launching), and I’d prefer an internal solution rather than relying on external drives.


Thanks so much in advance for any advice! Looking forward to learning from you all.
 
Hi Sinval,
I can help with a few points:

1. Best NVME Drive for the 2019 iMac is WD Black SN770 in terms of speed and price. (2900gb/s write /3100GB/s read according to AHA), and will not get much over 3000gb/s in practice whichever you choose due to 2019 iMac PCIE 3.0 logic board limitations.
Since PCIE 3.0 SSD are hard to find and are still quite costly, there is no point in buying them. Buy PCIE 4.0 which are backward compatible, and you may use it in future when you upgrade to ARM macs using PCIE4?

2. All Apple power units I have come across are made by Liteon https://www.ifixit.com/Parts/iMac/Power_Supplies. Ifixit offers new power units for your mac at US$ 129.00 Pricey but reliable. Personally I have been successful with some used parts from Ali Express. They offer full refund if item faulty.

3. Go to iMac (Retina 5K, 27-inch, 2017) CPU and NVME SSD Upgrade Pitfalls and Tips which offers detailed experience, tools and much else. Still valuable despite products being dated.

AND for your iMac particularly, see https://forums.macrumors.com/threads/a-list-of-successful-imac-27-2012-2019-ssd-upgrades.2162435/ pages-54-58-60-64/65 which gives experience upgrading a 2019 iMac and subsequent discussions about recommended adapters /NVME; technique and self insulation; heatsinks; etc.
 
@sinval The PSU shown in that advert's picture is a Liteon original item, with the Liteon branding (to the left of HF) obscured with a black marker.
So it is probably a refurbished item, and as it says in the advert: 'Sourced from trusted suppliers...'

I expect it will work fine. 😉
 
@sinval The PSU shown in that advert's picture is a Liteon original item, with the Liteon branding (to the left of HF) obscured with a black marker.
So it is probably an refurbished item, and as it says in the advert, 'Sourced from trusted suppliers...'

I expect it will work fine. 😉
Thank you! I bought it directly from Amazon USA I am now praying for it to work. :/
 
Hi sinval,
My impression is you have not opened an iMac previously. If so, there are some basic considerations to take seriously.

This link is 5 years old but deserves attention to tools and technique by a very experienced author.

Attitude: Rule 1; double check each step. Rule two; when removing cables, take time to identify and remember each one in relation to the logic board. See where they run. Sellotaping them temporarily onto the frame is useful to ensure they do not get trapped beneath the logic board or overlooked on reassembly. I have used phone camera to record cable positions before dismantling as OWC/Ifixit video resolution is too poor for enlargement in case of critical query.

Specifically; the 2019 iMac requires a T25 Allen key, or ensure you have a slender long shafted screwdriver and a T25 socket. Allan Key from Ali Express cheapest option.

1. About static: My studio has a carpeted floor which means it is impossible to earth myself and eliminate static electricity. Earth to the iMac aluminium is the best I can do. In the past I have blown an iMac power unit without touching it; due to static electricity jumping from my wrist. Wrist straps are very cumbersome and cable catches on components. Not recommended. Now I always wear surgical gloves. They insulate, keep perspiration off sensitive parts and ensure better grip for safer working practice. Keep fingers way from soldered points as rubber catches.

2. Technique: The iMac powerboard sits snugly adjacent to the Motherboard and the powerboard DC socket/plugs must be removed before you can remove the Motherboard. This is a delicate task. After unscrewing the powerboard you must release the tight DC power connector bearing several short cables. To move the power board away from the motherboard you are fighting the pressure of the connecting cables which unite the two boards. With experience I have learned to partially straighten the cables carefully thus enabling me to place the powerboard upright against the computer ‘chin’. Of course all the condensers and soldering is exposed - hence need to exercise great care and avoid contact. Hold power board by its edges whenever possible.

To release the socket, press the centre of the short bar, down hard, towards the body of the socket. This should raise the barb upwards but it is usually too tight. Supposedly - while applying this pressure, grip the two halves of the socket one in each hand, and work them apart. Not easy. I used the flat, sharp edge of a spudger first to lift the barb, then to lever the two halves apart, one at a time. Once they move a little, the separation becomes much easier.

While you are doing this the power unit and your hand are apt to collide. Now you see the value of surgical gloves for insulation. Nowhere have I read anyone offering a caution regarding this aspect of disassembly and video’s do not show the actual socket separation process. That video technicians use bare hands leaves me amazed. Obviously they are insured by experience. Not so with YouTube demonstrators who are far too cavalier in my opinion.

3. The oft recommended Sintech 2280 NVME adapter is unsuitable for WD Black SN 770/850x. The NVME adapter is best insulated with Kapton tape to reduce electrical field interference with metal cap, see photo - thanks mwidjaya. Best heatsink material is copper. With cool running NVME, heatsink material choice becomes less critical. With restricted space and airflow at back of the 2019 iMac, the fast but cool running WD Black SN770 rarely gets above C45° in graphics and office work. It is a safe choice for non gaming.

4. If you feel competent to handle the above you should find the procedure straight forward. First time around, I had the OWC video on the monitor of a second computer while I worked on the first iMac. Glass removal and screen opening are best done from an upright positions. Take care to open the screen a couple of inches only as you must carefully unplug the screen connector cable from the motherboard, and similarly a cable connecting the monitor inverter, before you can remove the screen. From that point onward I prefer the computer to be on its back.

Although I have the Macfix adhesive strips to seal the screen to the body, here I am two years later, still with sellotape temporarily holding the glass screen onto the back. I have been unduly cautious about finally sealing the iMac in case a problem occurs.
 

Attachments

  • Screenshot 2025-06-26 at 11.37.02 am.png
    Screenshot 2025-06-26 at 11.37.02 am.png
    1.3 MB · Views: 3
Last edited:
  • Like
Reactions: sinval
Hi sinval,
My impression is you have not opened an iMac previously. If so, there are some basic considerations to take seriously.

This link is 5 years old but deserves attention to tools and technique by a very experienced author.

Attitude: Rule 1; double check each step. Rule two; when removing cables, take time to identify and remember each one in relation to the logic board. See where they run. Sellotaping them temporarily onto the frame is useful to ensure they do not get trapped beneath the logic board or overlooked on reassembly. I have used phone camera to record cable positions before dismantling as OWC/Ifixit video resolution is too poor for enlargement in case of critical query.

Specifically; the 2019 iMac requires a T25 Allen key, or ensure you have a slender long shafted screwdriver and a T25 socket. Allan Key from Ali Express cheapest option.

1. About static: My studio has a carpeted floor which means it is impossible to earth myself and eliminate static electricity. Earth to the iMac aluminium is the best I can do. In the past I have blown an iMac power unit without touching it; due to static electricity jumping from my wrist. Wrist straps are very cumbersome and cable catches on components. Not recommended. Now I always wear surgical gloves. They insulate, keep perspiration off sensitive parts and ensure better grip for safer working practice. Keep fingers way from soldered points as rubber catches.

2. Technique: The iMac powerboard sits snugly adjacent to the Motherboard and the powerboard DC socket/plugs must be removed before you can remove the Motherboard. This is a delicate task. After unscrewing the powerboard you must release the tight DC power connector bearing several short cables. To move the power board away from the motherboard you are fighting the pressure of the connecting cables which unite the two boards. With experience I have learned to partially straighten the cables carefully thus enabling me to place the powerboard upright against the computer ‘chin’. Of course all the condensers and soldering is exposed - hence need to exercise great care and avoid contact. Hold power board by its edges whenever possible.

To release the socket, press the centre of the short bar, down hard, towards the body of the socket. This should raise the barb upwards but it is usually too tight. Supposedly - while applying this pressure, grip the two halves of the socket one in each hand, and work them apart. Not easy. I used the flat, sharp edge of a spudger first to lift the barb, then to lever the two halves apart, one at a time. Once they move a little, the separation becomes much easier.

While you are doing this the power unit and your hand are apt to collide. Now you see the value of surgical gloves for insulation. Nowhere have I read anyone offering a caution regarding this aspect of disassembly and video’s do not show the actual socket separation process. That video technicians use bare hands leaves me amazed. Obviously they are insured by experience. Not so with YouTube demonstrators who are far too cavalier in my opinion.

3. The oft recommended Sintech 2280 NVME adapter is unsuitable for WD Black SN 770/850x. The NVME adapter is best insulated with Kapton tape to reduce electrical field interference with metal cap, see photo - thanks mwidjaya. Best heatsink material is copper. With cool running NVME, heatsink material choice becomes less critical. With restricted space and airflow at back of the 2019 iMac, the fast but cool running WD Black SN770 rarely gets above C45° in graphics and office work. It is a safe choice for non gaming.

4. If you feel competent to handle the above you should find the procedure straight forward. First time around, I had the OWC video on the monitor of a second computer while I worked on the first iMac. Glass removal and screen opening are best done from an upright positions. Take care to open the screen a couple of inches only as you must carefully unplug the screen connector cable from the motherboard, and similarly a cable connecting the monitor inverter, before you can remove the screen. From that point onward I prefer the computer to be on its back.

Although I have the Macfix adhesive strips to seal the screen to the body, here I am two years later, still with sellotape temporarily holding the glass screen onto the back. I have been unduly cautious about finally sealing the iMac in case a problem occurs.
I'm truly grateful for your wonderful advice.
 
Register on MacRumors! This sidebar will go away, and you'll see fewer ads.