I did this a few years ago and never got around to documenting it. Cleaning came up in another thread here and someone asked about the setup. Figured it would make sense to post it here as well.
Details of the filter:
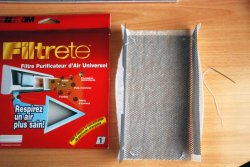
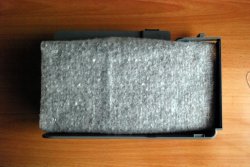
Here is the filter I bought.


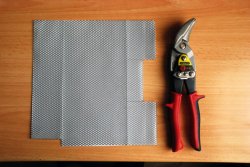
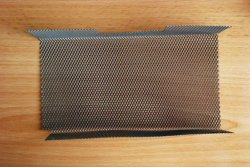
Back then, it was all black. It has been since eco-fied. I basically took the whole thing apart and used the middle layer. Which looks like this (after cutting to fit)

If I knew what this stuff was called, I would simply buy it by itself instead of trashing a filter. But since this is a "lifetime" filter. It can be cleaned and holds up pretty well. This one is about 2 years old.
When I get my new Pro (hopefully next month), I may play around with sowing all three layers together for extra dust stopping.
Performance:
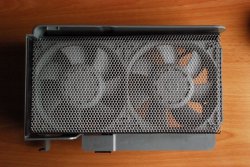
Here it is with a year's worth of dust (I missed a cleaning during a move).

I didn't notice an increase in temps as dust builds up, it runs pretty cool all the time.
Installed:
Here it is installed after today's cleaning.

 '
'
Procedure:
1. Buy a filter, or material.
2. Remove the front fan assembly
3. Cut the material to shape, accounting for any places that it needs to be shaped around (i.e. front I/O board).
a. The front IO board is easily removed and has some front holes underneath it. It should be easy to pull the board out and form the material around it to also keep dust from those openings beneath it.
4. There is a lip that the filter can be inserted into, so account for that when shaping it as it will fit more snug.
5. Once the filter is the right shape, insert it into the front. Be sure to push it into the various corners as it may get caught on the various cables running through the area.
6. It may bubble a bit. The fan assembly will keep it in place, so as long as it isn't a large bubble don't worry about it.
7. Reinstall the fan shroud.
8. Have a beer (of beverage of your choice!)
Details of the filter:
Here is the filter I bought.
Back then, it was all black. It has been since eco-fied. I basically took the whole thing apart and used the middle layer. Which looks like this (after cutting to fit)
If I knew what this stuff was called, I would simply buy it by itself instead of trashing a filter. But since this is a "lifetime" filter. It can be cleaned and holds up pretty well. This one is about 2 years old.
When I get my new Pro (hopefully next month), I may play around with sowing all three layers together for extra dust stopping.
Performance:
Here it is with a year's worth of dust (I missed a cleaning during a move).
I didn't notice an increase in temps as dust builds up, it runs pretty cool all the time.
Installed:
Here it is installed after today's cleaning.
Procedure:
1. Buy a filter, or material.
2. Remove the front fan assembly
3. Cut the material to shape, accounting for any places that it needs to be shaped around (i.e. front I/O board).
a. The front IO board is easily removed and has some front holes underneath it. It should be easy to pull the board out and form the material around it to also keep dust from those openings beneath it.
4. There is a lip that the filter can be inserted into, so account for that when shaping it as it will fit more snug.
5. Once the filter is the right shape, insert it into the front. Be sure to push it into the various corners as it may get caught on the various cables running through the area.
6. It may bubble a bit. The fan assembly will keep it in place, so as long as it isn't a large bubble don't worry about it.
7. Reinstall the fan shroud.
8. Have a beer (of beverage of your choice!)