Quick guide to enable correct color mode and 125% scaling on external Dell 4K (2650 x 1440) monitors with your MacBook. (Instructions for Windows and OSX).
This gives you a smoothly scaled external monitor experience which keeps UI elements approximately the same ‘size’ as you drag them between the Retina and external display.
Windows (approx 10 seconds)
OSX High Sierra/Mojave (approx 2.5 hours)
Gotta love OSX.
This gives you a smoothly scaled external monitor experience which keeps UI elements approximately the same ‘size’ as you drag them between the Retina and external display.
Windows (approx 10 seconds)
- Plug in monitor
- Right Click Desktop
- Click ‘Display Settings’
- Drag Scaling slider to 125%
- Click Apply
- Everything looks great.
OSX High Sierra/Mojave (approx 2.5 hours)
- Plug in monitor
- The screen doesn’t look right, text and black on white elements are blurry and have chroma ‘bloom’ around them.
- Open System Preferences
- Click Displays
- Look relevant settings
- There are none.
- Google it, not sure the exact issue, so try ‘OSX external display fuzzy text’
- Read 4 top links that are a collection of forum posts where die-hard Mac users tell me that:
- This is just the way it is with Mac
- OSX is ‘better’ because it displays fonts differently and this can make them blurry. Deal with it.
- My eyes are at fault because I’m comparing it to a Retina screen now and the Retina is SO good that everything else looks blurry.
- I need to buy an Apply display
- Try enabling or disabling font smoothing.
- Decide to try the font smoothing thing.
- Open System Preferences
- Click General (weirdly this is not considered a ‘Display’ setting)
- Font smoothing is enabled, so I try disabling it. It doesn’t fix the problem.
- Re-enable font smoothing.
- Back to Google.
- Finally find a forum post that explains the problem is that OSX incorrectly forces the color mode on some external screens to YPbPr/YCbCr instead of RGB.
- Open System Preferences
- Click displays
- Look for Color Mode setting
- It does not exist in OSX
- Eventually find this excellent blog post with a fix: https://spin.atomicobject.com/2018/08/24/macbook-pro-external-monitor-display-problem/
- Jaw drops at complexity of the fix - recovery mode?!!?!
- Decide to go for it.
- Download the script from GitHub
- Run the script - it writes a new EDID file.
- Shut down Mac
- Boot into Recovery Mode
- Open Disk Tool
- Mount the FileVault Encrypted disk
- Enter password
- Close Disk Tool
- Open Terminal
- Copy the EDID file created to the correct System folder
- Reboot
- IT WORKS!!! No more text blurring and color bloom.
- Celebratory beer.
- Things are still too small on the external display however, time to tackle the Scaling.
- Open System Preferences
- Click Displays
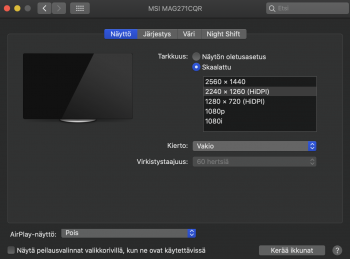
- Click the ’Scaled’ radio button.
- Weird, all it does it give a list of alternative resolutions.
- Try some alternative resolutions, they all look blurry and awful, as expected.
- Look for other settings related to Scaling.
- There are none.
- Back to Google
- Read through the top links which are all blog posts where die-hard Mac users tell me:
- This is just how it is with Mac.
- I need to buy an Apple approved display.
- That lowering the resolution is the same as scaling (FML you idiots)
- Eventually find some posts that talk about specific ‘HiDPI’ scaling options by pressing the ‘Option’ key while clicking the Scaled radio button.
- GO back to Display preferences, hold down Option and click Scaled.
- Still there are no HiDPI options.
- Google how to enable HiDPI
- Find this article: https://www.tekrevue.com/tip/hidpi-mode-os-x/
- Open Terminal
- Run the command
- Go back to Display Preferences
- Still no HiDPI options
- Back to Google.
- Eventually discover that OSX only natively supports HiDPI modes on monitors with specific Aspect Ratios. (This is completely undocumented by Apple - Thanks Apple!)
- Google how to set custom resolutions.
- Find post talking about some software called SwitchResX.
- Download SwitchResX
- Baulk at the bizarre user interface.
- Find the ‘supported’ resolution options for my Screen - there are lots more than in the Apple settings dialog, including some HiDPI ones.
- Try some HiDPI options, they look good but they are the wrong Aspect Ratio, so there black bars at the sides of the screen.
- Back to Google “custom HiDPI resolutions in OSX”
- Links back to SwitchResX FAQ https://www.madrau.com/support/supp...n_I_define_a_new_HiDPI_re.html?TB_iframe=true
- Open the ‘Manual Resolutions’ tab in SwitchResX
- Discover this part of the app only works if you disable System Integrity Protection.
- Can’t quite believe that you need to disable SIP to set a custom resolution, so Google it, end up back at the SwitchResX website where the author has a similar opinion. https://www.madrau.com/support/support/srx_1011.html
- Sigh.
- Shutdown
- Restart in Recovery Mode
- Open Terminal
- Enter command to disable SIP
- Reboot.
- Open SwitchResX
- Go to Manual Resolutions tab.
- Promted for ‘Scaled resolution’ parameters. No documentation on this.
- Take a guess that as I want 125% scaling I need to multiply my monitors Native resolution by 1.25 in both dimensions.
- Save the Custom resolution.
- Try to apply it and eventually realize that you have to Reboot again before this can be applied.
- Reboot
- Apply custom resolution.
- Partial success! Scaling has worked, aspect ratio is correct but everything is way to ‘big’ on the screen. Looks more like 175% scaling.
- Scratch head and have a think. Realize I did my math wrong. If I want 125% scaling I want to create a virtual resolution of 175% of my screen’s native resolution which will HiDPI scaled down to an effective resolution of 85% of my native resolution making everything appear… ??? 15% Larger?? Brain hurts. Close enough I decide.
- Try it with virtual resolution of 4480 x 2520.
- Reboot to save the new resolution.
- Open SwitchResX
- Set the screen resolution to the new manual HiDPI setting.
- OH MY GOD IT WORKS!!! I have a smooth scaled external monitor image which looks almost as good as the Retina!!!!!
- Realize I now have to pay for SwitchResX after 10 days
- Refuse to pay $14
- Scratch head, surely SwitchResX isn’t doing anything that advanced, probably just editing the Overrides files like the RGB fix
- Take a look at the overrides file, sure enough, SwitchResX just adds the custom resolutions in here
- Back to Google.
- Find great free tool and guide for encoding the custom resolution data: https://comsysto.github.io/Display-...or-with-HiDPI-Support-For-Scaled-Resolutions/
- Realize the custom scaled resolutions are still not available in System Preferences, hidden somehow. Another undocumented OSX ‘feature’.
- Back to Google.
- Find the awesome free tool RDM to enable the hidden resolutions. https://github.com/avibrazil/RDM
- Install RDM
- Finally!!! It all works, for FREEEEE!
- Shutdown
- Boot into recovery mode
- Re-enable SIP
- Reboot.
- Done!
Gotta love OSX.
Last edited: