@kenoh asked me to create a thread similar to the one started by @anotherscotsman (https://forums.macrumors.com/threads/how-done-it-play-on-who-done-it.2115033/#post-26017902). Both threads are similar in that they involve long exposure pics.
Here is the final version of the pic:
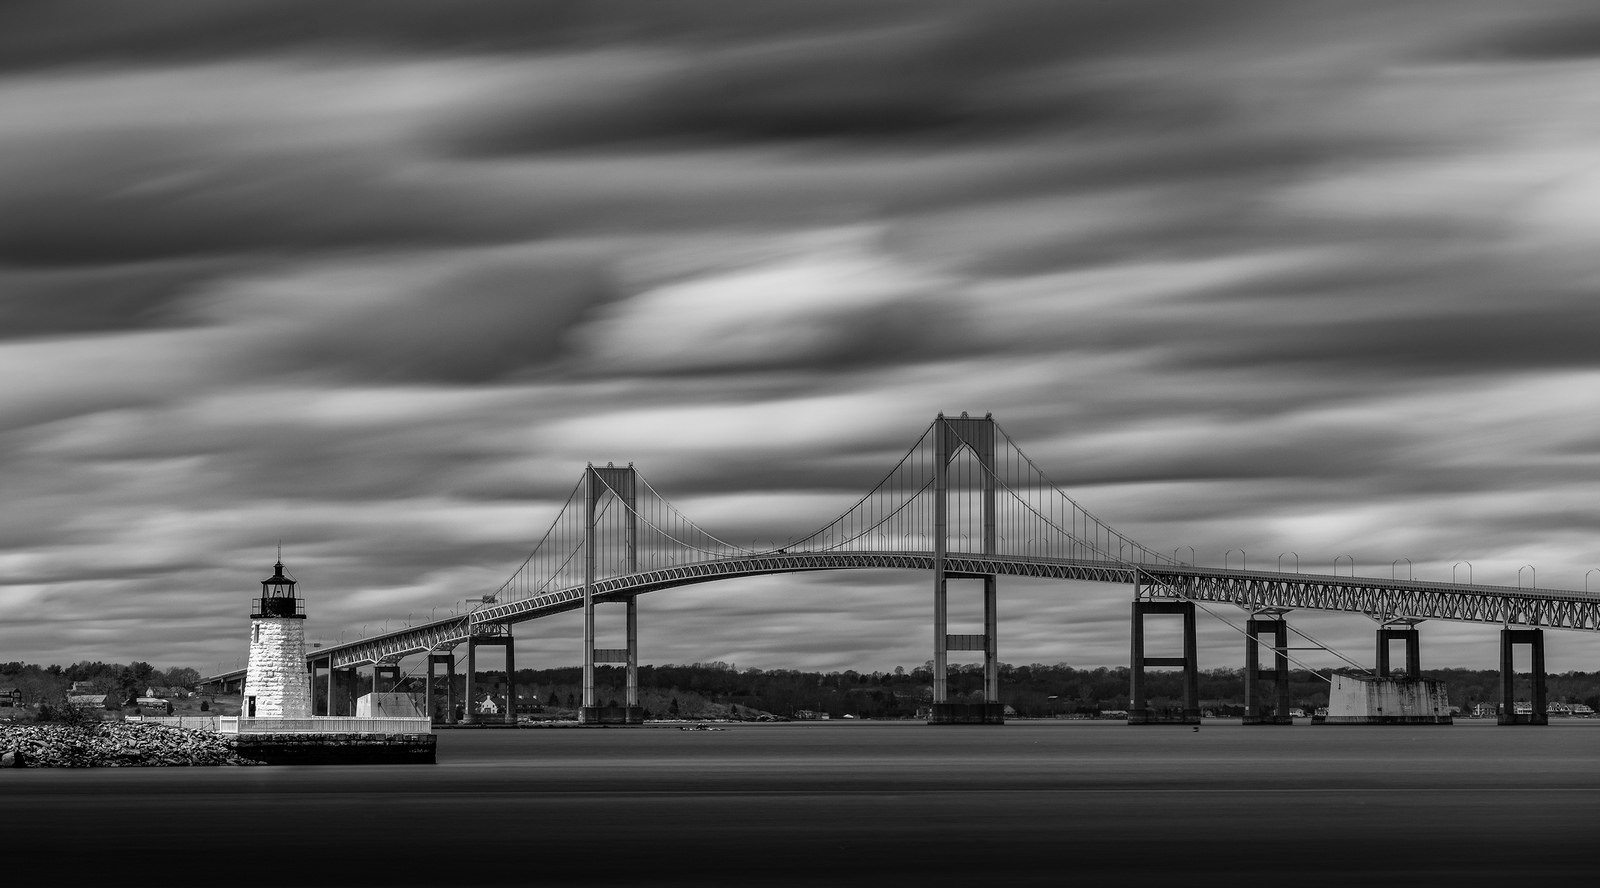
For this pic I went back to a familiar spot where I'd previously shot the Newport Bridge with the Goat Island lighthouse in the foreground. The advantage of being there before was that I knew exactly what composition I wanted. This was taken near the end of the bridge leading to Goat Island. I wanted the lighthouse to be the main subject on the left with the Newport Bridge in profile traversing the frame pulling the eye back towards the lighthouse. Other compositions from further back and to the right would have made the bridge compete with the lighthouse by coming towards the viewer.
I set up my tripod, attached the camera, and leveled it. Turned off image stabilization. Set the ISO to 100 (to both maximize sharpness/contrast/dynamic range and also to force a longer exposure time). Set the aperture to f/9 (to maximize depth of field without degrading sharpness from diffraction at smaller apertures). Attached the cable release (to prevent camera vibration while pressing the shutter and also because long exposures while holding the camera shutter button down are uncomfortable to say the least).
Tweaked the composition. I'm a huge fan of the cube tripod head as it makes it very easy to make precise adjustments to the composition while keeping everything level in the horizontal plane. Acquired focus using AF. Then turned off auto-focus. With a 13 stop ND filter and circular polarizer filter I wasn't going to be able to achieve focus either with AF or manually.
Now the camera was set and the hard part was done! In aperture priority mode I took a pic with a circular polarizer filter but without the ND filter attached. Again f/9 with ISO 100. The camera chose a shutter speed of 1/200 sec. Review of the histogram showed a good overall exposure, though it wasn't pushed to the right. I attached the 13 stop ND filter, changed the camera to manual exposure, set it to bulb mode, and made an exposure of 86 sec (was shooting from the hip and not using a calculator--just seemed right to me based on experience with other shots earlier in the day with the same exposure settings). Turned out it was a good educated guess as the exposure was close to perfect with the histograms pushed to the right but not blowing out any highlights. Went to my next shooting spot confident that I'd gotten what I came for at that location.
I reviewed the pics when I got home. Here are the RAW files without any adjustments:
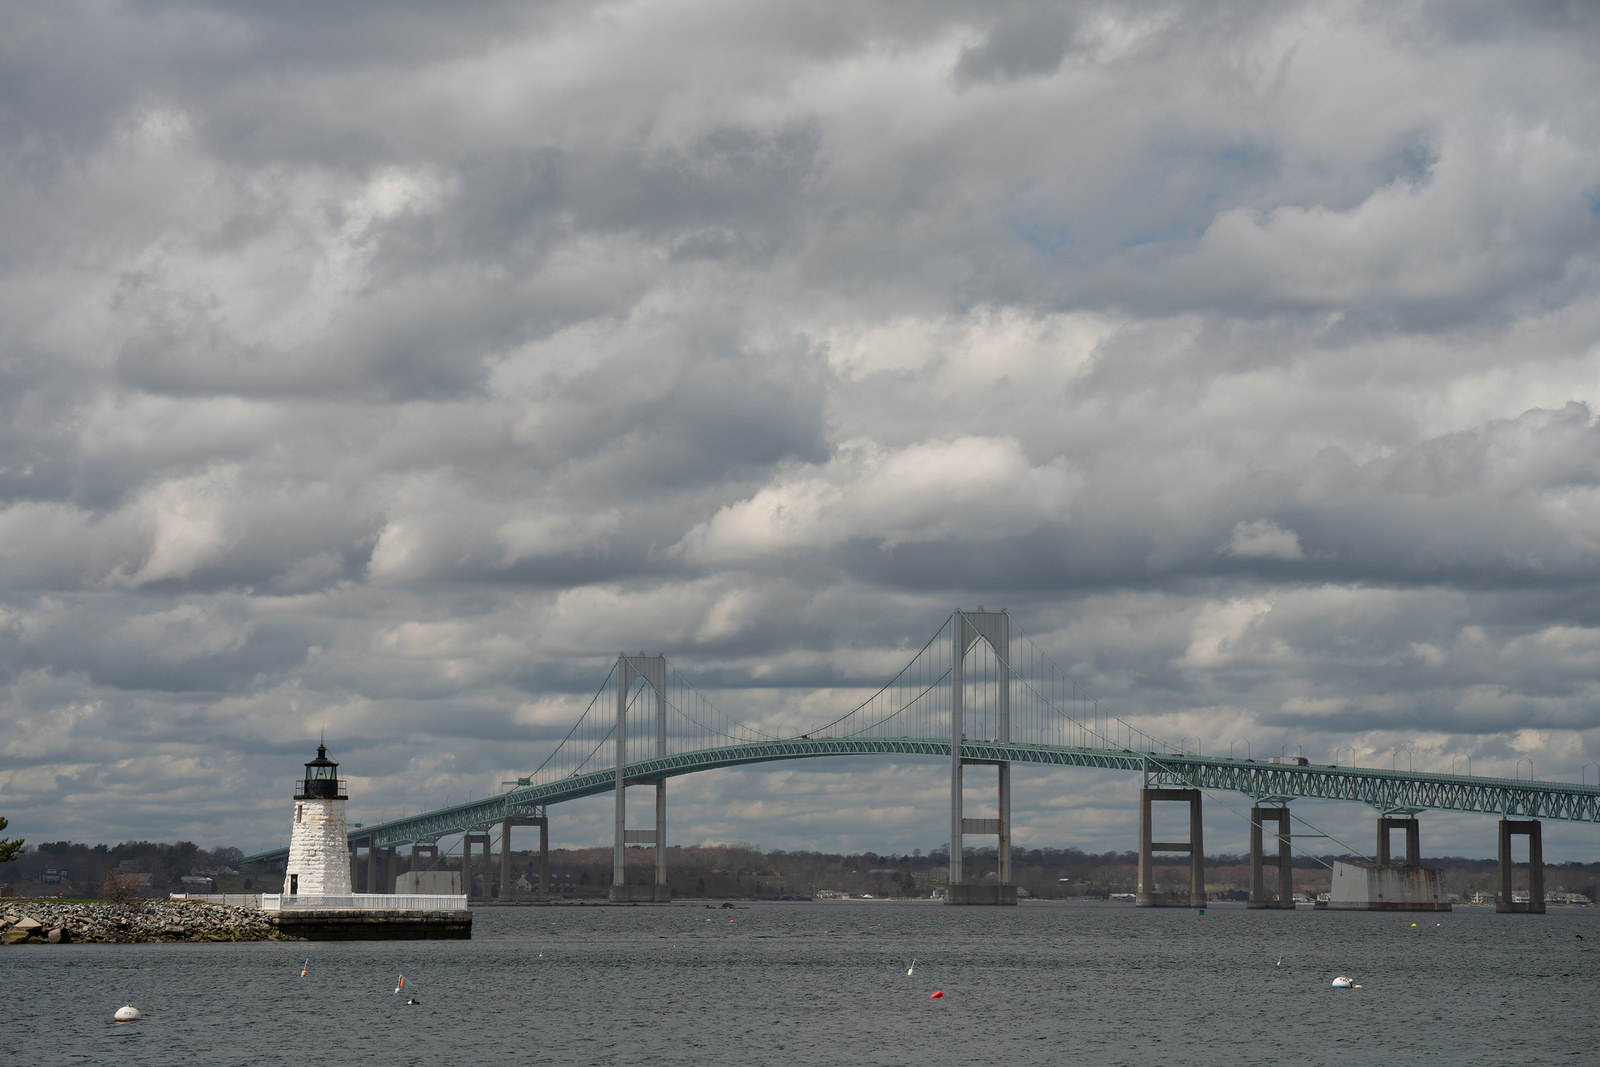
Zeiss Batis 135mm f/9, ISO 100, 1/200 sec with circular polarizer filter
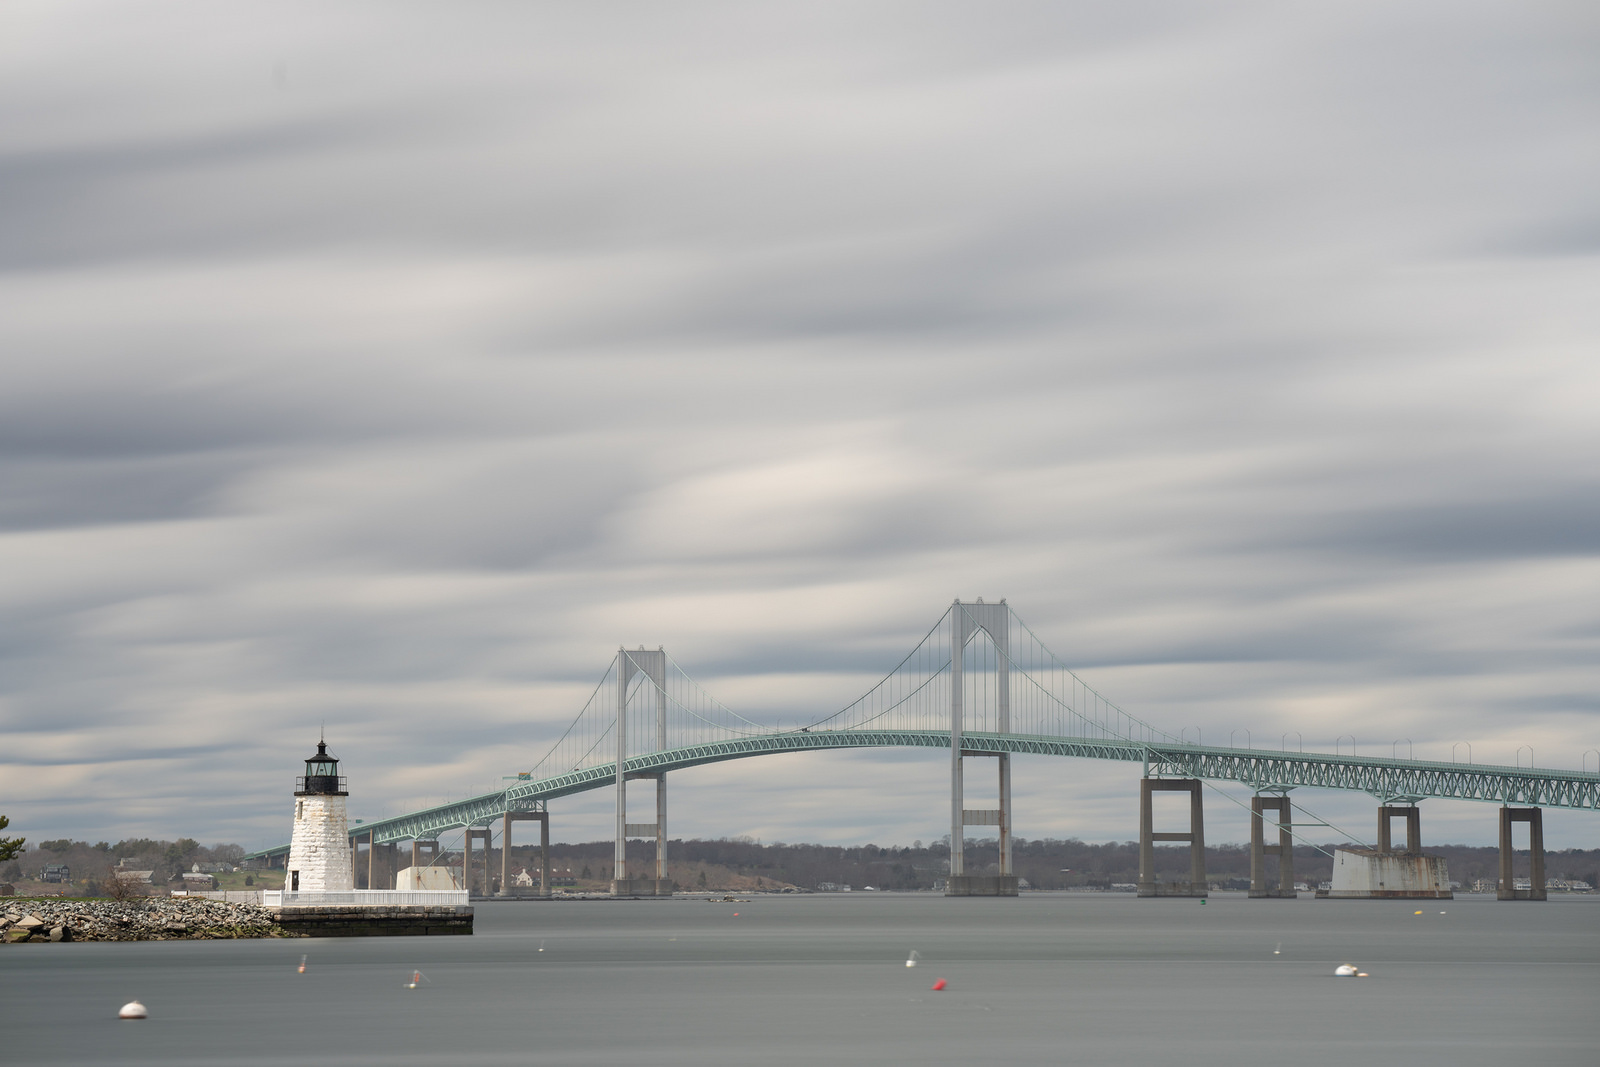
Zeiss Batis 135mm f/9, ISO 100, 86 sec with 13 stop ND filter and circular polarizer filter
I wanted to work with the long exposure pic. It's overexposed without blowing out any highlights which is fine and what I was going for. Impossible to recover blown out highlights, but easier to work with shadow areas that have retained detail and aren't muddy messes when you expose to the right.
Made some initial adjustments to the RAW file. Hit the auto tone button in LR as a starting place. Enabled lens correction. Set to medium contrast. Tweaked things a bit. Changed the crop a bit. This got me to the following:
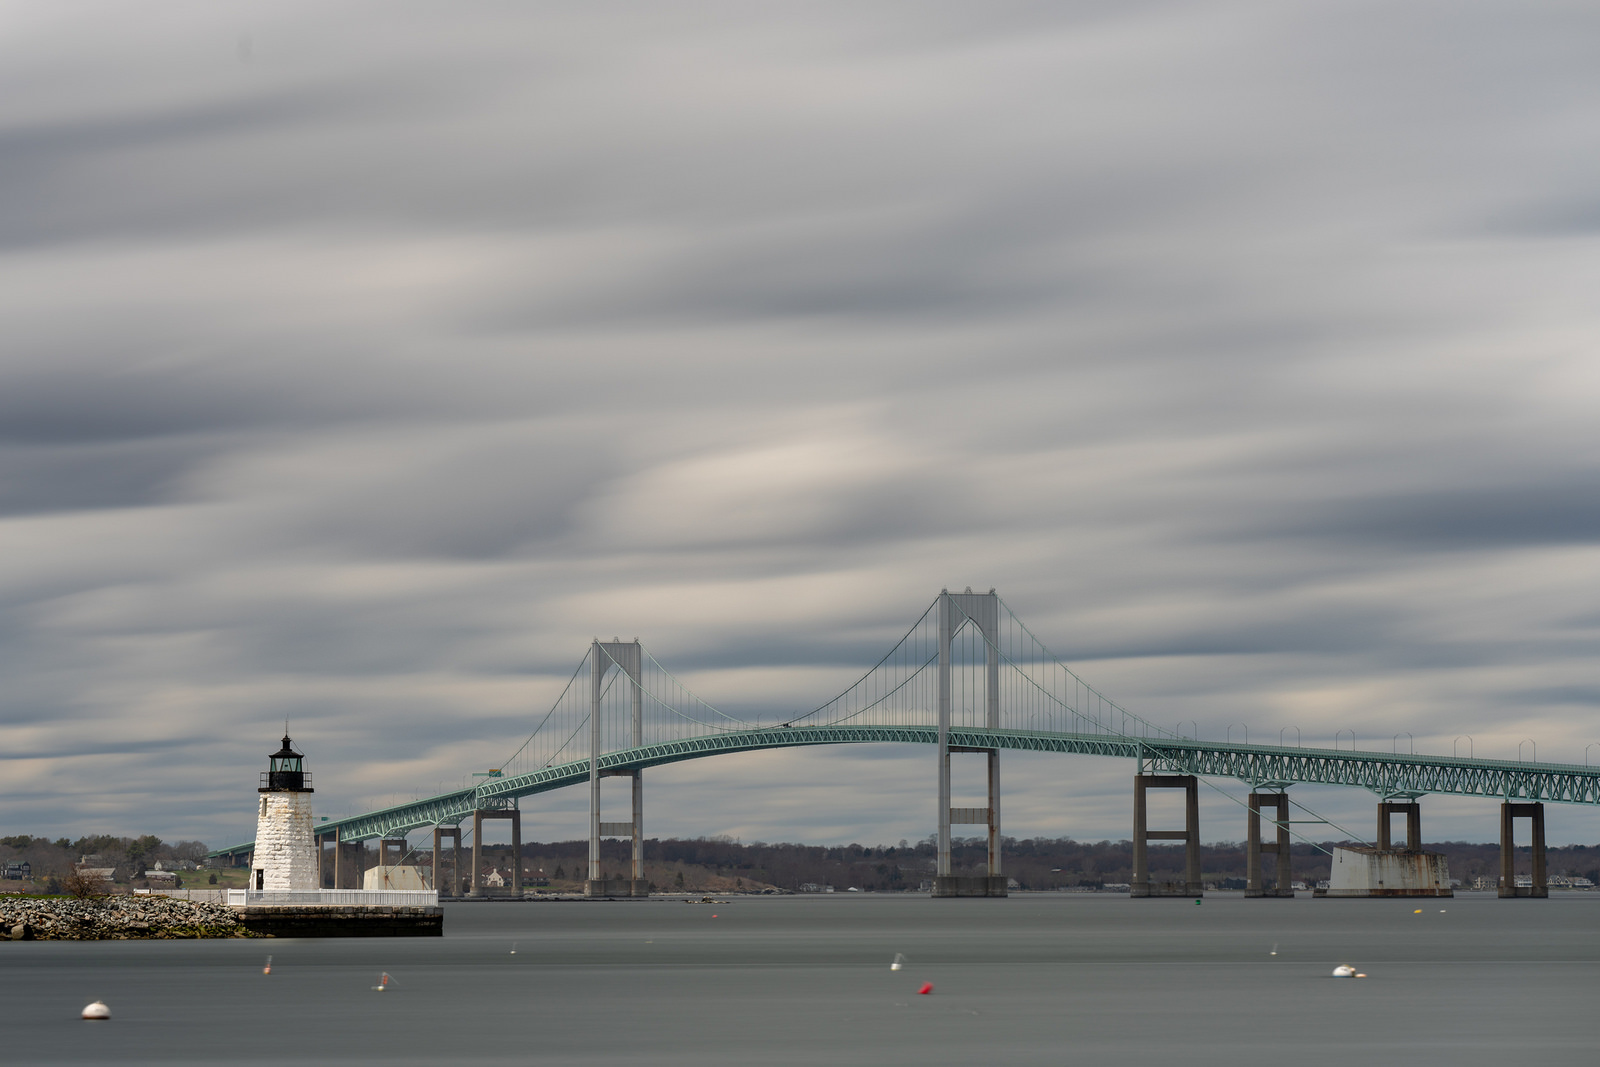
Now I wanted to convert it to B&W and I had to make some creative decisions. What was I hoping to see here? What needed to happen to change the pic to what I was seeing in my mind when I shot it?
Overall I wanted a somewhat surreal take with smooth water and clouds. My capture gave me a good starting place. I wanted the lighthouse to be prominent in the final pic and my timing was just right as the sun was shining on the lighthouse when I took this (I have other pics from the series where the sun wasn't shining on the lighthouse). Overall I wanted the sky to be darker. On a micro scale, I was happy with the sun shining on the lighthouse and the left side of the bridge. But I was concerned about the tones on the right side of the fence near the lighthouse being close to the tones on the concrete part of the bridge just above it. I was worried they would merge. So I went into Silver Efex Pro with an overall idea to darken the sky without having it merge into the bridge and also thinking that I needed to add a local adjustment to the concrete portion of the bridge just above the fence to make sure they didn't merge.
In Silver Efex Pro I first clicked on all the color filters which is my usual first step for any image--this simulates the effects of using a color filter if shooting with B&W film. The blue filter is rarely a good choice. I usually settle on either green, yellow, red, or clear depending on the pic. My next step is to add a control point in the sky and increase the size until it fills most of the frame. Then decrease the brightness on it by a large amount. Then move the control point around in the sky and see how it affects the image. The control points serve as rough masks which magically affect some elements in the pic but not others. Moving the control point around can result in dramatic changes that often fit what I want for a pic. The alternative is to go into PS and actually create masks to isolate each element in the pic. Very time consuming, but sometimes it's the only solution. But control points in the Nik software suite often work very, very well and are adequate without having to go to PS. For this pic I made a global control point that did what I wanted with the water and sky while preserving the tones on the bridge and lighthouse. I also added a small control point to darken the concrete area relative to the fence that I mentioned earlier.
Here is the pic after Silver Efex Pro:
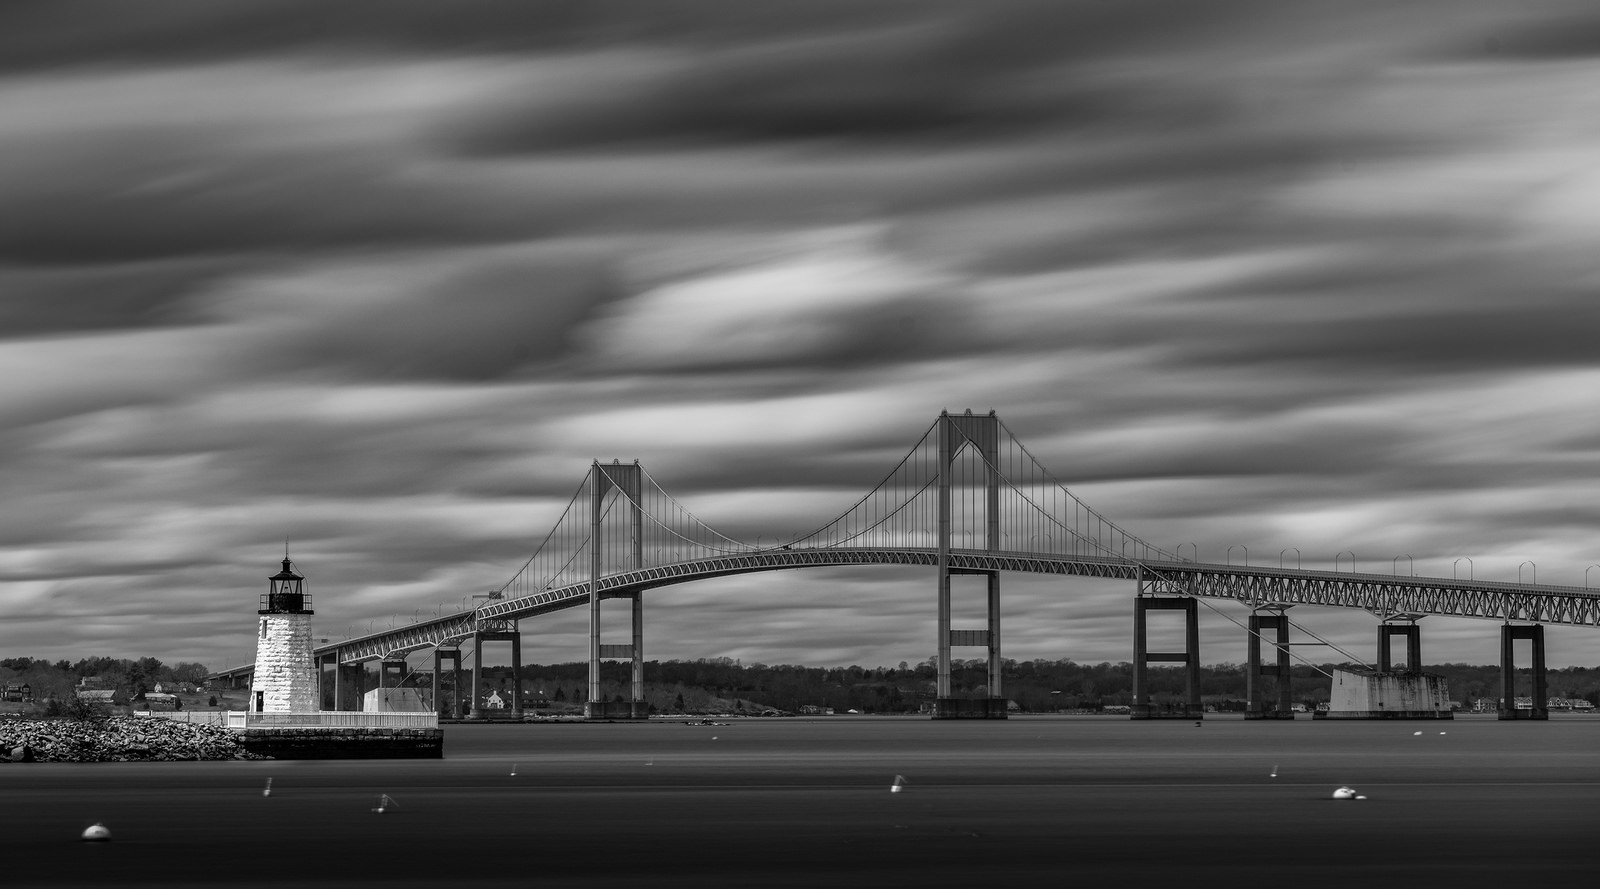
At this point I felt I was close to done. The pic was very close to what I had envisioned when I shot it. Still needed a few minor tweaks though. I wasn't happy with the buoys as I found them distracting. So cloned them out. Also made some minor overall tweaks to exposure and contrast. And added a slight negative exposure gradient to the lower left corner to even out the tones. This took me to the final pic which I am pleased with:

As an FYI I also processed the pic without the 13 stop ND filter taken at 1/200 sec:
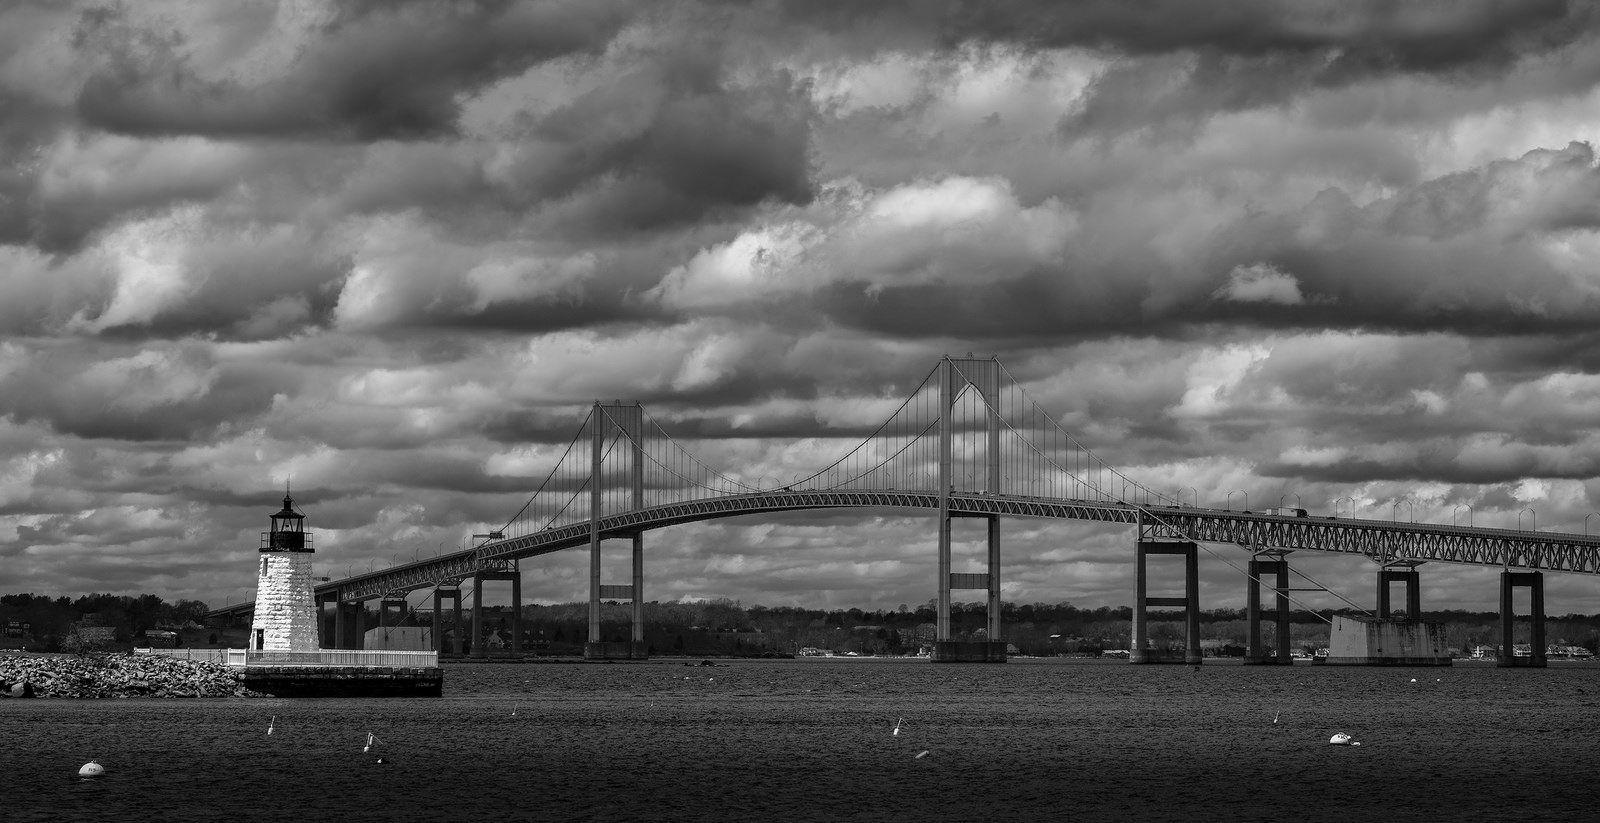
I prefer the long exposure pic. The standard exposure pic isn't bad, but it has a very different feel. To-MAE-to, To-MAH-to.
Including some of my comments regarding technique with long exposure photography that I posted in @anotherscotsman's thread:
You need to use a tripod (obviously) and it should be a good tripod. It needs to be stable. A flimsy tripod isn't going to work for this type of photography. A solid head is also important for the same reasons.
In general, turn off any image stabilization that your camera or lens may have.
Always use a remote release. Touching the shutter button introduces blur. For really long exposures it isn't as critical as for shorter exposures, but every little bit trying to get perfect tripod technique helps.
Before applying the ND filter, acquire focus (either with auto focus or manual focus). This should be done after setting your aperture as some lenses change focus with a change in aperture. Then set focus to manual. Then apply the ND filter. With a 16 stop ND filter you will not be able to focus (either AF or manual). Set the focus before applying the ND filter.
My workflow is as follows:
(1) Set up the tripod after finding the optimal shooting position.
(2) Mount the camera to the tripod
(3) Attach remote release to the camera
(4) Tweak the composition without any filters mounted on the lens. Level the camera on the tripod as part of the composition process.
(5) If I'm using a circular polarizer filter, add it to the lens and adjust for desired effect
(6) Set aperture (usually f/8 or f/9)
(7) Set ISO manually to 100
(8) Take exposure reading in aperture priority (or manual)
(9) With a 16 stop ND filter, a 5 min exposure is usually optimal with a 1/250 sec exposure without the filter. I use this as starting place and adjust aperture or ISO as needed to get an optimal exposure at 1/250 sec without the filter.
(10) Once the aperture is set, acquire focus (either with AF or manually). Once focus is acquired, set focus to manual.
(11) Add the ND filter.
(12) Turn off image stabilization if you haven't already.
(13) Set exposure to manual and move it to bulb mode
(14) Turn off long exposure noise reduction if it is on (this is somewhat controversial, but having it on will double your time between exposures and I personally haven't noticed any artifacts shooting with my Sony during the day and exposing to the right--possible it matters with long exposures at night but that isn't what we are talking about here)
(15) Pull out your iPhone (or whatever you are going to use as a stopwatch)
(16) Trip the shutter on your remote release (and hold it down!) while also starting the stopwatch function on your phone.
(17) Hold the shutter open for 5 min (or whatever time you think you want)
(18) Review the pic and make sure you look at the histograms! You want to expose to the right, meaning that the histograms are pushed to the right *without* blowing out highlights. Exposing to the right will give you the most latitude with processing in post. It's okay if it's overexposed overall as long as the highlights aren't blown out.
(19) Adjust exposure time as needed based on what you are seeing in the histogram. Or alternatively tweak the aperture and/or ISO if you aren't close to hitting the 5 min mark (or whatever time the scene you are shooting demands). If the exposure is way off, you may need to use a different ND filter density.
Here is the final version of the pic:

For this pic I went back to a familiar spot where I'd previously shot the Newport Bridge with the Goat Island lighthouse in the foreground. The advantage of being there before was that I knew exactly what composition I wanted. This was taken near the end of the bridge leading to Goat Island. I wanted the lighthouse to be the main subject on the left with the Newport Bridge in profile traversing the frame pulling the eye back towards the lighthouse. Other compositions from further back and to the right would have made the bridge compete with the lighthouse by coming towards the viewer.
I set up my tripod, attached the camera, and leveled it. Turned off image stabilization. Set the ISO to 100 (to both maximize sharpness/contrast/dynamic range and also to force a longer exposure time). Set the aperture to f/9 (to maximize depth of field without degrading sharpness from diffraction at smaller apertures). Attached the cable release (to prevent camera vibration while pressing the shutter and also because long exposures while holding the camera shutter button down are uncomfortable to say the least).
Tweaked the composition. I'm a huge fan of the cube tripod head as it makes it very easy to make precise adjustments to the composition while keeping everything level in the horizontal plane. Acquired focus using AF. Then turned off auto-focus. With a 13 stop ND filter and circular polarizer filter I wasn't going to be able to achieve focus either with AF or manually.
Now the camera was set and the hard part was done! In aperture priority mode I took a pic with a circular polarizer filter but without the ND filter attached. Again f/9 with ISO 100. The camera chose a shutter speed of 1/200 sec. Review of the histogram showed a good overall exposure, though it wasn't pushed to the right. I attached the 13 stop ND filter, changed the camera to manual exposure, set it to bulb mode, and made an exposure of 86 sec (was shooting from the hip and not using a calculator--just seemed right to me based on experience with other shots earlier in the day with the same exposure settings). Turned out it was a good educated guess as the exposure was close to perfect with the histograms pushed to the right but not blowing out any highlights. Went to my next shooting spot confident that I'd gotten what I came for at that location.
I reviewed the pics when I got home. Here are the RAW files without any adjustments:

Zeiss Batis 135mm f/9, ISO 100, 1/200 sec with circular polarizer filter

Zeiss Batis 135mm f/9, ISO 100, 86 sec with 13 stop ND filter and circular polarizer filter
I wanted to work with the long exposure pic. It's overexposed without blowing out any highlights which is fine and what I was going for. Impossible to recover blown out highlights, but easier to work with shadow areas that have retained detail and aren't muddy messes when you expose to the right.
Made some initial adjustments to the RAW file. Hit the auto tone button in LR as a starting place. Enabled lens correction. Set to medium contrast. Tweaked things a bit. Changed the crop a bit. This got me to the following:

Now I wanted to convert it to B&W and I had to make some creative decisions. What was I hoping to see here? What needed to happen to change the pic to what I was seeing in my mind when I shot it?
Overall I wanted a somewhat surreal take with smooth water and clouds. My capture gave me a good starting place. I wanted the lighthouse to be prominent in the final pic and my timing was just right as the sun was shining on the lighthouse when I took this (I have other pics from the series where the sun wasn't shining on the lighthouse). Overall I wanted the sky to be darker. On a micro scale, I was happy with the sun shining on the lighthouse and the left side of the bridge. But I was concerned about the tones on the right side of the fence near the lighthouse being close to the tones on the concrete part of the bridge just above it. I was worried they would merge. So I went into Silver Efex Pro with an overall idea to darken the sky without having it merge into the bridge and also thinking that I needed to add a local adjustment to the concrete portion of the bridge just above the fence to make sure they didn't merge.
In Silver Efex Pro I first clicked on all the color filters which is my usual first step for any image--this simulates the effects of using a color filter if shooting with B&W film. The blue filter is rarely a good choice. I usually settle on either green, yellow, red, or clear depending on the pic. My next step is to add a control point in the sky and increase the size until it fills most of the frame. Then decrease the brightness on it by a large amount. Then move the control point around in the sky and see how it affects the image. The control points serve as rough masks which magically affect some elements in the pic but not others. Moving the control point around can result in dramatic changes that often fit what I want for a pic. The alternative is to go into PS and actually create masks to isolate each element in the pic. Very time consuming, but sometimes it's the only solution. But control points in the Nik software suite often work very, very well and are adequate without having to go to PS. For this pic I made a global control point that did what I wanted with the water and sky while preserving the tones on the bridge and lighthouse. I also added a small control point to darken the concrete area relative to the fence that I mentioned earlier.
Here is the pic after Silver Efex Pro:

At this point I felt I was close to done. The pic was very close to what I had envisioned when I shot it. Still needed a few minor tweaks though. I wasn't happy with the buoys as I found them distracting. So cloned them out. Also made some minor overall tweaks to exposure and contrast. And added a slight negative exposure gradient to the lower left corner to even out the tones. This took me to the final pic which I am pleased with:

As an FYI I also processed the pic without the 13 stop ND filter taken at 1/200 sec:

I prefer the long exposure pic. The standard exposure pic isn't bad, but it has a very different feel. To-MAE-to, To-MAH-to.
Including some of my comments regarding technique with long exposure photography that I posted in @anotherscotsman's thread:
You need to use a tripod (obviously) and it should be a good tripod. It needs to be stable. A flimsy tripod isn't going to work for this type of photography. A solid head is also important for the same reasons.
In general, turn off any image stabilization that your camera or lens may have.
Always use a remote release. Touching the shutter button introduces blur. For really long exposures it isn't as critical as for shorter exposures, but every little bit trying to get perfect tripod technique helps.
Before applying the ND filter, acquire focus (either with auto focus or manual focus). This should be done after setting your aperture as some lenses change focus with a change in aperture. Then set focus to manual. Then apply the ND filter. With a 16 stop ND filter you will not be able to focus (either AF or manual). Set the focus before applying the ND filter.
My workflow is as follows:
(1) Set up the tripod after finding the optimal shooting position.
(2) Mount the camera to the tripod
(3) Attach remote release to the camera
(4) Tweak the composition without any filters mounted on the lens. Level the camera on the tripod as part of the composition process.
(5) If I'm using a circular polarizer filter, add it to the lens and adjust for desired effect
(6) Set aperture (usually f/8 or f/9)
(7) Set ISO manually to 100
(8) Take exposure reading in aperture priority (or manual)
(9) With a 16 stop ND filter, a 5 min exposure is usually optimal with a 1/250 sec exposure without the filter. I use this as starting place and adjust aperture or ISO as needed to get an optimal exposure at 1/250 sec without the filter.
(10) Once the aperture is set, acquire focus (either with AF or manually). Once focus is acquired, set focus to manual.
(11) Add the ND filter.
(12) Turn off image stabilization if you haven't already.
(13) Set exposure to manual and move it to bulb mode
(14) Turn off long exposure noise reduction if it is on (this is somewhat controversial, but having it on will double your time between exposures and I personally haven't noticed any artifacts shooting with my Sony during the day and exposing to the right--possible it matters with long exposures at night but that isn't what we are talking about here)
(15) Pull out your iPhone (or whatever you are going to use as a stopwatch)
(16) Trip the shutter on your remote release (and hold it down!) while also starting the stopwatch function on your phone.
(17) Hold the shutter open for 5 min (or whatever time you think you want)
(18) Review the pic and make sure you look at the histograms! You want to expose to the right, meaning that the histograms are pushed to the right *without* blowing out highlights. Exposing to the right will give you the most latitude with processing in post. It's okay if it's overexposed overall as long as the highlights aren't blown out.
(19) Adjust exposure time as needed based on what you are seeing in the histogram. Or alternatively tweak the aperture and/or ISO if you aren't close to hitting the 5 min mark (or whatever time the scene you are shooting demands). If the exposure is way off, you may need to use a different ND filter density.
Last edited:

