Become a MacRumors Supporter for $50/year with no ads, ability to filter front page stories, and private forums.

kenoh

macrumors 604
Jul 18, 2008
6,507
10,850
Glasgow, UK
A preset is just settings that you have used on an image saved so you can apply them again in a single click. The issue with a preset is that unless your image was taken in the same light with the same exposure setting then a preset of this may or may not work.

However, it looks to me like something along the following has been done to it assuming Lightroom...

1. WB Warmed up a touch
2. Contrast and Clarity increased a touch. Clarity is like salt. A little adds to the flavour, too much ruins it
3. Drop the Vibrance (mid tone Colour saturation)
4. Tweak the saturation to get the colours the way you like
5. Here is the daddy-o of the settings... adjust the tone curve so that is its a gentle S curve and also lift the lower left corner (the blacks) up a bit to wash them out a little. Again, this is salt like, a little is good, a lot will ruin it

Then maybe some dropped highlights, increased shadows and tweaks to the white and black to get the overall brightness of the image right to taste...

I think...

I may be wrong.

The thing here is the crushed blacks which is giving the overall retro film look to the images.
 
  • Like
Reactions: xoAnna and Solomani

Lighthou5e

macrumors newbie
Original poster
Dec 4, 2017
5
2
A preset is just settings that you have used on an image saved so you can apply them again in a single click. The issue with a preset is that unless your image was taken in the same light with the same exposure setting then a preset of this may or may not work.

However, it looks to me like something along the following has been done to it assuming Lightroom...

1. WB Warmed up a touch
2. Contrast and Clarity increased a touch. Clarity is like salt. A little adds to the flavour, too much ruins it
3. Drop the Vibrance (mid tone Colour saturation)
4. Tweak the saturation to get the colours the way you like
5. Here is the daddy-o of the settings... adjust the tone curve so that is its a gentle S curve and also lift the lower left corner (the blacks) up a bit to wash them out a little. Again, this is salt like, a little is good, a lot will ruin it

Then maybe some dropped highlights, increased shadows and tweaks to the white and black to get the overall brightness of the image right to taste...

I think...

I may be wrong.

The thing here is the crushed blacks which is giving the overall retro film look to the images.

thanks a lot, for your great & complete answer!!
;)
 
  • Like
Reactions: kenoh

kenoh

macrumors 604
Jul 18, 2008
6,507
10,850
Glasgow, UK
thanks a lot, for your great & complete answer!!
;)


Good luck. If you want to, post an image here and I will have a play and tell you what I did to it... I am not saying I am good enough to do it properly, but I reckon I can get the general gist.
 

ChrisA

macrumors G5
Jan 5, 2006
12,919
2,172
Redondo Beach, California
Hi!

Please, somebody tell me how to get this look on my photos?!

It looks to me like a film emulation. But the same thing can be done by hand by creating a soft toe and shoulder "s" type curve on levels and bumping the saturation.

I think there is also some hand selection going on too. I don't think the above effect is applied to the people, only the backgrounds. Using Photoshop or any layered type image editor you make a mask and then apply different effects to the masked v. unmasked parts

The one photo where to couple is leaning over after missing the trolly is for sure using a composite of serial photos. Perhaps one photo was of the background only.

When you are going to do this level of special effects it is best to shoot RAW format
 
Last edited:

mollyc

macrumors G3
Aug 18, 2016
8,065
50,763
yup, I was going to say VSCO as well. There are a ton of film presets out there right now. Too many, if you ask me (but you didn't).
 
  • Like
Reactions: kenoh

Lighthou5e

macrumors newbie
Original poster
Dec 4, 2017
5
2
It looks to me like a film emulation. But the same thing can be done by hand by creating a soft toe and shoulder "s" type curve on levels and bumping the saturation.

I think there is also some hand selection going on too. I don't think the above effect is applied to the people, only the backgrounds. Using Photoshop or any layered type image editor you make a mask and then apply different effects to the masked v. unmasked parts

The one photo where to couple is leaning over after missing the trolly is for sure using a composite of serial photos. Perhaps one photo was of the background only.

When you are going to do this level of special effects it is best to shoot RAW format

Thank you very much! ;)
[doublepost=1512536341][/doublepost]
I suspected Provia 400 or Ektar 100.... possibly... :oops:

From the Exif info, it's a preset based on VSCO KODAK PORTRA 160 +1 (PACK 6).
[doublepost=1512537145][/doublepost]
Good luck. If you want to, post an image here and I will have a play and tell you what I did to it... I am not saying I am good enough to do it properly, but I reckon I can get the general gist.
DSC_4720.JPG
 

kenoh

macrumors 604
Jul 18, 2008
6,507
10,850
Glasgow, UK
OK. Thanks a lot!

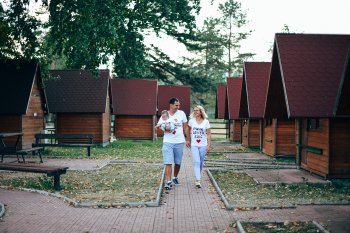
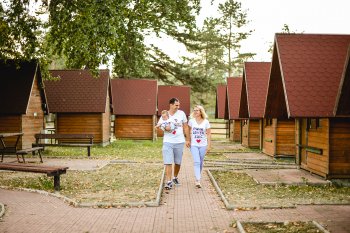
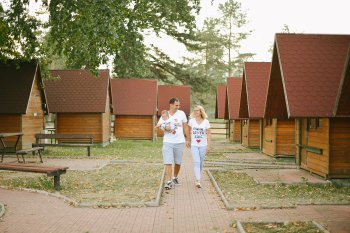
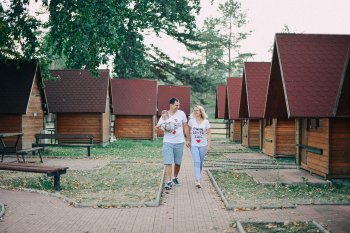
OK, tried a few for you.

Four for you to see.

Check the filename for info of what I did.

Portra 160 is in VSCO pack 6 push pull
Provia 400x is pack 4
Ektar 100 is pack 5

Manual process is loosely based on my steps above... I played about a bit to brighten it more

Hope this helps. Note they are small because of size limits on here.
 

Attachments

  • DSC_4720 Ektar100.jpg
    DSC_4720 Ektar100.jpg
    1.3 MB · Views: 171
  • DSC_4720-Manual Edit.jpg
    DSC_4720-Manual Edit.jpg
    1.1 MB · Views: 156
  • DSC_4720-Portra160.jpg
    DSC_4720-Portra160.jpg
    1.3 MB · Views: 139
  • DSC_4720-Provia400X.jpg
    DSC_4720-Provia400X.jpg
    1.2 MB · Views: 143
Last edited:

Lighthou5e

macrumors newbie
Original poster
Dec 4, 2017
5
2
OK, tried a few for you.

Four for you to see.

Check the filename for info of what I did.

Portra 160 is in VSCO pack 6 push pull
Provia 400x is pack 4
Ektar 100 is pack 5

Manual process is loosely based on my steps above... I played about a bit to brighten it more

Hope this helps. Note they are small because of size limits on here.

thanks a lot for your great work!!

they look great!!!
 
  • Like
Reactions: kenoh
Register on MacRumors! This sidebar will go away, and you'll see fewer ads.