Become a MacRumors Supporter for $50/year with no ads, ability to filter front page stories, and private forums.

Wowzera

macrumors 6502a
Original poster
Oct 14, 2008
858
28
Brazil
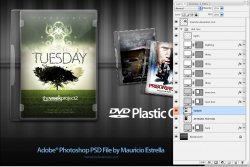
I am wanting to make some dvd covers myself, but I am almost totally noob in photoshop and couldn't do nothing more than change the layers place.
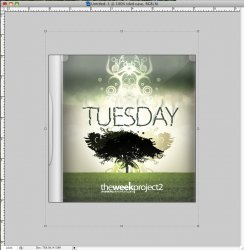
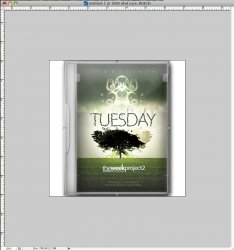
Basically, what I want to do is move the current DVD cover and replace with another DVD cover, then save and done.

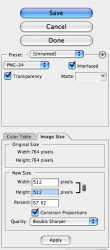
How can I get an image in internet, resize to match the dvd case and make a layer of it and place inside the dvd case?

Here's the PSD file:
http://kttns.org/e5nd


Please help me! :)

Thank you.
 
Hard to figure out what you're trying to do but I'm assuming you have a fixed size palate that matches your output size for a dvd cover. If you simply want to do multiple covers you can open any image in pshop and use the Edit>transform>scale tools to enlarge or change the aspect ratios. Once you have your original dvd image open and your next graphic, simply use the arrow tool and click>drag from the new image to the dvd image file.

Hold the shift key if you want the vertical to scale with the horizontal as one.


This is what I want to do:

I want to change the layer whose host the dvd cover:

1zmf


And replace with other DVD cover, let's suppose, Twilight movie:

zwy1n


Then the result would be something like it:

jmjm


jflna


I hope you got my point now! Thanks for helping!
 
Have both images open in pshop. Drag the new image to your other document image.

You can't imagine how noob I am felling right now.
Thanks, it worked, all work I needed do is resize my image to fill the dvd case.

Thank you very much !
 
Errr, now I've one more problem:

How do I get the image centralized ? I can make it be converted to 512x512 pixels, but it's not centralized!
 
You need to open the layer folder named "DVD Case" and either delete or turn off the layer name "Sample". Drag your new file to this location in the stack and position it to fit. The Sample image is about 6.5 X 9.
 

Attachments

  • dvd-cover-web.jpg
    dvd-cover-web.jpg
    347 KB · Views: 148
You need to open the layer folder named "DVD Case" and either delete or turn off the layer name "Sample". Drag your new file to this location in the stack and position it to fit. The Sample image is about 6.5 X 9.

Thanks for helping.
Now I am stuck into this:

yty4

(Click for larger)


How can I make the DVD box be 512x512 ?

I want the DVD box to be:

myyj


instead of

kndn
 
Thanks for helping.
How can I make the DVD box be 512x512 ?

Hold down the shift key to constrain marque selection to a square that approximates desired cropping. While dragging you can press the space bar to reposition. After the selection is complete, arrow keys can fine tune position. Now choose Image > Crop. Deselect.

At this point you have a square but it is not 512. Keep the original high-res version and save a smaller resolution version for your needs.
  1. Choose File > Save for Web & Devices.
  2. To preserve the transparent background, select PNG-24.
  3. Click the "Image Size" tab to specify 512 pixels.
  4. "Bicubic" is the default interpolation quality. For reductions, many people prefer "Bicubic Sharper."
  5. Be sure to press the "Apply" button before pressing "Save."
  6. When prompted, name the file. A copy of the original is made.

(Attached is Save for Web & Devices dialog in CS3.)
 

Attachments

  • resize.png
    resize.png
    40.8 KB · Views: 139
Another way is to make a new document at 512X512 and drag the dvd case layer folder to it. Pull the corner of the new window open more until you see the handles of the image bounding box. Hold the shift key and drag one of the handles in until it fits like you want. Use a transparent background when you make the new document. Mine was white and could cause you more problems.

Find a PhotoShop book and read up on layer management. PS is a complex tool, and there are many different ways of getting the same result.
 

Attachments

  • Picture-1.jpg
    Picture-1.jpg
    256.2 KB · Views: 112
  • Picture-2.jpg
    Picture-2.jpg
    212.1 KB · Views: 99
Register on MacRumors! This sidebar will go away, and you'll see fewer ads.