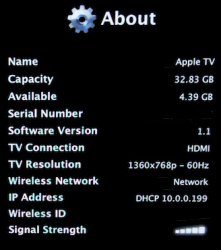
If you want to downgrade from 2.0 to 1.1 but have a 1.0 ATV, these steps will permit you to do so. This process requires you to remove the hard drive from your ATV and connect it to your Mac.
Disclaimers
1. This voids your ATV warranty.
2. I'm not responsible if you screw it up - you are hereby warned.
What you need:
Torx 10 driver
Torx 8 driver
Carbon Copy Cloner 3.0.1
An ATA-6 to USB or Firewire enclosure (I use the Universal Drive Adapter)
The Apple TV 1.1 update disc image (Note: Apple has killed this link)
Before starting, do a Factory Restore to your ATV to get it to version 1.0 of the ATV software. I don't know if it's necessary, but it's what I started with.
1. Remove the rubber pad from the ATV and remove the 4 outer screws with T10. They are of different sizes so keep them straight.
2. Gently lift the bottom off of the ATV and disconnect the ATA-6 cable at the logic board. Remove the drive using T8 and disconnect the ATA-6 cable from it.
3. Connect the drive to your Mac using an enclosure or UDA. Two volumes will mount: OSBoot and Media.
4. Follow the instructions here (steps 1 and 2) to clone the drive to your hard disk as a disk image. If you have a 40 gig ATV, you'll need 40 gigs of space. If you have 160 gig ATV, you'll need 160 gigs of space. This cloning process will take about 4 hours or 16 hours based upon the size of your drive. It is essential that you clone your Apple TV drive before using Carbon Copy Cloner so that if you screw up the process you will have it to restore the drive. If you don't image it and your ATV hard drive is compromised, you are royally screwed. You'll have to find someone willing to clone their drive to yours, and I'm pretty certain Apple won't do it for you.
5. Mount the Apple TV 1.1 update disk image. A new OSBoot partition should appear. It should be white, while the ATV's OSBoot partition should be orange.
6. Launch Carbon Copy Cloner and in the Source Disk choose the ATV 1.1 update OSBoot volume (white). In the Target Disk choose your ATV OSBoot partition (orange).
7. In the Cloning options box choose "Copy everything from source to target" and check both "Erase the target volume" and "Require a block-level clone".
8. Click the lock and enter your password. The Clone button becomes available and after clicking it you'll be asked to verify. Once the cloning starts, it only takes about a minute.
9. Reassemble your ATV and you should be back to 1.1.


