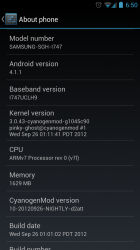
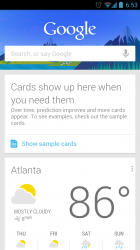
I am not responsible for any damage done to your S3. But if you follow the instruction then you have nothing to worry about. There may be other guides out there but this is what I used and it works perfectly.
First, you do need Windows. I used Windows 7 via virtual machine and at least 75% charge on the phones battery. (to be safe)
Download these three files to your phone. NOT the SD card.
Rooting package
CyanogenMod Rom nightly build
Google Apps Package
~ Backup all personal data on your phone to make sure you have a copy of your personal data (e.g., contacts, SMS, MMS, Internet settings, Wi-Fi passwords, and the like) in case the procedure in this guide erases such data.
~ You need USB device drivers for the AT&T Galaxy S3 installed on your computer. You can use Samsung Kies to obtain the drivers or via Samsung’s support page.
~ Enable USB Debugging on your phone. You can do this by head to Settings > Developer’s options > USB Debugging. Make sure that there is a check mark beside that option.
~ Temporarily disable Samsung Kies, antivirus, and firewall software as they may disrupt Odin during the installation process.
~ Download the following files and save it to your Windows OS:
Odin3 v3.04 (Odin3-v3.04.zip, 457 Kb)
ClockworkMod Recovery (clockworkmod.TAR, 6.8 MB)
~ Extract the Odin3-v.304.zip file using any extracting software such as 7-Zip or WinZip. Place the contents inside a single folder.
Launch the Odin3 v3.04 application by double-clicking Odin3 V3.04.exe.
Switch off your phone.
~ Boot into Download Mode. You can do this by pressing and holding down the Volume Down key, Home, and Power buttons until you reach a “Warning!!!” message displayed on your screen. Press the Volume Up button to enter Download Mode.
~ Connect your phone to your computer via USB cable. Your computer will automatically install the necessary drivers. If the installation was successful, you will see an “Added!!” message in Odin’s message box on the bottom left.
~ In Odin, select the PDA button, then browse for the clockworkmod.TAR file.
~ Important! Uncheck “Auto Reboot” leave “F. Rest Time” checked. Do not touch any other option except the ones mentioned in this guide. Doing so might brick your device. You need to Disable auto reboot because of the new OTA updates. If you leave auto reboot on when the phone reboots it will overwrite clockwork.
~ Once the necessary file is in place, click the START button in Odin to begin flashing the ClockworkMod Recovery on your phone.
(In case you get a FAIL message, disconnect your phone, close the Odin application, remove then reinsert your phone’s battery, and start over from step 5.)
~ Once the process is complete unplug the USB cable and pull the battery on the phone. Reinstall battery and boot into upload mode by holding the power + home + volume up button. Use the Volume buttons to navigate and the Home button to confirm an option.
~ Select Install ZIP From SD Card.
~Select Choose ZIP From SD Card, then browse for the ~CWM_SuperUser_3.0.7.zip file and select it. Confirm the installation by selecting Yes on the screen that follows.
~After the installation is complete, head back to the main recovery menu.
Select Reboot System Now to reboot your phone.
Once your phone boots up, you need to install the BusyBox binaries. Download the BusyBox app free from the Google Play Store and install it on your phone.
Run the BusyBox application on your phone.
When asked for root access, tap the Allow button.
Select the red “X” to close the dialog window that will pop out.
BusyBox will then scan your phone.
Select Install to begin installing BusyBox and make the necessary file changes on your phone. After the installation is finish, exit the BusyBox application.
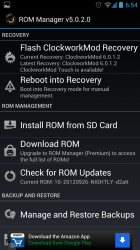
~ This is very important! You need to download and install Rom Manager from the Play Store. Flash the newest version of ClockwordMod Recovery from this application. Then select reboot into recovery or shut down and do it manually as shown above.
~ Create a NANDroid backup to backup your current ROM. In case there is something that doesn’t work out with this ROM, you can always revert to your old ROM. To perform a backup, select Backup and Restore and on the next screen, select Backup again. Head back to the main recovery menu once backup is complete.
~ Select Wipe data/factory reset. Select Yes on the next screen to confirm data wipe.
~ Select Install ZIP from SD card, then select Choose ZIP from SD card.
~ Browse for the downloaded CM10 ROM file and select it. Confirm the installation by selecting Yes on the next screen. It may take a couple of minutes for the ROM to finish installing.
~ Repeat step 6, but this time around select the gapps-jb-20120726-signed.zip to install the necessary Google Application package.
~ Head back to the main menu by selecting Go back and reboot your phone by selecting Reboot system now.
You are all done. Enjoy Jelly Bean.
Attachments
Last edited:


