Become a MacRumors Supporter for $50/year with no ads, ability to filter front page stories, and private forums.

JMStearnsX2

macrumors 6502
Original poster
Jun 14, 2020
363
672
Hi all, long time follower but first time poster here. Thanks to the amazing support through the years, you guys are heroes.

I've had a idea floating around in my head for a while now to do some customizing of my 2012 Mac Pro, but due to it being my daily driver I didn't take the plunge. But last week I was able to acquire a 2nd 5,1 (2010) due to my work recycling one. So I feel free to do some work on the new one (which is actually flawless case-wise, no dents, bends or scratches) without messing up my daily driver. If I'm happy with the results, I can just transfer all my upgrades to the 2010. Actually, as long as I have it apart I should do the Pixlas mod, even though my current GPU doesn't need it. I'm sure a future one will.

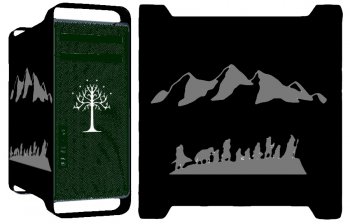
The size of the Mac Pro sides is just too perfect not to use it as a blank canvas. I'm thinking of a Lord of the Rings theme since it's got to be one of my all-time favorite films. Anyone know if you can make stencils from printouts? I'm thinking of going with mostly a matte/satin black, with the center grill section being metallic dark green. On the sides I'm thinking of grey silhouettes of either the Fellowship and/or Hobbiton on the black, so it's subtle.

Anyone done some Mac painting out there? I plan on taking & posting photos along the way, I figure this will take a while. Especially since I plan on using automotive grade paint.

Any thoughts?

~Jimmy
 
Anyone done some Mac painting out there? I plan on taking & posting photos along the way, I figure this will take a while. Especially since I plan on using automotive grade paint.

Any thoughts?

~Jimmy
Using the Forum search feature with keywords such as "Mac Pro, search", turns up several past posts dealing with painting.
 
Using the Forum search feature with keywords such as "Mac Pro, search", turns up several past posts dealing with painting.

Awesome, I like that I'm not the only one.

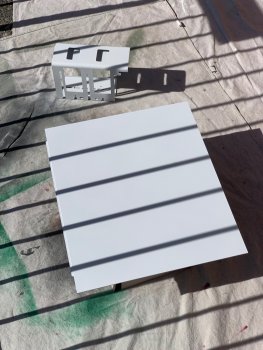
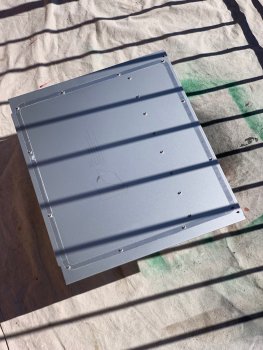
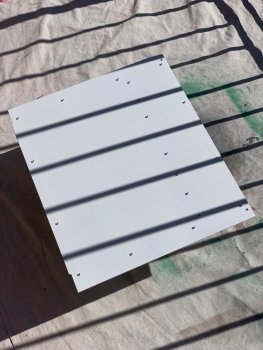
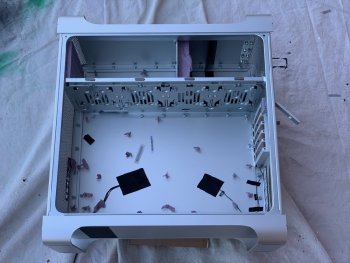
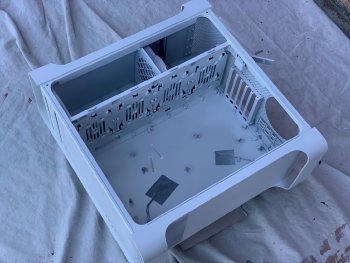
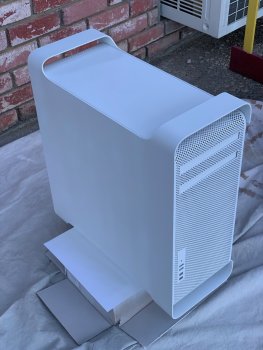
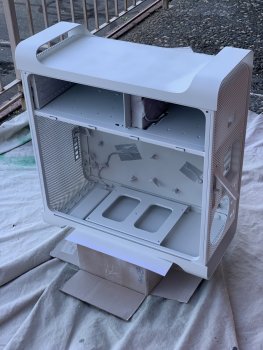
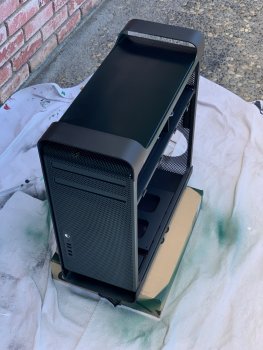
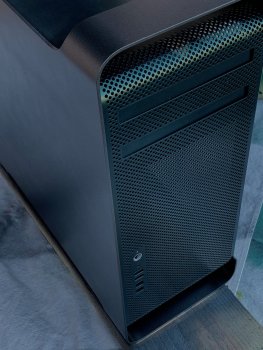
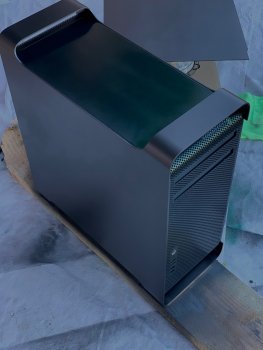
Finished disassembly, boy there are a lot of screws. Couldn't seem to figure out how to remove the DVD drive bay doors, so I masked off the inside and I'll make sure that they remain usable. Thoroughly cleaned all the parts I'm going to paint, and gave them a couple light coats of auto-grade Aluminum Primer. I'm really impressed with how little damage this case has, most of the machines that come through my office (IT) have at least some about of scratches/dents. After priming you can really see it is just about flawless. Most Mac Pros that I see have at least one dented handle.
So far, so good! I'll let the primer cure this week, and continue this project on Saturday.
 

Attachments

  • IMG_2367.jpg
    IMG_2367.jpg
    325.6 KB · Views: 317
  • IMG_2368.jpg
    IMG_2368.jpg
    392.9 KB · Views: 272
  • IMG_2369.jpg
    IMG_2369.jpg
    303 KB · Views: 289
  • IMG_2370.jpg
    IMG_2370.jpg
    217.7 KB · Views: 271
  • IMG_2371.jpg
    IMG_2371.jpg
    224.9 KB · Views: 311
  • IMG_2372.jpg
    IMG_2372.jpg
    330.6 KB · Views: 322
  • IMG_2373.jpg
    IMG_2373.jpg
    380.9 KB · Views: 320
  • Like
Reactions: johnmarki
Couldn't seem to figure out how to remove the DVD drive bay doors
A while ago I removed the whole dvd doors mechanism...
There's one screw (seen from inside) on the left of the doors.
You also have to remove the 2 screws on every door itself.
Behind the doors there are 2 pins that keep the whole plastic frame into a slot, so you'll have to fiddle a bit ....
 
JMStern2

You can re-route the cMP's PSU fan cable which means that if in the future your PSU fan dies or needs to be replaced you will no longer need to REMOVE THE BACKPLANE to replace it.

I did this in my 4.1>5,1 uing a Noctua 120mm NF-A12x25 along with a Noctua NA-FC1 PWN fan speed controller.

Everything works perfectly but better still . . . I now have my original Apple PSU fan as a working spare PSU fan.

Everything here
 
You can re-route the cMP's PSU fan cable which means that if in the future your PSU fan dies or needs to be replaced you will no longer need to REMOVE THE BACKPLANE to replace it.

Thinking the same here: you could route the cable through the optical bay.
 
That's true, thanks I might just do this.
[automerge]1592251664[/automerge]
Now I'm trying to find a dual CPU tray, without costing more than the Mac Pro itself....
 
Last edited:
I ordered the Pixlas mod cable a few days back and it says it shipped, we'll see when it comes in.
 
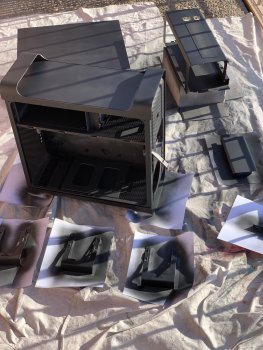
After 2 coats of primer which I let cure for a week, a coat of black to darken everything. Hopefully I'll be able to use less of the color paint. Next weekend I should be able to put the 1st color on after the black has had a chance to cure.
 

Attachments

  • IMG_2392.jpeg
    IMG_2392.jpeg
    593.3 KB · Views: 328
This looks amazing. Something I’ve been wanting to do for some time now but dreading the disassembly. It looks great. Please post more photos once it’s back up and running.
 
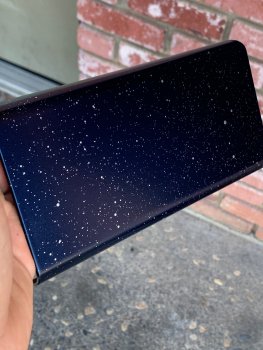
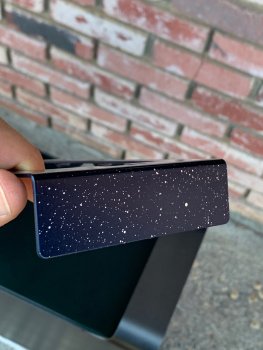
Here is a very rough visualization of what I am thinking of. I haven't fully decided on decals or painted with stencils, but the colors I've nailed down. The dark color is a close-to-black metallic slate grey, the green is a very dark metallic green from recent model Toyotas. I can't decide if my silhouettes should be white or grey colored. The interior will be black, except for the outward-facing surfaces which will be dark navy metallic with silver specs that I hope will be reminiscent of a night sky.
 

Attachments

  • mac-pro-front-and-side.jpg
    mac-pro-front-and-side.jpg
    134.7 KB · Views: 327
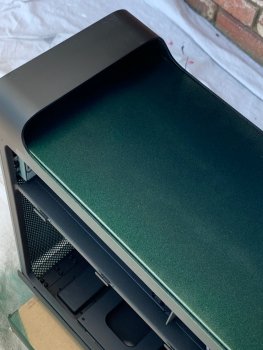
Got the inner color finished today, I think that this is going to really look nice when I'm finished. I'm going to keep the chrome/silver color of the power button untouched, so that should lend a nice pop to the front. This green looks so deep in person, I upped the exposure so that the color could be seen better.
[automerge]1593293690[/automerge]
Not seen is how much tape & masking off of things I did, I didn't want any color coming through to the inside so even the air grills on front & back were masked off from the inside.
 

Attachments

  • IMG_2435.jpeg
    IMG_2435.jpeg
    532 KB · Views: 371
  • IMG_2436.jpeg
    IMG_2436.jpeg
    452.1 KB · Views: 309
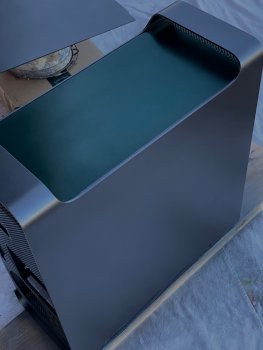
Finished the base coat for the 2nd color, starting to come together!

I also did the power supply part of the Pixlas mod, just waiting on my cable to come in.
 

Attachments

  • IMG_2458.jpeg
    IMG_2458.jpeg
    368.3 KB · Views: 261
  • IMG_2459.jpeg
    IMG_2459.jpeg
    583.9 KB · Views: 318
  • IMG_2460.jpeg
    IMG_2460.jpeg
    396.6 KB · Views: 281
  • Like
Reactions: johnmarki and arn
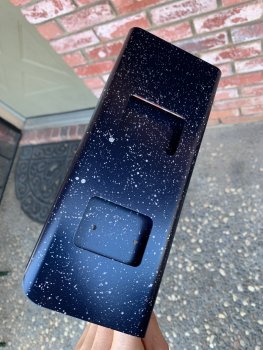
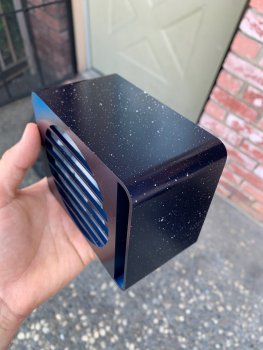
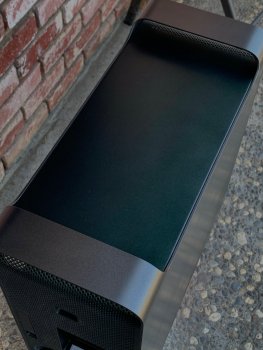
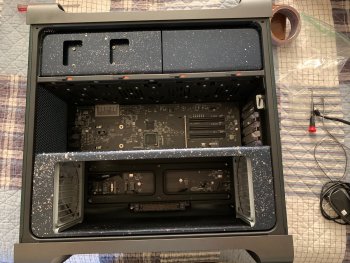
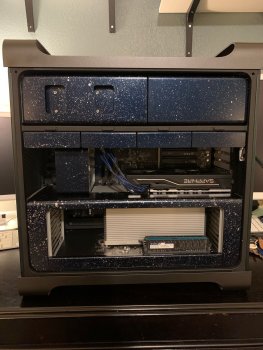
Back from vacation, I was able to get some stuff done this morning. I sprayed the internal components a dark metallic blue before I left, and they got their “night sky/stars” treatment today. I also put the matte clear on the main enclosure.
 

Attachments

  • IMG_2748.jpeg
    IMG_2748.jpeg
    407.2 KB · Views: 226
  • IMG_2749.jpeg
    IMG_2749.jpeg
    333.8 KB · Views: 234
  • IMG_2751.jpeg
    IMG_2751.jpeg
    497.8 KB · Views: 252
  • IMG_2752.jpeg
    IMG_2752.jpeg
    305.2 KB · Views: 234
  • IMG_2750.jpeg
    IMG_2750.jpeg
    418.9 KB · Views: 309
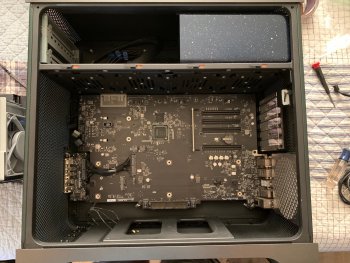
Reassembly time. I upgraded the wifi/bluetooth as long as I had it apart. I'll upgrade the processor when I can find a x5690.
 

Attachments

  • IMG_2753.jpeg
    IMG_2753.jpeg
    609.5 KB · Views: 263
  • IMG_2754.jpeg
    IMG_2754.jpeg
    636.3 KB · Views: 258
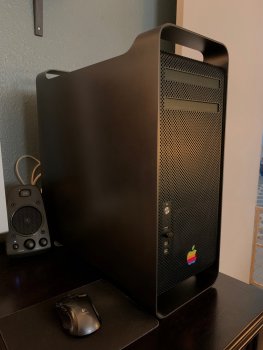
Fully assembled, just waiting on new memory & CPU to come in. The custom decals that I ordered from irockdecals.com are looking like they won't come in, according to the BBB I'm not the only one with a problem with these guys. Hopefully I didn't lose my $80...

But I'm pretty pleased with how it turned out. I'm thinking when the x5680 CPU comes in, I'll paint the outward facing edge of the CPU cooler black while I have it off.
 

Attachments

  • IMG_2758.jpeg
    IMG_2758.jpeg
    583.4 KB · Views: 522
  • IMG_2760.jpeg
    IMG_2760.jpeg
    404.2 KB · Views: 449
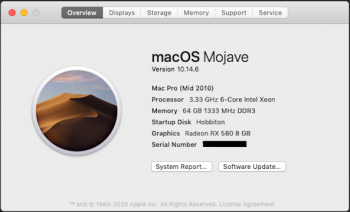
Current specs. I might upgrade the GPU to a 5700XT or a VII (if I can find one) when Bir Sur releases.
I skipped Catalina with the many issues I've had with it at work. I'v got the developer beta on my 2012 5,1, works wonderful so far. It's the first release that I'm excited about in several versions.
 

Attachments

  • Screen Shot 2020-08-11 at 8.15.03 AM.png
    Screen Shot 2020-08-11 at 8.15.03 AM.png
    106.7 KB · Views: 172
Really cool looking stuff. I'm not that much into stardust inside the machine, but I do appreciate the effort you have gone through with it. The exterior of the Mac on the other hand is really really great looking and to my taste exactly. Great finish too with the paint. Great texture in it. Congratulations!

OT: About your signature; How did you fit 5 TB HDD inside a Mac Mini 2012. Is it a 2,5" 7mm thick HDD or what, and there can I buy one? I'm just in the middle of updating a 2012 Mini with 1 TB SSD and 2 TB HDD. A 5 TB HDD would have been much thicker than 2 TB.
 
It's a normal 5TB 2.5" drive, the really thick one. It took some work but it does fit, without any modding. The most difficult part was the cable alignment, I believe it was the upper bay (the lower one when upside down). The drive cable that I had was slightly long when I shoehorned the drive in there.
 
Thank You for the info. I looked at Seagate Barracuda 5 TB, but at 15 mm thickness, I did back out. Maybe I'll try this later with my other Mini soon.

And I might get into painting one Mac Pro too, because of the looks of your project.
 
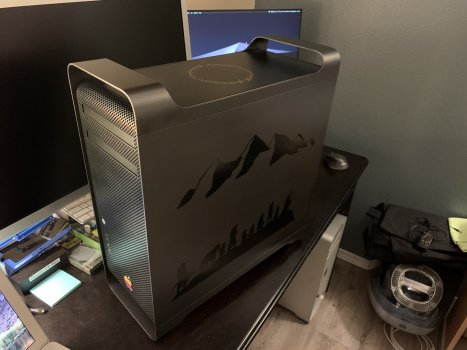
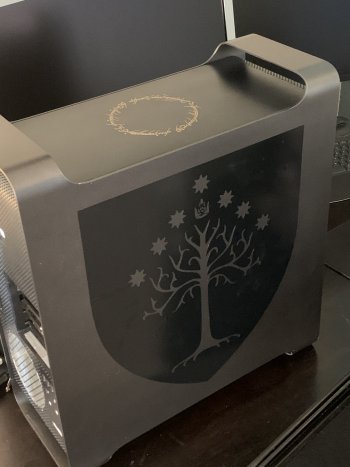
I figured I'd give an update. 4 months to the day after ordering my decals, they came in the post. There were a couple ones missing from my order, but I'm pretty pleased with how it turned out. I also was able to procure a dual CPU tray, which I fitted with dual X5680s. I figured that I wouldn't notice the .13GHz speed difference between the X5690 & the X5680, and I spent half as much doing so.
 

Attachments

  • IMG_3417.JPG
    IMG_3417.JPG
    430.6 KB · Views: 455
  • IMG_3420.JPG
    IMG_3420.JPG
    402.9 KB · Views: 273
Register on MacRumors! This sidebar will go away, and you'll see fewer ads.