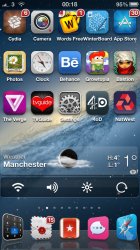
It's easiest to do it with Winterboard.
Just make a folder and name it what ever you want, like Icons.
Inside of that folder make another folder and name it Bundles.
Inside of that folder is where you will place all your icon folders.
To make an icon folder, you first have to figure out the bundle id of the app you're making an icon for. It's easiest to do this using iFile.
Go to /var/mobile/Applications. You'll probably see a bunch of letters and numbers that make no sense. To change this to something you can understand, tap the gear at the bottom left, tap File Manager, then switch Application Names to on.
Now go back to the Applications folder and find the app you're changing the icon for. Tap it then tap the .app folder of the app.
Now, in here we're looking for the file named Info.plist. Find it, tap it, then tap Text Viewer.
In this file we'll find the bundle id of the app. What you're looking for in this text is a line named com.something.something. Shouldn't be too hard to find. This will be the name you use for the icon folder I mentioned earlier.
Also, take note of the name of the icon of the app in Info.plist. It will look like:
icon@2x.png or
Icon@2x.png or something like that. That is what you'll name the icon you're putting in the icon folder. Capitalization is important as well so make sure it matches exactly.
After you name your new icon, put it in the icon folder you made earlier named com.something.something.
After you're done making all the icon folders you need, SSH the Icons folder into the /var/stash/Themes folder on your phone. The Icons folder should look like Icons/Bundles/All your icon folders.
Next you need to go to Winterboard on your phone and select the Icons folder that you just put on your phone. Make sure you move the folder to the top of the list to make sure all your icons will be themed.
Respring and you're done.
It looks like alot but it's not too bad once you get the hang of it.


