Become a MacRumors Supporter for $50/year with no ads, ability to filter front page stories, and private forums.

p11hlf

macrumors member
Original poster
Jul 27, 2018
69
44
Southampton UK
Hey Guys,

Curious to know if my Xeon X5690 CPU was being cooled right I went to town on cooling today.

For some reason, my PSU fan is running in the 800-900 range constantly..... so I started from the bottom of the case and will be working my way to the top. (backwards I know)

before pulling it apart I bought the following.

Innovation cooling graphite thermal pad - https://www.amazon.com/dp/B07CK9SHZG/ref=twister_B07CK7LG51?_encoding=UTF8&psc=1
New thermal pad for the cooler
https://www.amazon.com/Wathai-Condu...3&sr=8-2-spons&keywords=3mm+thermal+pad&psc=1

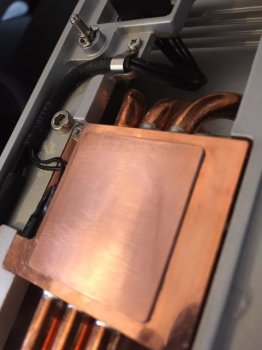
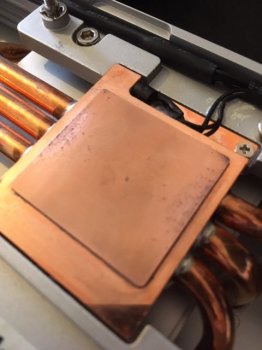
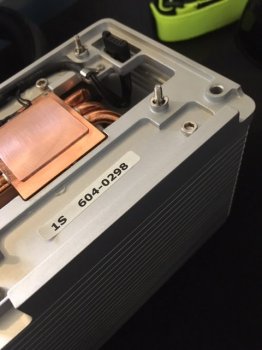
Upon pulling it apart I found that the copper heat plate on the cooler had some very small pitting, and the thermal pad was covered in dust and was all squished down.

I hit the copper with 1200 grit paper to give it a clean, just taking the top of the pitting off... it cleaned up quite quickly so it may have not been pitting but perhaps some very stubborn thermal grease..... but I could not even scratch it off with a blade so went down the sand paper route.

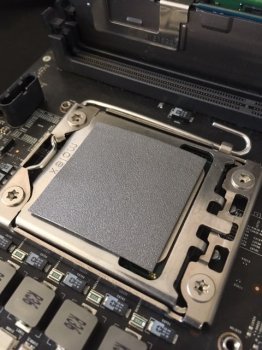
I cleaned it all up, CPU included and fitted a new thermal pads on the cooler and the CPU.

I used the graphite pad for ease of use, I had seen a few videos and reviews and it seems a way to go.

I then installed Macs Fan Control by Crystal Idea.
https://www.crystalidea.com/macs-fan-control/download

This had worked on my previous machines well so I thought I would give it another crack here.
As I had been lurking on the forums for a while I noticed that handheldgames has noticed that focusing the fans on the ram stick has made a big difference.

CMP case cover and heat

so I went at setting Mac Fan with the following settings.

Intake/exhaust is based on DIMM2. 30c / 50c
BoostA, based on CPU Diode 30c / 55c
PS, based on PS1 34c / 45c

All in all, my temps have dropped.... But with this many variables I can't say what exactly caused it.

And my Mac is so much quieter mostly due to the reduced PSU fan speed.

Whats next for me.

  • Put some fancy looking RAM coolers on the Samsung DIMMS (for this I need to buy another matching one)
  • Replace the Fan cable in my GPU cooler to a splitter off the cooler itself rather than the water pump.
  • Replace the GPU cooler fans to fancy Mag lev ones from corsair.
  • Clean out my PSU
Why? because I want something to do in the winter.... Im bored!

Thanks

Phil
 

Attachments

  • IMG_0091.JPG
    IMG_0091.JPG
    48.6 KB · Views: 371
  • IMG_0092.JPG
    IMG_0092.JPG
    42.8 KB · Views: 284
  • IMG_0090.JPG
    IMG_0090.JPG
    45.2 KB · Views: 289
  • IMG_0096.JPG
    IMG_0096.JPG
    78.7 KB · Views: 292
  • IMG_0095.JPG
    IMG_0095.JPG
    72.2 KB · Views: 340
  • IMG_0093.JPG
    IMG_0093.JPG
    79.9 KB · Views: 334
  • IMG_0094.JPG
    IMG_0094.JPG
    47.6 KB · Views: 326
As an Amazon Associate, MacRumors earns a commission from qualifying purchases made through links in this post.
OK so a quick update on the CPU cooling situation.

I've dropped 10% on average while gaming my CPU temps.

From hovering around 60 degree c to 54 degree c

All of my cables and fans arrived for the GPU today so I might give that a quick and dirty go this afternoon.

Thanks for the likes!
 
Inheriting a 5,1 soon and it's great to read some tips from others on cooling. First plan is to clean everything when I get it and start with a clean slate. Appreciate you sharing these details.
 
  • Like
Reactions: p11hlf
Inheriting a 5,1 soon and it's great to read some tips from others on cooling. First plan is to clean everything when I get it and start with a clean slate. Appreciate you sharing these details.

Thanks Alex, its good to see some new 5,1 owners here.

Ill update you all my my GPU cooling later today
 
Which size of the graphite thermal pad did you get to fit the CPU - the 30x30 or the 40x40? I wonder if one of those thermal pads might be useful for the Northbridge chip as well if it could be cut to fit. And can you explain where the blue 100x100 silicone pad is going?
 
Which size of the graphite thermal pad did you get to fit the CPU - the 30x30 or the 40x40? I wonder if one of those thermal pads might be useful for the Northbridge chip as well if it could be cut to fit. And can you explain where the blue 100x100 silicone pad is going?

Hey Flehman,

I bought the 40x40mm pad and it more than covered the CPU heat spreader.

I reckon the graphite pad could work well for the Northbridge chip, as I see no reason why it couldn't be cut down.

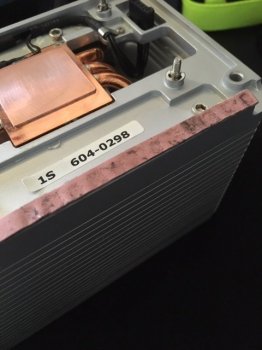
Lastly the silicone thermal pad was fitted on to the CPU town where it touches the CPU tray. Seen in the picture attached it replaces the old white putty like stuff that was all squished and dusty on my machine.

IMG_0091.JPG
IMG_0095.JPG
IMG_0093.JPG

[doublepost=1546960029][/doublepost]Yesterday I changed the fans on my GTX 980 GPU's radiator.

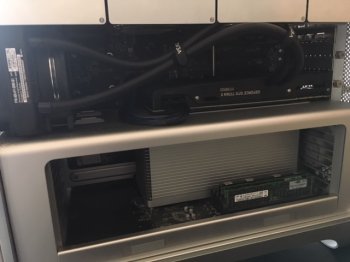
I have removed the PCI fan to make space for the push pull fan setup on the radiator.

The radiator is currently just sitting in this position with a couple of rubber pads on the bottom it seems to be self sufficient....

However I will probably make a bracket attached to the No.1 drive bay.

I removed these fans

https://www.amazon.com/Thermaltake-...-spons&keywords=thermaltake+riing+white&psc=1

Which I had originally fitted over the EVGA single fan originally fitted, I chose these because they were pretty much the only 3 pin fan I could find of semi decent quality.

They run at 1500rpm full speed, however when plugged directly into the GPU from the pump outlet they run at 56% constantly. so 840RPM

I replaced them with 2 Corsair ML pro fans.

https://www.amazon.com/Corsair-Prem...1546959651&sr=8-1&keywords=corsair+ml+pro+fan

Which have a much larger range 400 to 2400RPM

I also bought a cable for my graphics car enabling me to run these fans from the standard GPU fan plug.

What does this mean?

It means that when the GPU gets warmer, the fan get faster..... Meaning that my Mac Pro is quieter and cooler thanks to these new fans.


Not really much to see in the pictures but hey!


IMG_0096-1.JPG
IMG_0097.JPG
 
As an Amazon Associate, MacRumors earns a commission from qualifying purchases made through links in this post.
HI All (again)

today I decided to give the PSU a clean out.

Who knows what was lying in there? do you know how dirty your PSU is?

Here is a quick guide on removal, Not the same machine as mine but the screws were in the same place.

https://www.ifixit.com/Guide/Mac+Pro+First+Generation+Power+Supply+Unit+Replacement/32222

I also took apart my PSU ...... BE VERY CAREFUL

I blew out quite a few dust bunnies from various heatsinks within the PSU itself.

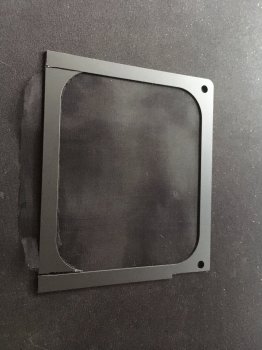
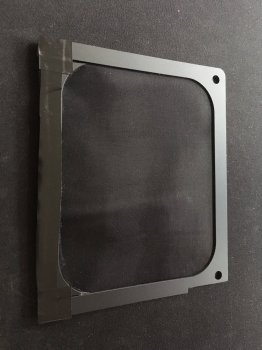
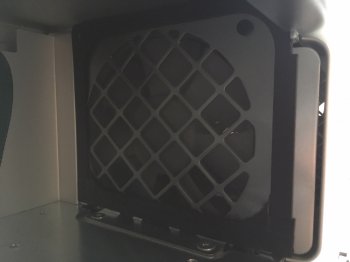
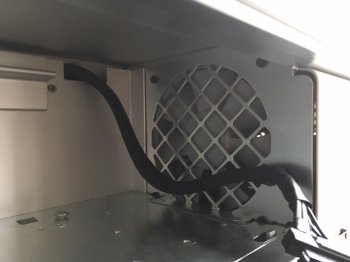
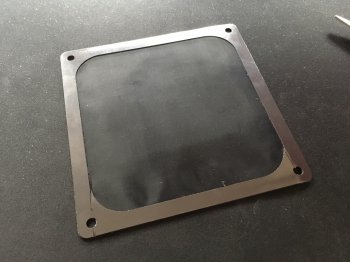
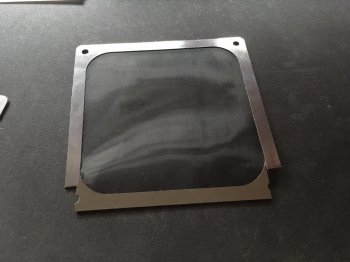
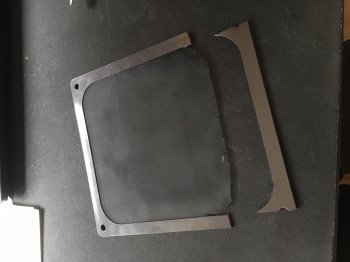
I also just ordered a magnetic 120mm fan filter.

https://www.amazon.com/AIYUE-Magnet...&sr=8-1-spons&keywords=120mm+fan+filter&psc=1

It will probably need modifying but the plate in front of the PSU fan is steel so it will stick right on.

 
As an Amazon Associate, MacRumors earns a commission from qualifying purchases made through links in this post.
  • Like
Reactions: Alex Sanders74
Hi all,

Not my last update I promise you this now!

But I fitted the fan filter, see the cuts and mods I had to do to achieve a fitment.

It looks great..... should stop the dust bunnies from ever coming back also!

IMG_0190.JPG
 

Attachments

  • IMG_0191.JPG
    IMG_0191.JPG
    734 KB · Views: 213
  • IMG_0192.JPG
    IMG_0192.JPG
    747.9 KB · Views: 220
  • IMG_0193.JPG
    IMG_0193.JPG
    720.2 KB · Views: 224
  • IMG_0185.JPG
    IMG_0185.JPG
    403.1 KB · Views: 209
  • IMG_0186.JPG
    IMG_0186.JPG
    696 KB · Views: 229
  • IMG_0187.JPG
    IMG_0187.JPG
    1.1 MB · Views: 199
  • IMG_0188.JPG
    IMG_0188.JPG
    1.1 MB · Views: 184
  • IMG_0189.JPG
    IMG_0189.JPG
    1,001.4 KB · Views: 225
"I reckon the graphite pad could work well for the Northbridge chip, as I see no reason why it couldn't be cut down. "

Not so sure it is a good idea. I was thinking also about this as I put it on my CPU's but the North bridge is much smaller... And the pad is conductive and it will cover elements on the board. Then it will insert electrical path due to conductivity .I reckon it should be cut only to the actual size.

absolutely, I advise cutting it down....... in fact!

Im doing it today!
 
absolutely, I advise cutting it down....... in fact!

Im doing it today!
I would like to know if there is any big temperature decrease after installing the pads in comparison to silver Arctic for example .
 
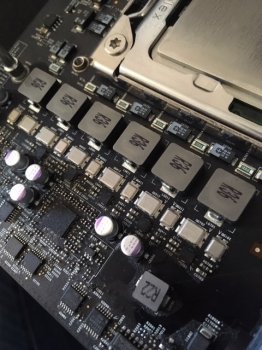
Take extreme care when removing the plastic rivets. You don't want to damage neighboring ICs, specifically the tiny 6 pin mosfet chip.
 
I think this heat sink can benefit from using some sort of bolts/nuts springs type of tightening to increase the contact and reduce the temperature.
 
  • Like
Reactions: w1z
I would like to know if there is any big temperature decrease after installing the pads in comparison to silver Arctic for example .
From my experience using these pads, the heatsink's temp would increase by a couple of degrees to approx 54C ~ 56C while the Northbridge chipset would drop by several degrees to approx. 58C. Also, when idle or stressed, there should be a couple of degrees difference at the most between the heatsink and chipset versus 8C or more when using a thermal paste.

The thing I liked most about these pads is their long lifetime and ease of application. They do however require medium to hard mounting pressure for effective heat transfer ie. not recommended for laptop heatsinks.
 
I know they work very well on my CPU's but there we apply pressure by torquing the bolts of the heatsink and the North bridge feels so loose in comparison . I read somewhere a guy who was selling upgraded CPU's to CPU trays sent to him was replacing those rivets with bolts and springs.
 
So that was easy. and it did go down the Nut and Bolt route.

I used
  • M3 x 12 screws
  • M3 washers
  • M3 Nuts
  • Springs from the olde plastic clip.
Some wise words about being careful removing the old plastic clips, there are indeed some sensitive chips around that area!

I used a pair of tweezers to unhook one side of the clip and then carefully pushed the other side in with a small engineers flat head screw driver.

I trimmed down the thermal pad to fit.... slightly oversized it actually to ensure I was covering it during installation but it quite clear from any other parts of the Northbridge setup.

the old paste was plenty and looked not too bad in terms of contact, but was dry and crumbled away from both the heatsink and chipset.

has it dropped loads of temps off at idle...... No! two or three degrees....

There is 10 degrees between the heatsink and diode however? this seems like a bit too much so I might check it in a week or two if the gap doesn't close over time.

IMG_0202.JPG
IMG_0201.JPG
IMG_0196.JPG
IMG_0195.JPG
IMG_0194.JPG
IMG_0205.JPG
IMG_0203.JPG
IMG_0204.JPG
IMG_0197.JPG
IMG_0198.JPG


IMG_0202.JPG
 
I think I used thermal grizzly or arctic silver 5 (thick layer) and I dropped the temperature difference to 6-8 deg C. The temperature differs between the single and dual CPU's quite a lot. On single CPU you can drop down to 56 C at idle whereas on dual 75 C seems the minimum. If you use Macs Fan Control you can drop it to 55-65 (dual CPU) C with little to minimum fan noise.
[doublepost=1548070374][/doublepost]I may try the bolts solution though to see the difference
 
  • Like
Reactions: h9826790
I think I used thermal grizzly or arctic silver 5 (thick layer) and I dropped the temperature difference to 6-8 deg C. The temperature differs between the single and dual CPU's quite a lot. On single CPU you can drop down to 56 C at idle whereas on dual 75 C seems the minimum. If you use Macs Fan Control you can drop it to 55-65 (dual CPU) C with little to minimum fan noise.
[doublepost=1548070374][/doublepost]I may try the bolts solution though to see the difference


ok I'm at 50c with an ambient of 26c on idle on the single CPU board
 
  • Like
Reactions: w1z
ok I'm at 50c with an ambient of 26c on idle on the single CPU board

That's much better ... what about the temp difference between the diode and heatsink?

By the way, that processor board needs some tlc.
 
That's much better ... what about the temp difference between the diode and heatsink?

By the way, that processor board needs some tlc.

yeah ill give it a clean soon!

50c on the T diode
39c on the Heatsink

As I said above, ill leave it a week and maybe tighten the screws a bit more.
 
  • Like
Reactions: w1z
p11hlf. Following this thread and appreciate all the pics you’re posting. Planning to give the 5,1 that I’m getting tomorrow a through go over. Also, appreciate everyone else’s feedback. Great info here.
 
In my reading on MR I thought the consensus was that Apple chose rivets for the north bridge in order to accommodate thermal expansion and contraction. Bolts would certainly prevent this sort of flexibility. That said, Pindelski and numerous others here have used rivets and I can’t say I’m familiar with any horror stories. But I also find it hard to believe the engineering team chose spring loaded fasteners for no reason.

Either way, glad you’re enjoying your Mac Pro. I am a fan of screen filters but I am past investing anything else in my cMP personally.

This was the reason for using the original springs.... it does exactly the same heat expansion task as the plastic snap rivet.

I replaced with screws for peace of mind, and was unsure that I would be able to get them off cleanly without breaking.


Glad people are enjoying it here, worth doing the fan filter anyway as separating the PSU is a pain in the rear in comparison to giving the filter a quick wipe.
 
  • Like
Reactions: h9826790
Register on MacRumors! This sidebar will go away, and you'll see fewer ads.