Become a MacRumors Supporter for $50/year with no ads, ability to filter front page stories, and private forums.

xli_ne

macrumors 6502a
Original poster
Mar 3, 2005
790
0
Center of the Nation
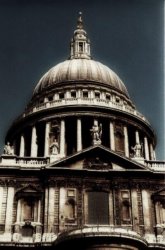
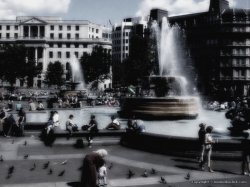
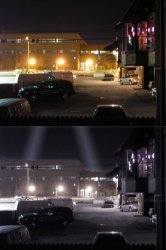
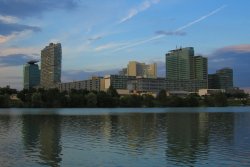
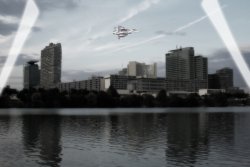
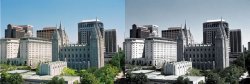
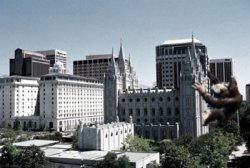
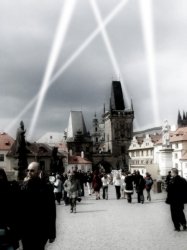
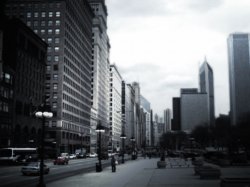
I've got some pictures of my hometown's downtown area and wanted play around and give them a look similar to "Sky Captain and the World of Tomorrow" Found one picture from the movie that might help. I'm using photoshop and wasn't sure what filters to use to create the look. Any advice would be helpful.

03.jpg
 
millions of $ worth of CGI work? :p

ok, that was not helpful. I dunno, it's hard to say exactly without seeing the photos your working from but I'd probably up the contrast, make some selections onto new layers (ie cut buildings & cars and such and give them their own layers) then I'd play around with gausian blur filter and put some white outer glow on some of the objects
 
1) Desaturate.

2) Up the contrast.

3) Add glow.

4) Add more searchlights!

(A friend of mine who was a compositor on Sky Captain said that "add more searchlights" became a running joke with the director, because he took the position that more searchlights would always be better.)

Also note that some of the darker areas seem to bleed a bit into the brighter areas, which used to happen a lot in printing negative film before anti-halation coatings became common. You can get that effect by inverting the image, converting to Lab color, applying a glow effect in luminosity, converting back to RGB, and then re-inverting.

-- Mark
 
Here's my quick hack.

1. Desaturate by -40 or so
2. Then Gaussian Blur by 10-30 pixel radius (depending on resolution)
3. Then Edit>Fade Gaussian Blur: Choose Overlay.
4. Adjust Levels or Curves to get the Noir contrasty look
5. Desaturate again.
6. Gaussian Blur by 1-3 pixel radius
7. Then Edit>Fade Gaussian Blur: Choose Normal and fade to about 50% to soften...
8. And yes, add spotlights. :D

Before and after on a random Googled image of St. Pauls, London. Took a minute or two...


stpaul02.jpg
 

Attachments

  • StPauls2.jpg
    StPauls2.jpg
    80.1 KB · Views: 298
I'm bored and can't sleep. Here's another of Trafalgar Square... I did the same steps as before but also overlaid a solid dark blue adjustment layer in Overlay (blend mode) after all those steps to cool the hues...

If I was going to do it properly then I'd mask off certain areas and do them separately on different layers as someone suggested earlier and also add a number of glow layers as well. But this is a quick and easy way to get started.

Trafalgar-Square.jpg
 

Attachments

  • Trafalgar Square.jpg
    Trafalgar Square.jpg
    123.6 KB · Views: 453
Blue Velvet that's awesome! I just tried it out on a bunch of photos and it looks really cool.
 
mark_wilkins said:
4) Add more searchlights!

(A friend of mine who was a compositor on Sky Captain said that "add more searchlights" became a running joke with the director, because he took the position that more searchlights would always be better.)

-- Mark

I gotta have more cowbell! :p

anyways here's my quick & sloppy attempt
 

Attachments

  • captianyesterday.jpg
    captianyesterday.jpg
    56.4 KB · Views: 352
Thank you!:)

Spotlights: I created the triangular forms with the path tool and then converted the paths to a selection (in the path menu, make selection comand) with a smooth border. Filled it with white on a seperate layer and duplicated the layer. On the top layer I applied the filter "minimize" or "maximize" (don't know exactly how it is called in english because I use german photoshop). It should be under "other filters" or something like that. Anyway it makes the white areas smaller. I set transparency to about 50% on the other layer and merged the two. A little erasing here and there with the rubber tool and it was done.
 
Blue Velvet said:
Here's my quick hack.

1. Desaturate by -40 or so
2. Then Gaussian Blur by 10-30 pixel radius (depending on resolution)
3. Then Edit>Fade Gaussian Blur: Choose Overlay.
4. Adjust Levels or Curves to get the Noir contrasty look
5. Desaturate again.
6. Gaussian Blur by 1-3 pixel radius
7. Then Edit>Fade Gaussian Blur: Choose Normal and fade to about 50% to soften...
8. And yes, add spotlights. :D

Well, nice jorb, BV! Even sans spotlights it looks nifty!
 

Attachments

  • BVsTips.jpg
    BVsTips.jpg
    106.8 KB · Views: 177
Is that Chicago? It looks like Chicago.

I'm also bored at work. Clearly. :)

For the life of me I cannot figiure out how to make decent spotlights. I tried following chaosbunny's directions, but I think perhaps he/she is using a post-PS 7.0.x version, as the path tool only allows me to draw boxes for some reason.

Anyone got any tips (for a retard)?


Hmm Too much red..
 
yellow said:
Is that Chicago? It looks like Chicago.

I'm also bored at work. Clearly. :)

For the life of me I cannot figiure out how to make decent spotlights. I tried following chaosbunny's directions, but I think perhaps he/she is using a post-PS 7.0.x version, as the path tool only allows me to draw boxes for some reason.

Anyone got any tips (for a retard)?

Hey, looks nice when applied to World of Warcraft!:)
I've got a lvl 60 druid myself. Have to try this with some of my screenshots too.

Concerning the spotlights maybe I did not give the correct name of the tool in english, I'm using the german version like I wrote. But I'm pretty sure it is called path tool in english and this should work with version 7 too. It is the one with the red arrow. Or alternatively use the one with the blue arrow in the screenshot.

Hope this helps.

Bild-1.jpg
 
Register on MacRumors! This sidebar will go away, and you'll see fewer ads.