I just went through the process of upgrading my CPUs in my dual processor 2009 4,1 Mac Pro from the stock 2.26 GHz E5520 to the 3.46GHz x5677 (both four core) and thought I would share my experiences as I am sure there are a lot of people out there that might find this information useful.
For the record, I have worked in IT for over a decade and in that time built countless servers, networks performed datacenter installs as well as build and modify my own home computers so when it came to the decision of how to upgrade, it was pretty clear cut.
For reference, the 2009 dual processor Mac Pro's are designed to use lid-less CPUs. I can only assume because Apple wanted better heat transfer to the coolers for the newer generation processors.
There are 2 trains of thought with the CPU upgrade process (after the firmware update to 5,1 of course);
1) Put the new CPUs in with the factory heat spreaders on them and use spacers to ensure a tight fit but not crush them.
2) Remove the heat spreader so the fit will be perfect (using a technique first created by overclockers to get better heat conduction for all cores by replacing the thermal paste that Intel used) as designed by Apple.
Option 2 has two clear benefits; no issues with crushing the CPUs and better heat dissipation by getting the die to contact directly to the heat sinks.
My upgrade is as with everything is in life on a budget. The insane current x5690 prices (that are double what they were a few months ago) pushed me to the same core speed and architecture x5677 which identical but has 4 cores instead of 6.
So, with my can-do spirit and a sharp craft knife in hand I slowly started cutting into the sealant that holds the lid onto the PCB of the CPU. After about 20 minutes of delicate work cutting, looking, checking I finally was sure that all of the sealant had been removed. This part is complicated by the fact that Intel clearly use a far better compound for the Xeon CPUs than their consumer Core i7 range which bonds the lid to the die with the vigor and strength that makes you doubt your sanity when you are wedging a blade under the lid and trying to pry it off all the time worrying if you just threw away the money you spent on this new CPU.
I would like to point out that if you watch some of the videos of the people doing this with their Core i7 chips, this final part is easy, just a slight twist of the blade and it is free.
So finally the lid released. It required enough force to flex the PCB at least 10 degrees, which is quite scary considering all the layers of wiring in the PCB.
Now I can finally inspect the fruit of my labours. One thing you have to be very careful of is to not cut too deep as there are tiny capacitors around the actual die of the CPU. It is here that the damage is evident. One capacitor sliced off and another with a good sized chunk missing.
It was at this point I decided to put aside my pride and contacted the person that advertises his services on eBay, a service that I had initially though "I don't need, because I do it all myself!" Paul turns out to have Mac Pro's and is an electrical engineer that also has the skills and means replace the damaged capacitors on my CPUs at $10 per capacitor. Here is a link to his eBay listing: http://r.ebay.com/IJgkMq
His seller name is box185 incase the listing ever expires and someone in the future wants to contact him.
He further explained that he has designed and built a special assembly to allow for the safe removal of the CPU lids as the cut and pry method is far too dangerous.
So, I ordered another new x5677 as and sent them plus my mangled botch job of a CPU to him for inspection in case it can be repaired.
Under the microscope, the capacitor damage was greater that my naked eyes could perceive. Any amount of damage can create a short circuit in the chip and it had over 5 capacitors damaged, plus damage to the PCB from all the cutting, which puts the repair job at nearly the cost of the brand new CPU and still leaves it with the risk of having a dangerously damaged PCB.
The decision was made, de-lid both new processors and send back my shameful handiwork so I can make a medallion or other fashion accessory with my now worthless CPU.
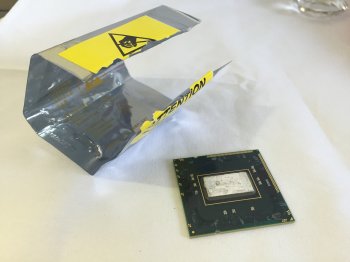
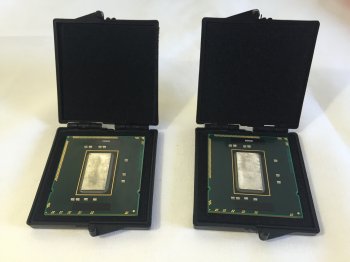
I was very surprised when I got the CPUs back, when you buy them new, they come in sealed antistatic bags provided by Intel, which are fine but not especially robust, but Paul puts them in antistatic hard cases with insulating foam inserts. Very professional, he also provides the long 3mm Allen wrench, instruction manual, thermal paste, thermal paste cleaner and USB drive with the firmware updater on it included in the price so you don't need to go off researching and collecting all the parts needed.
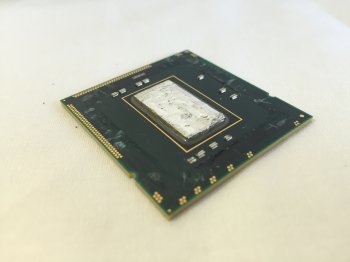
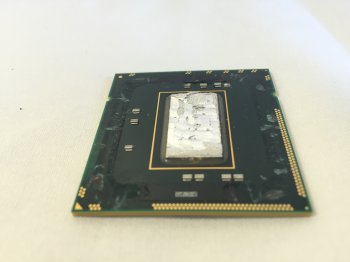
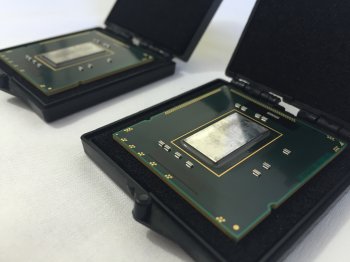
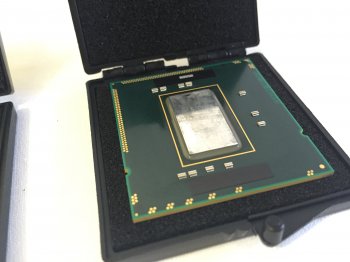
Under close inspection, the CPUs are perfect. The difference is night and day between the one I did and the ones he did. They look as good as the E5520 CPUs that I pulled out of my Mac Pro which were made with out the lid. See the attached photos. Sorry, I don't have a macro lens for my camera but even these photos show the difference.
To sum up my experience, if you have a 2009 Mac Pro and want to upgrade your CPUs, contact Paul first. He can provide you with everything you need. The actual replacement of the CPUs themselves is easy. If you have never done it before just watch some videos on YouTube. But do not go and try to de-lid them yourselves. Too much risk. I am sure that some people out there have done it themselves but from my experience, it is damned hard to do to a Xeon without damaging something.
Attachments
Last edited:


