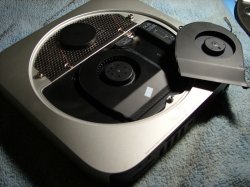
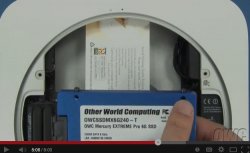
Rather than using a business card as some have used in videos to insert the hard drive, I just screwed the grill unto the SSD hard drive after attaching the data cable. Next, pivot the grill with the attached hard drive to the left and snap the antenna in. Then, align the grill and slide in. The hard drive would have already align with the two slots on the other side. Then, once the drive is seated in the other side, slightly lift the grill and attached the data cable to the motherboard.
To me, that was much easier.
To me, that was much easier.
")