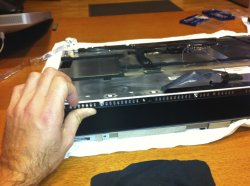
I will add some pictures later in the day but here is a step by step guide!
1. Remove the glass, unscrew the 10 torx screws, disconnect the cables and put the panel on a clean flat surface facing up. Follow this guide
http://www.ifixit.com/Teardown/iMac-Intel-27-Inch-Teardown/1236/1
2. Unscrew 8 screws holding the frame to the panel. Some of them are beneath the cushions. They are different sizes so keep track of that. This guy came to this part
http://www.youtube.com/watch?v=BNWASktH7-Q. Watch the video!
Now the hard part!
3. Put it in vertical position sitting on the bottom cushions and facing away from you. Peal of the metal tape on the top. You will see the 3 places for "pry opening" the frame. There are two more that you don't see on the top side. They are beneath the frame on the sides. You have to remove the metal tape in the corners in order to see those places. Look closely from the side. They look like small dents in which you put a flat head screwdriver. Don't pry it yet.
4. Now, you have to put the display face down so you see the tape that connects the frame to the panel on the sides and the bottom corners. On the bottom there is a black tape which you have to remove and you will see a prying place. Beneath the cushions are two more of them. In the bottom corners also, but you want see them - same as on the top side.
5.You see that metal gluey tape on the sides? Ok. It kinda glues the frame to the panel so you cant open it yet. You have to gently cut it loose from the panel! Yes this is the "do you have-the-guts-to-do-it" part. Take a knife or a razor blade and cut it so you can see the black plastic from the panel and the metal from the frame. When you're done with that you will see some more prying places for releasing the frame. 5 on each side.
6. Keep the display in vertical position. Pry open the frame on all sides. You need to pry between the black plastic and the metal frame. Don't pry under plastic. Try to find the prying dents it will be easier to release the frame. Rotate it if you need. Gently and slowly. On the top side be very careful! There are connections from the display glass to the logic board which are not to be harmed. I didn't even touch them so I don't know how careful you actually need to be, but try not to brake them. You can open the tin plate over the logic board. There are 4 screws and it comes off easily, but you don't have to do that. You can just unscrew 2 top screws so this plate releases the frame.
7. Remove the frame and put the panel face up.
8. You can open it now from the bottom side. The top side is connected to the logic board. Be gentle. Don't remove it all the way. Just crack it open.
9. Remove the dust from inside with a soft cloth. I used apple's cloth. There will be dust on the backlight and on the display from the inside.
10. Close it and put the frame back. Don't worry, it snaps back easily just be careful with the top where the connections are.
11. Screw all the screws back and assemble your imac.
That's it! Enjoy your, once again clear, imac 27" display.
Oggy


