Become a MacRumors Supporter for $50/year with no ads, ability to filter front page stories, and private forums.

philipma1957

macrumors 603
Original poster
Apr 13, 2010
6,406
280
Howell, New Jersey
Important update the 3.33 Ghz hex has dropped in price from 999 to 583 as per intels website.

as of AUG 2012 the best deal is below

http://www.provantage.com/intel-bx80613w3680~7ITEP374.htm

586 for a new under warranty seller


so this will give you geekbench of 16200 to 16500 vs 15500 to 15800 for the hex 3.2.


for now use the w3680!


((Last post has new cputest scores))

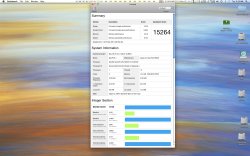
Well I did this install this morning my new geek bench scores are 15264 with 12gb ram an improvement from 9950.

I posted geekbench and about this mac I have about 25 photos to post. So far so good my old cpu temp was 97 f my new cpu temp is 97 f.

This is an easy upgrade just don't rush as the parts are costly.


You need some latex gloves a good light. q-tips and some micro fiber clothes like the ones for eyeglasses.
A grounding strap helps if you live in high static home or work space.

Links for arctic silver kit


http://www.amazon.com/ArctiClean-3-...Y3MM/ref=sr_1_1?ie=UTF8&qid=1300821393&sr=8-1 $11.50

metric key kit

http://www.amazon.com/Allen-Wrench-...APCM/ref=sr_1_2?ie=UTF8&qid=1300821466&sr=8-2 $13.91


total 25.41 gets free shipping

You need a long 3mm metric key 5 inches or more on the long shaft will work much better then the short one I used.( about a 3.75 inch shaft)

########################################################################
cpu
see new link above as of dec 2011

http://cgi.ebay.com/NEW-Intel-Xeon-...EN_Servers&hash=item230e914a2e#ht_3265wt_1250


612 with shipping

########################################################################


@@@@@@@@@@@@@@@@@@@@@@@@@@@@@@@@@@@@
@@@@@@@@@@@@@@@@@@@@@@@@@@@@@@@@@@@@

this link has more info:

https://forums.macrumors.com/threads/1120326/


@@@@@@@@@@@@@@@@@@@@@@@@@@@@@@@@@@@@@@@
@@@@@@@@@@@@@@@@@@@@@@@@@@@@@@@@@@@@@@@

NOTE OF CAUTION. I HAVE HANDLED COMPUTERS AND AUDIO GEAR FOR OVER 40 YEARS YOU CAN DAMAGE THE GEAR.
DAMAGE YOUR HOME OR DAMAGE YOURSELF IF YOU MAKE A MISTAKE!
SOOO IT IS YOUR CHOICE TO DO THE MOD NOT MINE AND DON'T BLAME ME or anyone else IF SOMETHING GOES WRONG.

Also I am not a lawyer so to be on the safe side if you do the mod say goodbye to the warranty. IMHO
 

Attachments

  • geek bench scores for hex 3.2 mod.jpg
    geek bench scores for hex 3.2 mod.jpg
    833.8 KB · Views: 6,630
  • Mac Pro upgrade quad 2.8  to hex 3.2.jpg
    Mac Pro upgrade quad 2.8 to hex 3.2.jpg
    876.7 KB · Views: 5,122
Last edited:
As an Amazon Associate, MacRumors earns a commission from qualifying purchases made through links in this post.
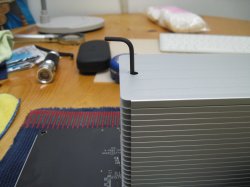
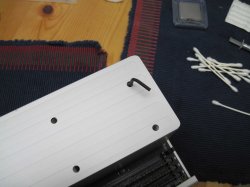
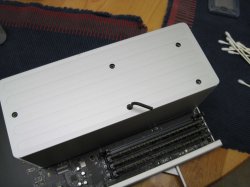
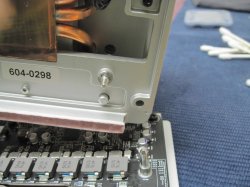
To start off I did not feel like waiting for the longer 3mm hex wrench. So I used the one I had it is about 3 and 3/4 inches long or about 92 mm. before the curve. Made the job a little harder so I do recommend a longer 3mm hex wrench. There are 5 hex bolts to open rotate as you loosen and only do a few turns then move on you do each bolt about 5 times one turn each time. doing the rotation this way will lift the unit off evenly always better that way. BTW this is exactly how you put the heatsink back on. Just tighten a little bit at a time always rotating holes and screws.
 

Attachments

  • IMG_0742small.jpg
    IMG_0742small.jpg
    597.9 KB · Views: 2,861
  • IMG_0783small.jpg
    IMG_0783small.jpg
    457.2 KB · Views: 2,586
  • IMG_0784small.jpg
    IMG_0784small.jpg
    552.2 KB · Views: 2,648
  • IMG_0786small.jpg
    IMG_0786small.jpg
    521.7 KB · Views: 2,559
  • IMG_0785small.jpg
    IMG_0785small.jpg
    630.6 KB · Views: 2,527
Last edited:
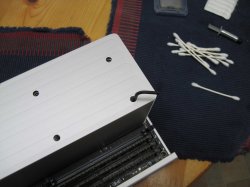
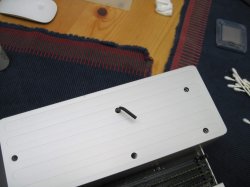
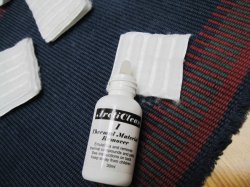
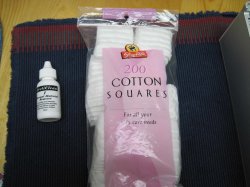
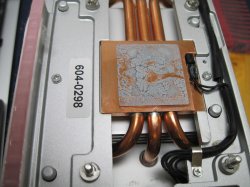
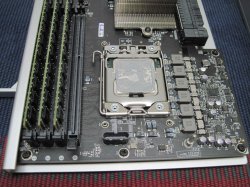
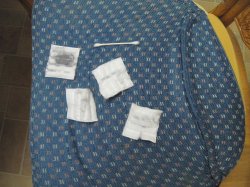
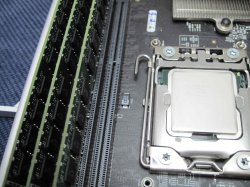
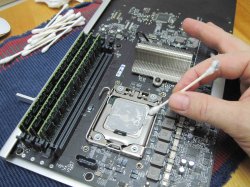
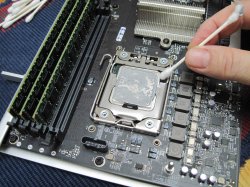
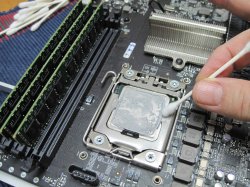
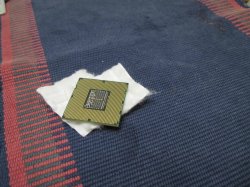
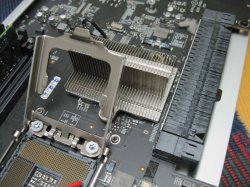
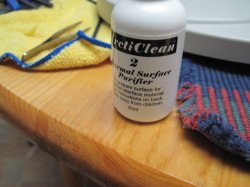
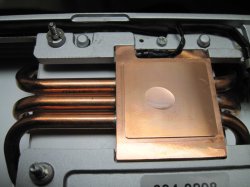
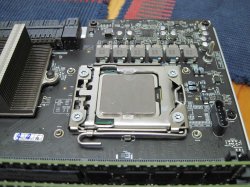
here is a shot of the oem cpu (quad 2.8) notice the oem paste has oozed over the edge and next to the holding clip. other shot is the copper heatsink notice the black temp wire always avoid. if you mentally flip the two pictures you will realize that the heat sink paste may not have fully covered and mated the two parts. next is the cleaner I used along with cotton pads. one drop on each pad is enough. you can see what it took to clean the copper heat sink in the last shot.

ONE NOTE OF CAUTION DON'T GET THE PADS NEAR THE PINS ON THE CPU BOARD . THE PINS ARE LIKE HOOKS AND WILL SNAG THE COTTON.
 

Attachments

  • IMG_0746small.jpg
    IMG_0746small.jpg
    621.2 KB · Views: 4,154
  • IMG_0745small.jpg
    IMG_0745small.jpg
    702.8 KB · Views: 4,257
  • IMG_0744small.jpg
    IMG_0744small.jpg
    679.8 KB · Views: 4,790
  • IMG_0743small.jpg
    IMG_0743small.jpg
    685.7 KB · Views: 5,390
  • IMG_0773small.jpg
    IMG_0773small.jpg
    673 KB · Views: 4,125
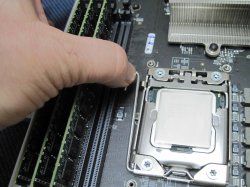
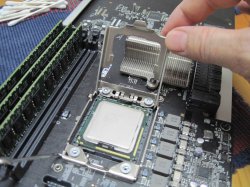
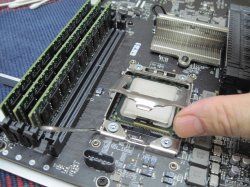
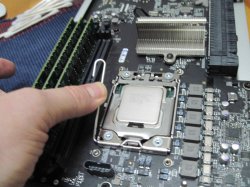
NEXT I cleaned the oem cpu before I pulled it out of the cpu board. Basically the oem thermal grease was a mess so I wanted to get it out of the way before I handled the oem cpu. last two shots show the clips that hold the cpu in place. The last shot I have slipped the clip out and I am preventing it from jumping like a MOUSETRAP!! DON'T FORGET! It is spring loaded be careful.
 

Attachments

  • IMG_0752small.jpg
    IMG_0752small.jpg
    577.5 KB · Views: 3,507
  • IMG_0751small.jpg
    IMG_0751small.jpg
    521.1 KB · Views: 3,452
  • IMG_0750small.jpg
    IMG_0750small.jpg
    637.7 KB · Views: 3,418
  • IMG_0749small.jpg
    IMG_0749small.jpg
    688.5 KB · Views: 3,324
  • IMG_0748small.jpg
    IMG_0748small.jpg
    659.9 KB · Views: 3,473
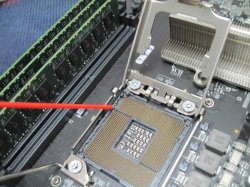
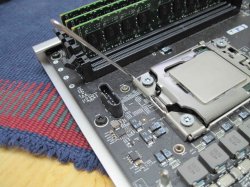
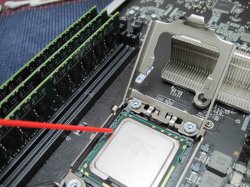
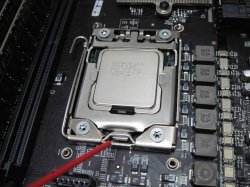
The spring latch all the way back. 2) The hatch lifts up. 3) fully opened. 4) Now here is the one mistake I made. I lifted the old cpu out with two cotton pads. I did not realize that the pins or hooks on the cpu board would snag the cotton. 5)I used a small tweezer and magnifying glass to pull the cotton off the pins along with the canned air to fluff the cotton up.The red stick is the canned air stick.

I would suggest using laxtex gloves to handle the cpu when lifting it out. Not the cotton pads.
 

Attachments

  • IMG_0759small.jpg
    IMG_0759small.jpg
    537.4 KB · Views: 3,824
  • IMG_0757small.jpg
    IMG_0757small.jpg
    569.8 KB · Views: 3,507
  • IMG_0756small.jpg
    IMG_0756small.jpg
    662.1 KB · Views: 3,442
  • IMG_0755small.jpg
    IMG_0755small.jpg
    588.3 KB · Views: 3,235
  • IMG_0754small.jpg
    IMG_0754small.jpg
    552.8 KB · Views: 3,306
Last edited:
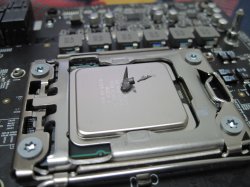
Moving along the pins have had the strands of cotton removed.
1)Now look at the alignment peg the right one is pointed out , but the second peg is over to the left.

2) Now new cpu is dropped in, note the two pegs line up there is only one way the put the cpu in the board.

3) then the spring latch is reloaded. DON'T LET IT SPRING.

4)THE CPU is now ready for arctic silver.
 

Attachments

  • IMG_0760small.jpg
    IMG_0760small.jpg
    630.2 KB · Views: 3,092
  • IMG_0761small.jpg
    IMG_0761small.jpg
    530.4 KB · Views: 3,096
  • IMG_0764small.jpg
    IMG_0764small.jpg
    566.5 KB · Views: 2,840
  • IMG_0766small.jpg
    IMG_0766small.jpg
    608.1 KB · Views: 2,979
Last edited:
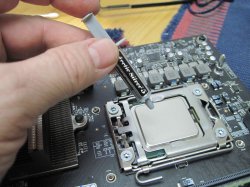
1)I placed a drop of the arctic silver prep fluid on the heat sink
I then polished the heat sink up a bit.

2)Photo of prep fluid.

3)photo of arctic silver.

4)how much I put on the cpu.
 

Attachments

  • IMG_0775small.jpg
    IMG_0775small.jpg
    731.6 KB · Views: 3,844
  • IMG_0774small.jpg
    IMG_0774small.jpg
    664.7 KB · Views: 3,464
  • IMG_0771small.jpg
    IMG_0771small.jpg
    579.3 KB · Views: 3,289
  • IMG_0770small.jpg
    IMG_0770small.jpg
    486.8 KB · Views: 3,386
Last edited:
Wow, this is a very informative thread. I think yours, is the most graphic of all the cpu - fiddling threads in macrumors.

I remember a guy who re-applied thermal paste in his macbook to cool it and another thread where a Mac Pro (a 2008 I believe) had to hack a little the CPU fan assembly to put in a Xeon that had a metal casing on top (back then, that Mac Pro had a naked Xeon from the factory).

Yours is definitely much easier to follow! Very informative! Thanks for sharing! Now I know exactly how and what to do with my Mac Pro! :D
 
last four shots.


1) the new cpu with arctic silver spread out on it. I used a latex glove and my pointer finger. To spread the paste. You can almost see a partial finger print at the top of the photo.

2)the heatsink cleaned and prepped note the hole on the bottom right. that is the alignment hole. there is a second one on the top left under my hand.

3) third shot I lowered the alignment hole onto the silver pin coming out of the board. I then swung the other alignment hole over the second pin and lowered the heatsink.

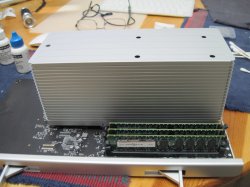
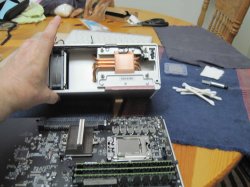
see last shot. All that you do is tighten the five hex screws a few turns each in rotation over and over. as soon as they don't want to turn you are done. remember to do them a little bit at a time in rotation to seat the heat sink. this link shows removal of cpu tray from the pro it shows parts needed.


https://forums.macrumors.com/threads/1120326/


So far the pro has been running for 3 hours. The upgrade was about an hour and would have been under 35 minutes if not for the cotton incident. The new cpu is 95 f the old one ran at 97 f.


I am amazed at how easy this cpu was to do. If you are looking for a mac pro consider buying the 2010 2.8 quad and putting in the 3.2 hex w3670 cpu. If you own a 2.8 consider the improvement 9950 to 15500 on 64 bit geek bench. Also it seems to me that this is the best bang for the buck. I spent under 560 and have not sold the 2.8 quad yet which should bring me down to 350-375 USD.

My totals were cpu for 620 after discounts___ 523.
Arctic silver kit _________________________ 12.
Metric wrench kit________________________ 13.
Q-tips and cotton pads 3 or 4 bucks__________ 4.
A few latex gloves _______________________ 5.
Two micro fiber cloths ____________________ 2.

TOTAL________________________________ 559. Less if I sell the oem cpu.
 

Attachments

  • IMG_0776small.jpg
    IMG_0776small.jpg
    729.7 KB · Views: 4,017
  • IMG_0777small.jpg
    IMG_0777small.jpg
    532.9 KB · Views: 3,881
  • IMG_0778small.jpg
    IMG_0778small.jpg
    545.2 KB · Views: 3,362
  • IMG_0779small.jpg
    IMG_0779small.jpg
    594.4 KB · Views: 3,114
Last edited:
  • Like
Reactions: bzbzbz
Also it seems to me that this is the best bang for the buck. I spent under 560 and have not sold the 2.8 quad yet which should bring me down to 350-375 USD.

Total cost of upgrade?

I'm amazed at the lack of reading skills on this forum sometimes. The OP clearly answers that question right above your post.


EDIT: Transporteur clearly beat me to it! I spent too long reading :(
 
Just put it in look above for details 559. I had a about a 90-100 discount on the cpu price of 620 due to an ebay coupon.

No I added the price later transporteur is fast!
 
Last edited by a moderator:
Reading, not only watching is the key to get information. :p;)

I'm amazed at the lack of reading skills on this forum sometimes. The OP clearly answers that question right above your post.
EDIT: Transporteur clearly beat me to it! I spent too long reading :(

Geez will you two (especially you peskaa :rolleyes:) calm down. The OP added the info AFTER i asked the question.

No I added the price later transporteur is fast!
 
Geez will you two (especially you peskaa :rolleyes:) calm down. The OP added the info AFTER i asked the question.

I'd rather sulk in a corner if that's okay?


As for doing the upgrade, if I had a 2010 model, or were buying one, I'd definitely be looking to do this than pay Apple's charges. Screw the warranty!
 
Is that heatsink going to be sufficient without a fan I don't know. The heatsink that came with the new cpu is a tower design with a fan right? Other than using too much AS5 you did a good job.
 
the heatsink is apple oem. the quad 2.8 the hex 3.2 and the hex 3.33 use the same power.

I have a Mac pro 3.33ghz hex on hand
it has the same heatsink
as this quad 2.8 turned hex 3.2

quad 2.8 link = http://ark.intel.com/Product.aspx?id=41313 PRICE 294 FOR A TRAY OF 1000

SPECIFICATIONS
Essentials
Status Launched
Launch Date Q1'10
Processor Number W3530
# of Cores 4
# of Threads 8
Clock Speed 2.8 GHz
Max Turbo Frequency 3.06 GHz
Intel® Smart Cache 8 MB
Bus/Core Ratio 21
Intel® QPI Speed 4.8 GT/s
# of QPI Links 1
Instruction Set 64-bit
Instruction Set Extensions SSE4.2
Embedded Options Available No
Lithography 45 nm
Max TDP 130 W
VID Voltage Range 0.800V-1.375V


watts are 130


hex 3.2 link = http://ark.intel.com/Product.aspx?id=47918 MY NEW MOD. PRICE 583 FOR A TRAY OF 1000

SPECIFICATIONS
Essentials
Status Launched
Launch Date Q3'10
Processor Number W3670
# of Cores 6
# of Threads 12
Clock Speed 3.2 GHz
Max Turbo Frequency 3.46 GHz
Intel® Smart Cache 12 MB
Bus/Core Ratio 24
Intel® QPI Speed 4.8 GT/s
# of QPI Links 1
Instruction Set 64-bit
Instruction Set Extensions SSE4.2
Embedded Options Available No
Lithography 32 nm
Max TDP 130 W
VID Voltage Range 0.800V-1.375V


watts are 130


hex 3.33 link = http://ark.intel.com/Product.aspx?id=47917 PRICE 999 FOR A TRAY OF 1000

SPECIFICATIONS
Essentials
Status Launched
Launch Date Q1'10
Processor Number W3680
# of Cores 6
# of Threads 12
Clock Speed 3.33 GHz
Max Turbo Frequency 3.6 GHz
Intel® Smart Cache 12 MB
Bus/Core Ratio 25
Intel® QPI Speed 6.4 GT/s
# of QPI Links 1
Instruction Set 64-bit
Instruction Set Extensions SSE4.2
Embedded Options Available No
Lithography 32 nm
Max TDP 130 W
VID Voltage Range 0.800V-1.375V


watts are 130


HEX 3.46 link = http://ark.intel.com/Product.aspx?id=52586 PRICE 999 FOR A TRAY OF 1000


SPECIFICATIONS
Essentials
Status Launched
Launch Date Q1'11
Processor Number W3690
# of Cores 6
# of Threads 12
Clock Speed 3.46 GHz
Max Turbo Frequency 3.73 GHz
Intel® Smart Cache 12 MB
Bus/Core Ratio 26
Intel® QPI Speed 6.4 GT/s
# of QPI Links 1
Instruction Set 64-bit
Instruction Set Extensions SSE4.2
Embedded Options Available No
Lithography 32 nm
Max TDP 130 W
VID Voltage Range 0.800V-1.375V


watts are 130.


It is pretty clear that if you want to mod your quad 2.8
buy a w3670 hex 3.2 for 583 or

buy a w3690 hex 3.46 for 999.99 these are intel bulk prices . = I corrected an error. meant w3690 it is the same price as the w3680

the W3680 hex 3.33 is not the best bang for the buck. just want to say that now the w3680 is much lower in price it is the best deal in the usa as of feb 2012
 
Last edited:
Awesome thread! I will definitely be taking this upgrade route later this year. Just a quick question, what did you use to spread the arctic silver so evenly?
 
Excellent write up and photos! Thank you very much for posting. It is helpful and I will consider the same upgrade myself.
 
Awesome thread! I will definitely be taking this upgrade route later this year. Just a quick question, what did you use to spread the arctic silver so evenly?

put a pair of latex gloves on and used my pointer finger! right now the new cpu runs 2 degrees lower the the stock cpu.
 
Geez will you two (especially you peskaa :rolleyes:) calm down. The OP added the info AFTER i asked the question.

Fair enough then.

But peskaa isn't wrong with his statement, there really are people that don't seem to read here at all (like in various pictures threads where questions like "where did you get that picture from?" are being asked although the image link is directly under the image).

Anyhow...

Screw the warranty!

I'm pretty sure that this does not void the warranty at all. As long as you don't damage anything (which is hardly possible) the warranty will remain I guess. Apple's warranty agreements are vague enough for lots of wiggle room.
 
I'm pretty sure that this does not void the warranty at all. As long as you don't damage anything (which is hardly possible) the warranty will remain I guess. Apple's warranty agreements are vague enough for lots of wiggle room.

To be honest, if I did this to a MP and had to get warranty service I'd simply swap the original CPUs back in. There's always those Genius Bar idiots who try to deny everything and anything...
 
....
Anyhow...


I'm pretty sure that this does not void the warranty at all. As long as you don't damage anything (which is hardly possible) the warranty will remain I guess. Apple's warranty agreements are vague enough for lots of wiggle room.


Yeah, I don't think it kills warranty, but by saying It does I do feel morally safer since I really do not know for sure..

To be honest, if I did this to a MP and had to get warranty service I'd simply swap the original CPUs back in. There's always those Genius Bar idiots who try to deny everything and anything...

I did not want to say that but I am holding on to my quad 2.8 for a while. if you look at the color of the oem heat-sink paste and the arctic silver paste in the above photos it looks like the same color and who is to say what paste was used at the factory.
 
Last edited by a moderator:
Register on MacRumors! This sidebar will go away, and you'll see fewer ads.