I'm the OP and have successfully installed the SSD and replaced the stock 4GB RAM with 16GB (two 8GB memory sticks). So far I'm very impressed with what will be my wife's new computer (replacing a 2008 iMac) when I'm done transferring everything.
Here's a summary of the upgrade and my experiences...
I bought a
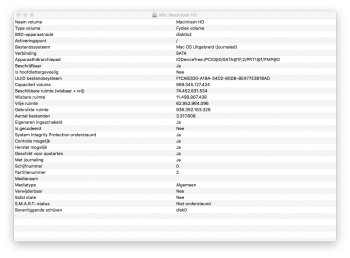
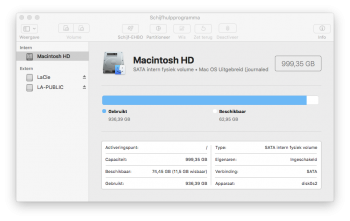
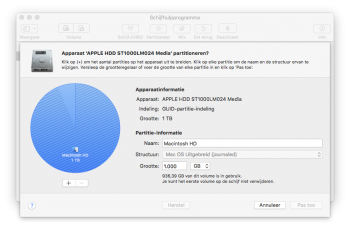
250GB Samsung 860 EVO SSD for use as the OSX/apps drive and finding the Apple factory-installed hard drive being in the
"lower" bay (
Disk utility gives this information), which apparently is the most common setup I also ordered the
OWC "lower" bay kit (OWCDIYIMM11D2) which contains the cable, screws etc. and tools needed to make this possible.
For those reading who have the upper bay populated with the hard drive you need to buy a different kit from OWC called the
"upper" bay kit (OWCDIYIMM11D2B).
The OWC kit appears to be quality throughout and contains everything you need including extensive step-by-step instructions (a paper booklet). I chose to read through this a couple of times first, then
watch the installation video while actually performing the upgrade, taking it slow and pausing in between each step. A lot of connectors and other things are quite flimsy and care needs to be taken not to damage stuff.
The OWC kit also now also includes
Bluetooth shielding foil, but you need to watch
a separate video for that. So be sure to watch it and install the shielding as soon as you've removed the main board from the Mac mini enclosure so you don't forget all about it!
I had an
anti-static wrist-strap attached to ground while upgrading, just to ensure any static electricity wouldn't damage things. All went quite smoothly except the part of sliding the main board out. It looked so simple in the video (just pull it out with the stiff wire insertion tool) but mine was completely stuck. After wiggling the board carefully in different directions it finally came loose and I was able to pull it out as in the video. Other than that it all went fine.
One thing I noticed was a
BR-2032 coin-cell battery mounted on the main board. I assume it's for keeping the clock time when powered off, and I thought now would be a good time to replace it (I'm not too keen on disassembling the computer in a couple of months) but had to leave it in as I couldn't find that particular battery (online info tells me that the "BR" type can withstand higher temperatures than the commonly available "CR" type, so I'll have to order it from an electronics dealer or something when time comes for doing that). But unlike myself you're hereby informed
prior to upgrading so you now have the opportunity to order and do it all in one go.
That's about it.
All that's left to do is transfer everything over from the old iMac (I'm having a little trouble with Migration assistant -one of them being that it appears not to transfer a user folder over to a separate drive from the boot drive, so I'll have to do most of it manually).