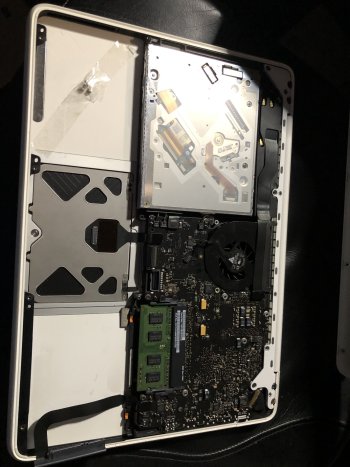
Edit: Second important note is to install mbpfan ASAP. Helps make cooling actually work properly in Linux. Otherwise this machine gets toasty. Also changed some small typos and grammar in the following text. I also notice that the format of text inside the inline code blocks isn't preserved. This is a problem with that hwdb config file that does the remap. Make sure that singular space at the beginning of the second line exists if you are making one for yourself.
Very important note for people running Linux on this MacBook. The only driver you can use for the GeForce 320M is the nouveau driver. NVidia does not update the drivers for this card anymore. So to do that now on the latest versions of software out today, you're going to have to deliberately downgrade your kernel and your Xorg installation. And you'll gradually run into issues over time. Not so much right now as I write this post, perhaps, but you'll already have problems on Ubuntu LTS and its derivatives.
There's a reason NVidia hardware has such a poor reputation historically in the Linux user community. They have slowly improved things as far as their proprietary drivers go, but it's all fun and games until they arbitrarily drop support. The rep is so poor overall that to this day
today, people will suggest you replace your GPU entirely once NVidia drops support for your card from their proprietary drivers. Because depending on the card you have, the situation can be pretty dire. For your sanity, honestly try nouveau. That's what I am doing with the GeForce 320M today, and will continue to do for a long time.
It's better than I expected, having not used nouveau in about 15 years. And when I did, it was with their infamously terrible GeForce 5200 FX. It was so long ago that the ugly of the proprietary GPU drivers (the old one, not the modern one) made Xorg unusable. Nouveau managed to actually make the card itself usable, and eeked out decent 2D performance. Nouveau has come a long way compared to the Bad Old Days™, even for this same card. But that card itself was so bad that I got better performance through pure software rendering (this mean using the vesa drivers in Xorg; Wayland either did not exist, or was in very early infancy) on hardware of the era the card was from: an Athlon64 3000+ and 2 GB of ram. And you know your GPU is pure ass if that can be achieved.
But we're talking about the 320M.
TL;DR, this card is part of what is know as the NV 50 family. The nouveau driver has an infamous problem with these GPUs: they randomly hardlock the system. This is very bad, and this makes having access to the Magic SysRq feature mandatory. Why? Because in a situation like that, you can use that to cleanly terminate (and kill) any running processes, sync your data to all your mounted filesystems, cleanly unmount those filesystems, then reboot (or shutdown--your choice). This is much better than forcing your computer off with the power button, because if the Linux kernel is even remotely alive in any way, it responds to the Magic SysRq key combo. By default, this is going to be Alt + Print Screen (aka SysRq. These are actually the same key.). Most keyboards have that key. But MacBooks and Macintosh keyboards do not. You have Alt (Option). You don't have Print Screen or SysRq.
You can plug in a USB keyboard that actually has print screen on it and use that, no problem, to use Magic SysRq. But what if you either don't want to, or you can't? What then? You can remap something to print screen or SysRq. Searching "Magic SysRq Mac Linux" gets you old information from early 2010's that doesn't apply anymore. What you do nowadays to achieve this is... easier? Maybe? In that actually doing that won't require weird tools like the info from 2010 would say.
But let's tackle the easy problem: you need to enable the full gamut of SysRq features. Or at least enable enough features so that REISUB works. It doesn't work by default on most distributions anymore. You need to do this anyway if you want to make sure that works, regardless of the whole keyboard situation. And you must do this before you actually need it (or after you find out you'll need it, like I did).
You need the terminal to check if it's currently enabled with this command:
cat /proc/sys/kernel/sysrq
If you get any other number than 1, you need to change it to 1. That enables all SysRq features. Do that with this terminal command as root. Get a root shell via
sudo -i because you'll need to do something else with root privileges as well afterwards:
echo 1 > /proc/sys/kernel/sysrq
Then double-check it again to make sure you get a 1. That takes care of it being enabled right away without a reboot, but it isn't going to persist. Running your favorite text editor as root (I like vim, but I recommend nano if you have no preference and want a recommendation), edit or create
/etc/sysctl.d/10-magic-sysrq.conf. Look for
kernel.sysrq and change the line to
kernel.sysrq = 1. Save and exit your editor. Now you're set on that front!
But the keyboard. If you have this exact MacBook, you can cheat on this next step and probably use my config verbatim. I put that worthless eject key to good use and remapped that to sysrq. It needs to be in
/etc/udev/hwdb.d. The file itself can be called whatever you want, but needs to end in
.hwdb. I use
/etc/udev/hwdb.d/10-macbook-kb.hwdb. Contents below.
evdev:input:b0003v05ACp0236* # built-in macbook keyboard
  KEYBOARD_KEY_c00b8=sysrq # remap eject key
Now for the notes. First, the second line
must start with
exactly 1 space. One. Singular. Space. Otherwise it won't work. Yes, I am serious. But wait, there's more! And this is important. We have to talk about the first line. With this identifier format (the only one I could make heads or tails of), the case of the letters is absolutely crucial. Look very carefully at what looks like a bunch of gibberish after
evdev:input:.
If you use this syntax in particular, case is important. The proper syntax is actually mixed case! But most people don't know it, because most people won't see either the bus, vendor, or product ID, each consisting of 4 characters in hexidecimal (important!) contain letters. But if they do, those
must be UPPER CASE, otherwise this won't work at all. Don't forget to leave the b, v, and p letters lower case, otherwise this also doesn't work.
Also, don't forget the modalias. What the actual **** is a modalias? It's that asterisk/star at the end of the gibberish. It's simply being used as a wildcard, or a catchall that matches everything. But the documentation calls it that weird, obscure term. I spent too long being puzzled by that and missing that detail. No matter the syntax, it must be there at the very end at minimum. Otherwise it won't work.
If you go past product ID, regardless of whatever notation you choose,
it also doesn't work! So don't include anything more after that and make sure it ends with a wildcard.
Finally, on the second line with the singular space, the case still matters. Whatever key scancode you are remapping, the actual scancode
must be lower case if it contains any letters. But
KEYBOARD_KEY_ before it
must be UPPER CASE. And your keycode that you're remapping to needs to be, uh, whatever the **** the kernel itself refers to them as in the source code? Something, something, input.h? I don't remember. But it's all words, not numbers or hexidecimal, unlike scancodes. And only those, and only lower case letters because
of course!
I specifically note the stuff that isn't well documented, but really should be documented, here. More important info well-documented
here (omg thank you!).
Now, to actually get the remap to happen without rebooting, run the following commands as root:
# systemd-hwdb update
# udevadm trigger
Test if it works by switching to a VT with Ctrl + Alt + F1. Log in. Press Alt + Eject + Space. If SysRq prints stuff on the screen, you've successfully remapped the eject key to print screen/sysrq. Congrats! If not, or you don't want to map the eject key to sysrq, refer to the
link I mentioned earlier. There are already many tutorials out there besides that one that describe how to find this info so you can put it in your config, so I don't want to reinvent the wheel.
Finally, I made sure to be as specific as I could so that it only does this on the built-in keyboard, and doesn't try to remap anything else. Just in case the scancode conflicts with some other keyboard that uses that same scan code for something else, or some other weird thing happens.
Final note: If you want to use this thing as a desktop PC and have a GUI, disable the hardware rendered mouse cursor. I found this tip by chance and it reduces the random lockups substantially, but not entirely. I have only experienced it once since setting it and using the computer pretty often. I still primarily use Xorg at this time. No idea about how this would be done in Wayland. But if you're like me and you're using Xorg, put this in
/etc/X11/xorg.conf.d/20-nouveau.conf:
Section "Device"
        Identifier "Nvidia Geforce 320m"
        Driver "nouveau"
        Option "HWcursor" "False"
EndSection
I personally like this better than the alternative, which is to disable nouveau's hardware acceleration entirely. I would rather still be able to use GPU hardware acceleration and see the mouse cursor flicker a little bit here and there.


