I'm creating a thread for my 4.1-->5.1 mod to keep everything in one place.
I will document my upgrade to X5690, PCIe SSD (Apple SSUBX) and PSU mod to allow for two modern gfx cards using only the internal PSU.
I have gotten my Mac Pro now (2x 2.26GHz) 4.1 from 2009. It had one Nvidia 120GT and one Nvidia 8800GT, 12GB ram and a few external scratches =) Price was $680 in March 2015.
I have ordered de-lidded X5690 CPUs that are being delivered. ($599 for package with dual de-lidded CPUs and thermal paste).
I have ordered a 1TB SSUBX that is being delivered. 1450 MB/s read/write with native TRIM. I got my blade from forum member Keter, who in our correspondence was friendly, quick to reply and basically shipped the SSD within hours. He is tapped in to the supply chain, so if you want a SSUBX specifically—check with him.
I have ordered a $10 PCIe adaptor for the SSD.
I have ordered 48GB CAS9 valueRAM 3+3 modules.
I already have a R9 280X 3GB in my current 5.1 3.33GHz 6-core.
I have an OWC Accelsior_E2 500GB card with external eSATA (currently a 1TB Samsung Evo 840 via eSATA)
I've got a bunch of hard drives.
----------
CPU upgrade, two Xeon X5690
I opted for de-lidded CPUs to save me the hassle. You can de-lid yourself and save up to $150. Check with forum member Box185 before buying from Ebay.
Upgrade firmware from 4,1 to 5,1. There is a very convenient tool out there and it is basically the click of one button. The tool explains the steps.
1) Download the EFI tool here. You need to be registered to the forum to see the file.
2) Just in case, download the Apple firmware update file here, then double click it to mount it.
Having this file mounted when you click the EFI tool will allow the EFI tool to grab updated files from Apple's newest archive and include them in the update process. That's what I did and I had no issues. Some people that just used the original tool (from 2011?) had problems.
3) Waiting for CPUs to arrive. In my case it's a drop-in procedure.
4) Here are Arctic Silver's instructions for applying thermal paste.
-----------
PSU mod:
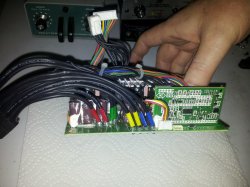
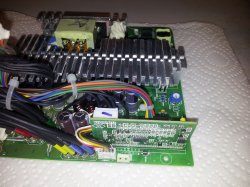
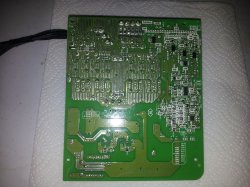
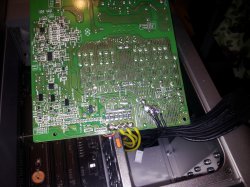
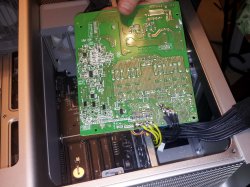
After having opened up my Mac Pro I found four 12V lines and four GND lines leading out of the PSU. My plan of attack is now to splice into these wires (not cutting or soldering, but using industrial clips that are purpose made for tapping into power cables. By using a small plastic clip we can create an insulated bridge between two cables very easily. See this youtube video for reference: https://www.youtube.com/watch?v=WFdVkSaHRpU
I will then either create, or have created for me, a nice sleeved cable that splices 8 wires onto the PSU lines (12V+GND) that later splits into two 8 pin PCIe connectors. Like this:

I will then be able to take the two 8 pin connectors directly from the PSU (distributed over all four lines) and use the 6 pin mini PCie from the mainboard for additional power.
This should allow for two 2+8 pin gfx cards.

UPDATE: I bought mine here on Ebay.
This little darling can be clipped onto a 12 awg wire, and then I can put a 14-18 awg wire into it, press the metal bridge down creating a connection, and then close the lid for insulation.
I will need to clip 8 wires in total to the 4 12V and 4 GND wires.
It's a clean solution that should work. If it does indeed work, I think this is easily the most approachable way to attempt this mod yet.
[UPDATED 17. April]
Here's the cable I got today, ordered from ModDIY.com, with the following description that they understand:
[open end, 10cm] ——— 70cm (sleeved)——— [8 pin graphics]— 10cm— [8 pin graphics]


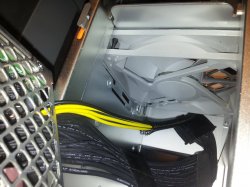
The cable needed to be routed through this hole:

That turned out to be a non-issue. I just taped the tip and threaded the cable on the first try with zero issues.


I needed to remove some tape around the original PSU cables to allow me to separate them a bit. After that came the fiddling of clipping everything on. I did the install in place, so there isn't too much room to work. You need a tool with decently long handles to allow you to clamp the splice connectors all the way down in the "box".


Even though the clips are somewhat bulky and hard to lay flat, there was room to install the optical bay without any issue. When pressed in, it doesn't actually quite reach the back plate.
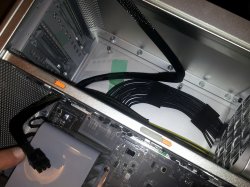
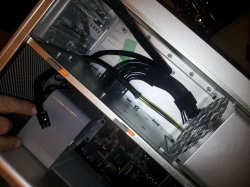
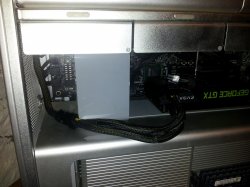
A clean install:


First test of running Valley on my 5870 has been successful. Will update when I've tried two cards.
I will document my upgrade to X5690, PCIe SSD (Apple SSUBX) and PSU mod to allow for two modern gfx cards using only the internal PSU.
I have gotten my Mac Pro now (2x 2.26GHz) 4.1 from 2009. It had one Nvidia 120GT and one Nvidia 8800GT, 12GB ram and a few external scratches =) Price was $680 in March 2015.
I have ordered de-lidded X5690 CPUs that are being delivered. ($599 for package with dual de-lidded CPUs and thermal paste).
I have ordered a 1TB SSUBX that is being delivered. 1450 MB/s read/write with native TRIM. I got my blade from forum member Keter, who in our correspondence was friendly, quick to reply and basically shipped the SSD within hours. He is tapped in to the supply chain, so if you want a SSUBX specifically—check with him.
I have ordered a $10 PCIe adaptor for the SSD.
I have ordered 48GB CAS9 valueRAM 3+3 modules.
I already have a R9 280X 3GB in my current 5.1 3.33GHz 6-core.
I have an OWC Accelsior_E2 500GB card with external eSATA (currently a 1TB Samsung Evo 840 via eSATA)
I've got a bunch of hard drives.
----------
CPU upgrade, two Xeon X5690
I opted for de-lidded CPUs to save me the hassle. You can de-lid yourself and save up to $150. Check with forum member Box185 before buying from Ebay.
Upgrade firmware from 4,1 to 5,1. There is a very convenient tool out there and it is basically the click of one button. The tool explains the steps.
1) Download the EFI tool here. You need to be registered to the forum to see the file.
2) Just in case, download the Apple firmware update file here, then double click it to mount it.
Having this file mounted when you click the EFI tool will allow the EFI tool to grab updated files from Apple's newest archive and include them in the update process. That's what I did and I had no issues. Some people that just used the original tool (from 2011?) had problems.
3) Waiting for CPUs to arrive. In my case it's a drop-in procedure.
4) Here are Arctic Silver's instructions for applying thermal paste.
-----------
PSU mod:
After having opened up my Mac Pro I found four 12V lines and four GND lines leading out of the PSU. My plan of attack is now to splice into these wires (not cutting or soldering, but using industrial clips that are purpose made for tapping into power cables. By using a small plastic clip we can create an insulated bridge between two cables very easily. See this youtube video for reference: https://www.youtube.com/watch?v=WFdVkSaHRpU
I will then either create, or have created for me, a nice sleeved cable that splices 8 wires onto the PSU lines (12V+GND) that later splits into two 8 pin PCIe connectors. Like this:

I will then be able to take the two 8 pin connectors directly from the PSU (distributed over all four lines) and use the 6 pin mini PCie from the mainboard for additional power.
This should allow for two 2+8 pin gfx cards.

UPDATE: I bought mine here on Ebay.
This little darling can be clipped onto a 12 awg wire, and then I can put a 14-18 awg wire into it, press the metal bridge down creating a connection, and then close the lid for insulation.
I will need to clip 8 wires in total to the 4 12V and 4 GND wires.
It's a clean solution that should work. If it does indeed work, I think this is easily the most approachable way to attempt this mod yet.
[UPDATED 17. April]
Here's the cable I got today, ordered from ModDIY.com, with the following description that they understand:
[open end, 10cm] ——— 70cm (sleeved)——— [8 pin graphics]— 10cm— [8 pin graphics]


The cable needed to be routed through this hole:

That turned out to be a non-issue. I just taped the tip and threaded the cable on the first try with zero issues.


I needed to remove some tape around the original PSU cables to allow me to separate them a bit. After that came the fiddling of clipping everything on. I did the install in place, so there isn't too much room to work. You need a tool with decently long handles to allow you to clamp the splice connectors all the way down in the "box".


Even though the clips are somewhat bulky and hard to lay flat, there was room to install the optical bay without any issue. When pressed in, it doesn't actually quite reach the back plate.
A clean install:


First test of running Valley on my 5870 has been successful. Will update when I've tried two cards.
Last edited:


