Apple has shut down the support for Win7 in the newest Macs, What if you still want it?
How to install Windows 7 in a Early 2015 MBP with 99% support
P.S The way to install Windows 7(I mean just put in into your disk) I introduce is the fastest way I can find, and it’s sort of unpredictable. However davidcie’s way is safe. If you want to install it safely, try his solution of installation. https://forums.macrumors.com/threads/guide-install-windows-7-on-air-2015.1961618/ Nevertheless, as far as I am aware, I am the first person who solved the problem about the trackpad (maybe not wireless adapter?) driver issue with MacBook Pro in Windows 7(if anyone did this before me, then tell me plz) so don’t miss the driver part!
Forewords
Before this article, I must thank this gentleman, davidcie, who made this wonderful, lucid article: https://forums.macrumors.com/threads/guide-install-windows-7-on-air-2015.1961618/. He did a nice shot of installing Windows 7 in his MacBook Air Early 2015 and shared the way he did it on the article. It is literally the bible for our Early-2015 downgraders. What a tremendous work! He deserves my highest praise. However, while I was trying following his steps, I realized that some part of the installation can be easier, or needs to be changed when apply to MPB. And in that page, no noe was able to make the trackpad in MBP work with Right click. That’s why I am here. I need to thank the first person who tested part of this, David W, thanks for his patience and trust while dealing with a incredibly hard problem with someone he never met before, he also gave me some vital information for this. I also need to thank all of the people that davidcie mentioned in his article, without you guys, Windows 7 will not be almost fully supported in Early-2015 MBPs.
Before Install, you need to realize
The definition of this 99% support includes, but not limited to the support of those device or function:
A system with the drivers that don’t crash unless you mess it up.
Trackpad(It functions the same way it does in Windows 8/10)
Wireless Network
Keyboard with it’s F-Keys functions(e.g. Mute, Increase the volume etc.)
Graphic Card
SD Card Reader
Bluetooth Function
Facetime Camera
Volumes
Those functions are NOT SUPPORTED
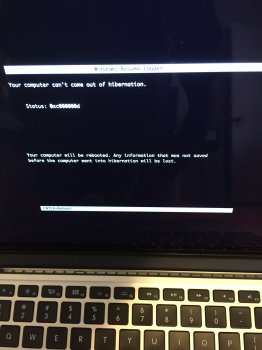
Hibernate(It hangs if you try)
Force Touch(Since Apple claimed that Force Touch function isn’t supported in ANY Windows OS)
Light Sensor(Seems that there is one)
Another unknown PCI device which I even can’t find what it is.
Those version of Windows 7 can be 99% supported.
Windows 7 Ultimate (David uses this one)
Windows 7 Enterprise
Windows 7 Professional ( I use this one)
Any edition of Windows Server 2008R2
Technically, if you follow the instruction, those system could possibly be 99% supported. I haven’t test them yet.
Any Edition of Windows Server 2008
Those versions of Windows 7 could be supported with all of the function list before, but you MUST press F8 and choose “Disable the Driver Signature Enforcement” to achieve the goal.
Windows 7 Home Premium
Windows 7 Home Basic
Those OS are not supported, or at least no one found a way to do it so far.
Windows 7 Starter
Windows Vista *
Windows Thin PC
Windows Embedded 7
Any edition of WIndows XP and earlier Windows.
Materials you need
Again you can skip this install processes if you want. If any part of this doesn't work since it is so unpredictable(just the installation), Davicie’s way worked fine and it is more safe than this. This is just faster and less concern(for me). And if you are using his way, back up your entire disk plz then go to the driver part after the installation.
Install Processes
_________________________________________________________________________________________
Back to my own words
___________________________________________________________________________________________________
Put VGA Shim In Place
Driver Installation
cd users/tom/desktop/Applemultitouchtrackpadinstaller64/
Alternative way to do it WITHOUT winrar is:
Something else
You can install Windows 10/8 after, just remember user disk utility to create partition. But don’t do insider preview, it’ll be all messed up. Which means you can’t boot.
Hibernate never works. Sleep works just fine. You may wanna run powercfg -h off. Which disableds the hibernate. Thanks @keysofanxiety to point this out.
Thanks to davidcie again!
Last but not the least, is some pictures which prove my success. http://imgur.com/a/FV1TF http://imgur.com/a/OaaoR
How to install Windows 7 in a Early 2015 MBP with 99% support
P.S The way to install Windows 7(I mean just put in into your disk) I introduce is the fastest way I can find, and it’s sort of unpredictable. However davidcie’s way is safe. If you want to install it safely, try his solution of installation. https://forums.macrumors.com/threads/guide-install-windows-7-on-air-2015.1961618/ Nevertheless, as far as I am aware, I am the first person who solved the problem about the trackpad (maybe not wireless adapter?) driver issue with MacBook Pro in Windows 7(if anyone did this before me, then tell me plz) so don’t miss the driver part!
Forewords
Before this article, I must thank this gentleman, davidcie, who made this wonderful, lucid article: https://forums.macrumors.com/threads/guide-install-windows-7-on-air-2015.1961618/. He did a nice shot of installing Windows 7 in his MacBook Air Early 2015 and shared the way he did it on the article. It is literally the bible for our Early-2015 downgraders. What a tremendous work! He deserves my highest praise. However, while I was trying following his steps, I realized that some part of the installation can be easier, or needs to be changed when apply to MPB. And in that page, no noe was able to make the trackpad in MBP work with Right click. That’s why I am here. I need to thank the first person who tested part of this, David W, thanks for his patience and trust while dealing with a incredibly hard problem with someone he never met before, he also gave me some vital information for this. I also need to thank all of the people that davidcie mentioned in his article, without you guys, Windows 7 will not be almost fully supported in Early-2015 MBPs.
Before Install, you need to realize
The definition of this 99% support includes, but not limited to the support of those device or function:
A system with the drivers that don’t crash unless you mess it up.
Trackpad(It functions the same way it does in Windows 8/10)
Wireless Network
Keyboard with it’s F-Keys functions(e.g. Mute, Increase the volume etc.)
Graphic Card
SD Card Reader
Bluetooth Function
Facetime Camera
Volumes
Those functions are NOT SUPPORTED
Hibernate(It hangs if you try)
Force Touch(Since Apple claimed that Force Touch function isn’t supported in ANY Windows OS)
Light Sensor(Seems that there is one)
Another unknown PCI device which I even can’t find what it is.
Those version of Windows 7 can be 99% supported.
Windows 7 Ultimate (David uses this one)
Windows 7 Enterprise
Windows 7 Professional ( I use this one)
Any edition of Windows Server 2008R2
Technically, if you follow the instruction, those system could possibly be 99% supported. I haven’t test them yet.
Any Edition of Windows Server 2008
Those versions of Windows 7 could be supported with all of the function list before, but you MUST press F8 and choose “Disable the Driver Signature Enforcement” to achieve the goal.
Windows 7 Home Premium
Windows 7 Home Basic
Those OS are not supported, or at least no one found a way to do it so far.
Windows 7 Starter
Windows Vista *
Windows Thin PC
Windows Embedded 7
Any edition of WIndows XP and earlier Windows.
Materials you need
- A Early-2015 MBP, obviously
- Windows ISO image. If you have a genuine copy of it, then you should be able to download it somewhere in Microsoft website, if you can’t find it, then google one. (NO Ghost image version allowed, it’s not only (in 99% case) illegal but also unsupported)
- (Only apply to the people who deleted their recovery partition in Mac OS)2 USB Disks, but you can use one and format them twice. If it is still there(the way to check it is press Command+R when you turn it on, if you got something like”OS X Utility”, then you are good), then 2 is enough.
- Bootcamp Driver which can be downloaded by:
- Open the Boot Camp Assistant.
- Click “Action” on the top bar and select “Download Windows Support Software”
- Find a place to storage it.
- Open the Boot Camp Assistant.
- Another Computer with Windows on it (If there is Windows 8/10 on your Mac, it’s fine, but it’s going to get removed later.)
- Windows Product Key
- Rt7Lite(optional)
Again you can skip this install processes if you want. If any part of this doesn't work since it is so unpredictable(just the installation), Davicie’s way worked fine and it is more safe than this. This is just faster and less concern(for me). And if you are using his way, back up your entire disk plz then go to the driver part after the installation.
Install Processes
- Get your Windows Installation Image Ready.
- Download the Latest Intel Graphic Card Driver or whatever graphic card you are using. Extract them.(If you click on the file it automatically extract it to a folder)
- Download VgaShim (download a release from GitHub or build from source). You get vgashim.efi and vgashim.bmp
- I suggest you to take a note about all of this files we use because if you misuse one it will not work.
_________________________________________________________________________________________
- Latest Intel USB 3.0 Windows 7 x64 drivers (v4.0.6.60 at the time of writing).
- Hotfix KB2775511 (this makes Windows happy about Apple Bootcamp drivers' digital signature) from Microsoft or web (google the exact filename AMD64-all-windows6.1-kb2775511-v2-x64_ec18cc10e27faf443c17e7a8073c9eba773eb13e.msu).
- Do_boot.wim.bat.txt and do_install.wim.bat.txt Prepare folders and files for integrating USB 3.0 drivers and the above hotfix into Windows 7: https://forums.macrumors.com/attachments/do_boot-wim-bat-txt.621577/ https://forums.macrumors.com/attachments/do_install-wim-bat-txt.621578/
- Create a C:\inject, C:\inject\drivers and C:\inject\hotfixes folders.
- Copy AMD64-all-windows6.1-kb2775511-v2-x64_ec18cc10e27faf443c17e7a8073c9eba773eb13e.msu to C:\inject\hotfixes.
- Unzip USB 3.0 drivers somewhere and copy contents of Drivers\HCSwitch\x64 and Drivers\Win7\x64 to C:\inject\drivers.
- Copy sources\boot.wim and sources\install.wim from your Windows 7 SP1 x64 CD or ISO to C:\inject.
- Copy do_boot.wim.bat and do_install.wim.bat to C:\inject.
- Your C:\inject folder structure should now look like in the screenshots.
- Create a C:\inject, C:\inject\drivers and C:\inject\hotfixes folders.
- Perform actual integration:
- Make note of the size of your boot.wim and install.wim files.
- Right click do_boot.wim.bat and run it as administrator.
- Right click do_install.wim.bat and run it as administrator. You will be asked which of the Windows 7 install images (Home, Professional, etc) stored inside install.wim you want to modify. The script will also try to copy bootmgfw.efi to your desktop which you will need later.
- Make sure the size of boot.wim increased by about 10MB and that of install.wim by about 250MB.
- Make note of the size of your boot.wim and install.wim files.
- Prepare an EFI-compatible pendrive:
- Connect your pendrive.
- Open administrative command prompt.
- Run diskpart
- list disk
- Check what number was assigned to your pendrive by looking at disk sizes.
- select disk <number>
- clean
- convert gpt
- create partition primary
- format fs=fat32 quick
- exit
- Connect your pendrive.
Back to my own words
- However, we only need the boot.wim file, the only thing we need from install.wim is the bootmgfw.efi.
- P.S The Install.wim generated from the batch works. But I am introducing this Rt7Lite-Unattended Installation, which saves time. If you don’t want this, skip it.
- Download Rt7Lite in http://www.softpedia.com/get/System/Boot-Manager-Disk/RT-Seven-Lite.shtml#download and there is an alternative link https://drive.google.com/file/d/0Bxq--onVE9j5bl9MTG1jdl9KamM/view?usp=sharing
- Install Rt7Lite
- Open Rt7Lite, Find the ISO file, Select whatever folder you want to extract, don’t extract it to your desktop, it’s a lot of files and they makes your desktop look ugly. it takes several minutes to load.
- After we finish loading, proceed to the next page, the core thing we need is the Integration. Go to that integration page, we already have the USB3.0 driver, the hotfix and the graphic card driver. Simply add the .ini file and right click them, then choose “Install.wim only”.
- You may want the other function like unattended installation. It saves time. Just remember, NEVER chose the target disk to install, NEVER! Also if you want to log in as the build in administrator, just check that mark and don’t care that longin counts option. Be careful to remove components.You can also intergrate office, anti virus soft, etc.
- After you are all done, back to the driver integration page and click apply. Then choose”Create ISO” This time it takes 15-30 mins.
- After this, you want to extract all of the content inside the ISO you created to your pen drive.
- Use the boot.wim created by davidcie to replace the one in your pendrive, it is in sources folder.
- ____________________Created by davidcie___________________________
- Copy bootmgfw.efi from your desktop to efi\microsoft\boot in your pendrive.
- Rename VgaShim.efi to bootx64.efi, VgaShim.bmp to bootx64.bmp and copy both files to efi\boot (you will need to create this folder).
- Then Disable OS X System Integrity Protection
___________________________________________________________________________________________________
- Use Disk Utility to delete all of the partitions except the one one for MacOs. Then add one partition which formatted by HFS(Remember, REMOVE FIRST, THEN CREATE). Remember how large it is. DON’T FORMAT TO FAT FILE SYSTEM BECAUSE IT WILL NOT BE ACCEPTED BY WINDOWS 7 SINCE THE DISK UTILITY CHANGES THE DISK INTO MBR+GPT FORMAT AND THAT’S UNACCEPTABLE. ALSO IT MAKES A 128MB UNALLOCATED SPACE BETWEEN EACH PARTITION. YOU MUST NOT MODIFY THIS SPACE OTHERWISE THE SYSTEM WILL NOT BOOT. If you have problem, go to the recovery mode (Command+R) as mentioned before. If you deleted it, that’s why I ask you to have two pendrives!
") Create a Mac OS Installation disk by this way. Also, if you previously install Windows 8/10 before, please use Paragon Hard Disk Manager for Mac to remove all of the Windows-Related partitions (INCLUDE THE HIDDEN STARTUP PARTITION). It provides 10-day free trial which is enough since we only use it for 10 mins. And the Paragon soft was useful in this part even you are not running Win before. I actually use it to remove the Recovery partition.
Create a Mac OS Installation disk by this way. Also, if you previously install Windows 8/10 before, please use Paragon Hard Disk Manager for Mac to remove all of the Windows-Related partitions (INCLUDE THE HIDDEN STARTUP PARTITION). It provides 10-day free trial which is enough since we only use it for 10 mins. And the Paragon soft was useful in this part even you are not running Win before. I actually use it to remove the Recovery partition.
- Install Windows 7 by your pendrive. Choose the partition you created in before, you should format it in the Windows 7 installation disk because Windows can’t be install in HFS file system(Now it is safe to format) If your mouse doesn’t move then there is something wrong with usb3.0 driver, if something went wrong with unattended installation, that means you messed it up, edit lastsession.inf and the unattended.xml to fix the problem.
- When it happens to restart, don’t go to Windows. Instead, press the option key and boot into Mac OS. Davidcie said that we need to reinstall the Mac OS. But I don’t see any necessities as long as you only keep two partitions. (You may see more during the installation but it’s fine) Then:
Put VGA Shim In Place
- Boot into OS X.
- Open Terminal and mount the hidden ESP partition which holds the boot loader:
- mkdir /Volumes/esp
- sudo mount -t msdos /dev/disk0s1 /Volumes/esp
- Plug your Windows 7 install media.
- In Finder copy the efi\boot folder from Windows 7 install media to the EFI folder on the ESP volume you just mounted.
- In the Terminal window run sudo bless --mount /Volumes/esp --setBoot
- If you cannot do “sudo mount -t msdos /dev/disk0s1 /Volumes/esp”, Try to replace /dev/disk0s1 to /dev/disk0s2, if it still fails, try /dev/disk0s3…..Until a disk icon pop up. Also, please set your finder so that your desktop shows all of the disks.
- sudo bless --mount /Volumes/esp --setBoot backs nothing in terminal if it runs successfully. If it shows error. There is still an little chances to succeed in the installation. However, is usually means you didn’t remove all of the extra partitions at the first time.
- Reboot the computer, finish up the Windows installation. If the digital signature of winload.efi can’t be verified, disabled the driver signature enforcement. If something went wrong with BCD, then you didn’t clean up your disk(Tell me you installed Win before and it is still there.) If you can’t see anything, then you didn’t put the VGA shim in phase.
- You see the desktop? Excellent! But it’s not the time to celebrate. We still got:
Driver Installation
- Unfortunately, many of the drivers davidcie provided don’t work for MBP, maybe MBA? Idk.
- You should have download the bootcamp setup file. If you have not, back to the materials you need.
- You want to install the chipset driver, the management software and graphic card driver(If you do the unattended installation I recommended) first. In (wherever your windows support files keep)\bootcamp\drivers\Intel or drivers\AMD(GPU only) or drivers\Nvidia(GPU Only)
- Then is network. NITHER THE WIRELESS NETWORK DRIVERS IN THE BOOTCAMP NOR DAVIDCIE’S DRIVER FOR MBA WORKS FOR MBP WITH WINDOWS 7. I searched forever and I found one work. And HERE IT IS!~~~ https://drive.google.com/file/d/0Bxq--onVE9j5T1dNY3BlRWxEZms/view?usp=sharing
- Now, install “bootcamp.msi”(It is the boot camp control panel which is vital) and “AppleSoftwareUpdate.msi” You must install bootcamp.msi in (wherever your windows support files keep)\bootcamp\drivers\Apple. Otherwise trackpad right click and keyboard function keys won’t work. Thanks David W to tell me this.
- Strongly recommend you to install applenulldriver.exe. If you want bluetooth, install the broadcom bluetooth driver in (wherever your windows support files keep)\bootcamp\drivers\boradcom. If you want it to make sound, install both of the cirrus drive in (wherever your windows support files keep)\bootcamp\drivers\Cirrus
- So far so good? Now we enter the HARDEST part in the whole installation, sit up tight! Keep your eyes on the screen!
- We must DISABLE the DRIVER SIGNATURE ENFORCEMENT in order to install the trackpad driver. Ope1. Open an admin-cmd, then run
- bcdedit.exe -set TESTSIGNING ON
- Bcdedit.exe -set nointegritychecks ON
- bcdedit.exe -set loadoptions DDISABLE_INTEGRITY_CHECKS.
- (Actually 5.5) I am not sure the order of the last two commands, so I would recommend you to run No. 4 again to be safe; however, I think I was fine without this step)
- I hope you are running Windows 7 Professional, Enterprise or Ultimate. That’s because any edition lower than professional don’t have gpedit.msc
- Press Command + R. type, gpedit.msc in the box. Then enter. There should be a "group policy editor" pop up.
- Navigate to "User Config/Administrative Templates/System/Driver Installation.” Find “Code Signing for Devices Drivers.” Double click it and choose enable. Then set the option of "When Windows detects a driver that is not digitally signed" to "Ignore"
- Restart. Press F8 and then press enter, then immediately press F8 again. Choose ”disable driver signature enforcement(Only once for pro, enterprise and ultimate! And you can actually skip it it doesn’t matter but just to be safe. But if you run Any Win7 lower than Pro, you have to do this every time you boot Windows or the driver won’t work)
- Install Winrar, If you don’t like this software here is an alternative way to do after I introduce the way with Winrar, and that’s the way I did.
- Install All of the drivers in the \bootcamp\Drivers\ folder with exception of the drivers in AMD and Nvidia folder if you don’t have their graphic card. Also left the “AppleMultiTouchTrackPadInstaller64.exe and “AppleKeyboardInstaller64.exe” alone.
- Make sure you have installed bootcamp, it can be saw in the hidden icons in the taskbar.
- Use Winrar to extract “AppleMultiTouchTrackPadInstaller64.exe” and “AppleKeyboardInstaller64.exe”. Don’t extract them to the same folder.
- Open an admin-cmd and locate to one of the folders where you extract one of the driver(you can only do one in one time). Here is a example of the command
cd users/tom/desktop/Applemultitouchtrackpadinstaller64/
- You can also copy the path by looking their properties. And paste them into the cmd window
- Now run DpInst.exe /f /LM
- The parameter /F means enforced installation, and /LM means ignore the driver signature checking.
- An example of this, Ik it is confusing
- cd/
- Cd users/tom/desktop/extract/ (this should be the path you extract)
- Dpinst.exe /f /LM
- Install
- Then do another one
- Install
Alternative way to do it WITHOUT winrar is:
- Drag “AppleKeyboardInstaller64.exe” to “AppleMultiTouchTrackPadInstaller64.exe”. Yes, I mean drag, and there will be an error. Don’t close it. On the second line, there is a path of extracted file, it’s usually under C:\Users\your user name\AppData\Local\Temp\Rarsfx0\dPins.exe navigate to there.(P.S if you press command+R, and type %temp%, then you will automatically go to c:/users/your user name/appdata/local/temp/)Don’t close the error windows until you finish installing
- After you find the file, do the same thing in a admin-cmd
- Install
- Finish
- Now drag “AppleMultiTouchTrackPadInstaller64.exe” to “AppleKeyboardInstaller64.exe”
- Repeat the same action.
- You are all set. If you can’t right click, then you didn't install bootcamp or you didn’t disable driver signature enforcement. Also if you use the wrong file, it will not work. Trackpad driver for MBP(Not sure if work for MBA or not) can be downloaded in https://drive.google.com/file/d/0Bxq--onVE9j5d2MyV2FoTm5QYWc/view?usp=sharing.
- If there is any driver else which can’t be installed. Try some driver detecting tools to fix them. But it’s not my case.
Something else
You can install Windows 10/8 after, just remember user disk utility to create partition. But don’t do insider preview, it’ll be all messed up. Which means you can’t boot.
Hibernate never works. Sleep works just fine. You may wanna run powercfg -h off. Which disableds the hibernate. Thanks @keysofanxiety to point this out.
Thanks to davidcie again!
Last but not the least, is some pictures which prove my success. http://imgur.com/a/FV1TF http://imgur.com/a/OaaoR
Last edited: