Just tried this and it failed on all counts.
USB enclosure... didn't work
eSATA enclosure using MBP.. didn't work
Internal Mac Pro SATA... didn't work.
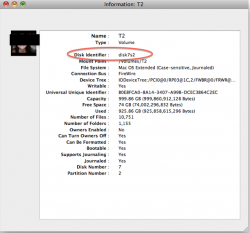
Last two didn't work because I couldn't find the correct /dev/ address.
Given up, booted into windows and used Intels SSD Toolbox instead!
USB enclosure... didn't work
eSATA enclosure using MBP.. didn't work
Internal Mac Pro SATA... didn't work.
Last two didn't work because I couldn't find the correct /dev/ address.
Given up, booted into windows and used Intels SSD Toolbox instead!
")