Become a MacRumors Supporter for $50/year with no ads, ability to filter front page stories, and private forums.

oshimai

macrumors member
Apr 7, 2020
53
31
Europe
@rockyhill sorry for taking ages to reply and thanks for the info on the speakers. I do remember that video.

The audio setback kind of killed my motivation for a while since now I need to order even more things and the bill for this project just keeps going up. I ordered a few PMT-30N18AL04-04 speakers from Digi-Key which seem to be essentially the same as what is sold on eBay except they're not Chinese.

The GUI is working now and can talk to the Arduino over serial. Here's a video of it.


I'll put up all of the code later this week once I polished it. Really not sure how to port this to run with Mono though.

By the way, does your iMac reliably degauss itself on every init when you turn the CRT on via initIvadBoard() ?

It seems like "init sequence 2" doesn't degauss. Now I'm using "This initsequence was provided by anotherelise" and then just dumping the commands to adjust CRT parameters after that entire init sequence was sent to the IVAD board. Not sure if that helps or if it just randomly decided to degauss once I changed the init sequence.
 

rockyhill

macrumors regular
Dec 24, 2016
214
67
Miami Fl, United States
@rockyhill sorry for taking ages to reply and thanks for the info on the speakers. I do remember that video.

The audio setback kind of killed my motivation for a while since now I need to order even more things and the bill for this project just keeps going up. I ordered a few PMT-30N18AL04-04 speakers from Digi-Key which seem to be essentially the same as what is sold on eBay except they're not Chinese.

The GUI is working now and can talk to the Arduino over serial. Here's a video of it.


I'll put up all of the code later this week once I polished it. Really not sure how to port this to run with Mono though.

By the way, does your iMac reliably degauss itself on every init when you turn the CRT on via initIvadBoard() ?

It seems like "init sequence 2" doesn't degauss. Now I'm using "This initsequence was provided by anotherelise" and then just dumping the commands to adjust CRT parameters after that entire init sequence was sent to the IVAD board. Not sure if that helps or if it just randomly decided to degauss once I changed the init sequence.


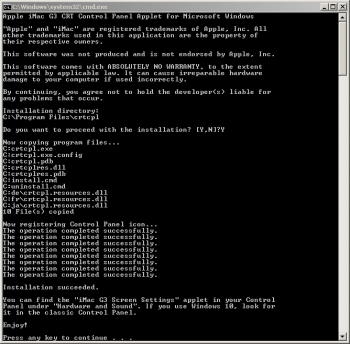
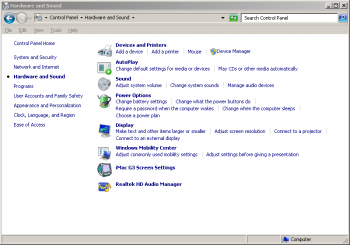
Wow, that's a slick GUI you made there, very impressive! How did you implement the default button?

sorry for taking ages to reply
No worries, spare time comes when it comes.

The audio setback kind of killed my motivation

I've definitely been there before and in fact I'm there now but I can feel it coming back after
you set me off on a quest to rework the edid. I thought it was the reason the OS
can't configure itself when using and HDMI to VGA converter but after some investigation and
i2c sniffing I found that the edid needs to be sent in a different manner for it to be recognized by HDMI to
VGA converters. I reworked the sketch and I have a version that works with my HDMI to VGA converter
but it no longer works when plugged directly into a VGA port. I'm pretty sure I can find a general solution
to this problem but I don't have the motivation yet.

I was able to use one of my android boxes "Mi Box" with the CRT. I tested netflix and cbs all access and it seemed o.k.

By the way, does your iMac reliably degauss itself on every init when you turn the CRT on via initIvadBoard() ?

Yes, every time and with all of the init sequences I've used. Does it reliably work with anotherelise's init sequence?
Although odd, who knows what we're missing in the init sequence. There might be some magic offset that is occasionally sent
to compensate for that.........

Your setup is looking really nice!
 

oshimai

macrumors member
Apr 7, 2020
53
31
Europe
Thank you.

For the default button I shoplifted borrowed your defaults and just implemented a command that resets all the settings to those and then writes them to the IVAD and EEPROM. Looks a lot fancier than it really is. 😕 I wanted it there in case I screw up and the picture goes black. I figured I'd be able to just ALT+D and get the picture back. Then I added range checks and now the defaults button lost its original purpose.

Here are the EDIDs I'm currently using if you want to compare notes. The first is the original one dumped using Debian (which you already have) and the second one is the reworked one I'll put on my Github once I dump the code there later this week. You can open the second one with the Windows EDID editor tool thingy we coincidentally both used.

Code:
#define EDID_IMAC_G3_VANILLA \
    0x00, 0xff, 0xff, 0xff, 0xff, 0xff, 0xff, 0x00, 0x06, 0x10, 0x05, 0x9d, \
    0x01, 0x01, 0x01, 0x01, 0x00, 0x08, 0x01, 0x01, 0x08, 0x1b, 0x14, 0x96, \
    0xe8, 0x66, 0xe9, 0x9c, 0x57, 0x4c, 0x96, 0x26, 0x10, 0x48, 0x4c, 0x00, \
    0x02, 0x00, 0x01, 0x01, 0x01, 0x01, 0x01, 0x01, 0x01, 0x01, 0x01, 0x01, \
    0x01, 0x01, 0x01, 0x01, 0x01, 0x01, 0x88, 0x13, 0x80, 0xc0, 0x20, 0xe0, \
    0x22, 0x10, 0x10, 0x40, 0x13, 0x00, 0x0e, 0xc8, 0x10, 0x00, 0x00, 0x1e, \
    0x60, 0x18, 0x20, 0xf0, 0x30, 0x58, 0x20, 0x20, 0x10, 0x50, 0x13, 0x00, \
    0x0e, 0xc8, 0x10, 0x00, 0x00, 0x1e, 0x00, 0x00, 0x00, 0xfd, 0x00, 0x4b, \
    0x75, 0x3c, 0x3c, 0x08, 0x00, 0x0a, 0x20, 0x20, 0x20, 0x20, 0x20, 0x20, \
    0x00, 0x00, 0x00, 0xfc, 0x00, 0x69, 0x4d, 0x61, 0x63, 0x0a, 0x20, 0x20, \
    0x20, 0x20, 0x20, 0x20, 0x20, 0x20, 0x00, 0xc9

#define EDID_IMAC_G3_OPTIMIZED_1_4  \
  0x00, 0xff, 0xff, 0xff, 0xff, 0xff, 0xff, 0x00, 0x06, 0x10, 0x05, 0x9d, \
  0x01, 0x01, 0x01, 0x01, 0xff, 0x0a, 0x01, 0x04, 0x08, 0x1b, 0x14, 0x96, \
  0xe8, 0x66, 0xe9, 0x9c, 0x57, 0x4c, 0x96, 0x26, 0x10, 0x48, 0x4c, 0x00, \
  0x02, 0x00, 0x31, 0x79, 0x45, 0x63, 0x01, 0x01, 0x01, 0x01, 0x01, 0x01, \
  0x01, 0x01, 0x01, 0x01, 0x01, 0x01, 0x88, 0x13, 0x80, 0xc0, 0x20, 0xe0, \
  0x22, 0x10, 0x10, 0x40, 0x13, 0x00, 0x0e, 0xc8, 0x10, 0x00, 0x00, 0x1e, \
  0x60, 0x18, 0x20, 0xf0, 0x30, 0x58, 0x20, 0x20, 0x10, 0x50, 0x13, 0x00, \
  0x0e, 0xc8, 0x10, 0x00, 0x00, 0x1e, 0x00, 0x00, 0x00, 0xfd, 0x00, 0x4b, \
  0x75, 0x3c, 0x3c, 0x08, 0x00, 0x0a, 0x20, 0x20, 0x20, 0x20, 0x20, 0x20, \
  0x00, 0x00, 0x00, 0xfc, 0x00, 0x69, 0x4d, 0x61, 0x63, 0x20, 0x47, 0x33, \
  0x0a, 0x20, 0x20, 0x20, 0x20, 0x20, 0x00, 0x3d

Try EDID_IMAC_G3_OPTIMIZED_1_4 -- with any luck it'll work with your HDMI-VGA converter and with a plain VGA port. It's working using the latter for me.

I'm at a loss why your init sequence won't degauss my CRT. I have a suspicion though. My microcontroller is an ATmega2560. It's slower than your ATMEGA328P-PU I think. Maybe there's a timing problem and anotherelise's init sequence being longer gets the timing just right. I'll look into it further.

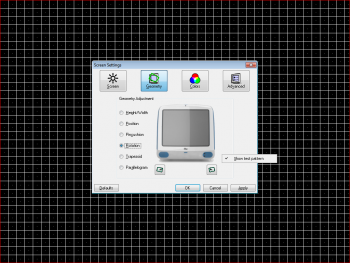
Still doing some polishing work and translations on the GUI code. It's almost ready though. I added a CRT adjustment test screen which really helps with the fine adjustments.

Got the headphone ports working (again) and tested an audio CD. That gave me some new hope to get the speakers working. Feels like the goal is almost within reach.

Sorry for abusing this thread as a blog.
 

Attachments

  • installer.png
    installer.png
    33.4 KB · Views: 177
  • controlpanel.png
    controlpanel.png
    46 KB · Views: 152
  • testscreen.png
    testscreen.png
    62.3 KB · Views: 201
  • jp.png
    jp.png
    54.2 KB · Views: 162
  • fr.png
    fr.png
    23.5 KB · Views: 148
  • de.png
    de.png
    26.1 KB · Views: 141

rockyhill

macrumors regular
Dec 24, 2016
214
67
Miami Fl, United States
Thank you.

For the default button I shoplifted borrowed your defaults and just implemented a command that resets all the settings to those and then writes them to the IVAD and EEPROM. Looks a lot fancier than it really is. 😕 I wanted it there in case I screw up and the picture goes black. I figured I'd be able to just ALT+D and get the picture back. Then I added range checks and now the defaults button lost its original purpose.

Here are the EDIDs I'm currently using if you want to compare notes. The first is the original one dumped using Debian (which you already have) and the second one is the reworked one I'll put on my Github once I dump the code there later this week. You can open the second one with the Windows EDID editor tool thingy we coincidentally both used.

Code:
#define EDID_IMAC_G3_VANILLA \
    0x00, 0xff, 0xff, 0xff, 0xff, 0xff, 0xff, 0x00, 0x06, 0x10, 0x05, 0x9d, \
    0x01, 0x01, 0x01, 0x01, 0x00, 0x08, 0x01, 0x01, 0x08, 0x1b, 0x14, 0x96, \
    0xe8, 0x66, 0xe9, 0x9c, 0x57, 0x4c, 0x96, 0x26, 0x10, 0x48, 0x4c, 0x00, \
    0x02, 0x00, 0x01, 0x01, 0x01, 0x01, 0x01, 0x01, 0x01, 0x01, 0x01, 0x01, \
    0x01, 0x01, 0x01, 0x01, 0x01, 0x01, 0x88, 0x13, 0x80, 0xc0, 0x20, 0xe0, \
    0x22, 0x10, 0x10, 0x40, 0x13, 0x00, 0x0e, 0xc8, 0x10, 0x00, 0x00, 0x1e, \
    0x60, 0x18, 0x20, 0xf0, 0x30, 0x58, 0x20, 0x20, 0x10, 0x50, 0x13, 0x00, \
    0x0e, 0xc8, 0x10, 0x00, 0x00, 0x1e, 0x00, 0x00, 0x00, 0xfd, 0x00, 0x4b, \
    0x75, 0x3c, 0x3c, 0x08, 0x00, 0x0a, 0x20, 0x20, 0x20, 0x20, 0x20, 0x20, \
    0x00, 0x00, 0x00, 0xfc, 0x00, 0x69, 0x4d, 0x61, 0x63, 0x0a, 0x20, 0x20, \
    0x20, 0x20, 0x20, 0x20, 0x20, 0x20, 0x00, 0xc9

#define EDID_IMAC_G3_OPTIMIZED_1_4  \
  0x00, 0xff, 0xff, 0xff, 0xff, 0xff, 0xff, 0x00, 0x06, 0x10, 0x05, 0x9d, \
  0x01, 0x01, 0x01, 0x01, 0xff, 0x0a, 0x01, 0x04, 0x08, 0x1b, 0x14, 0x96, \
  0xe8, 0x66, 0xe9, 0x9c, 0x57, 0x4c, 0x96, 0x26, 0x10, 0x48, 0x4c, 0x00, \
  0x02, 0x00, 0x31, 0x79, 0x45, 0x63, 0x01, 0x01, 0x01, 0x01, 0x01, 0x01, \
  0x01, 0x01, 0x01, 0x01, 0x01, 0x01, 0x88, 0x13, 0x80, 0xc0, 0x20, 0xe0, \
  0x22, 0x10, 0x10, 0x40, 0x13, 0x00, 0x0e, 0xc8, 0x10, 0x00, 0x00, 0x1e, \
  0x60, 0x18, 0x20, 0xf0, 0x30, 0x58, 0x20, 0x20, 0x10, 0x50, 0x13, 0x00, \
  0x0e, 0xc8, 0x10, 0x00, 0x00, 0x1e, 0x00, 0x00, 0x00, 0xfd, 0x00, 0x4b, \
  0x75, 0x3c, 0x3c, 0x08, 0x00, 0x0a, 0x20, 0x20, 0x20, 0x20, 0x20, 0x20, \
  0x00, 0x00, 0x00, 0xfc, 0x00, 0x69, 0x4d, 0x61, 0x63, 0x20, 0x47, 0x33, \
  0x0a, 0x20, 0x20, 0x20, 0x20, 0x20, 0x00, 0x3d

Try EDID_IMAC_G3_OPTIMIZED_1_4 -- with any luck it'll work with your HDMI-VGA converter and with a plain VGA port. It's working using the latter for me.

I'm at a loss why your init sequence won't degauss my CRT. I have a suspicion though. My microcontroller is an ATmega2560. It's slower than your ATMEGA328P-PU I think. Maybe there's a timing problem and anotherelise's init sequence being longer gets the timing just right. I'll look into it further.

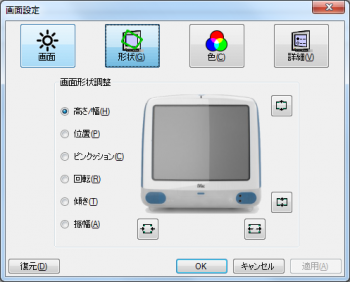
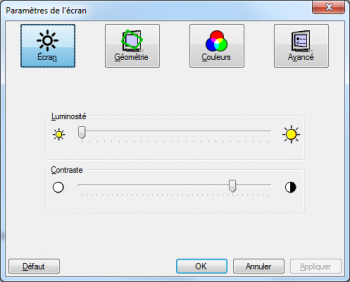
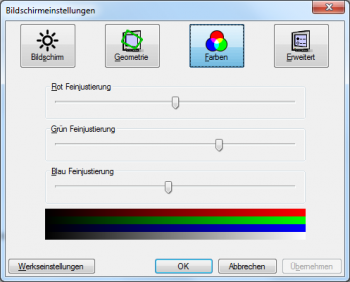
Still doing some polishing work and translations on the GUI code. It's almost ready though. I added a CRT adjustment test screen which really helps with the fine adjustments.

Got the headphone ports working (again) and tested an audio CD. That gave me some new hope to get the speakers working. Feels like the goal is almost within reach.

Sorry for abusing this thread as a blog.


Different languages? Nice touch!

I just tried the new edid and it worked perfectly without any issues when directly connected to the VGA port on my computer but
it didn't work when used via the hdmi to vga converter. That's o.k. though because I'm pretty sure it's a low memory thing on these
converters. I can get it to work if I send the edid 4 bytes at a time which is annoying because for whatever reason it doesn't work when sent four bytes at a time to the real vga port even though you would think it should.


I just tested the different init sequences and they all degaussed when I started the CRT so I think you're right in that it might be a
timing issue. Since anotherelise's init sequence works well with all three of our machines, I think I might make that one the default
init script. I still have a raw capture that I need to convert in order to test it with this IVAD so we'll see.

Keep up the good work!
 

oshimai

macrumors member
Apr 7, 2020
53
31
Europe
Well, here it is


Sorry I basically rewrote everything. This was mainly a learning experience for Arduino for me so I wanted to do as much as possible without just copying it from elsewhere.

I guess if you implement https://github.com/shuuryou/imacg3/blob/master/sketch/msgformat.md in your sketch, the Windows control panel applet will just work.

On the other hand it's also trivial - probably even much easier - to just update the control panel code to work with the serial protocol that's in your sketch.
 

rockyhill

macrumors regular
Dec 24, 2016
214
67
Miami Fl, United States
@oshimai


Sorry I basically rewrote everything. This was mainly a learning experience for Arduino for me so I wanted to do as much as possible without just copying it from elsewhere.

Absolutely, you have to learn somehow and why not working on something you're having fun with.

I cloned the repo last night and hopefully, if I have time today, I'll try and compile it.

fingers crossed
 
  • Like
Reactions: oshimai

rockyhill

macrumors regular
Dec 24, 2016
214
67
Miami Fl, United States
@oshimai

I tried to compile it under under monodevelop on linux and needless to say, there were many many many errors.
I would like to run the mono migration tool but I would need an executable. Could you provide a binary release on the
repo? A release and debug version?

Also, the actual binary might just actually run without modification under mono, I'll have to give a try.
 

oshimai

macrumors member
Apr 7, 2020
53
31
Europe
Here's a compiled build of everything:

Attention Windows 10 Users: Windows "Defender" will show you a scary virus warning and then proceed to delete everything because I refused to shell out $100 for an authenticode certificate and "rightclickassist.exe" contains a mouse hook. The most trustworthy people are those with big fat wallets. Go figure.


I really doubt Mono will work with WinForms programs. You'll probably have better chances using Wine. As long as you stay out of the test pattern in crtcpl, you won't hit any Windows specific code though (it calls SetActiveWindow to make sure you can't put the test pattern in the foreground, which would make the window with the CRT controls invisible and leave you trapped).

Actually it might really work out of the box using Wine. Check out https://appdb.winehq.org/objectManager.php?sClass=application&iId=2586. I target .NET 4.0 which is listed as "Garbage" for some reason, but you can use any of the 4.x versions and they'll work fine.

In other news, the new PMT-30N18AL04-04 speakers are working

They're not being driven by the Adafruit amplifier. Not because it broke but because some guy on eBay was selling just the controller/amplifier portion of USB PC speakers (those things in the $20 range that use USB for power and a 3.5mm jack for audio in) really cheap. The specs also matched the replacement speakers exactly. That essentially gave me the idiot-proof plug and play solution I wanted. I took the plastic casing apart and hooked up two jumper wires to the power switch, and connected those to a relay that the Arduino can control. Works perfectly.

But the headphone sense detect was all wrong. Apparently you can't just hook up the sense pins from J22 to analog inputs on the Arduino directly. The following circuit works...

headphone_sense.png


I stole the idea from a data sheet of some amplifier chip. I didn't have 1 MΩ resistors so I used 10 kΩ resistors and they also work. Below is how to do it properly.

correctway.PNG
 

rockyhill

macrumors regular
Dec 24, 2016
214
67
Miami Fl, United States
I really doubt Mono will work with WinForms programs. You'll probably have better chances using Wine. As long as you stay out of the test pattern in crtcpl, you won't hit any Windows specific code though (it calls SetActiveWindow to make sure you can't put the test pattern in the foreground, which would make the window with the CRT controls invisible and leave you trapped).

Wine works but I don't have it hooked up to the ivad board so I'm getting a connection error and then
the icons grey out.

oshimaiOSD.png

However, when I try to run it with mono it crashes with a serial port error

ignore
Gtk-Message: 15:04:21.145: Failed to load module "canberra-gtk-module"

thats a common warning with lots of programs.

Bash:
rockyhill@ThinkPad-T430:~/Downloads/Release$ mono crtcpl.exe
Gtk-Message: 15:04:21.145: Failed to load module "canberra-gtk-module"
System.InvalidOperationException: Serial port connection is not open.
  at crtcpl.UCCom.SendCommand (System.Byte cmd, System.Byte valA, System.Byte valB) [0x00007] in <b158378c8f9642c89c8892fcb66560e2>:0
  at crtcpl.AppletForm.SCREEN_ContrastChanged (System.Object sender, crtcpl.ScreenPageEventArgs e) [0x00008] in <b158378c8f9642c89c8892fcb66560e2>:0
  at crtcpl.ScreenPage.OnContrastChanged (crtcpl.ScreenPageEventArgs e) [0x0000a] in <b158378c8f9642c89c8892fcb66560e2>:0
  at crtcpl.ScreenPage.contrastTrackBar_Scroll (System.Object sender, System.EventArgs e) [0x00011] in <b158378c8f9642c89c8892fcb66560e2>:0
  at System.Windows.Forms.TrackBar.OnScroll (System.EventArgs e) [0x00019] in <bb0aba1aa2f44b688847e07603f97e33>:0
  at System.Windows.Forms.TrackBar.SetValue (System.Int32 value, System.Boolean fire_onscroll) [0x0003c] in <bb0aba1aa2f44b688847e07603f97e33>:0
  at System.Windows.Forms.TrackBar.UpdatePos (System.Int32 newPos, System.Boolean update_trumbpos) [0x00009] in <bb0aba1aa2f44b688847e07603f97e33>:0
  at System.Windows.Forms.TrackBar.OnHandleCreated (System.EventArgs e) [0x00046] in <bb0aba1aa2f44b688847e07603f97e33>:0
  at System.Windows.Forms.Control.WmCreate (System.Windows.Forms.Message& m) [0x00000] in <bb0aba1aa2f44b688847e07603f97e33>:0
  at System.Windows.Forms.Control.WndProc (System.Windows.Forms.Message& m) [0x0021c] in <bb0aba1aa2f44b688847e07603f97e33>:0
  at System.Windows.Forms.TrackBar.WndProc (System.Windows.Forms.Message& m) [0x00000] in <bb0aba1aa2f44b688847e07603f97e33>:0
  at System.Windows.Forms.Control+ControlWindowTarget.OnMessage (System.Windows.Forms.Message& m) [0x00000] in <bb0aba1aa2f44b688847e07603f97e33>:0
  at System.Windows.Forms.Control+ControlNativeWindow.WndProc (System.Windows.Forms.Message& m) [0x0000b] in <bb0aba1aa2f44b688847e07603f97e33>:0
  at System.Windows.Forms.NativeWindow.WndProc (System.IntPtr hWnd, System.Windows.Forms.Msg msg, System.IntPtr wParam, System.IntPtr lParam) [0x00085] in <bb0aba1aa2f44b688847e07603f97e33>:0

I'll try to compile it under windows and see If I can fudge some stuff to get it to run with mono. Mono supports windows forms on linux and I've successfully compiled and run a couple of simple test windows.

I think with very little work, you might actually have a platform independent program here.
.
In other news, the new PMT-30N18AL04-04 speakers are working

Sounds great and I like that you are using both headphone jacks, very nice!

I stole the idea from a data sheet of some amplifier chip. I didn't have 1 MΩ resistors so I used 10 kΩ resistors and they also work. Below is how to do it properly.

I might have to update the J22 board now to make interfacing a little easier. thanks for the doc!
 

oshimai

macrumors member
Apr 7, 2020
53
31
Europe
I'll try to compile it under windows and see If I can fudge some stuff to get it to run with mono. Mono supports windows forms on linux and I've successfully compiled and run a couple of simple test windows.

I think with very little work, you might actually have a platform independent program here.

Mono can do WinForms?? Wow, talk about hell freezing over. I was worried I would have to create an entirely separate GUI to get this anywhere near a working state on Linux. This changes everything. It should be a piece of cake to turn the one Win32 API call to something native to .NET and make whatever changes Mono needs for the serial port stuff to work. Tempting...

The hardware mods on my iMac are finished now -- to the best of my limited ability anyway -- so I closed it up. I couldn't get the EMI shield to fit and had to cut a small hole into the plastic for the power lead of the PC (I could not get into the CRT portion and tap into the mains connections to wire in the PSU since the top plastic didn't want to come off).

For anyone attempting this with a computer that uses an AMI Bios, look for their "ChangeLogo" utility. I managed to replace the Gigabyte logo with a Happy Mac.

Win10 boots and installs perfectly with the CRT since it uses UEFI all the way and keeps the startup video configuration instead forcing 1024x768x8bpp@60Hz like stupid Win7.

I wonder if MacOS boots with OpenCore. Any modern release probably won't like the screen resolution though and Hackintosh is a giant pain to get to work with iCloud.

IMG_0232.JPEG 61022701863__E3C659ED-6CA6-41B7-A77F-DB20BF3E4F5B.JPG
 
  • Like
Reactions: rockyhill

rockyhill

macrumors regular
Dec 24, 2016
214
67
Miami Fl, United States
Mono can do WinForms?? Wow, talk about hell freezing over. I was worried I would have to create an entirely separate GUI to get this anywhere near a working state on Linux. This changes everything. It should be a piece of cake to turn the one Win32 API call to something native to .NET and make whatever changes Mono needs for the serial port stuff to work. Tempting...

The hardware mods on my iMac are finished now -- to the best of my limited ability anyway -- so I closed it up. I couldn't get the EMI shield to fit and had to cut a small hole into the plastic for the power lead of the PC (I could not get into the CRT portion and tap into the mains connections to wire in the PSU since the top plastic didn't want to come off).

For anyone attempting this with a computer that uses an AMI Bios, look for their "ChangeLogo" utility. I managed to replace the Gigabyte logo with a Happy Mac.

Win10 boots and installs perfectly with the CRT since it uses UEFI all the way and keeps the startup video configuration instead forcing 1024x768x8bpp@60Hz like stupid Win7.

I wonder if MacOS boots with OpenCore. Any modern release probably won't like the screen resolution though and Hackintosh is a giant pain to get to work with iCloud.

View attachment 911799 View attachment 911798

Looking really nice, I can't wait to finish mine......... By the way, I was planning on including links to your videos on my repo but I wasn't sure you were going to keep them up. Will they stay up so I can link to them?

Also, is the optical drive working?

Mono can do WinForms?? Wow, talk about hell freezing over.
It's a crazy world these days................

On a side bar, I've been trying to learn to use freecad for a while now and I've decided to practice by making stuff for the iMac so that
I can print them later, specifically the little side panel and the inner bezel.

I started with the side panel so that I could add the connectors I'll eventually use and I think I'm getting it.
Check it out.

Screenshot from 2020-05-04 21-44-53.png

Screenshot from 2020-05-04 21-44-10.png
 
  • Like
Reactions: oshimai

oshimai

macrumors member
Apr 7, 2020
53
31
Europe
Streamable only keeps videos for 90 days, so I moved them all to www.vimeo.com/oshimai. They promptly banned me for linking to GitHub, but removed the ban within a few minutes of opening a support ticket, which speaks for them, I guess.

I don't intend to delete anything, so feel free to do whatever you please with anything I put online. :]

The optical drive works, as showcased here:

Also, update your copy of https://github.com/shuuryou/imacg3 when you get time. I spent some time looking at the build errors and it now builds without errors on Linux with Mono. README.md has Linux build instructions that work on Debian. It actually runs too without instantly crashing and the GUI is usable with only very minor visual glitches

The side bezel looks awesome. I assume you could just 3D print that directly without having to mess with it in another tool first?

Depending how much more work you want to put into this project, you could probably create and sell a complete iMac G3 CRT conversion kit that includes the audio amplifier, headphone circuit with sense, microphone amplifier, ground loop isolator, etc. For the side panel you could have a board that puts USB, ethernet, headphone, microphone, etc. conectors on the side and makes them available as headers inside the case so you just have to connect them as appropriate.

I used the original Apple bezel and a type of resin glue that handles like Sugru for 10 minutes and then turns hard like concrete. The empty holes look ugly though.
 

rockyhill

macrumors regular
Dec 24, 2016
214
67
Miami Fl, United States
@oshimai

Your build looks amazing! I especially like the attention to detail i.e. the apple icon at boot-up and the fact that you're using the
amber LED, very nice!

Also, update your copy of https://github.com/shuuryou/imacg3 when you get time.


I just did and I'll try and build it tonight.

projectThe side bezel looks awesome. I assume you could just 3D print that directly without having to mess with it in another tool first?

Thanks, I should be able to just 3d print it as is without tooling. I actually ordered a budget 3D printer several weeks ago and as soon as it gets here I plan on printing that first. I saw it in action in this video ----> Budget 3D printer

I have several ideas for the side bezel and one of them is to make it a raspberry pi 4 holder.
The idea is to have the rpi fixed to it with the usb ports and the ethernet port on the face of it
along with a uSD card extender from the pi to the face. Let see how that goes.


Depending how much more work you want to put into this project, you could probably create and sell a complete iMac G3 CRT conversion kit

That would be cool and it's definitely something I could see myself doing but given the amount of free time I have
available it will take a while to finish. Maybe when I finally "feel" like my iMac conversion is complete I'll compile it all
and make the kit.

I used the original Apple bezel and a type of resin glue that handles like Sugru for 10 minutes and then turns hard like concrete. The empty holes look ugly though.

I don't think your's is bad at all, it looks very clean.

Great work!
 

rockyhill

macrumors regular
Dec 24, 2016
214
67
Miami Fl, United States
@oshimai

After some hair pulling and modifications, I was finally able to compile it on Ubuntu 18.04.

Running "xbuild /p:Configuration=Mono crtcpl.sln" produced errors.

Bash:
This project references NuGet package(s) that are missing on this computer. Use NuGet Package Restore to download them.  For more information, see http://go.microsoft.com/fwlink/?LinkID=322105. The missing file is packages/Microsoft.CodeAnalysis.VersionCheckAnalyzer.2.9.6/build/Microsoft.CodeAnalysis.VersionCheckAnalyzer.props

I used nuget to install the missing dependency but to my frustration the error did not go away!

I finally edited "crtcpl.csproj" and commented all of the imports at the top and I commented all of the package
checks at the bottom as I didn't see why this program would need them anyway "could be wrong though..."

After making the changes the project compiled and ran.

During compilation I noticed this warning

Bash:
>>>> xbuild tool is deprecated and will be removed in future updates, use msbuild instead <<<<

So I used msbuild but it failed with different errors. apparently using msbuild requires that the files in ImageRes be lowercase so I renamed them all and it compiled and ran.

Next I'll adapt it to work with my version of the display adjust.


Fantastic program!!!!
 

oshimai

macrumors member
Apr 7, 2020
53
31
Europe
Sorry to hear/see that you had so much trouble getting it to compile. I really hoped you'd just be able to copy and paste the build commands and call it a day.

I had actually fixed these errors - especially the code analysis NuGet crap -before, but it appears the fixed project file never made its way to GitHub. Visual Studio might have overwritten it with the broken version again since it was also running while I was hand editing the files in my Debian VM. I also took the lazy approach earlier when I fixed the code up for Linux by mounting the source code folder via VirtualBox's file system integration. That made the file name casing issue invisible since the VirtualBox file system emulation ignores casing.

I checked out a clean copy of the code earlier today, made the required Linux build fixes (essentially what you had to do) and checked in the changes, so hopefully in the future you'll never have problems again.

I don't know why it doesn't compile with msbuild. Debian doesn't include msbuild so I can't test straight away. On the other hand, xbuild has been deprecated for a few years now it seems, but it doesn't seem to be going away any time soon.

Glad to hear you like the GUI though. I would very much like to add a "rockyhill mode" of sorts, either as a GUI option or (probably easier/faster) as a bunch of #if ROCKYHILL ... #else ... #endif s to be switched on/off when compiling. Please do share any changes you need to make to get it working with your serial code. I'd be happy to integrate and maintain them going forward. :]
 

rockyhill

macrumors regular
Dec 24, 2016
214
67
Miami Fl, United States
Sorry to hear/see that you had so much trouble getting it to compile. I really hoped you'd just be able to copy and paste the build commands and call it a day.

The changes I made to get it to compile where not that bad once understood, I just needed to wrap my head around it. I considered it a success because It's not easy making cross platform software.

I don't know why it doesn't compile with msbuild. Debian doesn't include msbuild so I can't test straight away. On the other hand, xbuild has been deprecated for a few years now it seems, but it doesn't seem to be going away any time soon.

It actually does compile and it compiles with fewer warnings. It only has two with msbuild.

Glad to hear you like the GUI though. I would very much like to add a "rockyhill mode" of sorts, either as a GUI option or (probably easier/faster) as a bunch of #if ROCKYHILL ... #else ... #endif s to be switched on/off when compiling. Please do share any changes you need to make to get it working with your serial code. I'd be happy to integrate and maintain them going forward. :]

I do like like the gui and as I make changes I'll issue pull requests so maybe there could be a rockyhill mode.
thanks!
 
  • Like
Reactions: oshimai

oshimai

macrumors member
Apr 7, 2020
53
31
Europe
Small update to the control panel. It detects multiple instances now. Windows users get the other instance put in the foreground. Mono shows an error message and exits instead.

And I finally figured out why rockyhill's IVAD init sequence would not degauss the CRT but anotherelise's would.

C:
  writeToIvad( PROPERTY, CONTRAST, 0x00); //setting contrast to 0x00 seems to turn something on.
  //writeToIvad( PROPERTY, HEIGHT, 0xE4);
  //writeToIvad( PROPERTY, ROTATION, 0xC9);

Uncomment the two commented lines in rockyhill's sketch and you get degauss. I wonder if that makes it possible to add a degauss button to the control panel.
 

rockyhill

macrumors regular
Dec 24, 2016
214
67
Miami Fl, United States
Small update to the control panel. It detects multiple instances now. Windows users get the other instance put in the foreground. Mono shows an error message and exits instead.

And I finally figured out why rockyhill's IVAD init sequence would not degauss the CRT but anotherelise's would.

C:
  writeToIvad( PROPERTY, CONTRAST, 0x00); //setting contrast to 0x00 seems to turn something on.
  //writeToIvad( PROPERTY, HEIGHT, 0xE4);
  //writeToIvad( PROPERTY, ROTATION, 0xC9);

Uncomment the two commented lines in rockyhill's sketch and you get degauss. I wonder if that makes it possible to add a degauss button to the control panel.


It's possible I commented these when trying to clean up the sequence. What is odd however is that my iMac does
degauss....... Once I get my other iMac modded I'll have to test it out.

Good find!
 
  • Like
Reactions: oshimai

rockyhill

macrumors regular
Dec 24, 2016
214
67
Miami Fl, United States
@oshimai

So after changing and debugging and testing and retesting I think I might not modify the gui at all
but it instead it might be easier for me to adapt my arduino sketch to be compatible with with the GUI.

I'll let you know how it goes.
 

oshimai

macrumors member
Apr 7, 2020
53
31
Europe
@oshimai

So after changing and debugging and testing and retesting I think I might not modify the gui at all
but it instead it might be easier for me to adapt my arduino sketch to be compatible with with the GUI.

I'll let you know how it goes.

Typing this from my iMac. :]

Sorry that it wasn't as straightforward as I hoped it would be. The protocol I made up isn't exactly ideal. I wanted to save time and just grabbed code from a different project of mine and dumbed it down. Hope you can get it implemented in your sketch though. Feel free to copy what you need and remember there's a full spec sheet for it in the sketch folder too.

Today I wanted to fix the image sharpness of the CRT since I'm using the iMac productively now. Easy enough to do with the potentiometer on the side. Then I fiddled with the master brighness one as well since maximum brightness wasn't really as bright as I hoped and that really fcked up the image. A really small turn and suddenly the image looked like as if you took your finger and smeared around on a wet painting. Some kind of whiteish distortions pulling colors to the right. So I turned it back, but the smear stayed.

It took the better part of the afternoon to get it to a state where the smear is gone and the image is both sharp and bright. The control panel code got updated today to support several different test patterns so I could fix the CRT.

Here's how I fixed it:

- Set brightness to 50%
- Set contrast to 0%
- Open black/white test pattern
- Set master brightness potentiometer so that black is really black (not grayish)
- Adjust sharpness potentiometer so that the transition from white to black is crisp
- Close test pattern
- Set brightness and contrast to max, start over if image is smeared
- Open a text file, fine tune sharpness so that the text is as crisp as it gets
- Set brightness and contrast as desired
- Close the plastic cover and vow never to open it again

It took several attempts before the smearing suddenly disappeared, but due to how long it took I am now banned from further fiddling around with the hardware side of the iMac by my wife. :(

Any CRT gurus out there that can explain the cause of the smear and why it suddenly disappeared?
 
  • Like
Reactions: rockyhill

rockyhill

macrumors regular
Dec 24, 2016
214
67
Miami Fl, United States
Sorry that it wasn't as straightforward as I hoped it would be. The protocol I made up isn't exactly ideal. I wanted to save time and just grabbed code from a different project of mine and dumbed it down. Hope you can get it implemented in your sketch though. Feel free to copy what you need and remember there's a full spec sheet for it in the sketch folder too.

No worries, the protocol is fine, I just though it would be easier to maintain a single version of the gui.
I'll take a look at the spec sheet.


I'm using the iMac productively now.

That's fantastic! Hopefully I'll be there soon. I have some more free time coming up and I'm
planning on getting a lot done.

I'm not a CRT guru but I did fiddle with lots of CRT television sets as a child (and got shocked quite a bit too).

The two potentiometers on the side are on the flyback transformer. These are usually but not always used to adjust
brightness and focus.

If the CRT is a bit dim you can bump it up with one of these pots but you cant go too much because it will looked washed out.
The other pot will just make the image look sharper or less sharp(focus)

Whenever I had to make a CRT brighter and I couldn't do it via the traditional method, I used a little trick I learned
from a guru back in the day. By increasing the green component of the CRT you can increase it's brightness.

I would take a television set and turn the color all the way down to get a black and white picture then I would turn the green
up high to the brightness I wanted. At this point the image was bright but everything was green so then I would turn red and blue up until the image was black and white again and then finish by adding in the color.

I actually did this for my iMac because the image was dark, you can see it in the comments for the init sequence.
I commented out the original RGB numbers and tuned it for my dim crt

C-like:
  writeToIvad( PROPERTY, 0x04, 0x80);//red x-30
  writeToIvad( PROPERTY, 0x05, 0xB0);// green x
  writeToIvad( PROPERTY, 0x06, 0x78); //blue x-38


You can't turn the color down on the iMac like you could on an old TV but you can display a greyscale image and adjust the RGB values
until the image looks greyscale again.
 

oshimai

macrumors member
Apr 7, 2020
53
31
Europe
My new iMac joy didn't last long. The green color channel has decided to die over night. Luckily my wife has given me permission to find out why after seeing how frustrated I got.

It might be the PAV board, because after about 15 minutes the green color finally comes in. First it flickers a bit like the CRT has a seizure, but it eventually stabilizes and is then fine. Before the green color channel would sometimes (rarely) disappear for a split second and then reappear.

It isn't the VGA cable, because I made a new one and it has the same issue. It isn't the computer, because another PC hooked up the CRT has the same issue.

I took the top part off without breaking the plastic and have access to the CRT internals now. Took a flashlight to check the caps, they look okay. No buldges or leaks. I also had a nice Grace Hopper bug moment: a moth flew out once I got the plastic cover off.

So this is a long shot, but does anyone have a schematic of the PAV board or an idea where I can try to poke at to check for a bad solder/connection? Or a photo or something? I'm not an electric engineer, but I know that 10kV hurt. I also know how to discharge the CRT before doing work on it.

The alternative would be to trash the iMac and buy another one, then transfer the reworked internals over, but I've come so far on this. Everything is done and working except for this one last problem. 😭
 

rockyhill

macrumors regular
Dec 24, 2016
214
67
Miami Fl, United States
My new iMac joy didn't last long. The green color channel has decided to die over night. Luckily my wife has given me permission to find out why after seeing how frustrated I got.

It might be the PAV board, because after about 15 minutes the green color finally comes in. First it flickers a bit like the CRT has a seizure, but it eventually stabilizes and is then fine. Before the green color channel would sometimes (rarely) disappear for a split second and then reappear.

It isn't the VGA cable, because I made a new one and it has the same issue. It isn't the computer, because another PC hooked up the CRT has the same issue.

I took the top part off without breaking the plastic and have access to the CRT internals now. Took a flashlight to check the caps, they look okay. No buldges or leaks. I also had a nice Grace Hopper bug moment: a moth flew out once I got the plastic cover off.

So this is a long shot, but does anyone have a schematic of the PAV board or an idea where I can try to poke at to check for a bad solder/connection? Or a photo or something? I'm not an electric engineer, but I know that 10kV hurt. I also know how to discharge the CRT before doing work on it.

The alternative would be to trash the iMac and buy another one, then transfer the reworked internals over, but I've come so far on this. Everything is done and working except for this one last problem. 😭

Sorry to hear about your CRT, that is really frustrating!

Are you sure you're not accidentally turning off the green filament from the arduino?
Or rather incrementing and causing a rollover from 0xFF to 0X00?
I've done that once or twice when I was messing with the colors.

I don't have a schematic but I do have a service manual that might help at least locate and area to check.
I just added it to the repo in the pdf folder.

Removing the PAV board is a huge pain in the ass and you risk destroying the inner bezel so be very careful.
I had to replace a couple of caps to get my PAV board working again.

If I were to guess where to look,
I would look just north-west of the flyback because the CRT selector switch is there.

20200511_175551.jpg


Check the wire harnesses that come off of the IVAD board to the PAV board, one may be loose or have broken or loose
solder.

Sometimes the board on the neck of the CRT, in this case the IVAD board can be slightly loose.

Hopefully your CRT is o.k.

Good luck!
 

rockyhill

macrumors regular
Dec 24, 2016
214
67
Miami Fl, United States
@oshimai

Today I had some time and I was able to create a hybrid sketch that can communicate with your GUI.
I had a good amount of success.
At the moment it passes the EEPROM version check and it can change monitor properties however I still need to stitch in the EEPROM load and save bits.

One thing I noticed was that when I first started the GUI, the RED was completely turned down, it reminded me of your green issue.
Might be worth a look.....

The only change I've made to the GUI has been to increase the baud rate to 155200. This eliminated communications errors that
occasionally occurred.

Great GUI,

Good luck with your CRT, hopefully it's an easy fix.
 
Register on MacRumors! This sidebar will go away, and you'll see fewer ads.