Installing Snow Leopard Server into Parallels 8
[This procedure still works for Parallels 9 with slight differences in installing Parallel Tools;
For Parallels 10, go to this link]
BE SURE TO UPGRADE PARALLELS 8 TO ITS MOST CURRENT VERSION
Which as of the date of this revision of this post is: Build 8.0.18483 (Revision 860857; March 30, 2013).
Step 1: Launch Parallels 8, go to File... New... Enter your system password if requested.
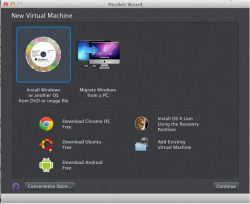
Step 2: On the next screen (Parallels Wizard), click on "Install Windows or another OS from DVD or image file" [see image at bottom of this post] and then click on Continue.
Step 3: Insert a new, freshly acquired from Apple, Mac OS X Snow Leopard Server Install DVD into your optical drive and be sure that "Install from" has your optical drive's name selected. Then click Continue.
Step 4: Give the "Name" something more specific. I like "Mac OS X Snow Leopard Server" and click Continue.
Step 5: Parallels should now commence the process of installing Snow Leopard Server into a file that will be named Mac OS X Snow Leopard Server.pvm and will be located at ~/Documents/Parallels/. This process will take up to five or ten minutes.
Step 6: You will then be presented with the normal "Mac OS X Server" installation screens, such as:
A. "Use English for the main language" -- Click on blue Right Arrow.
B. "To set up the installation of Snow Leopard Server, click Continue" -- Click on Continue.
C. Click Agree on the Software License Agreement for Mac OS X Server.
D. Select the Macintosh HD as the disk where you want to install Mac OS X Server. You do NOT have to click on Customize, as Rosetta is selected to install by default in SLS, unless you want to also install Quicktime 7. Then click Install. This Installing process will take 30 - 60 minutes, so go enjoy a cup of coffee!
E. At the completion of the install, either the System will restart itself or click Restart. You will be taken to the Welcome screen
F. Select your country and Click Continue. Select your keyboard and Click Continue.
G. Enter your Product Serial Number from the insert contained in your fresh, newly purchased from Apple Snow Leopard Server box, Enter your name (and optionally your Organization) and Click Continue.
H. Click Set up a new server and Click Continue. Enter your Registration information and Click Continue. Answer the Few More Questions and Click Continue. Enter your Time Zone and Click Continue.
I. Give your Administrator Account a Name: I like to use "Snow Leopard Server" and the short name will automatically be "snowleopardserver". I like to use an easy to remember password of "password" with the Hint: "It is what it is!" but feel free to use your own password that YOU WILL REMEMBER! ... and Click Continue.
J. The Network settings should be picked up automatically from your Host Mac; Click on Continue.
K. Network Names: Give it a Primary DNS Name and Computer Name such as sls.private and Click on Continue.
L. Users and Groups - Click on Create Users and Groups and Click Continue.
M. Services - either keep checked ALL of these options or deselect those not needed. I just kept File Sharing checked to keep overhead lowest. ...and Click Continue.
N. In Client Backup, I deselected Allow Users to Backup to this Server; and Click Continue.
O. In the Review screen, Click Set Up (or Go Back if you want to change any options before you Set Up). It will take a few minutes while your Server is Setting Up and then Click Go! The system should reboot and take you to your Mac OS X Snow Leopard Server Desktop!
P. You have now successfully installed and configured Snow Leopard Server and should now proceed to complete the Parallels installation.
Step 7: Eject the Snow Leopard Server Install icon from your Desktop, so that the DVD ejects from your optical drive. In Finder, in the Finder Menu, go to Preferences and check the boxes for Hard Disks and Connected Servers: your Macintosh HD should now appear.
Step 8: Install Parallels Tools from the Virtual Machines menu and then Restart and when the Desktop returns eject Parallels Tools. A Shared Folders folder should now appear.
Step 9: If you want to avoid having to log in at each Startup or Restart, go to System Preferences, Accounts, click on the padlock at the bottom left, enter your SLS password, click on Login Options, Change Automatic Login from Off to the name of your SLS account, enter your SLS password and click on the padlock.
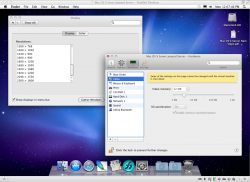
While in System Preferences, I also like to go to Date & Time, Clock and check Display the time with seconds, so that you can always see from the changing seconds if SLS has frozen.
") .
.