Troubleshooting "An invalid Mac OS version is installed"
Once you have a working Snow Leopard partition, the file ServerVersion.plist is required to be located at /Macintosh HD/System/Library/CoreServices/ when starting Parallels and first booting Snow Leopard.
However, the process com.rectalogic.vmware.plist, created at Step Three #2, removes this file while Snow Leopard is running, so that Software Updates will run properly and File Sharing can be turned on and off. When a Shut Down is effected, this same process recreates this file, so it will again be present for Parallels to find when it again boots Snow Leopard.
Using the Parallels SUSPEND feature and/or if there is anything that ends Parallels without a proper Shut Down (such as a crash of Parallels while Snow Leopard is running) could result in this file NOT being recreated. Since it will be missing when Parallels reboots Snow Leopard, the resulting error message "An invalid Mac OS version is installed" will appear.
Here is how to fix this problem:
1. Go to ~/Documents/Parallels/ and double-click your Mac OS X Snow Leopard.pvm BACKUP file created in Step Four.
2. If you see a Dialog Box similar to "Duplicate MAC addresses detected. Do you want to recreate the MAC address for the virtual machine "Mac OS X Snow Leopard3 (1)" or use the current MAC address anyway?" -- SELECT Create New.
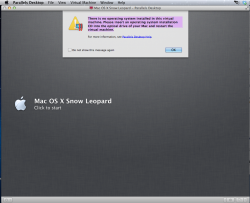
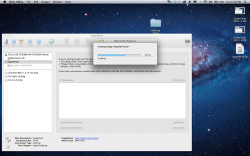
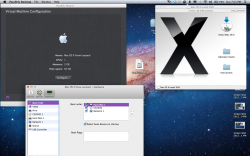
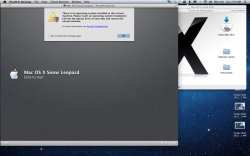
3. You now want to be at the window in Parallels where the backup partition is loaded but NOT yet started. If the backup Snow Leopard partition starts, wait until it fully starts up and then using the Apple Menu, do a Shut Down. See the image below.
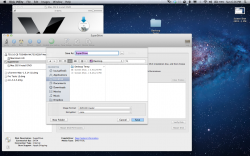
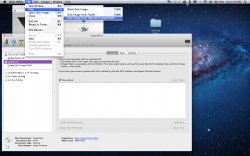
4. In the Parallels Virtual Machine menu, go down to Configure... Unlock to allow changes, if necessary and click on the + symbol go down to another Hard Disk. Click on Type: Existing Image File and click on the Location box and when the Open box appears, go to ~/Documents/Parallels/.
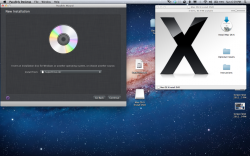
5. Find the Mac OS X Snow Leopard.pvm file from the Partition that you want to fix and click on it and click Open. When it opens click on the Mac OS X Snow Leopard Server-0.hdd file (or similarly named) and click Open. Again: when this file opens, click on the Mac OS X Snow Leopard Server-0.hdd file and click Open. Now you should have the box similar to the last image below and click OK. This will result in a Hard Disk 2 added to your Hardware List.
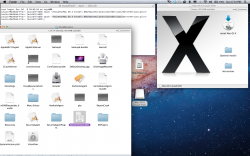
6. Click the red button to close the Hardware box and Click to start your Snow Leopard Partition. When Snow Leopard starts up you will see TWO Macintosh HDs.
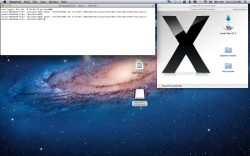
7. Inside Snow Leopard, go to /Applications/Utilities/ and launch Terminal in the upper Macintosh HD. Type this command in Terminal:
touch '/ServerVersion.plist'
Quit Terminal
8. Open the upper Macintosh HD and you should see the file ServerVersion.plist. Drag it to the Desktop.
9. In the lower Macintosh HD go to /Macintosh HD/System/Library/CoreServices/ and drag the ServerVersion.plist file from the Desktop to this open folder. When it says that "The item 'ServerVersion.plist' can't be moved because 'CoreServices' can't be modified." Click on Authenticate and enter your Snow Leopard account password. Look inside this folder and confirm that a copy of ServerVersion.plist now exists there.
10. Keep the original copy of ServerVersion.plist on the Desktop for future use. Shut down the Backup Snow Leopard partition from the Apple Menu.
11. Quit Parallels and in the future the Backup Snow Leopard partition will always have both Macintosh HDs available if you must ever boot it up again and copy the ServerVersion.plist file to the lower /Macintosh HD/System/Library/CoreServices/ .
Now if you boot your main Snow Leopard Partition, it should boot up correctly!
YOU MUST AVOID USING THE PARALLELS SUSPEND FEATURE AND ALWAYS MANUALLY DO A FULL SHUT DOWN OF SNOW LEOPARD, ESPECIALLY WHEN SHUTTING DOWN OR RESTARTING YOUR MACINTOSH.
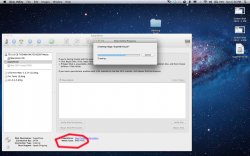
[click on individual images to ENLARGE]

")