Got a tip for us?
Let us know
Become a MacRumors Supporter for $50/year with no ads, ability to filter front page stories, and private forums.
My xMac Project
- Thread starter Schtumple
- Start date
- Sort by reaction score
You are using an out of date browser. It may not display this or other websites correctly.
You should upgrade or use an alternative browser.
You should upgrade or use an alternative browser.
Can you tell me the exact model of the wireless usb device?
Dlink DWL-G122
Hardware version B1 (I don't think it makes that much difference)
Chipset is Ralink RT2571F
I've tried one USB Wireless app already, that came from Dlinks or Ralinks website, but that was for PPC and Tiger, and wouldn't recognise the device, but, on Leo4all v2, there's a universal version of the app that does recognise the device, trouble is, I'm on Kalyway 10.5.2...
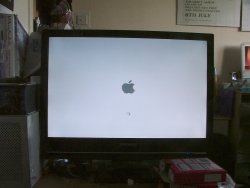
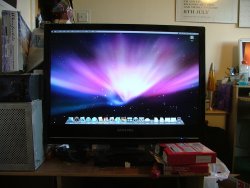
Apart from intermittent boot freezing, it runs leopard like a charm, not to much slower than my imac actually, which is impressive considering the spec difference.
As for it being fully up and running, my girlfriend lost the USB wifi stick I had so I've gotta hunt out a new PCI card that will fool Leopard into thinking it's a Airport Extreme card.
My dad's finally ordered some screws for the front, and once the machine at his friends becomes availible, he's going to make a tool to make it easier to drill into the case.
After that, the acrylic can go on.
Simple things really.
It's been a bit difficult of late to actually get any of it done,w hat with work and my girlfriend, it's difficult to get some time to work on it.
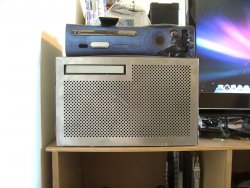
Ok, so it's been a little while now, the delays have really been with waiting for my dad to build a tool so I can drill into the front plate, I'm actually quite tempted just to glue it now....
Anyway, nice pictures to follow, I applied a second coat of paint to the CD tray cover, only to come back to find it happily reacting and bubbling away... minor set back...
Anyway, nice pictures to follow, I applied a second coat of paint to the CD tray cover, only to come back to find it happily reacting and bubbling away... minor set back...
Attachments
Ok, so it's been a little while now, the delays have really been with waiting for my dad to build a tool so I can drill into the front plate, I'm actually quite tempted just to glue it now....
Anyway, nice pictures to follow, I applied a second coat of paint to the CD tray cover, only to come back to find it happily reacting and bubbling away... minor set back...
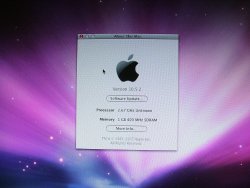
Do you mind sharing that custom apple logo from the about this mac screen. I quite like it. I know how to drop it in, just need the image. Nice project as well. I like it very much. You should build these things, you would make some nice change
NVM found it.
Do you mind sharing that custom apple logo from the about this mac screen. I quite like it. I know how to drop it in, just need the image. Nice project as well. I like it very much. You should build these things, you would make some nice change
NVM found it.
Somebody's already trying that, see Psystar
very nice!! ,but there's a reason why apple doesn't make computers with white and aluminium.. they don't look nice together, i would make it black with aluminium..
black + chrome = amazing, in my book.
white and aluminum? They look OK, as far as I'm concerned. Not a lot of contrast, but I don't see any other problem.
What about this whole thing made from Lego blocks?
black + chrome = amazing, in my book.
white and aluminum? They look OK, as far as I'm concerned. Not a lot of contrast, but I don't see any other problem.
What about this whole thing made from Lego blocks?
Lego? really? and after all the effort i put in, awww shucks, i even have some lego somewhere from when i was young...
Ok, so it's been a little while now, the delays have really been with waiting for my dad to build a tool so I can drill into the front plate, I'm actually quite tempted just to glue it now....
Anyway, nice pictures to follow, I applied a second coat of paint to the CD tray cover, only to come back to find it happily reacting and bubbling away... minor set back...
Something I noticed was the mac mini. In the frontal shots you've either hidden it or moved it away, but in the overview/side shot it's there alive and kicking..
Are you going to buffer the front up?
Something I noticed was the mac mini. In the frontal shots you've either hidden it or moved it away, but in the overview/side shot it's there alive and kicking..
Are you going to buffer the front up?
Yeah its my little media/torrent machine, sadly the xmac makes too much noise for me to leave it going over night.
The front is actually slightly buffered, I didn't want it to glossy as the acrylic is already glossy itself.
Ok, so getting things back on track, now I'm off work I've found myself with ALOT of free time, so I've been dipping back into projects here and there, and today, the xMac was a bit of my focus.
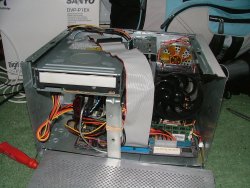
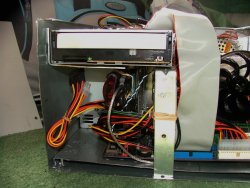
Todays task was to align the CD drive properly so that it's not wonky, I found a small L bracket that I screwed into the CD tray that now supports the drive much better than before.
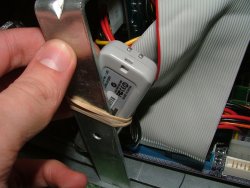
I found a proper home for the wireless stick (it was just dangling around before).
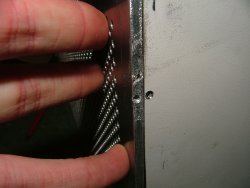
I also did something my dad said would be completely impossible, I drilled into the side of the front plate, allowing for it to be screwed in, only hiccup is I've yet to find a tapper(? or threader??) that'll thread such a small hole. (Just so you know, I buggered up the first hole but the rest are ok)
All in all things are back on track.
Todays task was to align the CD drive properly so that it's not wonky, I found a small L bracket that I screwed into the CD tray that now supports the drive much better than before.
I found a proper home for the wireless stick (it was just dangling around before).
I also did something my dad said would be completely impossible, I drilled into the side of the front plate, allowing for it to be screwed in, only hiccup is I've yet to find a tapper(? or threader??) that'll thread such a small hole. (Just so you know, I buggered up the first hole
All in all things are back on track.
Attachments
Lookin' good!
Sorry about hi-jacking your thread before!
Ok, so getting things back on track, now I'm off work I've found myself with ALOT of free time, so I've been dipping back into projects here and there, and today, the xMac was a bit of my focus.
Todays task was to align the CD drive properly so that it's not wonky, I found a small L bracket that I screwed into the CD tray that now supports the drive much better than before.
I found a proper home for the wireless stick (it was just dangling around before).
I also did something my dad said would be completely impossible, I drilled into the side of the front plate, allowing for it to be screwed in, only hiccup is I've yet to find a tapper(? or threader??) that'll thread such a small hole. (Just so you know, I buggered up the first holebut the rest are ok)
All in all things are back on track.
whoa! that second picture is the drilling you are talking about correct?
i would definitely drill through the front and mess it all up LOL looks good!
That hole looks *far* too close to the surface of the sheet. Be careful you don't break through the surface when you thread it, that would ruin the finish.I also did something my dad said would be completely impossible, I drilled into the side of the front plate, allowing for it to be screwed in, only hiccup is I've yet to find a tapper(? or threader??) that'll thread such a small hole. (Just so you know, I buggered up the first holebut the rest are ok)
That hole looks *far* too close to the surface of the sheet. Be careful you don't break through the surface when you thread it, that would ruin the finish.
Yeah I know, I'm tempted to do another one just a few millimeters above or below it, just to be on the safe side...
To be fair though, the metal is 4mm thick, and I'm drilling using a 3mm drill, so it's not exactly easy
Why drill into the side of the front plate?
Also, the second hole, on the edge of the side (beige-coloured) plate looks like it may break out of the very thin side under the slightest force.
It would be safer, and maybe more tidy to attach a small angle bracket or a small wood block (glue it on?) to the back of the front plate. You can then drill a hole in the side plate a centimeter or more back from the edge to put your screw / bolt into.
Why drill into the side of the front plate?
Also, the second hole, on the edge of the side (beige-coloured) plate looks like it may break out of the very thin side under the slightest force.
It would be safer, and maybe more tidy to attach a small angle bracket or a small wood block (glue it on?) to the back of the front plate. You can then drill a hole in the side plate a centimeter or more back from the edge to put your screw / bolt into.
agh why didn't I think of that, I'll enquire with my dad and see what small brackets we've got.
Why drill into the side of the front plate?
Also, the second hole, on the edge of the side (beige-coloured) plate looks like it may break out of the very thin side under the slightest force.
It would be safer, and maybe more tidy to attach a small angle bracket or a small wood block (glue it on?) to the back of the front plate. You can then drill a hole in the side plate a centimeter or more back from the edge to put your screw / bolt into.
please do that! we know how long it took for your dad to drill those holes
please do that! we know how long it took for your dad to drill those holes
I think I'll just glue it and hope it stays in place, I bought 2 high density tubes of super glue, so that should do the trick
Just got to get the CD drive to stay in place and find a way to get the acrylic to stay on (don't think I can use glue, it reacts), then it's done
Register on MacRumors! This sidebar will go away, and you'll see fewer ads.


