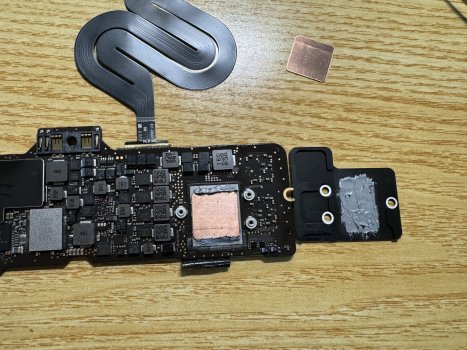
First time poster here, and I went ahead and did the mod while I was replacing the USB-C port, I have a 2017 i7. I used conductonaut Liquid Metal on the CPU die -> Copper shim, and regular Corsair TM30 thermal paste on the heatsink since it's aluminum, otherwise I would have used Liquid Metal there too. I did NOT use thermal pads on the heatsink so the heatsink does not have any more direct contact with the outer casing vs stock.
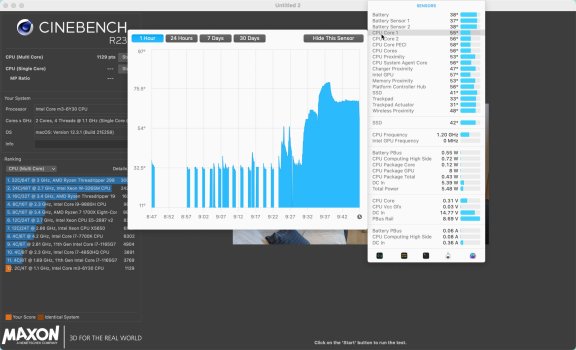
At the absolute highest, the temps of the CPU gets to 80-85 C during Cinebench testing, but with less throttling, and it cools rather rapidly. During regular tasks it hovers around 45/50 C, so definitely an improvement from having one mediocre task sending temps to the 70s. Battery temp doesn't exceed 40 C but I have a suspicion that 40 is the highest that the battery thermometer will read, so I can't say the true temp readout is accurate.
Anyway, my Geekbench score: https://browser.geekbench.com/v6/cpu/6646961
Cinebench 2024 score is 48 single core, 88 multi core. I'll do more prolonged testing on Cinebench but I'll happily take the 20% boost in performance just for switching to Liquid Metal and adding a copper shim.