Preface
I made the decision to install OpenBSD 6.9, using a 16GB USB (2.0) flash drive, on my iMac G3/600 (slot-loader). Mostly disappointed by the lack of detailed instructions around the web, for how iMac G3 owners (specifically) can boot off of a USB flash drive, especially when I know that any Mac user with a busted optical drive would probably just get rid of their old slot-loading Mac, I just thought I'd share the process I used, which also includes instructions on how to upgrade to OpenBSD 7.0, and then to OpenBSD 7.1, in that order, without the need to burn additional installation images separately to USB flash drives.
Action Retro, on YouTube, uploaded a video a while back, showing his own installation process for installing OpenBSD. But I just think he skipped some otherwise useful details that I would've preferred he'd left in. Additionally, he was lucky enough to still have a functioning optical drive and burned the .iso to CD. Unfortunately for me, and I'm just as sure as for many/any other slot-loading Mac owners out there, I don't have that luxury.
I used 'dd' on my Linux machine to actually burn the .iso image ('install69.iso'), because the iMac's optical drive is dead. I can't explain why 'dd' on Linux results in a USB flash drive that is actually bootable... but, when i tried creating the flash drive on my Windows machine, using either RUFUS or Balena Etcher, using the same OpenBSD .iso image, it didn't work. That is to say that my iMac's Open Firmware can't seem to recognize the resulting flash drive. I'm guessing that this has something to do with the file system in which the .iso image was originally created. This is very strange to me, since I was actually able to use those Windows programs to successfully burn a bootable Debian Sid .iso image. But I digress.
Bottom line: However you choose to burn your downloaded .iso installation image to USB, may still involve multiple tries in getting it to boot, even if you know you've burned it correctly. More on that, later.
Process
First, i inserted the USB flash drive into my Linux machine, then made sure it was unmounted
... where "*" is where the USB flash drive is actually located.
Then to actually burn the .iso image:
...where "##" is the version number of the OpenBSD install image.
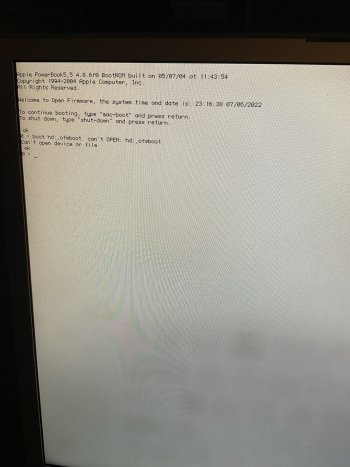
To boot off the flash drive on my iMac G3, I had to boot into Open Firmware:
One thing I should mention is that, if for whatever reason the attempt to boot off the flash drive fails, at least on my iMac G3, I found that I actually have to RESTART the whole computer and reboot back into Open Firmware to try again. It is very annoying, to say the least, but it works. But this is ONLY if I know for a fact that the .ISO image was first verified (via 'signify') and, of course, burned properly.
Once I got to the part of the installation process that says that it was time to 'install the sets'. I had to specify that I wanted to install from the 'disk', rather than 'cd0'. When it asked me if the disk was mounted, i input 'n' for 'no'. This allowed me to specify the flash drive ('sd0') as the device location where the 'sets' for installation were actually located, and thereby continue with the installation. Note that, after specifying the USB flash drive's device location, the path ultimately still ended in '/6.9/macppc/'.
Immediately after post-install, I actually had to reboot, back into the Open Firmware prompt, and tell the system to set the hard drive as the startup device:
Once I powered-on again, I installed the 'nano' text editor, because that's what I'm most familiar with, and I don't really like 'pico'. And then I also added 'wget', just in case I needed to download something off the web, using a direct download link, later on.
Then, I used 'nano' to edit the 'doas' configuration file to let me actually use 'doas'.
Added the line:
... then CTRL+X to exit, and then SAVE.
From this point, I was able to upgrade to OpenBSD 7.0 and then subsequently to 7.1, without having to burn any .iso image for either of them. All I had to do was:
The above command automatically downloaded everything needed, for upgrading the installation of OpenBSD 6.9 to 7.0. After it restarted (also automatically), I was brought to the log-in prompt. I then repeated the process, one final time, to upgrade to OpenBSD 7.1:
Conclusion
And that is where I am, at the moment.
I have not installed an xorg.conf file just yet, but I already know that I will eventually need to either create one from scratch, or download it from a website. That's why I chose to install the 'wget' program, earlier on. Once I have the default GUI working (ie. 'xenodm'), I can then try fooling around with another environment like 'XFCE' (hopefully) or at the very least, 'LXQT'.
A parting note about Debian Sid, MintPPC, Linux Adelie, and MESA drivers
I have mostly abandoned my efforts to get any sort of GUI working in Debian Sid, MintPPC (which is essentially Debian Sid, plus custom-ported Linux Mint packages), and even Linux Adelie. The Rage 128 ('r128') driver (at least in those operating systems) seems to require an older version of 'MESA' to be installed (and 'pinned'), and I can't be bothered to fool around with that, let alone look for where to download it. I just really wish that a working version of MESA could be created ('forked'), specifically to retain existing functionality of the Rage 128, and I suppose for other drivers that had their support similarly-dropped. I KNOW that I saw a Google search result that showed, someone else actually recommended doing just that (ie. forking MESA for older GPUs), but I can't find the link for it anymore.
I made the decision to install OpenBSD 6.9, using a 16GB USB (2.0) flash drive, on my iMac G3/600 (slot-loader). Mostly disappointed by the lack of detailed instructions around the web, for how iMac G3 owners (specifically) can boot off of a USB flash drive, especially when I know that any Mac user with a busted optical drive would probably just get rid of their old slot-loading Mac, I just thought I'd share the process I used, which also includes instructions on how to upgrade to OpenBSD 7.0, and then to OpenBSD 7.1, in that order, without the need to burn additional installation images separately to USB flash drives.
Action Retro, on YouTube, uploaded a video a while back, showing his own installation process for installing OpenBSD. But I just think he skipped some otherwise useful details that I would've preferred he'd left in. Additionally, he was lucky enough to still have a functioning optical drive and burned the .iso to CD. Unfortunately for me, and I'm just as sure as for many/any other slot-loading Mac owners out there, I don't have that luxury.
I used 'dd' on my Linux machine to actually burn the .iso image ('install69.iso'), because the iMac's optical drive is dead. I can't explain why 'dd' on Linux results in a USB flash drive that is actually bootable... but, when i tried creating the flash drive on my Windows machine, using either RUFUS or Balena Etcher, using the same OpenBSD .iso image, it didn't work. That is to say that my iMac's Open Firmware can't seem to recognize the resulting flash drive. I'm guessing that this has something to do with the file system in which the .iso image was originally created. This is very strange to me, since I was actually able to use those Windows programs to successfully burn a bootable Debian Sid .iso image. But I digress.
Bottom line: However you choose to burn your downloaded .iso installation image to USB, may still involve multiple tries in getting it to boot, even if you know you've burned it correctly. More on that, later.
Process
First, i inserted the USB flash drive into my Linux machine, then made sure it was unmounted
Code:
sudo umount /dev/sd*Then to actually burn the .iso image:
Code:
sudo dd if=/path/to/install##.iso of=/dev/sd* bs=1MTo boot off the flash drive on my iMac G3, I had to boot into Open Firmware:
- While powering-on, hold: Command+Option+O+F.
- Continue holding until reaching the white screen that contains the message, saying that it is okay to let go of those keys.
- Insert the freshly-burned USB flash drive directly into the bottom USB port. In my case, my iMac G3 has only 2 USB ports. Normally, this would be one USB port for the keyboard and one USB port for the mouse (if the USB keyboard didn't have a USB pass-through port included). To make my life simple, what I ended up doing was to get a separate, cheap, external USB hub to connect my mouse and keyboard to the top USB port.
- In Open Firmware, i found that the bottom USB port is designated by the system as 'usb0', while the top USB port was designated as 'usb1'.
Code:
setenv boot-device hd:,ofwboot
boot usb0/disk:,ofwboot /6.9/macppc/bsd.rd
One thing I should mention is that, if for whatever reason the attempt to boot off the flash drive fails, at least on my iMac G3, I found that I actually have to RESTART the whole computer and reboot back into Open Firmware to try again. It is very annoying, to say the least, but it works. But this is ONLY if I know for a fact that the .ISO image was first verified (via 'signify') and, of course, burned properly.
Once I got to the part of the installation process that says that it was time to 'install the sets'. I had to specify that I wanted to install from the 'disk', rather than 'cd0'. When it asked me if the disk was mounted, i input 'n' for 'no'. This allowed me to specify the flash drive ('sd0') as the device location where the 'sets' for installation were actually located, and thereby continue with the installation. Note that, after specifying the USB flash drive's device location, the path ultimately still ended in '/6.9/macppc/'.
Immediately after post-install, I actually had to reboot, back into the Open Firmware prompt, and tell the system to set the hard drive as the startup device:
Code:
setenv boot-device hd:,ofwboot
shut-down
Once I powered-on again, I installed the 'nano' text editor, because that's what I'm most familiar with, and I don't really like 'pico'. And then I also added 'wget', just in case I needed to download something off the web, using a direct download link, later on.
Code:
su
pkg_add nano wget
Then, I used 'nano' to edit the 'doas' configuration file to let me actually use 'doas'.
Code:
su
nano /etc/doas.conf
Added the line:
Code:
permit: wheelFrom this point, I was able to upgrade to OpenBSD 7.0 and then subsequently to 7.1, without having to burn any .iso image for either of them. All I had to do was:
Code:
doas su
sysupgrade
The above command automatically downloaded everything needed, for upgrading the installation of OpenBSD 6.9 to 7.0. After it restarted (also automatically), I was brought to the log-in prompt. I then repeated the process, one final time, to upgrade to OpenBSD 7.1:
Code:
doas su
sysupgrade
Conclusion
And that is where I am, at the moment.
I have not installed an xorg.conf file just yet, but I already know that I will eventually need to either create one from scratch, or download it from a website. That's why I chose to install the 'wget' program, earlier on. Once I have the default GUI working (ie. 'xenodm'), I can then try fooling around with another environment like 'XFCE' (hopefully) or at the very least, 'LXQT'.
A parting note about Debian Sid, MintPPC, Linux Adelie, and MESA drivers
I have mostly abandoned my efforts to get any sort of GUI working in Debian Sid, MintPPC (which is essentially Debian Sid, plus custom-ported Linux Mint packages), and even Linux Adelie. The Rage 128 ('r128') driver (at least in those operating systems) seems to require an older version of 'MESA' to be installed (and 'pinned'), and I can't be bothered to fool around with that, let alone look for where to download it. I just really wish that a working version of MESA could be created ('forked'), specifically to retain existing functionality of the Rage 128, and I suppose for other drivers that had their support similarly-dropped. I KNOW that I saw a Google search result that showed, someone else actually recommended doing just that (ie. forking MESA for older GPUs), but I can't find the link for it anymore.
Last edited:


