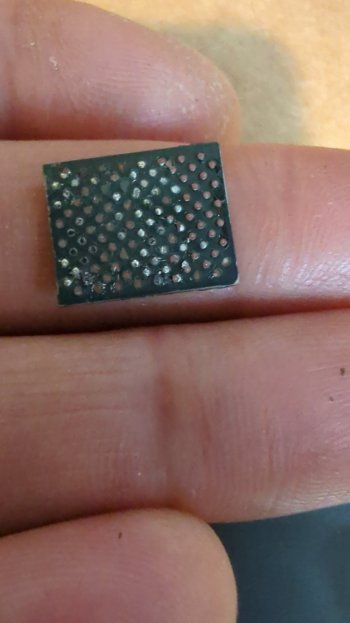
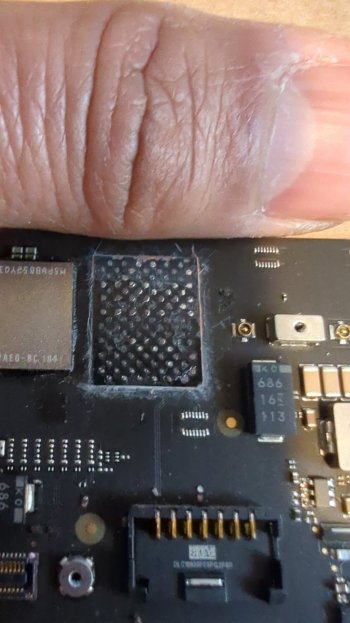
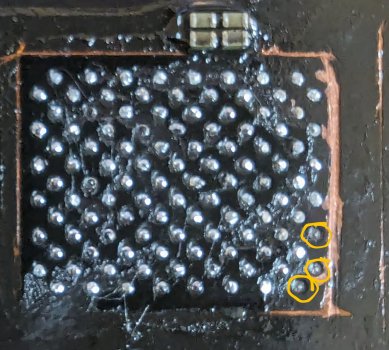
I have a good seller from aliexpress who sells them to me privately for 129 dollar (shippment to germany inclusive). He also sells the 2tb configuration for the m1 for 110 dollar. I can give you (and of course everyone else who needs) the contacts if you want.I know, trying to locate some.
Got a tip for us?
Let us know
Become a MacRumors Supporter for $50/year with no ads, ability to filter front page stories, and private forums.
Apple Silicon Soldered SSD Upgrade Thread
- Thread starter dosdude1
- WikiPost WikiPost
- Start date
-
- Tags
- apple silicon nand upgrade
- Sort by reaction score
You are using an out of date browser. It may not display this or other websites correctly.
You should upgrade or use an alternative browser.
You should upgrade or use an alternative browser.
- Status
- The first post of this thread is a WikiPost and can be edited by anyone with the appropiate permissions. Your edits will be public.
I finally got my A2338 M2 macbook working with 2tb instead of 256gb. In comparison with the M1 upgrade its really not as easy since adding all the small capacitors and resistors is a really long and hard way to go. But since you go from single nand to dual nand its actually worth it.
The most important thing is to first set up the nands and then start adding the resistors and capacitors, since they can easily get lost when adding the heat to remove the nand. With the schematics you can easily spot all the parts you need to add (just as dosdude said in his Video about the nand upgrade: everything with ssd_2l).
There are also 2 small capacitors on top of the m2 chip and 2 above the second nand. Also there is one resistor on the back of the m2 chip that has to be placed. The rest is just on the back site of the second nand.
I think the smartes way would be ordering all the capacitors and resistors from mouser or somewhere, so you can add brand new ones and dont need a donor board. I only had a M1 donor board and had to check everything twice since some parts are on different places.
Does anyone know if there is any important difference between the KICM223,KICM223R and KICM223K? I’d check the datasheet but they seem nonexistent!
They are all the same, and will work no issue. Just ensure they are properly programmed or blank, of course.Does anyone know if there is any important difference between the KICM223,KICM223R and KICM223K? I’d check the datasheet but they seem nonexistent!
Many thanks, it is great to remove an unknown. Also many thanks for your experiments and detailed videos.They are all the same, and will work no issue. Just ensure they are properly programmed or blank, of course.
I became a proud owner of a 16gb 512gb M3 MBA yesterday. I have been watching SSD upgrade videos on YT, especially by you dosdude1, very inspiring! I want to do the upgrade on my M3 but am not able to find the exact nand chips on aliexpress. Are they the ones from iPhone 14 and above?
Yes, though you want to ensure they are new/blank, as ones programmed for iPhone 14 already will not work. For 2TB on M3 MacBook Air, you are looking for "K5A8" NANDs.I became a proud owner of a 16gb 512gb M3 MBA yesterday. I have been watching SSD upgrade videos on YT, especially by you dosdude1, very inspiring! I want to do the upgrade on my M3 but am not able to find the exact nand chips on aliexpress. Are they the ones from iPhone 14 and above?
@dosdude1 can you tell looking at these pictures if I destroyed the solder pads on the motherboard?Yes, though you want to ensure they are new/blank, as ones programmed for iPhone 14 already will not work. For 2TB on M3 MacBook Air, you are looking for "K5A8" NANDs.
Attachments
Yeah, looks like most of the pads are ripped, so board is probably trash at this point. As I always say, with underfill removal especially, you need to practice a good number of times on some junk boards with underfilled chips to ensure you can cleanly remove them before attempting with a good board. It took me at least 4 or 5 tries before I got it down well enough to attempt on a good board my first time.@dosdude1 can you tell looking at these pictures if I destroyed the solder pads on the motherboard?
So since the board is trashed I thought why not try my hand at the second nand. I'm the kind of person that just can't accept failure and it will nag me until I do it rightYeah, looks like most of the pads are ripped, so board is probably trash at this point. As I always say, with underfill removal especially, you need to practice a good number of times on some junk boards with underfilled chips to ensure you can cleanly remove them before attempting with a good board. It took me at least 4 or 5 tries before I got it down well enough to attempt on a good board my first time.
Attachments
Lol luckily this is just a hobby and my livelihood doesn't depend on it... I'll chalk up the $640 spent on a learning exercise. Incidentally I bought an M3 MacBook 16gb/512gb for $1080 last week for tinkering with asahi on it once it is ready for M3. All in the name of learning pursuitThat's bananas ...
Hopefully you can afford a new one 🙈
So I do have the two unused 1tb kicm223 nands I got from aliexpress if anyone is interested in buying from me.
Do you still sometimes make mistakes or after learning it the success rate is 100%?It took me at least 4 or 5 tries before I got it down well enough to attempt on a good board my first time.
Nope, never had a single failure after completing my first successfully. Once you practice and get familiar with the temperatures and force needed to remove the underfill, you can get it done without issue every time.Do you still sometimes make mistakes or after learning it the success rate is 100%?
Fascinating but seems risky to meAnother way to remove the old NAND:
Nope, never had a single failure after completing my first successfully. Once you practice and get familiar with the temperatures and force needed to remove the underfill, you can get it done without issue every time.
Shame that its not complicated for a trained person to do ... because it means Apple Genius Bar could do it too. Instead buyers have to make up their minds about capacity before purchasing. Apple at least should allow a mother board exchange program, with increased capacity to suit a previous buyers needs. It's not a customer focused business model, while the competition does mostly allow user upgrades.
Where you being satirical?Shame that it’s not complicated for a trained person to do because it means Apple Genius Bar could do it too…
Doubt this a sit & wait while this is done type of procedure. @dosdude1 if your experience how long does it take to do an SSD update (once you are experienced at it)?
I'm in Australia.Where you being satirical?
Doubt this a sit & wait while this is done type of procedure. @dosdude1 if your experience how long does it take to do an SSD update (once you are experienced at it)?
Apple does take and repair their gear. An example are the faulty MacBook Pro keyboards. They'll replace motherboards and screens.
Apple's business model was always for very high parts costs. Their fear was people buying Apple parts - say a motherboard - and putting the motherboard into their own computer casing. So Apple always sold their parts for very high prices. But they'd trade in a motherboard for a high price. Which mean't a broken Apple computer could have its faulty part replaced for a reasonable price.
It would be possible for Apple to swap over a motherboard via their service capabilities. And because their SSD prices are three times what they should be, they darn well should offer that service. They should simply have a minor service charge, and the price of changing from 1 TB to 4 TB, should be the same as when paying for that extra capacity at the time of buying. That process would make up for Apple not having upgradable SSDs. It would also increase the used value of a Mac. The same model for RAM should also be available.
If a brand gains a reputation for not being customer focused, it can damage the whole brand and hence hurt the whole business.
Last edited:
It depends on the machine, but if it is dual-NAND with both NANDs populated already, it takes about an hour or so to do the swap (not including the time needed to restore the software). If one NAND not installed, it takes a little more than twice as long (as you have to install 40 tiny passive components too).Where you being satirical?
Doubt this a sit & wait while this is done type of procedure. @dosdude1 if your experience how long does it take to do an SSD update (once you are experienced at it)?
So, my experience in case it helps anyone else. Disassembling the mini was pretty clear from Apple's new docs. I carefully marked all the screws etc and stuck them to some paper to keep clear what was what. This covers everything except removing the heatsink cover, which has 4 screws on the underside with a little adhesive pad on top and little insulating loops. Then 2 pressure clamps also on the underside to remove the heatsink itself.
Removing the underfill round the edge of the NANDs was not difficult, though I did manage to scrape a little solder mask on the edge of the PCB so watch that.
I wasn't getting much traction getting the flat underfill tool under though even at 380 deg C for about 5 mins. I upped it to 400 deg C then was slowly able to remove a NAND, using very low force. The resistors next to it stayed in place without issue.
Unfortunately about 50% of the pads are ripped off. As @dosdude1 wisely said above, practice first on several other boards with underfill. Did I? No, of course not, I just practiced on lots of plain BGA chips
I suspect my hot air station is under-reporting temperature or something since that time and temp should be enough to melt the solder and soften the underfill. It's a fairly good hobbyist one (Quick 861DW) and I had it on the preheater fairly low so as not to melt anything (just 130 deg C). So perhaps while I was aiming for 'cutting cold butter force' I was applying 'rip off pads nastily force' and most likely it was too cold. 🥲
So, I've got a few spares if anyone else wants a go at also breaking their Mini send me a pm! Two unused KICM223 chips which appear to be in the original packaging, I opened them to look at them with anti-static precautions, but they were sealed. Oh and the rest of the Mac mini maybe, though I'm tempted to keep the pretty case for another project which could still provide more fun... 😀
On the positive side, I tried the second NAND and this came off no problem. Increasing the hot air to 430 degrees C worked nicely. All pads intact. I'm not sure if I lost a resistor on the right or not though, they are so tiny I can't even be sure through the microscope!

(It looks even worse here than in reality with the reflections...)
I presume there aren't any valid configurations for 'left chip only' for this Mini model? 😂
So if I want to save it I have my work cut out with the relife pad repair kit. I can see small copper bits under each pad. Perhaps I can do one a day for a month or so! Presume no-one has the schematic of which of the 110 pins are actually used?
Last edited:
Register on MacRumors! This sidebar will go away, and you'll see fewer ads.


