It isn’t for everyone. But wanting to get the longest life out of my devices is key and given that the north bridge can get hot and operates at 80c at idle I didn’t want to risk killing my fans as they are hard to come by and any aftermarket will run at 100%. Instead I put a SATA to pwm cable to power my fan for the north bridge. It’s not uncommon for the north bridge to break the rivets so anything to lower that risk was welcome also. Again just trying to get as much out of this machine as possible even if those chips are designed to run hot. Also I live in Texas and it gets hot it Texas so anything to lower temps on my machine are welcome.Yes! ...while you put considerably more effort to the topic with even (IMHO) destroying the beauty of the case itself. Without any real need to do so, as nortbridge-chips are known hotrunners and should easily take temps around 70ºC for extended periods of time without any danger of dammage.
But, as you said: to each his own.
Got a tip for us?
Let us know
Become a MacRumors Supporter for $50/year with no ads, ability to filter front page stories, and private forums.
MP 1,1-5,1 Cooler Northbridge on The Mac Pro 5,1 Dual CPU
- Thread starter drolson
- Start date
- Sort by reaction score
You are using an out of date browser. It may not display this or other websites correctly.
You should upgrade or use an alternative browser.
You should upgrade or use an alternative browser.
Hmmm, i doubt a slight speed increasement of the big intake- and exhaust fans from their lowest speed @ ~600 up to 850 - 900 (which was all it took for me to drop the NB-temps from 75 to 66-67) will remarkably shorten their lifes...I didn’t want to risk killing my fans as they are hard to come by and any aftermarket will run at 100%.
...while i would strongly recommend not to make any modifications like shown in #1, as they break the free horizontal airflow trough both of the CPU-heatsinks and therefore will increase the temps of the anyway hotter running rear CPU A even more.
peterc18st
Noctua sell an inline PWM speed controller. = NA-FC1


During this summer 2019 the only thing that gave me cause for concern was the PSU temps.
For next year's summer I will be replacing my 4,1>5,1's PSU fan with the Noctua "A12x25" 120mm unit with the " NA-FC1 " connected in serial.

Amazon.com https://www.amazon.com/Noctua-NF-A12x25-PWM-Premium-Quality-Quiet/dp/B07C5VG64V
Nominally, removal of the motherboard = backplane is required to replace the PSU fan but there is another way ! I will document this process in a future post.
In the meantime this video is very informative
Noctua sell an inline PWM speed controller. = NA-FC1


Noctua NA-FC1, 4-Pin PWM Fan Controller (Black)
Noctua NA-FC1 contrôleur de vitesse du ventilateur 3 canaux Noir
www.amazon.com
During this summer 2019 the only thing that gave me cause for concern was the PSU temps.
For next year's summer I will be replacing my 4,1>5,1's PSU fan with the Noctua "A12x25" 120mm unit with the " NA-FC1 " connected in serial.
Amazon.com https://www.amazon.com/Noctua-NF-A12x25-PWM-Premium-Quality-Quiet/dp/B07C5VG64V
Nominally, removal of the motherboard = backplane is required to replace the PSU fan but there is another way ! I will document this process in a future post.
In the meantime this video is very informative
As an Amazon Associate, MacRumors earns a commission from qualifying purchases made through links in this post.
Yes! ...while you put considerably more effort to the topic with even (IMHO) destroying the beauty of the case itself. Without any real need to do so, as nortbridge-chips are known hotrunners and should easily take temps around 70ºC for extended periods of time without any danger of dammage.
But, as you said: to each his own.
Does this look hamfisted ? Ugly ? Unattractive ? Non-standard ?
Current case ambient temp is 34°C / 93.2F. Northbridge diode is at 58°C
Regardless of the Northbridge chip's published operating temperatures 70°C plus is too hot for such a confined space and results in an overall temperature increase around the CPU A area.
The SATA powered fan I have installed is an Ainex OMEGA Typhoon CFZ10-6010S mm x 60mm x 60mm and is angled down towards the NB heatsink.
It is rated for 3,500 RPM @ 16.14 CFM and is silent due to it's magnetic bearing design.
The 4,1 / 5.1Northbridge diode heatsink's nylon spring retaining rivets surely don't like being at 70°C + for extended periods eg: 10 years for the 2009 4,1. and by comparison the 4,1 / 5,1's heatsink is much, much smaller and therefore much less efficient than the 2008 cMP's heatsink.
2008 cMP Northbridge heatsink
============================================================
The LED drive activity light is extremely useful. It runs from my Samsung 970 EVO ( boot disk ) M.2 PCIe adaptor.
It shows me when the 970 EVO is actually doing something, especially at boot up.
DVD drive doors taped open :
I use an ASUS external DVD drive powered by TWO usb cables standard. Therefore I no longer need internal DVD drives. I have removed the DVD drives housing - a SanDisk Ultra 3D SSD drive now lives in there Velcro taped to the case rear wall. the result is a greatly increased airflow to the PSU fan.
The stock PSU incidentally also seems to run hot despite having been torn apart and thoroughly de-dusted.
My 4,1>5,1 cMP is now ready for `whatever summer 2020 can throw at it.
I RE-ITERATE .. the side cover shown above is from a 2,1 cMP
NOTE 1 : If the weather is extremely hot I use a VL805 2 port PCIe USB 3.0 card ( supported by Mojave 10.14.6 ) to power two other USB powered fans - one is for the Samsung M.2 970 EVO. The other is for RAM banks 1 ~ 4 in front of CPU A. As summer has peaked here in Japan I m not using them at the moment.
NOTE 2 Since may 2019 I have done exhaustive research and testing of the available options leading to substantial, effective Northbridge diode operating temp reductions. Gradually I came to understand that there are two main factors.
1. De-dusting not only all the case plus fans but also ALL of the cMP 'cheesegrater holes" as well.
2. The stock 4,1 / 5,1 Northbridge heatsink was 'shoehorned ' into the CPU tray and appears to be a 'space
saving compromise by Apple at the time. It could have been designed to work more effectively.
There IS space available to extend the heatsink heat dissipation fins.
Consider what 10 years ( 2009 cMP ) of 70°C plus does to the Northbridge heatsink NYLON rivets ?
Also, if one DOES have to replace one or both ( better) rivets then the CPU heatsink must be removed and it's retainer bolts correctly tensioned . . not for the faint heated I wholeheartedly assure you.
Currently I consider this " cooling" project 99.9% successfully completed. My 41>5,1 now runs cooler in every area in hot weather.
The only future change I will be making will be to replace the current Apple PSU fan with a Noctua NF-A12x2 120mm fn with the Noctua NA-FX1 inline PWM power controller. I will make a separate thread regarding this process in the near future.
The naysayers obviously have yet to have their dual cpu tray fail for whatever reason.
For the 5,1 with the spring loaded CPU sockets this isn't a problem at all. And as soon as i replace my 3.33s for the always more affordable getting 3.46ers, i will have a closer look at those nylon pins.then the CPU heatsink must be removed and it's retainer bolts correctly tensioned . . not for the faint heated I wholeheartedly assure you.
Thanks for the hint!
If you want a better Northbridge temperature, reapply the thermal grease. It's not as intimidating as it may seem.
See this post for what I used as replacement rivets. #14
There's plenty of videos out there. It may seem intimidating at first, but I went from an unusable computer (rivet popped yielding zero cooling) to 57c under a HandBrake load.
The Northbridge in my system is actually cooler under a load than at idle with the new thermal paste.
I installed two X5675 in my 5.1 and also replaced the nb heatsink rivets with screws. used thermal grizzly on all components.
Northbridge was at about 86c before, now at about 75c. I think this is still somewhat high...?
Also the derivation in CPU temperature's seems a little bit too much.
feedback much appreciated!
thanks,
g.
edit: this values where taken under no load.

Northbridge was at about 86c before, now at about 75c. I think this is still somewhat high...?
Also the derivation in CPU temperature's seems a little bit too much.
feedback much appreciated!
thanks,
g.
edit: this values where taken under no load.
Northbridge was at about 86c before, now at about 75c. I think this is still somewhat high...?
Also the derivation in CPU temperature's seems a little bit too much.
Those Northbridge temps are pretty normal without an auxiliary fan installed.
Again, ~7-8 deg CPU difference is fairly normal. Remember that CPU B gets fresh cool air running across its heatsink and CPU A then gets it second, as well as the Northbridge cooling under the edge of CPU A's heatsink bleeding heat into CPU A's heatsink.
Last edited:
All looks ok to me!Northbridge was at about 86c before, now at about 75c. I think this is still somewhat high...?
Also the derivation in CPU temperature's seems a little bit too much.
Northbridge temp depends much on room/ambient temp. How much real fresh air the tower gets trough it's front panel. Anything around or slightly above 70 is just fine. And in the first place the difference between the diode and the heat sink right below 10c looks good. It shows, your thermal compound is working properly which is the thing you have the most influence on anyway.
Also CPU A (rear) getting something around 7/8 degrees warmer than CPU B (front) on idle is normal behaviour as it gets it's cooling air preheatetd by B and the northbridge.
[automerge]1575413488[/automerge]
Sorry for double post!
I installed two X5675 in my 5.1 and also replaced the nb heatsink rivets with screws. used thermal grizzly on all components.
Northbridge was at about 86c before, now at about 75c. I think this is still somewhat high...?
Also the derivation in CPU temperature's seems a little bit too much.
feedback much appreciated!
thanks,
g.
edit: this values where taken under no load.
View attachment 880631
Everything looks nothing to me.
It should have a way better solution to keep northbridge stay cool. I don't want to add other fans. I saw amazon sell heatpipes radiator aluminum heatsink. Why not I take out the blades from the aluminum heatsink and put in the between of Northridge's heatsink.

1) I took two blade off.

2) I tested put one in Northridge's heatsink it fit good.


3) Then second one. It fitted beautifully.
I decided to wait and do research more about it. I need your opinions before I go ahead complete it. Thanks

1) I took two blade off.

2) I tested put one in Northridge's heatsink it fit good.


3) Then second one. It fitted beautifully.
I decided to wait and do research more about it. I need your opinions before I go ahead complete it. Thanks
Last edited:
KingBurb
Your thinking is on the right track but I doubt that those 2 blades will have any useful effect.
10 copper blades ' might' lower temps a bit.
I'm definitely interested in seeing the results of your experimentation. Don't give up !
I DO agree that Apple could have made something similar to that type of heatsink in your sample pic ALL blades.
The WHOLE heatsink shown in your your post would definitely yield much more heat IF it could be adapted to fit on the base of the existing Northbridge heatsink. This would require milling the existing NB heatsink from top down and milling the bottom of your sample heatsink and then fitting a very thin COPPER layer for efficient heat transfer between the old & new. Then screw everything together to create the NEW heatsink .. .then . . devise a way to scure it to the Dual CPU tray PCB board..
( Slightly increasing both Booster fans would also greatly assist heat dissipation.).
I worked up a design for the above but managed to lose it ! 😰
I'm on holiday now so I'll mock up a 3D image sometime in the next few days & post it.
I would dearly love to attempt this but simply do not have enough time.
==================================
Today, with a high CFM 10mm x10mm x 60mm USB powered fan ( post #154) my Northbridge Tdiode's temp is 52°C. with just a couple of non-stressful apps running.
During Japan's peak 2019 summer period I managed to keep my NB Tdiode temps at around 56 ~ 60°C even on 39°C days with the (silent) USB powered fan ON.
=====================================================
found that removing ALL accessible dust on the whole Dual CPU tray with a soft, long haired non-conductive brush reduces temps by a couple of degrees.
if you haven't already read it, please take a look at my " Dedusting thread" here https://forums.macrumors.com/thread...mp-reduction-in-dual-cpu-cmp-4-1-5-1.2179729/
Likewise getting the Intake & Exhaust fans to a shiny, polished-looking finish moves a lot more air for the same fan speed.
NOTE : Anyone who thinks that 75 ~ 86° NB Tdiode temps is acceptable, needs to consider how that heat affects components close to it.
Your thinking is on the right track but I doubt that those 2 blades will have any useful effect.
10 copper blades ' might' lower temps a bit.
I'm definitely interested in seeing the results of your experimentation. Don't give up !
I DO agree that Apple could have made something similar to that type of heatsink in your sample pic ALL blades.
The WHOLE heatsink shown in your your post would definitely yield much more heat IF it could be adapted to fit on the base of the existing Northbridge heatsink. This would require milling the existing NB heatsink from top down and milling the bottom of your sample heatsink and then fitting a very thin COPPER layer for efficient heat transfer between the old & new. Then screw everything together to create the NEW heatsink .. .then . . devise a way to scure it to the Dual CPU tray PCB board..
( Slightly increasing both Booster fans would also greatly assist heat dissipation.).
I worked up a design for the above but managed to lose it ! 😰
I'm on holiday now so I'll mock up a 3D image sometime in the next few days & post it.
I would dearly love to attempt this but simply do not have enough time.
==================================
Today, with a high CFM 10mm x10mm x 60mm USB powered fan ( post #154) my Northbridge Tdiode's temp is 52°C. with just a couple of non-stressful apps running.
During Japan's peak 2019 summer period I managed to keep my NB Tdiode temps at around 56 ~ 60°C even on 39°C days with the (silent) USB powered fan ON.
=====================================================
DUST
I can see dust layers on your dual CPU tray.found that removing ALL accessible dust on the whole Dual CPU tray with a soft, long haired non-conductive brush reduces temps by a couple of degrees.
if you haven't already read it, please take a look at my " Dedusting thread" here https://forums.macrumors.com/thread...mp-reduction-in-dual-cpu-cmp-4-1-5-1.2179729/
Likewise getting the Intake & Exhaust fans to a shiny, polished-looking finish moves a lot more air for the same fan speed.
NOTE : Anyone who thinks that 75 ~ 86° NB Tdiode temps is acceptable, needs to consider how that heat affects components close to it.
Last edited:
It isn’t for everyone. But wanting to get the longest life out of my devices is key and given that the north bridge can get hot and operates at 80c at idle I didn’t want to risk killing my fans as they are hard to come by and any aftermarket will run at 100%. Instead I put a SATA to pwm cable to power my fan for the north bridge. It’s not uncommon for the north bridge to break the rivets so anything to lower that risk was welcome also. Again just trying to get as much out of this machine as possible even if those chips are designed to run hot. Also I live in Texas and it gets hot it Texas so anything to lower temps on my machine are welcome.
Clever fan mod . But be very careful not to obstruct with the vertical movement of the Northbridge Controller Heatsink - it does move ever so slightly up and down and that's the reason its secured to the CPU Tray using two push pins ( they're not rivets , please ) . Those fasteners have springs to permit a solid connection between the NB die and heatsink , while permitting vertical movement of the heatsink . If you prevent that heatsink this movement , you will crack the NB die and lose your CPU Tray .
By the way , you should really re-thermal paste your NB Heatsink if you are going to spend time with this
This works on my 4,1>5,1 using the spring from the original broken spring retainers.Clever fan mod . But be very careful not to obstruct with the vertical movement of the Northbridge Controller Heatsink - it does move ever so slightly up and down and that's the reason its secured to the CPU Tray using two push pins ( they're not rivets , please ) . Those fasteners have springs to permit a solid connection between the NB die and heatsink , while permitting vertical movement of the heatsink . If you prevent that heatsink this movement , you will crack the NB die and lose your CPU Tray .
By the way , you should really re-thermal paste your NB Heatsink if you are going to spend time with this. Your Mac will have just awesome durability then .
This works on my 4,1>5,1 using the spring from the original broken spring retainers.
View attachment 885058
I used something safer and better . Nylon push pins bought from Digi-Key . Just cut half of the top of the head so it won't hit the bottom of the CPU heatsink . Once the push pin has been secured through the bottom of the PCB of the CPU Tray , add ordinary red fiber logic board washers to adjust tension as needed . You will need to first remove the PCB from the CPU Tray - it is kept in place by nine P2 screws . I've done this operation hundreds of times . Its not as good as factory original , but better than the alternatives . Model number shown in picture .
Last edited:
Clever fan mod . But be very careful not to obstruct with the vertical movement of the Northbridge Controller Heatsink - it does move ever so slightly up and down and that's the reason its secured to the CPU Tray using two push pins ( they're not rivets , please ) . Those fasteners have springs to permit a solid connection between the NB die and heatsink , while permitting vertical movement of the heatsink . If you prevent that heatsink this movement , you will crack the NB die and lose your CPU Tray .
By the way , you should really re-thermal paste your NB Heatsink if you are going to spend time with this. Your Mac will have just awesome durability then .
Are you saying that the vertical movement is required because of the extreme temp differences and the expansion that can take place? I have ordered and used new push pins from Digi-Key before when I replaced the CPU in an old Mac mini that someone had given me to upgrade it to a faster CPU. I am not sure I see much of difference using nylon screws and nuts with the original springs off the original push pins. I would think either approach should work.
This has been a very interesting thread for sure and got me looking at my NB diode temps. For now using just Macs Fan Control it has dropped down. I think I am going to reapply thermal paste and replace my push pins with nylon screws using the original springs. I have been thinking about replacing the x5650 stock 2.66GHz CPUs with something faster. Might be a good time to do it all at once while I have the processor tray out.
Lots of great information in this thread. Thank you to everyone.
[automerge]1579496571[/automerge]
I noticed other posts with concerns for turning up our fan speeds and wearing our fans out.
I just purchased this 4 fan set on Ebay and they have more if anyone is interested.
$12.89 with free shipping. Heck they even had the make offer button active but I figured that $12.89 was the cheapest I had seen a set for and did buy it now. If someone makes an offer I would be curious how low you got them down to.

Apple Mac Pro 2009-2012 -Set of 4 fans- PCI, PSU, Front CPU W/ Speaker Rear CPU | eBay
This sale is for a fully tested, fully functioning Apple Mac Pro 2009-2012 -Set of 4 fans- PCI, PSU, Front CPU W/ Speaker Rear CPU it will be delivered as pictured. If you have any questions, or require additional information please feel free to contact us through eBays ask seller a question...
www.ebay.com
Are you saying that the vertical movement is required because of the extreme temp differences and the expansion that can take place? I have ordered and used new push pins from Digi-Key before when I replaced the CPU in an old Mac mini that someone had given me to upgrade it to a faster CPU. I am not sure I see much of difference using nylon screws and nuts with the original springs off the original push pins. I would think either approach should work.
This has been a very interesting thread for sure and got me looking at my NB diode temps. For now using just Macs Fan Control it has dropped down. I think I am going to reapply thermal paste and replace my push pins with nylon screws using the original springs. I have been thinking about replacing the x5650 stock 2.66GHz CPUs with something faster. Might be a good time to do it all at once while I have the processor tray out.
Lots of great information in this thread. Thank you to everyone.
[automerge]1579496571[/automerge]
I noticed other posts with concerns for turning up our fan speeds and wearing our fans out.
I just purchased this 4 fan set on Ebay and they have more if anyone is interested.
$12.89 with free shipping. Heck they even had the make offer button active but I figured that $12.89 was the cheapest I had seen a set for and did buy it now. If someone makes an offer I would be curious how low you got them down to.

Apple Mac Pro 2009-2012 -Set of 4 fans- PCI, PSU, Front CPU W/ Speaker Rear CPU | eBay
This sale is for a fully tested, fully functioning Apple Mac Pro 2009-2012 -Set of 4 fans- PCI, PSU, Front CPU W/ Speaker Rear CPU it will be delivered as pictured. If you have any questions, or require additional information please feel free to contact us through eBays ask seller a question...www.ebay.com
Use the spring that came with the push pin , as they are designed to function as a single unit . So don't use the factory spring on an after market push pin . If you mix and match parts , you will probably lose the necessary force you desire . Only Apple knows the force rating for these fasteners , so a replacement pin's force will be something you'll just have to gauge by hand . Get a feel for how tight the factory installed pin is ( if one is still retained ) and replicate that force as best you can . You can actually move it , without removing it , if you try . I have good tactile feedback with my hands and I can feel the proper installation subconsciously as a technician . Those red fiber logic board washers are really handy in setting the proper force , since Apple used a proprietary pin that will never be available retail .
The Northbridge controller chip of this Mac expands and contracts ever so slightly depending on how hard the Mac is used . The range of distance is so minute I don't think the naked eye can notice it .
Thanks for the post, I must say this is a very informative read on a problem I've been avoiding for 5 yearsget Northbridge temp down to 120 F ( 49c ) direct the airflow over the Northbridge HeatsinkView attachment 826579View attachment 826580
Since I'm an old school engineer I'll make a passing comment that everyone should carefully avoid blocking a heat sink. I'm pretty sure that obstructing the intake of any fan reduces its performance. While the air dam innovation looks like it will draw more air over the Northbridge and also increase velocity over the Northbridge heat sink, therefore reducing heat sink and 'diode' temperature there is a lower risk software solution. Personally I would not be leaving that barrier in place for long as its on the in-take side of the fan. Please do comment back as I'd love to hear how its going.
So What did I do ?
After reviewing all the thread comments and making my credit card bend into the spending shape rather than the air dam shape I bought some screws and some nuts and washers and some thermal paste. Despite my partners incredulity that a matching pair of faster CPU's would help the Mac Pro run cooler I convinced them and now have upgraded from x5650>x5680 and a spare pair of X5690 are ordered and in the air.
Problem statement
Northbridge Diode was at 120ºC, smell of smouldering cat fluff was present.
Work statement
Remove All heatsinks and reapply Thermal paste ( no no special brand as there's only a smear in it ).
basically followed this guide.
Mac Pro Single CPU Northbridge Heatsink Repair
Step by Step Illustrated Guide These are easy to follow instructions for replacing the plastic stays on the northbridge heatsink in a Mac Pro 4,1 &...
Outcomes
I've just completed a remove and re-install of the CPU Heatsinks and Northbridge and got my Northbridge heat sink idle temp down to 45ºC. I don't mind a few extra watts of power usage but I don't really have money for another processor board.
Thanks again to EACH poster, right or wrong it was great to see so many brains at work keeping their Mac Pro machines alive.
regards
Attachments
-
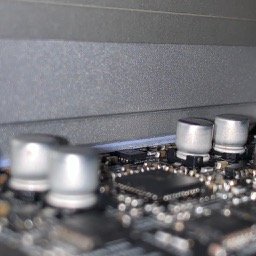 Mac PRo5,1 Northbridge Heatsink with new 2x1mm thermal pads for VRMS from side after fitting.jpg25.3 KB · Views: 528
 -
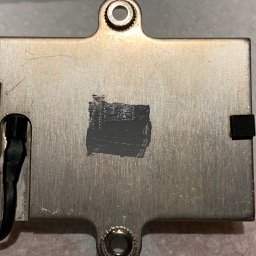 Mac PRo5,1 Northbridge Heatsink face with test thermal paste.jpg27.5 KB · Views: 524
 -
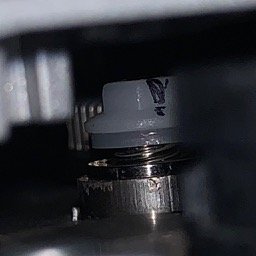 Mac PRo5,1 Northbridge Heatsink with new 15 mm Steel panhead bolts and nylon Top Nuts from sid...jpg18.6 KB · Views: 449
 -
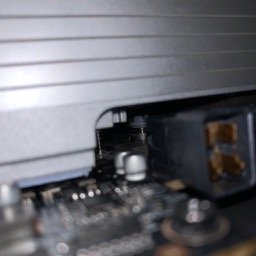 Mac PRo5,1 Northbridge Heatsink with new 15 mm Steel panhead bolts and nylon Top Nuts from sid...jpg19.1 KB · Views: 492
 -
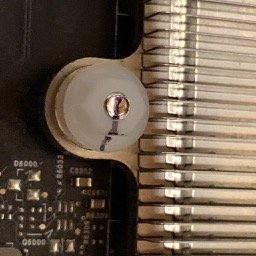 Mac PRo5,1 Northbridge Heatsink with new 15 mm Steel panhead bolts and nylon Top Nuts Front.jpg28.3 KB · Views: 478
 -
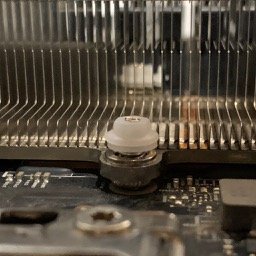 Mac PRo5,1 Northbridge Heatsink with new 15 mm Steel panhead bolts and nylon Top Nuts Side Close.jpg30.2 KB · Views: 460
 -
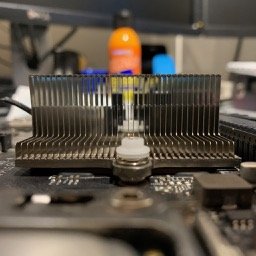 Mac PRo5,1 Northbridge Heatsink with new 15 mm Steel panhead bolts and nylon Top Nuts side.jpg55.4 KB · Views: 515
 -
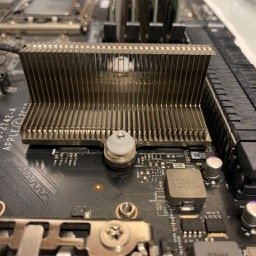 Mac PRo5,1 Northbridge Heatsink with new 15 mm Steel panhead bolts and nylon Top Nuts.jpg33.7 KB · Views: 881
 -
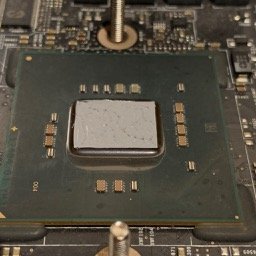 Mac PRo5,1 Northbridge with test thermal paste.jpg25.9 KB · Views: 648
Last edited:
Wow these MFC settings are definitely wrong... Unless you want to keep your Mac quiet. These settings counteract each other:Thanks for the post, I must say this is a very informative read on a problem I've been avoiding for 5 years
Since I'm an old school engineer I'll make a passing comment that everyone should carefully avoid blocking a heat sink. I'm pretty sure that obstructing the intake of any fan reduces its performance. While the air dam innovation looks like it will draw more air over the northbridge and increase velocity over the norrtbridge heat sink therefore reducing temperature there is a lower risk software solution and personally I would not be leaving that barrier in place for long. Please do comment back as I'd love to hear how its going.
What did I do ?
After reviewing all the thread comments and making my credit card bend into the spending shape rather than the air dam shape I bought some screws and some nuts and washers and some thermal paste. Despite my partners incredulity that a matching pair of faster CPU's would help the Mac Pro run cooler I convinced them and now have upgraded from x5650>x5680 and a spair pair of X5690 iare ordered and in the air.
Problem statement
Northbridge Diode was at 120ºC, smell of smouldering cat fluff was present.
Work statement
Remove All heatsinks and reapply Thermal paste ( no no special brand as there's only a smear in it ).
basically followed this guide.
I use the Macs Fan Control Pro application to set a custom range for the 3 key fans to keep the Northbridge between 45 and 60ºC. ( come on ISO metric is old news ).
Mac Pro Single CPU Northbridge Heatsink Repair
Step by Step Illustrated Guide These are easy to follow instructions for replacing the plastic stays on the northbridge heatsink in a Mac Pro 4,1 &...www.ifixit.com
Outcomes
I've just completed an remove and re-install of the CPU Heatsinks and Northbridge and got my Northbridge down to 45ºC. I don't mind a few extra watts of power usage but I don't really have money for another processor board. Might mac my Mac Pro 5,1 from 2010 last until I get my hands on a new Mac Pro 7,1!
Thanks again to EACH poster, right or wrong it was great to see so many brains at work keeping their Mac Pro machines alive.
regards
Install Macs Fan Control
Macs Fan Control is a utility that gives you considerable control over the fans in your Mac Pro. It is
possible to configure it incorrectly and make the problem to worse. Don't use fixed speeds. Use dynamic
settings taken from the Mac Pro temperature sensors. Here is my recommended configuration.

The fans start to speed up at the lower temperature, and reach maximum speed at the higher temperature.
Do not make the mistake of thinking that the upper temperature is the maximum that the respective
components can reach. The fans at full speed cannot keep the components at a safe temperature if they are
heavily loaded for more than a few minutes.
@startergo Thanks for the tip.Wow these MFC settings are definitely wrong... Unless you want to keep your Mac quiet. These settings counteract each other:
I wonder if we can install a plastic board like this to achieve similar result.
View attachment 826601
@h9826790 Yes that is indeed a great idea.
I've also been thinking of a way to get more air over the NB Heatsink. I was just brute forcing the problem for a few days with a Macs Fan Control driven brute force attempt at pushing more air through the A CPU ( at rear of the Mac ). I'm just generally unhappy with this approach.
Why?
1. Using the CPU A Boost fan method from my previous post was getting on my nerves as the small fan inside the Heatsink was running at mid speed give a great mosquito pitched whine.
2. moving back to "auto" settings and therefore without the whine the Northbridge temperatures were just too high in mid 60ºC for my comfort and despite ignoring my Northbridge for 5 years I'd like to not have the processor board fail from inaction.
So to Action!
Get McGuyver prototype, what ever was handy and could be iterated before dinner was due on the table (since it was my turn to cook ).
Prototype
Here's my 15 minute prototype in A4 80 GSM A4 and Cello tape. which I left installed and running under test while cooking pasta bolognese from a frozen base sauce with fresh everything else.
ta' da THE Mac Pro Air Baffle ( origami edition ) is born.
MacsFan settings
Back story: I've spent a bit of research time from my olden days at IBM. we introduced a Racked server "back in the day" and it had an innovative Air baffle as part of a memory and CPU up-scalable feature that allowed some similar scaling as the cMP ( Classic Mac Pro series ). There was one part in particular that I was enamored with. 'The Air Baffle', IT was both a gift and a impediment to servicing and adding RAM but if left out it was well known by field engineers to be a required part to avoid auto shutdown conditions.
Therefore I posit that while Apple's very capable engineers configured the processor board for a laminar flow they did not win the marketing / design battle to add a air flow guide ( baffle) to direct air over the North Bridge Heatsink Fins.
Bear in mind that IBM x346 had a similar power density but with 16 redundant fans and no effective sound output limits. X346 26.44 litres with 2 x 650 Watt Power Supplies giving 51 Watts per litre versus Mac Pro 5,1 with 43 litres and 980 Watts 22.8 Watts per litre or less than half the density. No criticism intended but there are therefore weaker spots in the design, aka the NB thermal problem!
What did IBM do ?
Testing
Initial testing Using iCore System Load running full load on 2 x 6 Cores of x5680 with 8 x 4 GB RAM slots 1-8 Full.
It seems the Inlet fan can provide sufficient total pressure to keep the velocity high enough to actually reduce the Northbridge temp check the attached 45 minute Full load test graph captured using Hardware Monitor.
Next Steps
Given the Hypothesis seems supported by the experiment I will now try fabricating a fit test model on my hobby 3d PLA Printer, It wil take some more time to get a heat resistant version.
Time Frame
Possibly 3 weeks for a fit testable engineering prototype.
If you're interested just pop a reply.
Last edited:
Looking forward for your results.@h9826790 Yes that is indeed a great idea.
I've also been thinking of a way to get more air over the NB Heatsink. I was just brute forcing the problem for a few days with a Macs Fan Control driven brute force attempt at pushing more air through the A CPU ( at rear of the Mac ). I'm just generally unhappy with this approach.
Why?
1. Using the CPU A Boost fan method from my previous post was getting on my nerves as the small fan inside the Heatsink was running at mid speed give a great mosquito pitch wine.
2. Without the win the Northbridge temperatures were just too high in mid 60ºC for my comfort and despite ignoring my Northbridge for 5 years I'd like to not have the processor board fail from inaction.
Prototype
Here's my 15 minute prototype in A4 80 GSM A4 and Cello tape.
Air Baffle
View attachment 919346View attachment 919347View attachment 919348
MacsFan settings
Back story: I've spent a bit of research time from my olden days at IBM. we introduced a Racked server "back in the day" and it had an innovative scalable feature that allowed some similar scaling as the cMP ( Classic Mac Pro series ). There was one part in particular that I was enamored with. The Air Baffle, IT was both a gift and a impediment to servicing and adding RAM but if left out it was well known by field engineers to be a required part.
Therefore I posit that while Apple's very capable engineers configured the processor board for a laminar flow they did not win the marketing / design battle to add a air flow guide ( baffle) to direct air over the North Bridge Heatsink Fins.
Bear in mind that IBM had a similar power density but with 16 redundant fans and no effective sound output limits.
View attachment 919344
Testing
Initial testing Using iCore System Load running full load on 2 x 6 Cores of x5680 with 8 x 4 GB RAM slots 1-8 Full.
It seems the Inlet fan can provide sufficient total pressure to keep the velocity high enough to actually reduce the Northbridge temp check the attached 45 minute Full load test graph captured using Hardware Monitor.
View attachment 919349
Next Steps
Given the Hypothesis seems supported by the experiment I will now try fabricating a fit test model on my hobby 3d PLA Printer, It wil take some more time to get a heat resistant version.
Time Frame
Possibly 3 weeks for an testable engineering prototype.
If your'e interested just pop a reply.
@h9826790 Yes that is indeed a great idea.
I've also been thinking of a way to get more air over the NB Heatsink. I was just brute forcing the problem for a few days with a Macs Fan Control driven brute force attempt at pushing more air through the A CPU ( at rear of the Mac ). I'm just generally unhappy with this approach.
Why?
1. Using the CPU A Boost fan method from my previous post was getting on my nerves as the small fan inside the Heatsink was running at mid speed give a great mosquito pitched whine.
2. moving back to "auto" settings and therefore without the whine the Northbridge temperatures were just too high in mid 60ºC for my comfort and despite ignoring my Northbridge for 5 years I'd like to not have the processor board fail from inaction.
So to Action!
Get McGuyver prototype, what ever was handy and could be interated before dinner was due on the table ( my turn to cook ).
Prototype
Here's my 15 minute prototype in A4 80 GSM A4 and Cello tape. which I left installed and running under test while cooking pasta bolognese from a frozen base sauce with fresh everything else.
ta da' THE Mac Pro Air Baffle ( origami edition ) is born.
View attachment 919346View attachment 919347View attachment 919348
MacsFan settings
Back story: I've spent a bit of research time from my olden days at IBM. we introduced a Racked server "back in the day" and it had an innovative Air baffle as part of a memory and CPU up-scalable feature that allowed some similar scaling as the cMP ( Classic Mac Pro series ). There was one part in particular that I was enamored with. 'The Air Baffle', IT was both a gift and a impediment to servicing and adding RAM but if left out it was well known by field engineers to be a required part to avoid auto shutdown conditions.
Therefore I posit that while Apple's very capable engineers configured the processor board for a laminar flow they did not win the marketing / design battle to add a air flow guide ( baffle) to direct air over the North Bridge Heatsink Fins.
Bear in mind that IBM x346 had a similar power density but with 16 redundant fans and no effective sound output limits. X346 26.44 litres with 2 x 650 Watt Power Supplies giving 51 Watts per litre versus Mac Pro 5,1 with 43 litres and 980 Watts 22.8 Watts per litre or less than half the density. No criticism intended but there are therefore weaker spots in the design, aka the NB thermal problem!
What did IBM do ?
View attachment 919344
Testing
Initial testing Using iCore System Load running full load on 2 x 6 Cores of x5680 with 8 x 4 GB RAM slots 1-8 Full.
It seems the Inlet fan can provide sufficient total pressure to keep the velocity high enough to actually reduce the Northbridge temp check the attached 45 minute Full load test graph captured using Hardware Monitor.
View attachment 919349
Next Steps
Given the Hypothesis seems supported by the experiment I will now try fabricating a fit test model on my hobby 3d PLA Printer, It wil take some more time to get a heat resistant version.
Time Frame
Possibly 3 weeks for an testable engineering prototype.
If your'e interested just pop a reply.
Just a quick update with Fans speeds achieved, which is "nearly normal" as per "auto" settings
Register on MacRumors! This sidebar will go away, and you'll see fewer ads.

