Become a MacRumors Supporter for $50/year with no ads, ability to filter front page stories, and private forums.
Status
The first post of this thread is a WikiPost and can be edited by anyone with the appropiate permissions. Your edits will be public.

Diego107

macrumors newbie
Feb 10, 2018
1
2
Schweiz
Thanks you for the solution. It is great!

It work perfectly for my MacBookPro 2011 with a HD where high sierra is on it.

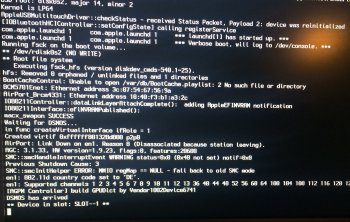
With my HD where Lion 10.7 is on it, the graphic ist ok during the boot, but it hangs up... last Entry in Verbose Mode:
** Device in Slot: SLOT -- 1 **
The same HD (Lion) work on a 13" MacBookPro younger withouts problems.

Anyone have an idea?

Thank you very much
 

Attachments

  • IMG_1668.jpg
    IMG_1668.jpg
    705.5 KB · Views: 786
  • Like
Reactions: AppleMacFinder

stephenvis

macrumors newbie
Sep 9, 2007
16
3
Please excuse me for my ignorance! But i have some questions:

1. Which method that there is out there now is the best? The method on this thread or one of the others?
2. Will this method work perfectly? My sister bought a new laptop and i'm trying to fix her old 2011 mpb. But i'm wondering if this fix is decent enough to sell it afterwards or that i should just go with a hardware upgrade and sell it for a tiny bit of profit.

Thanks guys!
 
  • Like
Reactions: AppleMacFinder

nsgr

macrumors 6502
May 22, 2017
317
117
I'm going updating this post because I have to do some reboots in Macbook Pro.

Macbook Pro 15" 2011 - Intel HD3000 and AMD Radeon HD 6750M - Sierra and High Sierra - Istatmenu.

The agc option in nvram boot-args actually influences the temperature.

AGC option -> only set in Recovery Mode (Commnad + R at boot) or Single User Recovery Mode (Command + R + S at boot).

Test done with the system in idle. Only Active Monitor and Terminal open.

Temperature measured after 4 minutes of manually loading AMDRadeonX3000.kext.
Code:
sudo kextload /DisableExtensions/AMDRadeonX3000.kext


0 - agc=0 - It greatly decreases the temperature AMD GPU and System - tested Sierra and High Sierra - Istatmenu.

System Temperature: 40ºC
GPU Die Analog: zero or 4ºC

Code:
nvram boot-args="-v agc=0"


1 - agc=1 - Does not lower the temperature of the AMD GPU and System - tested Sierra and High Sierra - Istatmenu.

Code:
nvram boot-args="-v agc=1"


2 - agc=2 - Does not lower the temperature of the AMD GPU and System - tested Sierra and High Sierra - Istatmenu.

System Temperature: 50ºC - 55ºC
GPU Die Analog: 45ºC - 50ºC

Code:
nvram boot-args="-v agc=2"


3 - agc=3 - Does not lower the temperature of the AMD GPU and System - tested Sierra and High Sierra - Istatmenu.

System Temperature: 50ºC - 55ºC
GPU Die Analog: 45ºC - 50ºC

Code:
nvram boot-args="-v agc=3"

I have not yet tested agc 4, 5, 6, 7 and 8.


9 - agc=9 - It greatly decreases the temperature given AMD GPU and System - tested only with High Sierra - Istatmenu.

System Temperature: 40ºC
GPU Die Analog: zero or 4ºC

Code:
nvram boot-args="-v agc=9"


In the High Sierra, there is an executable file called AGDCDiagnose. It stays inside AppleGraphicsControl.kext.

AGDCDiagnose provides various information about Intel, AMD and Nvidia GPUs.

Code:
AGDCDiagnose -a
-bash: AGDCDiagnose: command not found

This error above occurs because on the UNIX system the executable file has to be configured in the PATH (usually /bin, /sbin, etc).

As the AGDCDiagnose is outside the above directories, then it has to be placed "./" before the AGDCDiagnose.

Alternative 1 - only High Sierra
Code:
cd /System/Library/Extensions/AppleGraphicsControl.kext/Contents/MacOS/
./AGDCDiagnose -a

Alternative 2 - only High Sierra
Code:
./System/Library/Extensions/AppleGraphicsControl.kext/Contents/MacOS/AGDCDiagnose -a

AGDCDiagnose Version: 3.16.21
## ScanPort - Start ##
[1] IOService:/IOResources/AppleGPUWrangler
Vendor: Apple [0000106b]: AppleGPUWrangler [8 10000] (0)
[2] IOService:/AppleACPIPlatformExpert/GMUX/AppleMuxControl/AGDCMuxClientControl
Vendor: AppleMuxControl [0000106b]: AppleMuxControl [9 10000] (0)
## ScanPort - End ##
## Display Metrics - Start ##
Display Metric Tool Version: 1.2
Display Metric Plugin Version: 1.2 AGDC Version: 3.16.21
Dumping Metric Logs: currentlog(0) logsize(32768) numberlogs(819)
Total lines: 1
## Display Metrics - End ##
## Mux state - Start ##

System is in Dynamic mode: Better Performance Mode set, using Integrated

gMUX Status: Version: 1.9.23, 3D:2, FB:4
LVDS: IG [DDC: IG], DP: IG [bf, 0]

IG: FB0:on  FB1:N/A FB2:N/A 3D:idle HDA:N/A  Power:on
EG: FB0:off FB1:off FB2:off 3D:idle HDA:idle Power:on

Switch Statistics: 0 Switches 0 Errors
Policy:off GPUPowerDown:off Backlight Control:on Recovery:on
Power State Machine IG: 0 EG: 0
StateMachine: 0 [AGC_GPU_IDLE]
gMUX Status: Version: 1.9.23 LVDS: IG [DDC: IG], DP: IG

For agc=0 or agc=9, after the kextload AMDRadeonX3000.kext, the AMD GPU switches to the state Power: off.

IG: Intel GPU (integrated)
EG: AMD GPU (discrete)

Before kextload AMDRadeonX3000.kext:
IG: FB0: on FB1:N/A FB2:N/A 3D:idle HDA:N/A Power: on
EG: FB0: off FB1: off FB2: off 3D:idle HDA:idle Power: on

After kextload AMDRadeonX3000.kext:
IG: FB0: on FB1:N/A FB2:N/A 3D:idle HDA:N/A Power: on
EG: FB0: off FB1: off FB2: off 3D:idle HDA:idle Power: off

For agc=1, agc=2, agc=3, after the kextload AMDRadeonX3000.kext, AMD GPU continues in the state Power: on.

If you put a negative sign on the agc, then it goes crazy.
Code:
nvram boot-args="-v agc=-0"
or
Code:
nvram boot-args="-v agc=-1"

1 - The message appears in boot verbose "AGC: force unload"

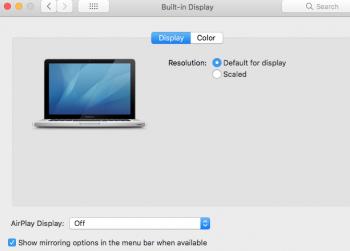
2 - Disappears brightness control in System Preferences -> Display.

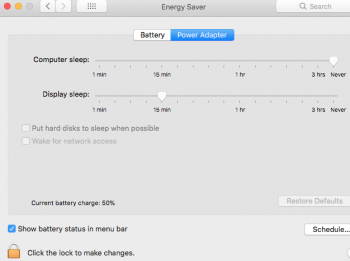
3 - Disappears the option to enable / disable "Automatic Graphics Switching" in -> System Preferences -> Energy Saver.

4 - Istatmenu informs that there is an "ATI" GPU showing the letter "A". Even with the nvram gpu-powe-prefs=%01%00%00%00 for Intel GPU.

https://bjango.com/help/istatmenus6/cpugpu/

5 - The gfxCardStatus app does not load and informs that the system has only one GPU (not dual GPU).

6 - System Information -> Graphics/Displays -> show AMD and Intel GPU -> show Intel GPU as Active GPU -> Online: Yes
 

Attachments

  • MacbookPro-2011-AMD-Intel-GPU-System-Preferences-Display-AGC-Negative-value.png
    MacbookPro-2011-AMD-Intel-GPU-System-Preferences-Display-AGC-Negative-value.png
    63.3 KB · Views: 262
  • MacbookPro-2011-AMD-Intel-GPU-System-Preferences-Energy-Saver-AGC-Negative-value.png
    MacbookPro-2011-AMD-Intel-GPU-System-Preferences-Energy-Saver-AGC-Negative-value.png
    55.7 KB · Views: 314
Last edited:

VoorhR

macrumors newbie
Feb 11, 2018
1
1
If you don't have time to read my story (which also describes some interesting technical approaches) just scroll down this thread until a "100% WORKING SOLUTION" text

Discrete AMD GPU of my 2011 MacBook Pro 8,2 has finally failed because of the reasons mentioned here ( http://logicboardmac.blogspot.ru/ ) and there ( https://www.macrumors.com/2015/02/19/2011-macbook-pro-repair-program-apple/ ) . It has been working perfectly for 6 years under quite a high load, even tried SETI@HOME mining at background! So I was confident that my MBP is not affected by bad solder / bad soldering quality and didn't want to bring it to Apple for a free repair program - partially because couldn't find the time to pause my important software projects, partially because I was afraid that Apple might give me a less reliable logic board or refuse a free repair because of the several unrelated repairs that I did manually by myself earlier to save money: changed thermal paste a few times, replaced the internal battery 2 times, replaced a keyboard with broken buttons, etc. But it finally broke down last week: laptop's screen image became distorted, it refused to boot OS X (always freezing half-way), and - Apple free repair program has already ended! I know there are affordable solutions like $50 BGA resoldering at unofficial local repair shop and that its possible to get a new replacement HD 6750M chip from AliExpress for $35 or cheaper ( http://www.aliexpress.com/item/DC-2...0028-216-0810028-BGA-Chipset/32764872143.html or https://www.aliexpress.com/item/DC-2015-New-216-0810001-216-0810001-Graphic-Chipset/32718112928.html , because don't know if this is true - https://www.rossmanngroup.com/board...0604-replace-216-0810005-gpu-with-216-0810028 ) to guarantee a successful repair, so the total price of repair would be either $50 or $50+$35=$85 - less than $100 in any case. But I don't like investing money to the old computers, so I have thought - what if there is some hack to force MBP to use integrated graphics ALL THE TIME, even while booting ? And then started to explore the possible solutions...

===

First of all, it is possible to successfully boot a MBP to OS X while still using the failed GPU, after you remove the AMD drivers by booting in command line mode (CMD+S) and entering these commands:
1) fsck -fy (to check a disk)
2) mount -uw / (mount a root filesystem with read/write permissions)
3) sudo mkdir /AMD_Kexts/ (make a directory to store the AMD drivers in case you'll need them in future)
4) sudo mv /System/Library/Extensions/AMD*.* /AMD_Kexts/ (move the AMD drivers)
5) sudo rm -rf /System/Library/Caches/com.apple.kext.caches/ (remove the AMD drivers cache)
6) sudo mkdir /System/Library/Caches/com.apple.kext.caches/ (just in case OS X will be dumb and will not recreate this directory, I am creating it for OS X)
7) sudo touch /System/Library/Extensions/ (to update the timestamps so that new driver caches - without AMD drivers - will be definitely rebuilt)
8) sudo umount / (umount a partition to guarantee that your changes are flushed to it)
9) sudo reboot

The degree of your inconvenience while doing these steps - strongly depends on how heavily a screen's image is distorted in your case. In my case it was even more difficult because the OS X partition became a "read-only" partition (because of too many emergency shutdowns I did while desperately trying to boot OS X with a failed GPU) so I had to remove a hard drive from MacBook Pro and (using a USB to SATA 2.5" adapter taken from my portable HDD) attached it to a computer with Linux, then followed these instructions:

https://superuser.com/questions/961401/mounting-hfs-partition-on-arch-linux (1st answer) - carefully executed a number of commands, calculated a sizelimit for my parition layout, and finally ran sudo mount -t hfsplus -o force,rw,sizelimit=YOURNUMBER /dev/sdb2 /mnt to mount this HFS+ partition to /mnt directory in read-write mode. Then I performed these "1)-7)" steps you see above, and also repaired a filesystem by running sudo fsck.hfsplus -f /dev/sdb2 before unmounting a partition with sudo umount /mnt and putting a hard drive back to MBP...

===

This gave me a MBP which could boot to OS X although STILL using a broken AMD GPU: so it screen's image is very distorted (could browse the Internet but quite inconvenient to read a text), Launchpad is super laggy, and you can't switch to Integrated GPU using gfxCardStatus because: without AMD drivers (which we had to remove to successfully boot to OS X) Macbook Pro thinks its' internal screen is External Display and gfxCardStatus tells it is impossible to switch because External Display is using AMD GPU. Somewhere I found a suggestion that it is possible to rebuild a gfxCardStatus from the source code - https://github.com/codykrieger/gfxCardStatus - with removed or commented out 156-166 lines in the ./gfxCardStatus/Classes/GSProcess.m to make it to ignore the external display:

// find out if an external monitor is forcing the discrete gpu on
CGDirectDisplayID displays[8];
CGDisplayCount displayCount = 0;
if (CGGetOnlineDisplayList(8, displays, &displayCount) == noErr) {
for (int i = 0; i < displayCount; i++) {
if ( ! CGDisplayIsBuiltin(displays))
[list addObject:[NSDictionary dictionaryWithObjectsAndKeys:
Str(@"External Display"), kTaskItemName,
@"", kTaskItemPID, nil]];
}
}


So I rebuilt a gfxCardStatus using the instructions from the last reply of this issue -
https://github.com/codykrieger/gfxCardStatus/issues/229
(also had to download a MacOSX10.11.sdk from here - https://github.com/phracker/MacOSX-SDKs/releases - unpack and copy it to XCode's /Applications/Xcode.app/Contents/Developer/Platforms/MacOSX.platform/Developer/SDKs/MacOSX10.11.sdk - because of the Apple's stupidity the latest XCode for El Capitan does not include SDK for El Capitan!) However, it still didn't work - gfxCardStatus only pretended that it has switched to Integrated GPU, while in reality OS X did not let it switch! Even after I edited ./gfxCardStatus/Classes/GSGPU.m file to enable the mysterious "Nuke it from orbit switching" option, it still couldn't switch...

===

Then I discovered this interesting repository - https://github.com/0xbb/gpu-switch - which is partially similar by its' source code to gfxCardStatus but also has the "Login Hooks" (install_hooks.sh) to "automate the switching process for login/logout". Sadly it didn't work for me... However, there is a very interesting gpu-switch text file right at the root of this repository, which describes the EFI variables!

https://github.com/0xbb/gpu-switch/blob/master/gpu-switch

After studying it and also reading this issue's comments - https://github.com/0xbb/gpu-switch/issues/11 - I became confident to try this solution, but found out that my MacBook Pro 2011 8,2 with OS X El Capitan 10.11.6 is in a VERY problematic situation:

1) rEFInd is not installed, and to install it - must disable SIP protection. But I cannot boot to Recovery mode (Command+Option+R) or to OS X Installation DVD/USB (hold Option), (to disable SIP), because they freeze while booting! - although I removed AMD kexts from my system, of course these recovery tools are using AMD kexts integrated to their design. Also cannot use Rootfool hack ( https://github.com/gdbinit/rootfool ) to disable SIP during runtime, because it works only at OS X version older than 10.11.4

2) Tried overheating my Macbook Pro on purpose (forcing CPU usage to 100% and putting it to a tightly closed bag) to force it to shutdown from overheating and then quickly reboot so that Integrated graphics will be enabled during the boot time - making it possible to boot to Recovery. But because of the wonderful high end thermal paste I have applied not so long ago - cannot overheat it even after waiting for a long time! At this point I thought that could either: a) remove AMD kexts from Installation media, or b) to connect MBP's hard drive to a Linux machine again and run a bunch of chmods to remove the SIP flags from the directories mentioned here ( http://apple.stackexchange.com/questions/193368/what-is-the-rootless-feature-in-el-capitan-really ) which could potentially make a system unbootable, or c) to try installing rEFInd to HFS+ partition directly from a Linux machine with root rights because it will bypass SIP --- but have not explored these options, although some of them might have worked...

3) Wanted to boot a Linux LiveCD to edit the EFI variables from there, but no matter what I did: tried booting straight without GRUB option modifications, tried editing GRUB boot options (with "e" key) to add nomodeset / remove quiet splash / or both in every combination , or like suggested in this article ( https://wiki.archlinux.org/index.php/MacBookPro8,1/8,2/8,3_(2011) ) also add i915.modeset=0 radeon.modeset=0 or radeon.modeset=0 i915.modeset=1 i915.lvds_channel_mode=2 ; and then pressed Fn+F10 or Shift+Ctrl+Fn+F10 to boot with these options: but the Linux boot process always failed at different boot stages, no matter what popular user-friendly Linux distribution or what version of it I am trying: tried many releases of Ubuntu / Lubuntu / Fedora , even the old "AMD64 Mac" and "Alternate AMD64 Mac" images, but they always failed - either at the very beginning of boot process (black screen, or a black screen with a blinking or stuck _ character at the left upper corner) or failed at the very end of it - right before it is supposed to show a graphical desktop environment...

Later, totoe_84 wrote that he was able to boot Ubuntu in graphical mode using the following setup for GRUB:
  • To disable the AMD graphics card I added the following lines after set gfxpayload=keep
outb 0x728 1
outb 0x710 2
outb 0x740 2
outb 0x750 0
  • Next I added the following after quiet splash
    i915.lvds_channel_mode=2 i915.modeset=1 i915.lvds_use_ssc=0
(based on https://ubuntuforums.org/showthread.php?t=2157775 )

===

Then I remembered that there are not-mainstream Linux distributions for advanced users, which have a LiveCD without any graphical interface: you are dropped to a pure console and you are supposed to install the system along with only those graphical interfaces and software packages / groups of packages which you explicitly select. For example: Arch Linux (https://www.archlinux.org/) and Gentoo Linux (https://gentoo.org/) . Because their LiveCD does not have a graphical interface, they could be booted without a problem to a pure Linux console and there you could edit the EFI variables ! So here is a...

===
=== 100% WORKING SOLUTION
===
=== Force your MBP to ALWAYS use Intel integrated GPU (EFI variable fix)
===
=== to make it great again ! ;)
===


1) Create the Arch Linux LiveCD/LiveUSB :

You need a working computer for that and a spare CD/DVD/USB drive. Download the latest Arch Linux ISO image from this page - https://www.archlinux.org/download/ , at the time of writing it is archlinux-2017.03.01-dual.iso . Then you could either simply burn this ISO to CD/DVD (which later could be either inserted to MBP's SuperDrive or External DVD Drive connected to MBP by two USB cables) or create a bootable USB: use the great detailed instructions from this page, https://wiki.archlinux.org/index.php/USB_flash_installation_media

2) Boot to it: insert this CD/DVD/USB to Macbook Pro, hold Option key while booting, choose "EFI boot" (that is your bootable installation media), press "e" key to edit the GRUB options of the Arch Linux archiso x86_64 UEFI CD menu entry while it is selected at the main screen, add nomodeset to the end of this line and press Enter. If everything is done correctly, you will find yourself at the Linux console!

3) Edit EFI vars: looks like efivarfs filesystem is mounted by default! So you can already cd /sys/firmware/efi/efivars and ls to explore this directory and see if there is a "gpu-power-prefs-..." variable (where ... is UUID of this variable). If there is such a variable, its better to remove it with rm. In my case the efivarfs has been mounted by default with read/write permissions, but if you are getting the "operation not permitted" message while attempting to rm, it means that in your case efivarfs has been mounted as read-only and you need to remount it with read-write permissions and try again (credits to totoe_84 for this valuable addition) :
*) cd /
*) umount /sys/firmware/efi/efivars/
*) mount -t efivarfs rw /sys/firmware/efi/efivars/
*) cd /sys/firmware/efi/efivars/

If your screen is so distorted that it is difficult to see the letters, just start typing the rm gpu-power-pre and then press TAB key for autocompletion. In my case there were not such a EFI variable, only "gpu-active-..." and maybe somehow related "gfx-saved-config-restore-status-..." . Then I looked again at that gpu-switch text file (mentioned above, https://github.com/0xbb/gpu-switch/blob/master/gpu-switch),
and entered THESE COMMANDS:

*) chattr -i "/sys/firmware/efi/efivars/" <----- skip this command

Actually a gpu-switch script had "${sysfs_efi_vars}/${efi_gpu}" but I didnt have a "gpu-power-prefs-..." variable - so, partially by mistake, I didn't add that efi_gpu suffix and entered this incomplete path accidentally

*)
printf "\x07\x00\x00\x00\x01\x00\x00\x00" > /sys/firmware/efi/efivars/gpu-power-prefs-fa4ce28d-b62f-4c99-9cc3-6815686e30f9

Did not have a EFI "gpu-power-prefs-" variable so I thought that it will be OK to create a new one with a random UUID - in this case, taken directly from a gpu-switch script

*) chattr +i "/sys/firmware/efi/efivars/gpu-power-prefs-fa4ce28d-b62f-4c99-9cc3-6815686e30f9"

http://www.tecmint.com/chattr-command-examples/ - chattr (Change Attribute) is a command line Linux utility that is used to set/unset certain attributes to a file in Linux system to secure accidental deletion or modification of important files and folders, even though you are logged in as a root user.
...
Syntax of chattr ---> chattr [operator] [flags] [filename]
...
A file is set with ‘i‘ attribute (+i as you see in this command) ---> cannot be modified (immutable). Means no renaming, no symbolic link creation, no execution, no writable, only superuser can unset the attribute.
...
Operator
  1. + : Adds the attribute to the existing attribute of the files.
  2. : Removes the attribute to the existing attribute of the files.
  3. = : Keep the existing attributes that the files have.
This chattr command is supposed to lock a file to make it accessible only by "superuser" - and so that, while booting, your EFI will have no chance to screw up your gpu-power-prefs-... variable under any circumstances

*) cd /

Could not unmount efivars if you are inside this directory, so change to the root directory

*) umount /sys/firmware/efi/efivars/

Guarantees that your EFI variables are flushed to efivarfs filesystem, please unmount it safely before rebooting)

*) reboot

===> IF YOU DID EVERYTHING CORRECTLY, MOST LIKELY THAT YOUR MACBOOK PRO IS NOW USING INTEGRATED GRAPHICS WHILE BOOTING, AFTER BOOTING, AND IS WORKING GREAT AGAIN ! ;)

In the future maybe you could need to re-apply this solution if you would have to reset your PRAM / NVRAM / SMC because of some other problems, so remember this solution somewhere... Funny thing: now you can't switch to Discrete GPU even using gfxCardStatus, it is forever stuck at Integrated


I spent two working days to discover this solution, and really hope that it will work flawlessly for every MBP owner with a broken discrete GPU. Good luck!
[doublepost=1518379828][/doublepost]Hi AppleMacFinder,

Thanks for your great work and post.
I am almost getting there ...

I run High Sierra and when I run the process you advice, I get to boot up my computer and login to my account.
I can switch between users by logging in and out.

Yet when I power down my macbook pro 2011 and start it up again it seems it boots up again with the AMD GPU and I have a bad screen which also means I can not log in anymore. Redoing the process below works but it is tedious to do that every time after a reboot.

I did reset the SMC and PRAM before doing the script.

Any thoughts?
 
  • Like
Reactions: AppleMacFinder

Bravo3013

macrumors member
Sep 1, 2016
67
34
Norway
I heard that forcing the mac to only use integrated graphics disables the minidisplay port. Is this true?

The Mini DisplayPort (or Thunderbolt 1/2) is not disabled, but you cannot use an external display due the interface being hardwired to the broken AMD GPU. You can however use AirPlay mirroring if you want an external display.

If you need an external display an eGPU setup might work, which I am going to test later once I receive my GTX 1080. I will post an update on the forum later to inform wether or not an eGPU works or not :)
[doublepost=1518451004][/doublepost]
330qjpg.jpg

http://i63.tinypic.com/330qjpg.jpg

hi

where do i make mistakes?
Thanks


Your hard drive is still in read only. You have forgotten a backslash in the mount command. You must do the following:
1) fsck -fy
2) mount -uw /
Do not forget the slash after -uw

Hope this works.
 
Last edited:

onosideboard

macrumors newbie
Feb 4, 2018
7
7
The Mini DisplayPort (or Thunderbolt 1/2) is not disabled, but you cannot use an external display due the interface being hardwired to the broken AMD GPU. You can however use AirPlay mirroring if you want an external display.

If you need an external display an eGPU setup might work, which I am going to test later once I receive my GTX 1080. I will post an update on the forum later to inform wether or not an eGPU works or not :)
[doublepost=1518451004][/doublepost]


Your hard drive is still in read only. You have forgotten a backslash in the mount command. You must do the following:
1) fsck -fy
2) mount -uw /
Do not forget the slash after -uw

Hope this works.

So theoretically, a usb to hdmi adapter should work if I wanted an external display?
 
  • Like
Reactions: AppleMacFinder

Bravo3013

macrumors member
Sep 1, 2016
67
34
Norway
So theoretically, a usb to hdmi adapter should work if I wanted an external display?

Yes I believe usb to hdmi should work, at least according to what other users have posted earlier in this thread. The USB interface will however have limited bandwidth, so you might not be able to run your display at the native resolution or refresh rate.

I have not tested a USB-HDMI adapter, so I would recommend looking through the last pages of the thread to gather more information.
 
  • Like
Reactions: AppleMacFinder

Ricardiaco

macrumors newbie
Feb 13, 2018
4
2
Hi every one,
I'm curious to know if this solution also works on a Mid 2010 MBP17 with a NVIDIA GeForce GT 330M GPU removing Kexts and forcing the integrated card instead?
Thanks in advance
 
Last edited:
  • Like
Reactions: AppleMacFinder

nsgr

macrumors 6502
May 22, 2017
317
117
  • Like
Reactions: AppleMacFinder

Pirlet

macrumors newbie
Feb 15, 2018
1
1
Hello everyone, thanks for this guide.

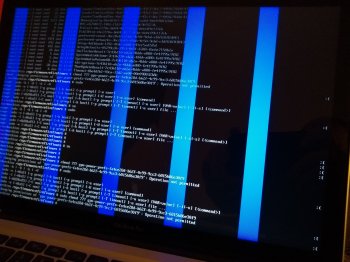
But I seem to get stuck at the point where I need to remove the gpu-power-prefs....

I keep getting operation not permitted, I've tried to enter these commands already 4 times.
I must say that I disconnected my harddisk, but I don't think this can be related.

Anyone got ideas?
 

Attachments

  • IMG_20180215_205946343.jpg
    IMG_20180215_205946343.jpg
    1.9 MB · Views: 269
Last edited:
  • Like
Reactions: AppleMacFinder

MaEc

macrumors newbie
Feb 15, 2018
1
1
Thanks infinte for this guide.

At the moment the problem is totally unsolved with Bootcamp. Windows continues to work only with dGPU.
Is there anyone who knows a solution, or will I have to resign myself to using it only in virtual?

Got the same issue.
So far the most promising aproach for me seemed to be installing a newer release of parallels desktop and having it start the bootcamp partition. This way I could get into the DOS cmd ....but then?
Any ideas?
 
Last edited:
  • Like
Reactions: AppleMacFinder

wolverine153

macrumors newbie
Feb 15, 2018
3
2
If you don't have time to read my story (which also describes some interesting technical approaches) just scroll down this thread until a "100% WORKING SOLUTION" text

Discrete AMD GPU of my 2011 MacBook Pro 8,2 has finally failed because of the reasons mentioned here ( http://logicboardmac.blogspot.ru/ ) and there ( https://www.macrumors.com/2015/02/19/2011-macbook-pro-repair-program-apple/ ) . It has been working perfectly for 6 years under quite a high load, even tried SETI@HOME mining at background! So I was confident that my MBP is not affected by bad solder / bad soldering quality and didn't want to bring it to Apple for a free repair program - partially because couldn't find the time to pause my important software projects, partially because I was afraid that Apple might give me a less reliable logic board or refuse a free repair because of the several unrelated repairs that I did manually by myself earlier to save money: changed thermal paste a few times, replaced the internal battery 2 times, replaced a keyboard with broken buttons, etc. But it finally broke down last week: laptop's screen image became distorted, it refused to boot OS X (always freezing half-way), and - Apple free repair program has already ended! I know there are affordable solutions like $50 BGA resoldering at unofficial local repair shop and that its possible to get a new replacement HD 6750M chip from AliExpress for $35 or cheaper ( http://www.aliexpress.com/item/DC-2...0028-216-0810028-BGA-Chipset/32764872143.html or https://www.aliexpress.com/item/DC-2015-New-216-0810001-216-0810001-Graphic-Chipset/32718112928.html , because don't know if this is true - https://www.rossmanngroup.com/board...0604-replace-216-0810005-gpu-with-216-0810028 ) to guarantee a successful repair, so the total price of repair would be either $50 or $50+$35=$85 - less than $100 in any case. But I don't like investing money to the old computers, so I have thought - what if there is some hack to force MBP to use integrated graphics ALL THE TIME, even while booting ? And then started to explore the possible solutions...

===

First of all, it is possible to successfully boot a MBP to OS X while still using the failed GPU, after you remove the AMD drivers by booting in command line mode (CMD+S) and entering these commands:
1) fsck -fy (to check a disk)
2) mount -uw / (mount a root filesystem with read/write permissions)
3) sudo mkdir /AMD_Kexts/ (make a directory to store the AMD drivers in case you'll need them in future)
4) sudo mv /System/Library/Extensions/AMD*.* /AMD_Kexts/ (move the AMD drivers)
5) sudo rm -rf /System/Library/Caches/com.apple.kext.caches/ (remove the AMD drivers cache)
6) sudo mkdir /System/Library/Caches/com.apple.kext.caches/ (just in case OS X will be dumb and will not recreate this directory, I am creating it for OS X)
7) sudo touch /System/Library/Extensions/ (to update the timestamps so that new driver caches - without AMD drivers - will be definitely rebuilt)
8) sudo umount / (umount a partition to guarantee that your changes are flushed to it)
9) sudo reboot

The degree of your inconvenience while doing these steps - strongly depends on how heavily a screen's image is distorted in your case. In my case it was even more difficult because the OS X partition became a "read-only" partition (because of too many emergency shutdowns I did while desperately trying to boot OS X with a failed GPU) so I had to remove a hard drive from MacBook Pro and (using a USB to SATA 2.5" adapter taken from my portable HDD) attached it to a computer with Linux, then followed these instructions:

https://superuser.com/questions/961401/mounting-hfs-partition-on-arch-linux (1st answer) - carefully executed a number of commands, calculated a sizelimit for my parition layout, and finally ran sudo mount -t hfsplus -o force,rw,sizelimit=YOURNUMBER /dev/sdb2 /mnt to mount this HFS+ partition to /mnt directory in read-write mode. Then I performed these "1)-7)" steps you see above, and also repaired a filesystem by running sudo fsck.hfsplus -f /dev/sdb2 before unmounting a partition with sudo umount /mnt and putting a hard drive back to MBP...

===

This gave me a MBP which could boot to OS X although STILL using a broken AMD GPU: so it screen's image is very distorted (could browse the Internet but quite inconvenient to read a text), Launchpad is super laggy, and you can't switch to Integrated GPU using gfxCardStatus because: without AMD drivers (which we had to remove to successfully boot to OS X) Macbook Pro thinks its' internal screen is External Display and gfxCardStatus tells it is impossible to switch because External Display is using AMD GPU. Somewhere I found a suggestion that it is possible to rebuild a gfxCardStatus from the source code - https://github.com/codykrieger/gfxCardStatus - with removed or commented out 156-166 lines in the ./gfxCardStatus/Classes/GSProcess.m to make it to ignore the external display:

// find out if an external monitor is forcing the discrete gpu on
CGDirectDisplayID displays[8];
CGDisplayCount displayCount = 0;
if (CGGetOnlineDisplayList(8, displays, &displayCount) == noErr) {
for (int i = 0; i < displayCount; i++) {
if ( ! CGDisplayIsBuiltin(displays))
[list addObject:[NSDictionary dictionaryWithObjectsAndKeys:
Str(@"External Display"), kTaskItemName,
@"", kTaskItemPID, nil]];
}
}


So I rebuilt a gfxCardStatus using the instructions from the last reply of this issue -
https://github.com/codykrieger/gfxCardStatus/issues/229
(also had to download a MacOSX10.11.sdk from here - https://github.com/phracker/MacOSX-SDKs/releases - unpack and copy it to XCode's /Applications/Xcode.app/Contents/Developer/Platforms/MacOSX.platform/Developer/SDKs/MacOSX10.11.sdk - because of the Apple's stupidity the latest XCode for El Capitan does not include SDK for El Capitan!) However, it still didn't work - gfxCardStatus only pretended that it has switched to Integrated GPU, while in reality OS X did not let it switch! Even after I edited ./gfxCardStatus/Classes/GSGPU.m file to enable the mysterious "Nuke it from orbit switching" option, it still couldn't switch...

===

Then I discovered this interesting repository - https://github.com/0xbb/gpu-switch - which is partially similar by its' source code to gfxCardStatus but also has the "Login Hooks" (install_hooks.sh) to "automate the switching process for login/logout". Sadly it didn't work for me... However, there is a very interesting gpu-switch text file right at the root of this repository, which describes the EFI variables!

https://github.com/0xbb/gpu-switch/blob/master/gpu-switch

After studying it and also reading this issue's comments - https://github.com/0xbb/gpu-switch/issues/11 - I became confident to try this solution, but found out that my MacBook Pro 2011 8,2 with OS X El Capitan 10.11.6 is in a VERY problematic situation:

1) rEFInd is not installed, and to install it - must disable SIP protection. But I cannot boot to Recovery mode (Command+Option+R) or to OS X Installation DVD/USB (hold Option), (to disable SIP), because they freeze while booting! - although I removed AMD kexts from my system, of course these recovery tools are using AMD kexts integrated to their design. Also cannot use Rootfool hack ( https://github.com/gdbinit/rootfool ) to disable SIP during runtime, because it works only at OS X version older than 10.11.4

2) Tried overheating my Macbook Pro on purpose (forcing CPU usage to 100% and putting it to a tightly closed bag) to force it to shutdown from overheating and then quickly reboot so that Integrated graphics will be enabled during the boot time - making it possible to boot to Recovery. But because of the wonderful high end thermal paste I have applied not so long ago - cannot overheat it even after waiting for a long time! At this point I thought that could either: a) remove AMD kexts from Installation media, or b) to connect MBP's hard drive to a Linux machine again and run a bunch of chmods to remove the SIP flags from the directories mentioned here ( http://apple.stackexchange.com/questions/193368/what-is-the-rootless-feature-in-el-capitan-really ) which could potentially make a system unbootable, or c) to try installing rEFInd to HFS+ partition directly from a Linux machine with root rights because it will bypass SIP --- but have not explored these options, although some of them might have worked...

3) Wanted to boot a Linux LiveCD to edit the EFI variables from there, but no matter what I did: tried booting straight without GRUB option modifications, tried editing GRUB boot options (with "e" key) to add nomodeset / remove quiet splash / or both in every combination , or like suggested in this article ( https://wiki.archlinux.org/index.php/MacBookPro8,1/8,2/8,3_(2011) ) also add i915.modeset=0 radeon.modeset=0 or radeon.modeset=0 i915.modeset=1 i915.lvds_channel_mode=2 ; and then pressed Fn+F10 or Shift+Ctrl+Fn+F10 to boot with these options: but the Linux boot process always failed at different boot stages, no matter what popular user-friendly Linux distribution or what version of it I am trying: tried many releases of Ubuntu / Lubuntu / Fedora , even the old "AMD64 Mac" and "Alternate AMD64 Mac" images, but they always failed - either at the very beginning of boot process (black screen, or a black screen with a blinking or stuck _ character at the left upper corner) or failed at the very end of it - right before it is supposed to show a graphical desktop environment...

Later, totoe_84 wrote that he was able to boot Ubuntu in graphical mode using the following setup for GRUB:
  • To disable the AMD graphics card I added the following lines after set gfxpayload=keep
outb 0x728 1
outb 0x710 2
outb 0x740 2
outb 0x750 0
  • Next I added the following after quiet splash
    i915.lvds_channel_mode=2 i915.modeset=1 i915.lvds_use_ssc=0
(based on https://ubuntuforums.org/showthread.php?t=2157775 )

===

Then I remembered that there are not-mainstream Linux distributions for advanced users, which have a LiveCD without any graphical interface: you are dropped to a pure console and you are supposed to install the system along with only those graphical interfaces and software packages / groups of packages which you explicitly select. For example: Arch Linux (https://www.archlinux.org/) and Gentoo Linux (https://gentoo.org/) . Because their LiveCD does not have a graphical interface, they could be booted without a problem to a pure Linux console and there you could edit the EFI variables ! So here is a...

===
=== 100% WORKING SOLUTION
===
=== Force your MBP to ALWAYS use Intel integrated GPU (EFI variable fix)
===
=== to make it great again ! ;)
===


1) Create the Arch Linux LiveCD/LiveUSB :

You need a working computer for that and a spare CD/DVD/USB drive. Download the latest Arch Linux ISO image from this page - https://www.archlinux.org/download/ , at the time of writing it is archlinux-2017.03.01-dual.iso . Then you could either simply burn this ISO to CD/DVD (which later could be either inserted to MBP's SuperDrive or External DVD Drive connected to MBP by two USB cables) or create a bootable USB: use the great detailed instructions from this page, https://wiki.archlinux.org/index.php/USB_flash_installation_media

2) Boot to it: insert this CD/DVD/USB to Macbook Pro, hold Option key while booting, choose "EFI boot" (that is your bootable installation media), press "e" key to edit the GRUB options of the Arch Linux archiso x86_64 UEFI CD menu entry while it is selected at the main screen, add nomodeset to the end of this line and press Enter. If everything is done correctly, you will find yourself at the Linux console!

3) Edit EFI vars: looks like efivarfs filesystem is mounted by default! So you can already cd /sys/firmware/efi/efivars and ls to explore this directory and see if there is a "gpu-power-prefs-..." variable (where ... is UUID of this variable). If there is such a variable, its better to remove it with rm. In my case the efivarfs has been mounted by default with read/write permissions, but if you are getting the "operation not permitted" message while attempting to rm, it means that in your case efivarfs has been mounted as read-only and you need to remount it with read-write permissions and try again (credits to totoe_84 for this valuable addition) :
*) cd /
*) umount /sys/firmware/efi/efivars/
*) mount -t efivarfs rw /sys/firmware/efi/efivars/
*) cd /sys/firmware/efi/efivars/

If your screen is so distorted that it is difficult to see the letters, just start typing the rm gpu-power-pre and then press TAB key for autocompletion. In my case there were not such a EFI variable, only "gpu-active-..." and maybe somehow related "gfx-saved-config-restore-status-..." . Then I looked again at that gpu-switch text file (mentioned above, https://github.com/0xbb/gpu-switch/blob/master/gpu-switch),
and entered THESE COMMANDS:

*) chattr -i "/sys/firmware/efi/efivars/" <----- skip this command

Actually a gpu-switch script had "${sysfs_efi_vars}/${efi_gpu}" but I didnt have a "gpu-power-prefs-..." variable - so, partially by mistake, I didn't add that efi_gpu suffix and entered this incomplete path accidentally

*)
printf "\x07\x00\x00\x00\x01\x00\x00\x00" > /sys/firmware/efi/efivars/gpu-power-prefs-fa4ce28d-b62f-4c99-9cc3-6815686e30f9

Did not have a EFI "gpu-power-prefs-" variable so I thought that it will be OK to create a new one with a random UUID - in this case, taken directly from a gpu-switch script

*) chattr +i "/sys/firmware/efi/efivars/gpu-power-prefs-fa4ce28d-b62f-4c99-9cc3-6815686e30f9"

http://www.tecmint.com/chattr-command-examples/ - chattr (Change Attribute) is a command line Linux utility that is used to set/unset certain attributes to a file in Linux system to secure accidental deletion or modification of important files and folders, even though you are logged in as a root user.
...
Syntax of chattr ---> chattr [operator] [flags] [filename]
...
A file is set with ‘i‘ attribute (+i as you see in this command) ---> cannot be modified (immutable). Means no renaming, no symbolic link creation, no execution, no writable, only superuser can unset the attribute.
...
Operator
  1. + : Adds the attribute to the existing attribute of the files.
  2. : Removes the attribute to the existing attribute of the files.
  3. = : Keep the existing attributes that the files have.
This chattr command is supposed to lock a file to make it accessible only by "superuser" - and so that, while booting, your EFI will have no chance to screw up your gpu-power-prefs-... variable under any circumstances

*) cd /

Could not unmount efivars if you are inside this directory, so change to the root directory

*) umount /sys/firmware/efi/efivars/

Guarantees that your EFI variables are flushed to efivarfs filesystem, please unmount it safely before rebooting)

*) reboot

===> IF YOU DID EVERYTHING CORRECTLY, MOST LIKELY THAT YOUR MACBOOK PRO IS NOW USING INTEGRATED GRAPHICS WHILE BOOTING, AFTER BOOTING, AND IS WORKING GREAT AGAIN ! ;)

In the future maybe you could need to re-apply this solution if you would have to reset your PRAM / NVRAM / SMC because of some other problems, so remember this solution somewhere... Funny thing: now you can't switch to Discrete GPU even using gfxCardStatus, it is forever stuck at Integrated


I spent two working days to discover this solution, and really hope that it will work flawlessly for every MBP owner with a broken discrete GPU. Good luck!
 

wolverine153

macrumors newbie
Feb 15, 2018
3
2
First off, Thank you AppleMacFinder for all of your research and help and for posting this solution! The first part of this helped me and I was able to save all of my information off of my Mac, and I was scared that I had lost everything...this included things from my Dad who had passed...so THANK YOU VERY MUCH! Second, I got it running and was able to create the LiveCd disk. My problem is that when I go to start up the system it will not recognize the disk. The only thing it shows is the hard drive. I keep holding and holding and holding "option" and the all it shows is the hard drive. I've tried it several times and nothing works. I know the CD works because I was able to create the disk. Do you have any suggestions for me please? I'm t a total loss and can't proceed any further without being able to select the CD. Thank you!
 
  • Like
Reactions: AppleMacFinder

xanderx007

macrumors 6502
Nov 7, 2017
262
140
First off, Thank you AppleMacFinder for all of your research and help and for posting this solution! The first part of this helped me and I was able to save all of my information off of my Mac, and I was scared that I had lost everything...this included things from my Dad who had passed...so THANK YOU VERY MUCH! Second, I got it running and was able to create the LiveCd disk. My problem is that when I go to start up the system it will not recognize the disk. The only thing it shows is the hard drive. I keep holding and holding and holding "option" and the all it shows is the hard drive. I've tried it several times and nothing works. I know the CD works because I was able to create the disk. Do you have any suggestions for me please? I'm t a total loss and can't proceed any further without being able to select the CD. Thank you!

Try using a USB stick instead of a CD, since those old MBP optical drives become cranky after 5 years.
 
  • Like
Reactions: AppleMacFinder

Djabroni

macrumors newbie
Feb 16, 2018
2
3
I found this online and followed the instructions but it never worked for me. However, after some messing around and going off prior knowledge and using the instructions I was able to solve the problem. Here is what I did step by step. And it worked perfect for me.

Reset PRRAM

Step 1:
a: Boot Mac holding Command+R+S
b: type csrutil disable
c: reboot
d: Boot into Single user mode (Command+S)
e: fsck -fy
f: Mount -uw /
g: mkdir /oldextensions
h: cd /Systems/Library/Extensions/
i: mv AMD6000Controller.kext /oldextensions/
h: mv AMDFramebuffer.kext /oldextensions/
j: mv AMDRadeonX3000.kext /oldextensions/
k: mv AMDRadeonX3000GLDriver.bundle /oldextensions/
l: mv AMDSupport.kext /oldextensions/
m: cd /
n: sudo touch /System/Library/Extensions
o: reboot

After completing Step 1 I was able to boot to the OS but it was very slow.

Step 2 is to download and install Arch Linux Live USB https://www.archlinux.org/download/
a: Once booted to Arch Linux make sure you don't have gpu-power-pref. if you do delete it. (follow instructions from the first post).
b: Then
  1. Cd /sys/firmware/efi/efivars
  1. printf "\x07\x00\x00\x00\x01\x00\x00\x00" > /sys/firmware/efi/efivars/gpu-power-prefs-fa4ce28d-b62f-4c99-9cc3-6815686e30f9
  1. chattr +i "/sys/firmware/efi/efivars/gpu-power-prefs-fa4ce28d-b62f-4c99-9cc3-6815686e30f9"
  1. Cd /
  1. Umount /sys/firmware/efi/efivars/
  1. Reboot
Once complete you should be able to boot to the OS and it will run faster.
 
Last edited:
  • Like
Reactions: AppleMacFinder

NintendoFan

macrumors 6502
Apr 14, 2006
268
23
Massachusetts
So, I'm trying this on a 2011 iMac 27", and the hard drive comes up as read-only. According to the OP, the hard drive needs to be removed. Not wanting to pull off the screen... am I SOL?
 
Last edited:
  • Like
Reactions: AppleMacFinder

apple_eater

macrumors newbie
Feb 12, 2018
3
1
Hi everyone — I would just like to start by saying thank you to all of the people contributing to this thread, you’re amazing! I have a very very very minimal baseline of technical proficiency, just enough to be able to follow the instructions presented on the forum but not enough to fully understand what exactly each step is doing and why or, more importantly, how to deal with unexpected circumstances. Given that, I was hoping someone here could help walk me through how to proceed with safely upgrading my 2011 MBP laptop, as discussed below. The answer to this may already exist buried somewhere in the thousands of other posts, so please pardon any redundancy!

BACKGROUND/CONTEXT:
When I bought my fancy new MBP in 2011, it turns out it was actually a 6lb aluminum-coated lemon: within the first year the logic board, cabling, RAM, airport/bluetooth, and thermal pad all had to be replaced; then the HD failed; then portions of the screen started going bad; and then the battery stopped holding a charge. Eventually last summer, the GPU finally died (Apple failed to proactively notify me that there was a recall and I was outside of the window by the time this happened).

MODEL SPECIFICS:
I have an early 2011 15" MBP, 2.2 Ghz Intel i7, 8GB RAM, with the Intel HD Graphics 3000 card and AMD Radeon 6750M GPU (if useful, it has ROM version 113-C0170L-573, gMux Version 1.9.23, EFI Driver Version 01.00.573). I am currently running Mavericks 10.9.5. I don’t run any external hardware or peripherals or do any gaming, video editing or other graphics heavy activities. I primarily use the laptop for general business purposes, but I do use it heavily with multiple browsers running concurrently with lots and lots of browser tabs open, lots of word, excel, and powerpoint files open at any given time, etc.. This thing is my lifeline to the world…

PREVIOUS TROUBLESHOOTING:
After the GPU went out, I eventually and thankfully found this forum through some frantic googling. I followed @AppleMacFinder’s original instructions exactly as presented (post #1) and it worked perfectly for me, restoring the MBP to normal operating use. I’ve installed any and all OS system updates that Apple has issued since and have had zero issues. More recently I ran the command "sudo kextload /DisableExtensions/AMDRadeonX3000.kext” after reading that it might help with the laptop running as hot as it does, and there did seem to be an improvement (the high heat was issue for me before I ran into any GPU issues).

WHAT I’M TRYING TO DO:
For various reasons at this point, I would like to replace the original HD and upgrade to an SSD with a clean installation of either Sierra or High Sierra. I am tentatively planning to get the new internal SSD and load Sierra or High Sierra onto it using my brother’s computer (don’t think it’s relevant, but he has a 13” 2017 MBP with High Sierra). I am reasonably confident I can figure that part out without too much difficulty, here is what I am left wondering:

QUESTIONS I AM TRYING TO ANSWER:
(1) Is there any super strong reason why I should use either High Sierra or Sierra over the other given the various potential issues with the sleep/wake and brightness key functionality? I seem to have found conflicting guidance on this scattered across various posts/sites, and would definitely appreciate a clear, well articulated rationale one way or the other.

(2) What, if anything, should I do when configuring the new drive on the other laptop to minimize the risk of there being a problem once it’s installed in my 2011 MPB? Would I run any terminal commands at this point?

(3) Will there be any issues with installing the newly configured SSD into my 2011 MBP given that I already implemented the original GPU fix?

(3) Once the new drive is physically installed in the original 2011 MBP and it’s now running Sierra or High Sierra, which set of solution instructions should I follow (e.g., is the “GRUB" solution the best option?) and what, if anything needs to be modified from the default process to account for my particular circumstances?

(4) Given this approach, what lingering/persistent issues can I expect to face (e.g., how likely am I to have issues when rebooting, installing updates, etc.)?

FINAL CAVEATS:
I can’t really afford to have the laptop completely die on me right now (too cost prohibitive to replace it, hence the desire to rely on upgrades), so if the right answer is to completely avoid putting in a new SSD with a current OS, then I will have to live with it as is. That is not ideal, but I would just like to know what to expect in advance! Also, I’ll reiterate that my technical proficiency is nowhere near what the average user on this forum seems to possess, so any efforts to explain things in greater detail with added context is massively appreciated (it helps me improve my own understanding)!!

FINAL THANK YOU:
THANK YOU AGAIN TO ALL OF THE CONTRIBUTORS HERE FOR YOUR GUIDANCE AND INSIGHT, AND A SPECIAL THANK YOU TO ANYONE WHO CAN HELP WALK ME THROUGH THIS WITHOUT BRICKING MY LAPTOP!!!!
 
  • Like
Reactions: AppleMacFinder

guillebaque

macrumors newbie
Feb 17, 2018
2
2
Hello. It worked like a charm for me. Now it Boots with the Intel HD Graphics 3000.
The problem is that the Mac crashes when i try to open some apps installed in it, like Ableton Live , Adobe Premier, Spotify, Adobe Photoshop....
The Mac works grate with any browser, playing videos, mail, and small apps.
It looks like it has a problem opening some apps.
Anyone having this issue?
 
  • Like
Reactions: AppleMacFinder

wolverine153

macrumors newbie
Feb 15, 2018
3
2
Try using a USB stick instead of a CD, since those old MBP optical drives become cranky after 5 years.


Xanderx007, Thank you for taking the time to reply to me. I got a USB stick and put the file there and it wasn't recognized either. So, now I am questioning if I pulled off the right file or not? I went to:
https://www.archlinux.org/download/
And then I went to the file under Worldwide and clicked:
evowise.com
From there I chose:
The file at the top that ended in .iso
Did I choose the correct file? Thank you again for your time, I truly appreciate it!
 
  • Like
Reactions: AppleMacFinder

jfrubiom

macrumors newbie
Jan 27, 2018
6
3
I'm going updating this post because I have to do some reboots in Macbook Pro.

Macbook Pro 15" 2011 - Intel HD3000 and AMD Radeon HD 6750M - Sierra and High Sierra - Istatmenu.

The agc option in nvram boot-args actually influences the temperature.

AGC option -> only set in Recovery Mode (Commnad + R at boot) or Single User Recovery Mode (Command + R + S at boot).

Test done with the system in idle. Only Active Monitor and Terminal open.

Temperature measured after 4 minutes of manually loading AMDRadeonX3000.kext.
Code:
sudo kextload /DisableExtensions/AMDRadeonX3000.kext


0 - agc=0 - It greatly decreases the temperature AMD GPU and System - tested Sierra and High Sierra - Istatmenu.

System Temperature: 40ºC
GPU Die Analog: zero or 4ºC

Code:
nvram boot-args="-v agc=0"


1 - agc=1 - Does not lower the temperature of the AMD GPU and System - tested Sierra and High Sierra - Istatmenu.

Code:
nvram boot-args="-v agc=1"


2 - agc=2 - Does not lower the temperature of the AMD GPU and System - tested Sierra and High Sierra - Istatmenu.

System Temperature: 50ºC - 55ºC
GPU Die Analog: 45ºC - 50ºC

Code:
nvram boot-args="-v agc=2"


3 - agc=3 - Does not lower the temperature of the AMD GPU and System - tested Sierra and High Sierra - Istatmenu.

System Temperature: 50ºC - 55ºC
GPU Die Analog: 45ºC - 50ºC

Code:
nvram boot-args="-v agc=3"

I have not yet tested agc 4, 5, 6, 7 and 8.


9 - agc=9 - It greatly decreases the temperature given AMD GPU and System - tested only with High Sierra - Istatmenu.

System Temperature: 40ºC
GPU Die Analog: zero or 4ºC

Code:
nvram boot-args="-v agc=9"


In the High Sierra, there is an executable file called AGDCDiagnose. It stays inside AppleGraphicsControl.kext.

AGDCDiagnose provides various information about Intel, AMD and Nvidia GPUs.

Code:
AGDCDiagnose -a
-bash: AGDCDiagnose: command not found

This error above occurs because on the UNIX system the executable file has to be configured in the PATH (usually /bin, /sbin, etc).

As the AGDCDiagnose is outside the above directories, then it has to be placed "./" before the AGDCDiagnose.

Alternative 1 - only High Sierra
Code:
cd /System/Library/Extensions/AppleGraphicsControl.kext/Contents/MacOS/
./AGDCDiagnose -a

Alternative 2 - only High Sierra
Code:
./System/Library/Extensions/AppleGraphicsControl.kext/Contents/MacOS/AGDCDiagnose -a

AGDCDiagnose Version: 3.16.21
## ScanPort - Start ##
[1] IOService:/IOResources/AppleGPUWrangler
Vendor: Apple [0000106b]: AppleGPUWrangler [8 10000] (0)
[2] IOService:/AppleACPIPlatformExpert/GMUX/AppleMuxControl/AGDCMuxClientControl
Vendor: AppleMuxControl [0000106b]: AppleMuxControl [9 10000] (0)
## ScanPort - End ##
## Display Metrics - Start ##
Display Metric Tool Version: 1.2
Display Metric Plugin Version: 1.2 AGDC Version: 3.16.21
Dumping Metric Logs: currentlog(0) logsize(32768) numberlogs(819)
Total lines: 1
## Display Metrics - End ##
## Mux state - Start ##

System is in Dynamic mode: Better Performance Mode set, using Integrated

gMUX Status: Version: 1.9.23, 3D:2, FB:4
LVDS: IG [DDC: IG], DP: IG [bf, 0]

IG: FB0:on  FB1:N/A FB2:N/A 3D:idle HDA:N/A  Power:on
EG: FB0:off FB1:off FB2:off 3D:idle HDA:idle Power:on

Switch Statistics: 0 Switches 0 Errors
Policy:off GPUPowerDown:off Backlight Control:on Recovery:on
Power State Machine IG: 0 EG: 0
StateMachine: 0 [AGC_GPU_IDLE]
gMUX Status: Version: 1.9.23 LVDS: IG [DDC: IG], DP: IG

For agc=0 or agc=9, after the kextload AMDRadeonX3000.kext, the AMD GPU switches to the state Power: off.

IG: Intel GPU (integrated)
EG: AMD GPU (discrete)

Before kextload AMDRadeonX3000.kext:
IG: FB0: on FB1:N/A FB2:N/A 3D:idle HDA:N/A Power: on
EG: FB0: off FB1: off FB2: off 3D:idle HDA:idle Power: on

After kextload AMDRadeonX3000.kext:
IG: FB0: on FB1:N/A FB2:N/A 3D:idle HDA:N/A Power: on
EG: FB0: off FB1: off FB2: off 3D:idle HDA:idle Power: off

For agc=1, agc=2, agc=3, after the kextload AMDRadeonX3000.kext, AMD GPU continues in the state Power: on.

If you put a negative sign on the agc, then it goes crazy.
Code:
nvram boot-args="-v agc=-0"
or
Code:
nvram boot-args="-v agc=-1"

1 - The message appears in boot verbose "AGC: force unload"

2 - Disappears brightness control in System Preferences -> Display.

3 - Disappears the option to enable / disable "Automatic Graphics Switching" in -> System Preferences -> Energy Saver.

4 - Istatmenu informs that there is an "ATI" GPU showing the letter "A". Even with the nvram gpu-powe-prefs=%01%00%00%00 for Intel GPU.

https://bjango.com/help/istatmenus6/cpugpu/

5 - The gfxCardStatus app does not load and informs that the system has only one GPU (not dual GPU).

6 - System Information -> Graphics/Displays -> show AMD and Intel GPU -> show Intel GPU as Active GPU -> Online: Yes
Hi, When I set AGC=9 and restart, I lost the sound
 
  • Like
Reactions: AppleMacFinder

xanderx007

macrumors 6502
Nov 7, 2017
262
140
Xanderx007, Thank you for taking the time to reply to me. I got a USB stick and put the file there and it wasn't recognized either. So, now I am questioning if I pulled off the right file or not? I went to:
https://www.archlinux.org/download/
And then I went to the file under Worldwide and clicked:
evowise.com
From there I chose:
The file at the top that ended in .iso
Did I choose the correct file? Thank you again for your time, I truly appreciate it!

Did you follow the instructions on how to make the USB stick exactly? It's not just copying it from your drive to the stick via drag and drop, you'll have to use terminal.

Screen Shot 2018-02-19 at 00.50.22.png


You might need to do this from a separate computer/MBP (as I have) if you can't start up on your laptop.

Also, in my experience, the EFI fix is a bit unstable, and it still switches to the dGPU with certain GPU-heavy applications (like, ugh, Facebook). You might want to read up on the GRUB solution thread as well.
 
  • Like
Reactions: AppleMacFinder
Register on MacRumors! This sidebar will go away, and you'll see fewer ads.