Become a MacRumors Supporter for $50/year with no ads, ability to filter front page stories, and private forums.

connor55

macrumors member
Original poster
Nov 14, 2017
56
153
Edmonton canada
Hey guys, I wanted to share a little project I've been working on over the holidays. I'm new to this forum and I am not a professional at this by any means, I just like to challenge myself with projects like this. I'll share the details of my ongoing project, but please keep in mind that I am just doing this for fun.

It started when my friend gave me an iMac G4 that he didn't need anymore, and I thought the design was way too cool to just throw away or not use. Technically it was working just fine (the disc drive wasn't strong enough to open the door anymore though) but the system didn't have wifi, and was really slow for even the most basic tasks. I had heard about colbyjohn94's successful M1 project and wanted to see if I could also do it.

My goal is to make the computer appear stock from the outside, while retaining all the original functionality(except for all the outdated ports) and being powered by Mac mini hardware either from an M1 or the upcoming M1 pro/max in the future.

At this point I'm just looking for a good deal on a used M1 Mini with decent specs (16gb 512gb at least). Or if the rumoured "pro" mini comes out before then, and the hardware is small enough, I may get that instead. Imagine what a sleeper that'd be..

Anyway, here are the progress pics. Enjoy!

tempImagez1moFk.png

Picking it up.. working slowly but really dusty and doesn't connect to the internet.
tempImagePKdNVo.png

Got it home, and immediately began to gut it.

tempImageiDNQY5.png

They really made use of every bit of space here
tempImageARX9hT.png

pretty unique PSU, such an apple thing to do

tempImageovFQGn.png

Finished gutting the main components.. now what? Time to do some research...

tempImageVEe8HT.png

after some digging I found this amazingly detailed guide from Dremeljunkie http://www.dremeljunkie.com/2011/08/guide-step-by-step-17-imac-g4-tmds-to.html If you plan to do this, this guide is essential. Removing the base made life a lot easier from this point.
tempImagefKgfIg.png

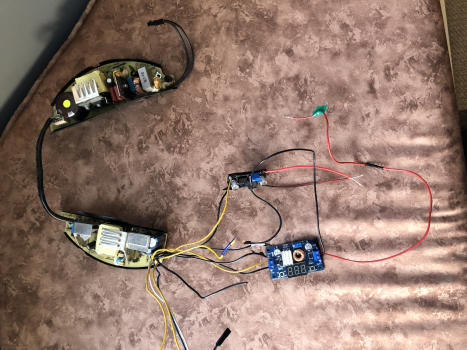
Picked up a few of these, Plan is to use stock PSU(which has 5 12v rails) and down convert them to 5vdc and 3.3vdc as per the guide
tempImageuQxpVO.png

Needed a new drive as well with a bit more modern SATA, which allows me to then connect it to the Mac mini by USB. The included DC adaptor was also conveniently outputting 12v as well, so I can again use the stock PSU for this.

tempImageyKnKIN.png

and of course the resistors and alligator test wires per the guide


Had to remove the faceplate from the optical drive in order to mount it in the G4 dome, but works correctly when connected to my MacBook

tempImage0a15Zg.png
tempImage95zuOT.png
tempImage3Z5Tek.png

Prepping the PSU and making a 5VDC output for use later. hard to dial these things in perfectly, but I think its close enough..

tempImagewFsWTo.png

again following the guide, making sure everything on the inverter/backlight side of things works. so far so good
tempImageuWB11P.png

this took a little while even with tweezers, but they look like they're in the right position. thank goodness again for the guide, or id have never figured this out!
tempImageUSvrtZ.png

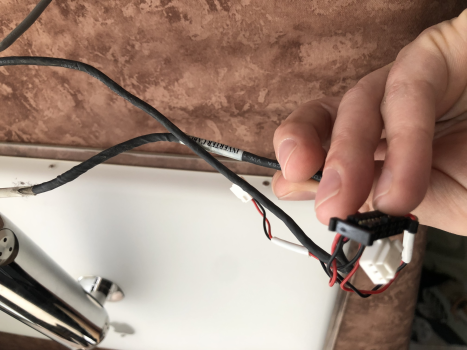
prepping my remaining wires.. dont mix up the grey, white and purple. they look really similar at a glance.
tempImageRWkLci.png

I think thats all the connection I need to make, after quadruple checking I think its right.. lets find out
tempImageTjSvbM.png

amazingly its working! this felt good as I was sure id mess up some of the wiring.

tempImageCgXbZa.png

time to give the dome its first and only bath after 20 years lol

tempImagedD4kPi.png

I know the guide says you dont really need 3.3VDC, but I felt better being closer to the stock setup(thinking that running 5V to the display would compromise longevity)
tempImageODO9A9.png

here is the PSU complete with 12, 5, and 3.3vdc outputs

tempImagePwmmq0.png

Put the base back on, ran the wires through, and beginning to solder/clean up as much as I can

tempImageahZZ1H.png

Saw another guide where the guy uses hot glue to hold the pins in. Good idea, im gunna do that too. (the image quality actually improved after doing this)
tempImagesQsETi.png

power supply and video connections are and looking a little less like a rats nest..

tempImageBLSg7t.png

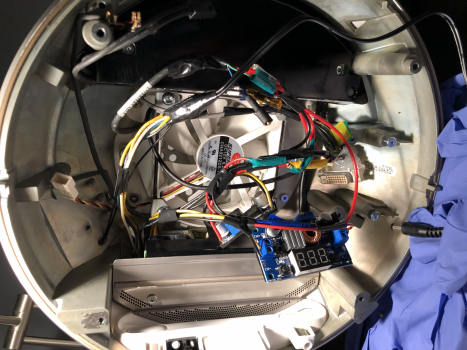
Temporarily trying to put the optical drive in, and trying to figure out where I should put everything. I realized after setting it up this way that there was only about 1.5cm of space directly under the optical drive. not enough space even for the tiny M1 guts. so I later relocated everything else to the side or below the drive. That means ill have to mount the logic board above the drive. I hope theres enough space..


testing the "brainless" iMac G4, using my MacBook for now. everything managed to fit together just fine with everything ive installed so far being under the optical drive. That leaves the space above the drive for the Mac mini hardware. I may have to remove the stock fan, and probably put the Mac mini PSU on the bottom or side of the dome. This may get tricky, but we'll cross that bridge when we get there.

I would also need room for a low profile usb hub to run down from the logic board to the rear ports.

To be continued.. just need to find a Mac mini now
 

Attachments

  • tempImageODO9A9.png
    tempImageODO9A9.png
    4.3 MB · Views: 655
  • tempImageXLr3Tn.png
    tempImageXLr3Tn.png
    3.7 MB · Views: 625
  • tempImageCRZCH3.png
    tempImageCRZCH3.png
    2.8 MB · Views: 707

ruslan120

macrumors 65816
Jul 12, 2009
1,417
1,139
Love it! Watching for more posts :)

Do you need the optical drive or is it just to be thorough with the project? Seems like nowadays optical is such a low priority compared to having the base computer working.

Have you considered a custom cooling solution if sticking to the optical drive? (? just wondering)

Have you considered a slim laptop optical drive? The ones that still have faceplates? Might work out better with voltage too…

Super exciting. :)
 

MacPoulet

macrumors 6502a
Dec 11, 2012
618
455
Canada
Awesome work so far. The G4 iMac is one of my favourite designs and I still miss mine (gave it to a friend when I moved to a different province). Maybe you can find a busted M1 Mini for cheap that you can harvest.

Subscribed to this thread.
 

connor55

macrumors member
Original poster
Nov 14, 2017
56
153
Edmonton canada
Love it! Watching for more posts :)

Do you need the optical drive or is it just to be thorough with the project? Seems like nowadays optical is such a low priority compared to having the base computer working.

Have you considered a custom cooling solution if sticking to the optical drive? (? just wondering)

Have you considered a slim laptop optical drive? The ones that still have faceplates? Might work out better with voltage too…

Super exciting. :)

Thanks man! The optical drive is important because I want to keep the use of the dvd door. I know that most of the other conversions have deleted the drive, but I see it as cheating a little haha. Cooling wise im not too worried, since the fan on the m1 mini has been shown to be almost overkill even in the heaviest scenarios. Im also going to place it right under the stock fan, so it should actually be better cooled than the Mac mini itself is.

I looked into the slim drives, but I couldn't find any laptop drives that have a fully motorized tray that could open the iMacs DVD door. Do you know of anything like that? Id love to save all that space if possible.

Awesome work so far. The G4 iMac is one of my favourite designs and I still miss mine (gave it to a friend when I moved to a different province). Maybe you can find a busted M1 Mini for cheap that you can harvest.

Subscribed to this thread.

Thank you! I love this design too and think its worth saving. working on getting a Mac mini in hand asap!

AW SWEET!

This is a great project! Subbed.

Hey do I know you?
 
  • Like
Reactions: MacPoulet

connor55

macrumors member
Original poster
Nov 14, 2017
56
153
Edmonton canada
An update on the project: M1 Mac mini with 16gb memory and 1TB storage has arrived! A few road blocks to deal with from the M1 Mac mini though. Having trouble with the backlight being woken up after sleep or a shut down. the HDMI to DVI adaptor needs to be plugged back into the Mac mini every time, or the backlight won't turn back on. didn't have this issue when testing off my MacBook Pro, so a little annoyed with this issue. Anyone have any ideas for fixing this?

Here are some other things I am working on right now:

tempImageWDdhRH.png

Planning out the final ports. from Left to Right I plan to install: HDMI, 3 USB A, 2 USB C, AC power, Headphone Jack, Ethernet, and SD Card slot in the last slot. Ill have to do a bit of cutting to make the port bezel into a slot shape, but shouldn't be too hard.

tempImageN0K9YD.png

tempImaged6eXI9.png

getting this rear panel off was a huge struggle, I needed a heat gun set to 400C in order to soften the glue enough to pull off. im surprised the plastic didn't melt.. the inner painted layer had some scratches in it somehow, and I need to spray pain the inside to get the white to appear even from the outside again.
tempImageincgoR.png

Previously there was an inner scratch above the apple logo where the inner paint was missing somehow. now it looks evenly white.
tempImagemfqQGJ.png

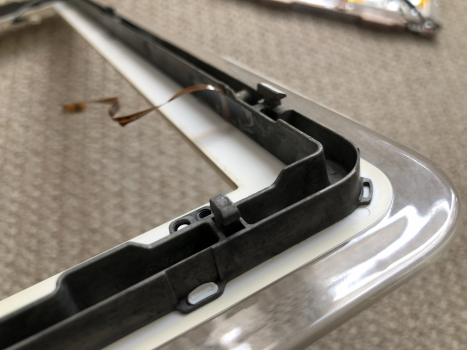
The white bezel was also yellowed a bit, I wanted to separate the clear part off the white in order to restore it back to white, but it looks like the 2 pieces are somehow permanently fused together.
tempImageTSkijx.png

even with the heat gun set pretty high, the bond did not seem to weaken at all. in fact the inner plastic started to melt a bit.. I guess im stuck with a yellow bezel, unless anyone has any other ideas for getting these apart??

tempImage81gNS4.png


Decided to start sanding and polishing the bezel anyway, at least I could try to make the plastic clearer and smoother.
tempImageWvuYUi.png

here's the current set up for now. I cant put the Mac mini internals into the iMac until I resolve this HDMI issue.

I heard that USB C to dvi might do the trick, so ive ordered a few adaptors to try and test that out. Worst case scenario ill relocate the inverter On/Off wire(red 3.3v) to another source that turns on and off with the computer, or just control it manually with a switch off of the 3.3v constant from the iMac PSU.

tempImageXEzB8A.png

this thing is snappier than a G4 iMac could ever hope to be. on restarts, the computer is already back to the login screen by the time I plug the HDMI connector back into the mini.
 

Attachments

  • tempImagemfqQGJ.png
    tempImagemfqQGJ.png
    2.5 MB · Views: 249

connor55

macrumors member
Original poster
Nov 14, 2017
56
153
Edmonton canada
Mac mini teardown has begun..
tempImagexZS4pc.png

tempImageIdU2lZ.png

So empty lol
tempImageYNx9UB.png

tempImageItx6gT.png

Amazing that an entire computer is smaller than just the stock G4 HDD. should fit over the cd drive nicely.
tempImages6Y6Tz.png

splicing into the Mac mini AC cord to tie into the G4
tempImageVLXVKh.png

Maybe I can reduce the amount of slack later but this'll do for testing right now.
tempImageSDTJWE.png

after some struggle, I got this LED out of the Mac mini. Now theres nothing left in the shell.
IMG_3562.JPG

threw the components together to see if the "unified" AC cable works. Ill have to do something about the fan set up to make it fit

It works!
Fished the power button out of the rear face plate, tested it with a meter and luckily its just a normally open button just like the G4s! Should make using the stock power button relatively convenient. (micro soldering aside)
IMG_3569.jpg

Here's a very rough sketch of how I want to lay things out. The internal fitment will probably the most challenging part of the entire project. Red goes directly to the Mac mini, yellow will go to a USB hub, green is ac related stuff
tempImageW7KPz3.png

rearranging the fan to make it more compact. It would be nice to have a 3D printer to make a custom duct. but ill have to improvise for now..
tempImagem3LfQM.png

Had some actual furnace ducting tape lol, so just testing this out to redirect the air into the heat sink(not that the M1 necessarily needs it)
tempImageydrBQV.png

sealing all the gaps
tempImagewsbqcO.png

back on the board in the new arrangement. added a layer of electrical tape outside to keep anything nearby from shorting by accident.

I may need to order a bunch of 90 degree ports to fit this properly..
 

connor55

macrumors member
Original poster
Nov 14, 2017
56
153
Edmonton canada
Quick update: after a lot of struggle with making a firm connection to tiny ribbon cable pins, I’ve got the original g4 power button (with a small piece of its motherboard for mounting) working with the Mac mini logic board.

current struggle: all the 90 degree adaptors fit, but for some reason display backlight (even though it’s running off usb C) won’t turn on unless I remove the usb plug for the dvd drive. Sometimes it works just fine though. I’m scratching my head over this one, and struggling to think of a solution or test for this, as the problem is also intermittent.
 

connor55

macrumors member
Original poster
Nov 14, 2017
56
153
Edmonton canada
switched to a different cable , and luckily the screen issue went away. this should be the last update before completing the project, as im just waiting for a couple small parts to arrive.

tempImageHeipEd.png

chopped the stock g4 power button for use with the m1 motherboard. should allow me to easily use the exterior power button.

tempImageObY6RR.png

also chopped out the floor of the base, the bottom cover can still be screwed on when all is done, and those extra few mms of space definitely help.
tempImagej6gKRh.png

test fitting the Mac mini board in its final position in the iMac, luckily I can plug the M1 power supply into the bottom of its board if I just reverse the 2 rows of pins.

tempImageAmCRGe.png

added a few inches to the power supply wires so that it could reach around the optical drive that'll sit below the board.

tempImageX5rYTv.png

using a **** load of glue to put in the final ports. from left to right: HDMI out, 3x usb A, 2x USB c, AC power, Headphone jack, Blank for now, but maybe ill extend the ethernet down if I need it in the future, and finally SD + Micro SD slots

Fingers crossed nothing goes wrong at this point, and the project will be complete by the end of the week!
 

PML7554

macrumors member
Oct 8, 2021
35
97
Great work !
I'm also a iMac G4 modder... I used a 2014 Mac Mini, to be able to boot on windows.
And my goal was to keep the original look of the I/Os, so I just convert the USB to USB3, and rewired Ethernet, Jack and Apple Pro Speakers. So the only difference with the original iMac is the color of USB ports.

Where did you place the antennas ? I bought standard antennas and I placed them instead of the G4 originals, between the metallic and the plastic domes.
And don't you have a problem to watch Netflix/Prime/AppleTV with the original screen... ?
 
  • Like
Reactions: connor55

Technerd108

macrumors 68040
Oct 24, 2021
3,061
4,311
Amazing. I would love to try something like this but after reading all you did I doubt I could have done this! Really, really cool!!
 
  • Like
Reactions: connor55

connor55

macrumors member
Original poster
Nov 14, 2017
56
153
Edmonton canada
Great work !
I'm also a iMac G4 modder... I used a 2014 Mac Mini, to be able to boot on windows.
And my goal was to keep the original look of the I/Os, so I just convert the USB to USB3, and rewired Ethernet, Jack and Apple Pro Speakers. So the only difference with the original iMac is the color of USB ports.

Where did you place the antennas ? I bought standard antennas and I placed them instead of the G4 originals, between the metallic and the plastic domes.
And don't you have a problem to watch Netflix/Prime/AppleTV with the original screen... ?

thanks man! I saw your project as well, and definitely wish I could make the port situation a little cleaner like yours, but I wanted to go with the usb C, HMDI, and SD card slots in the end.

the 3 antennas from the M1 Mac mini have been chopped down to just the actual antennas, I placed them all right next to the vents at the top of the base. The wifi signal is meh, so I have a range extender right by it And I can get over 100mbps still. The Bluetooth only works right next to the dome, so borderline useless. What did you get for antennas? I would love to properly tackle this problem. If you have pics of how you arranged yours, that would be really helpful!

im actually surprised by how well the stock display does, I was originally thinking of finding something higher res, but its quite hard to find in this size and aspect ratio.
Amazing. I would love to try something like this but after reading all you did I doubt I could have done this! Really, really cool!!
Thanks! This ended up being a lot more work than I originally expected, but once youre into it, you gotta finish the project right?
 

PML7554

macrumors member
Oct 8, 2021
35
97
thanks man! I saw your project as well, and definitely wish I could make the port situation a little cleaner like yours, but I wanted to go with the usb C, HMDI, and SD card slots in the end.

the 3 antennas from the M1 Mac mini have been chopped down to just the actual antennas, I placed them all right next to the vents at the top of the base. The wifi signal is meh, so I have a range extender right by it And I can get over 100mbps still. The Bluetooth only works right next to the dome, so borderline useless. What did you get for antennas? I would love to properly tackle this problem. If you have pics of how you arranged yours, that would be really helpful!

im actually surprised by how well the stock display does, I was originally thinking of finding something higher res, but its quite hard to find in this size and aspect ratio.

Thanks! This ended up being a lot more work than I originally expected, but once youre into it, you gotta finish the project right?
For the antennas, I bought 3 NGFF MHF4 ipex connector antennas like these

I placed them instead of the original antennas of the iMac, so you have to separate plastic and metallic domes.
Two on a side, one on the other.
And i plugged them on the airport card

IMG_7955.jpg
IMG_7956.jpg


The reception of the wifi is very good, Bluetooth is a little less good, but it is enough to use a keyboard and a mouse.
 

connor55

macrumors member
Original poster
Nov 14, 2017
56
153
Edmonton canada
For the antennas, I bought 3 NGFF MHF4 ipex connector antennas like these

I placed them instead of the original antennas of the iMac, so you have to separate plastic and metallic domes.
Two on a side, one on the other.
And i plugged them on the airport card

View attachment 1959215 View attachment 1959216

The reception of the wifi is very good, Bluetooth is a little less good, but it is enough to use a keyboard and a mouse.
so those plug directly onto the board? I thought impedance had to be matched with the original antenna?
@connor55: is this the original LCD-panel in the iMac or did you change it? The colors/brightness looks too good for such and old computer.
original panel! goes to show how good these were for their time.
 

PML7554

macrumors member
Oct 8, 2021
35
97
so those plug directly onto the board? I thought impedance had to be matched with the original antenna?

original panel! goes to show how good these were for their time.
I did not check impedance or whatever… but the airport card of the mini 2014 is listed as compatible on the description of the item.
And it works perfectly, even at 3 or 4 meters of the router.
I did plug the antennas directly on the board.
 
Last edited:
Register on MacRumors! This sidebar will go away, and you'll see fewer ads.