Become a MacRumors Supporter for $50/year with no ads, ability to filter front page stories, and private forums.
Status
The first post of this thread is a WikiPost and can be edited by anyone with the appropiate permissions. Your edits will be public.
I have a 2008 Mac Pro (3,1). I'll include the specs at the bottom of this post. Running a 2 TB internal SSD via a PCIe controller (OWC). I was running El Capitan and opted to put in @dosdude1 High Sierra patch in order to be able to run some newer software I couldn’t run on El Capitan.

Following his website's instructions, I installed from a 32GB USB thumb drive. I was surprised that, start to finish, it took literally 34 hours to install. I chalked it up to USB 2.0 on a 10-year-old machine being awfully slow by any modern standard, but I’m not so sure that’s the problem anymore.

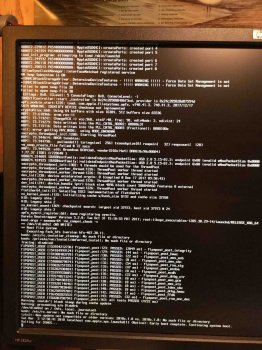
I then ran the patch's post-install and selected the default options for a 3,1 Mac Pro, and then rebooted into the SSD. It came up quickly with the password prompt (I run FileVault, so the SSD is encrypted). And then the progress bar started moving to load the rest of the OS. This is where the problems come up. There are two in particular:

1. It hangs perpetually around 95%.
2. The display goes into energy saving mode and will not come back up.

I've let it run for four hours - occasionally poking the keyboard to keep energy saving off. I also on another attempt let it run overnight and then some -- I'd estimate about 11 hours. If it ever got any further than that 95%, I wouldn't know since the energy saver came on and turned off the display and wouldn't restore. That said, subsequent attempts repeat these problems, so I assume it never gets past 95%. It’s an SSD, so I can’t listen for any hard drive mechanical movements nor observe any other activity in the background.

Following the instructions again, I rebooted into the boot USB, ran the post installer again, and this time opted for the Force Rebuild option for the caches. Rebooted back into the SSD. Same problems. I turned off the machine and let it sit for a few days and went back to my MacBook Pro while I researched and thought through what’s going on.

I next decided to try building a new boot drive w/ High Sierra and the patch, on the off chance either the original USB installer was corrupted somehow or perhaps USB 2.0 performance is slow enough to be causing some issues. This time I used a LaCie 1TB, FireWire 800 external HDD.

Re-ran both the macOS installer and the post install from that drive and also did the forced cache rebuild again. Same exact problem.

When I did the force rebuild, it told me there’s a command I should run from Terminal after booting into HighSierra. I haven’t even been able to get that far to run it.

Is there any point in running that command from Terminal from the installer boot drive?

I also attempted to install a patched HS onto an empty, internal 1TB HDD. Didn't work.

SIP is disabled as far as I know. I did so successfully at the outset of all of this and I have not reset my PRAM or anything. Since the system hasn't run anything but these installers since then, I have no reason to believe the system itself has reset the SIP.

The SSD is not APFS, unless the installer converted it automatically

Might any of you, or perhaps even @dosdude1 himself, have any idea (A) what's causing this; and (B) how I might be able to solve it?

The machine is not strictly OEM spec anymore. These are the relevant details:

  • Dual 2.8 GHz Quad Core (Xeon Harpertown E5462 x2; factory-provided configuration)
  • Internal HDD in bay 2, 1 TB (unused except for efforts above)
  • 64 GB of 800MHz DDR2 EEC FB-DIMM RAM (OWC sourced)
  • Primary drive -- internal, Extreme 6G SSD, 2 TB, running on a PCIe controller (OWC sourced)
  • Nvida Quadro 4000, 256 CUDA cores and 2GB (sourced direct)
  • All other parts and configurations are OEM specs and supplied
[doublepost=1520127974][/doublepost]
This attempt failed, too. Same problems. At least this time it only took a couple hours to get the install done. But ultimately the same problems.

Time to revert to El Capitan, unfortunately. If anyone has any ideas, I don't mind doing a clone of my drive and experimenting off it.

1.0 64 GB RAM Mac Pro 3,1 Failure to Boot High Sierra
---- Summary of relevant results ------
64 GB 2008 Mac Pro 3,1 and High Sierra ... High Sierra boot stalls on (never exits) "Waiting on DSMOS"
56 GB or less 2008 Mac Pro 3,1 and High Sierra ... High Sierra boot proceeds normally in all RAM cases 56 GB and under.
64 GB 2008 Mac Pro 3,1 and Sierra (10.12) ... Sierra (10.12) boot proceeds normally.

1.1 Discussion:
Hi dtrimble,

It's been some time since your original post, so you may not see this, but in case you do - or others find it helpful - I also have a 2008 Mac Pro 3,1 with 64 GB of RAM ... I was able to succeed with dosdude1's High Sierra Patcher, but in the process I did learn something useful that could be your problem. After much investigation through repeated power-off/power-on verbose (-v) boots and RAM experiments, I was able to confirm that in my particular Mac Pro 3,1 configuration, High Sierra does not exit DSMOS if 64 GB of RAM is loaded into the two RAM risers. I have no solution beyond reducing the RAM from 64 GB to the next highest size (56 GB). "DSMOS" is the kernel extension code Apple uses to trigger and prevent macOS from booting if macOS is run on non-apple hardware... but under High Sierra, it apparently can't exit on a MacPro 3,1 with 64 GB of RAM.

For general information, I have experimented with loading the risers with 64 GB and attempting to boot in High Sierra with boot-args, but in all cases the boot stalled at "Waiting on DSMOS."
sudo nvram boot-args="maxmem=32" and
sudo nvram boot-args="maxmem=64"

Other reading and searching (that's how I saw your note) brought up a few other possibilities but nothing I read seemed feasible to try with my skill set <smile>... So, I'm accepting the 56 GB RAM constraint, and just using the now "extra" two 8 GB DIMMs as cold spares.

2.0 SLOW INSTALL Workaround:
In my case, I used a PCIe USB 3.0 Card (Sonnet tech Allegro still sells a nice one) to provide USB 3.0 into the Mac Pro 3,1. For the High Sierra Boot Volume, I used 1 TB SSD and selected J HFS+ (Mac OS Extended, Journaled).
The SSD connected to USB 3.0 via a USB 3.0 to SATAIII cable. This is a faster than pulling one of the drives out of one of the 4 bays and replacing it with the SSD; however, if you don't want to install a USB 3.0 card, then even SATA 3.0 Gbps is pretty quick (375 MB) so you are right - that's better than using the USB 2.0 ports native to the Mac Pro 3,1.


Good luck!
parker

My configuration for reference
Hardware Overview:
Model Name: Mac Pro
Model Identifier: MacPro3,1
Processor Name: Quad-Core Intel Xeon
Processor Speed: 2.8 GHz
Number of Processors: 2
Total Number of Cores: 8
L2 Cache (per Processor): 12 MB
Memory: 56 GB
Bus Speed: 1.6 GHz
Boot ROM Version: MP31.006C.B05
SMC Version (system): 1.25f4
Graphics:
ATI Radeon HD 5870
Chipset Model: ATI Radeon HD 5870
Bus: PCIe. Slot: Slot-1. PCIe Lane Width: x16
VRAM (Total): 1 GB
Wifi Card Replaced with 802.11ac model
Card Type: AirPort Extreme (0x14E4, 0x111)
Firmware Version: Broadcom BCM43xx 1.0 (7.77.37.5.1a3)
Supported PHY Modes: 802.11 a/b/g/n/ac
Supported Channels: 1, 2, 3, 4, 5, 6, 7, 8, 9, 10, 11, 36, 40, 44, 48, 52, 56, 60, 64, 100, 104, 108, 112, 116, 120, 124, 128, 132, 136, 140, 144, 149, 153, 157, 161, 165
AirDrop: Supported
AirDrop Channel: 149
Auto Unlock: Supported
Status: Connected
 

Attachments

  • 64GB_MacPro3_1_High_sierra_fail2.jpg
    64GB_MacPro3_1_High_sierra_fail2.jpg
    476.5 KB · Views: 274
Installed HS on a Mac Mini 3,1 that I bought for use as a media server, and replaced the old slow hard drive with an SSD. Other than incompatible Airport (that I'm not using anyway), the install works without a hitch.
 
[ softwareupdate ] Cannot install System Update 10.13.1 or any other app.
  • App Store hangs when Update tab selected.
  • softwareupdate command hangs at the terminal.
  • I have run diskutilty First Aid and repair permissions
  • I tried deleting com.apple.softwareupdated.plist and other suggested remedies for softwareupdate hangs.
When I download swupatch.sh and run script it hangs at:

Would you like to refresh available updates now? (y/n): y
Software Update Tool
Finding available software

Any tips or troubleshooting suggestion are much appreciated.

( If softwareupdate can be fixed I am going to install a SSD and wifi card to make my 10 year old 2008 iMac "feature complete" again. :)

Thank you for great smart software that keeps my iMac 24" Early 2008 running!
 
I have a mid 2009 MacBook Pro 5.4 which has been a great computer for many years. I upgraded it with 8gb of ram and a solid state drive. It runs fast and I was able to update it to Sierra and High Sierra thanks to the hard work of many here. I had no issues up to 10.13.3. At that point I started having issues and decided it was probably time to stop the un-supported updates and revert back to El Capitan and let it live it’s life out from there.

No problem I thought because I have years worth of time capsule backups.

I was able to get El Capitan downloaded and re-installed but could not restore any of pre Sierra TC backups because some of the backups in the sparce bundle were created with Sierra. I get a message telling me I have to upgrade the OS to restore. That is frustrating. I can manually install many files but it is a pain. Also photos won’t work because the library was upgraded.

I have figured out most workarounds but think that maybe you should warn on the first post that going back is almost impossible and a PIA.

I also had a thought I might use this computer to run Windows. I used to run Vista on it through Parallels. My old version of Parallels is obsolete, so is Vista. Apparently the old MacBook Pro will not run Windows 10 with Bootcamp, but you can’t purchase Windows 7 anymore which it will support.

So sadly it looks like it will sit on a shelf seeing very little use until I can upgrade to a later model Mac that I can restore from my Time Capsule.

I guess it is to be expected from a 9 year old machine but just sad when it works so fast and well.

I went to Apple because I grew tired of having to replace Windows PC’s every few years. Now Apple has joined the planned obsolescence game.

You can install Windows 10 64bit on your macbook. You just have to burn the Windows 10 iso to a dvd and install it like you would any PC. After installing run the bootcamp 5 installer and you’re golden. With a new battery that laptop will last a long time on Windows 10. I have Windows 10 running on a 2010 mbp and it’s fast even with a spinning hard drive.
 
  • Like
Reactions: roronl
You can install Windows 10 64bit on your macbook. You just have to burn the Windows 10 iso to a dvd and install it like you would any PC. After installing run the bootcamp 5 installer and you’re golden. With a new battery that laptop will last a long time on Windows 10. I have Windows 10 running on a 2010 mbp and it’s fast even with a spinning hard drive.

I was assumimg I couldn’t based on this information:

Mac computers that support Windows 10
The following Mac models support 64-bit versions of Windows 10 when installed using Boot Camp. Use About This Mac to see which Mac you have, then check this list to see if it supports Windows 10:

  • MacBook Pro (2012 and later)
  • MacBook Air (2012 and later)
  • MacBook (2015 and later)
  • iMac Pro (2017)
  • iMac (2012 and later)
  • Mac mini (2012 and later)
  • Mac mini Server (Late 2012)
  • Mac Pro (Late 2013)

Are you saying I can? Want to make sure because I would have to purchase a full version.
Well, if not, use Linux to use the MacBook a few years on, right?
 
I was assumimg I couldn’t based on this information:

Mac computers that support Windows 10
The following Mac models support 64-bit versions of Windows 10 when installed using Boot Camp. Use About This Mac to see which Mac you have, then check this list to see if it supports Windows 10:

  • MacBook Pro (2012 and later)
  • MacBook Air (2012 and later)
  • MacBook (2015 and later)
  • iMac Pro (2017)
  • iMac (2012 and later)
  • Mac mini (2012 and later)
  • Mac mini Server (Late 2012)
  • Mac Pro (Late 2013)

Are you saying I can? Want to make sure because I would have to purchase a full version.

Windows 10 is running fine on the very first MacBook (MacBook1,1).
 
Windows 10 is running fine on the very first MacBook (MacBook1,1).

It's nice that Microsoft still supplies the 32-bit version of Windows 10 for older machines, for those who need to run Windows.

There's also a way to convert the 64-bit Windows 10 iso to boot on 64-bit Macs with 32-bit EFI:
https://josephlo.wordpress.com/2015/08/09/tutorial-installing-windows-10-64-bit-on-2007-imac-7-1/

Scroll down to Step 1 for the link to Microsoft's own tool to make the conversion. Works like a charm.
 
I was assumimg I couldn’t based on this information:

Mac computers that support Windows 10
The following Mac models support 64-bit versions of Windows 10 when installed using Boot Camp. Use About This Mac to see which Mac you have, then check this list to see if it supports Windows 10:

  • MacBook Pro (2012 and later)
  • MacBook Air (2012 and later)
  • MacBook (2015 and later)
  • iMac Pro (2017)
  • iMac (2012 and later)
  • Mac mini (2012 and later)
  • Mac mini Server (Late 2012)
  • Mac Pro (Late 2013)

Are you saying I can? Want to make sure because I would have to purchase a full version.

That’s the official stance from Apple. You can literally burn a win 10 install dvd, boot to it and install Windows 10 like any computer. You just have to manually install the bootcamp 5 drivers which is just running the 64 bit bootcamp installer from the command line in Windows. Works like a champ
 
  • Like
Reactions: roronl
Beta 4 (17E170c)... from iBooks.app (10.13.3), to Books.app (Beta 3), back to iBooks.app (Beta 4). Wonder why... Installation went without a hitch
 
Last edited:
Beta 4 (17E170c)... from iBooks.app (10.13.3), to Books.app (Beta 3), back to iBooks.app (Beta 4). Wonder why... Installation went without a hitch
I can tell you why, in beta 3 of iOS the iCloud-syncing of books between macOS and iOS was broken. In this iOS beta 4 the previous working app iBooks is restored.
 
That’s the official stance from Apple. You can literally burn a win 10 install dvd, boot to it and install Windows 10 like any computer. You just have to manually install the bootcamp 5 drivers which is just running the 64 bit bootcamp installer from the command line in Windows. Works like a champ
OK - I'm trying to run windows along side Mac OS )don't care how) but my drive's formatted APFS and windows says it has to be NTSB or something. Now, I can re-format the bootcamp partition with windows but when I do everything gets sorta borked. Any ideas?

I'm on a Mac Pro 3,1 with a SSD drive. The Mac Pro, is very tetchy about drives and evidently the windows EFI has - HAS to be on a USB stick? and Windows ISO definitely HAS to be on the optical drve )DVD-RW.). Why it can't or won't work? why????

Postscript -
I may somehow have a bad windows ISO? - this is what windows says when I boot from the DVD.
Gonna try again and re-write it and install first then add the drivers. Thanks
 
Last edited:
I'm very grateful for this patch. I'm running a MacBook Pro 4,1 and have everything working except two finger secondary click on the trackpad. It's weird that it doesn't function, as all the other multitouch functions do. Has anyone else had similar struggles?
 
OK - I'm trying to run windows along side Mac OS )don't care how) but my drive's formatted APFS and windows says it has to be NTSB or something. Now, I can re-format the bootcamp partition with windows but when I do everything gets sorta borked. Any ideas?

I'm on a Mac Pro 3,1 with a SSD drive. The Mac Pro, is very tetchy about drives and evidently the windows EFI has - HAS to be on a USB stick? and Windows ISO definitely HAS to be on the optical drve )DVD-RW.). Why it can't or won't work? why????

Windows 10 has to be installed on a partition formatted with NTFS (can format during the install). I tried a few different methods to create a Win10 USB drive installer but could never get different Macs to recognize it, but they recognize the blank DVD when I burned the Win10 ISO to it. Bootcamp probably does something to the USB drive to get the Mac to recognize it but you can't use bootcamp to create a Win10 USB on High Sierra because it will say your Mac Pro isn't supported. Here's what I did for my MacBook and iMac that aren't officially approved by Apple to run Win10:

- Download the Win10 64bit iso (must be 64bit) from microsoft directly and burn to a dual layer DVD (it's slightly too large to fit on a regular blank DVD).

- Using disk utility make a partition on your hard drive for the Win10 install and format it as MS-DOS and master boot record. Name the partition anything.

- Put the Win10 install DVD in your drive and shut down. Start up and hold down option to get the boot options. Choose the picture of the disc that says Windows, not the one that says EFI. In a few minutes the Win10 installer will load.

- Choose to make a new install (not upgrade) and select the partition you formatted as MS-DOS. Click format then the "next" button on the bottom left will be clickable and the installer will do its thing. After 30 minutes or so you'll be at the Win10 welcome screen and will choose different configuration options then will boot to the desktop.

- Download the Bootcamp 4 and 5 drivers from apple. The Win10 install should have generic drivers for the Mac Pro ethernet but if not you'll need to find a way to get the bootcamp drivers on your Windows install (download on your Mac install and copy to a flash drive formatted in FAT32 for example).

- Copy the Bootcamp 4 and 5 driver folders to the C: drive on your Win10 install.

- In the search bar on the bottom of the task bar type "cmd" then right click the command prompt program that pops up and run as admin. Change the directory to the C: drive then to the apple folder in bootcamp 5 driver folder. After you're in that folder you'll type msiexec /i bootcamp.msi and the bootcamp 5 installer will load. after about 10 minutes bootcamp will be installed and you'll restart your computer. Make sure you option boot and select windows to get to the Win10 install.

- The drivers for your Mac pro should be installed now but you can check the device manager under "this pc". If you see any hardware with a ! next to it you can select it and choose to update the driver. Choose that you want to browser for the driver and to search sub folders for the location. Select the bootcamp 5 folder and if that doesn't have the driver search again but choose the bootcamp 4 folder.

That's about all there is to it. If you have any questions pm me.
 
  • Like
Reactions: roronl and OGNerd
Hi guys, three questions for you! :)
I have an imac 9.1 (early 2009) with a gt120 nvidia video card; now, the patcher for sierra had a gforce9400m/gt120 injector, which is not present in the high sierra patcher. is this absence going to create problems? Second question: the first post of the thread says that screen brightness controls are missing for the imac 9.1; the screen brightness is fixed at maximum or at minimum?
last question: this imac has a "fantastic" nvidia mcp79 ahci sata controller (basically, the worst controller ever made for ssd compatibility)... i have a crucial bx300 ssd which boots sometimes at sata 2 speed, sometimes at sata 1 without any logical reason. was the driver updated after el capitan?
maybe others have already asked these questions, but I wasn't able to find anything. thank you!
 
Screen Automatically Dims to Lowest Setting!

I have a MacbookPro4,1 (2008 17"). After updating to 10.3.3 the display now dims to the lowest brightness setting repetitively. When I increase the brightness it stays that way for about a second and then reverts to the lowest brightness. I've turned off "Automatically Adjust Brightness" in Display Preferences. I have also tried resetting the SMC. No luck.

Please help! Thank you!
Re-install the backlight control patch using the Patch Updater application.
 
Hi guys, three questions for you! :)
I have an imac 9.1 (early 2009) with a gt120 nvidia video card; now, the patcher for sierra had a gforce9400m/gt120 injector, which is not present in the high sierra patcher. is this absence going to create problems? Second question: the first post of the thread says that screen brightness controls are missing for the imac 9.1; the screen brightness is fixed at maximum or at minimum?
last question: this imac has a "fantastic" nvidia mcp79 ahci sata controller (basically, the worst controller ever made for ssd compatibility)... i have a crucial bx300 ssd which boots sometimes at sata 2 speed, sometimes at sata 1 without any logical reason. was the driver updated after el capitan?
maybe others have already asked these questions, but I wasn't able to find anything. thank you!
Hi, I got the same iMac 9,1 but with the standard Nvidia GeForce card. I can tell you that with the backlight control patch, there is no problem anymore with the brightness controls. After the patch they work fine.
Maybe anyone else can help you with your sata question?
 
Hello,
i'm running High Sierra 10.13.3 on a MacBook Pro 4.1
It is perfect, thanks to dosdude and all the people that contributed in this project.

I've bought a gmyle usb 3.0 expresscard, but i can't use it: for every device i plug in i get the error "USB Accessories Disabled. Unplug the accessory using too much power to re-enable USB devices."
I'm using the Generic USB3.0 XHCI kext, downloaded here https://bitbucket.org/RehabMan/os-x-generic-usb3/downloads/

can you help me understanding what i'm doing wrong?

Thanks!

Try without that kext. OS X since 2011 or 2012 has native support for USB3 XHCI host adapters. Any USB 3 expresscard adapter, that i try will work fine in OS X with the native driver.
 
Register on MacRumors! This sidebar will go away, and you'll see fewer ads.