Become a MacRumors Supporter for $50/year with no ads, ability to filter front page stories, and private forums.
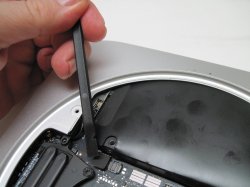
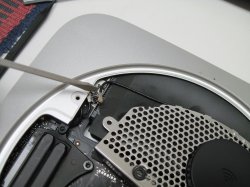
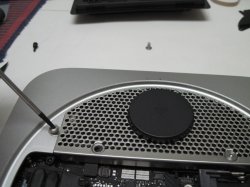
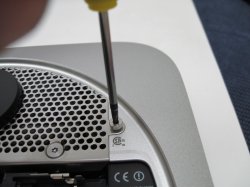
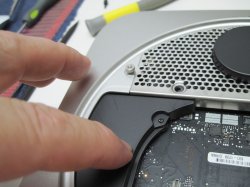
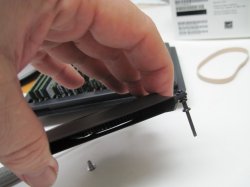
still more photos

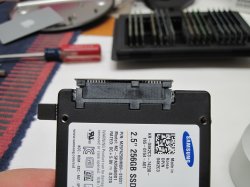
first shot has the cable on the samsung

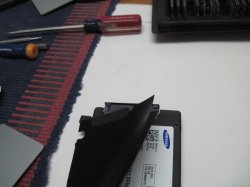
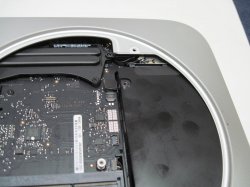
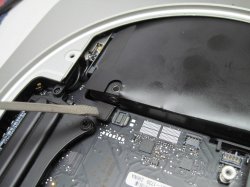
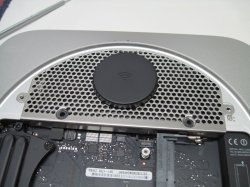
second shot has the plastic wrap be careful with it. third shot shows the drive in place it will go in without removing the entire case. fourth shot is the sata jack note the empty one next to it. the fifth shot is more of the same
 

Attachments

  • IMG_1119small.jpg
    IMG_1119small.jpg
    1.1 MB · Views: 290
  • IMG_1120small.jpg
    IMG_1120small.jpg
    846.7 KB · Views: 249
  • IMG_1121small.jpg
    IMG_1121small.jpg
    848.8 KB · Views: 261
  • IMG_1122small.jpg
    IMG_1122small.jpg
    966.5 KB · Views: 270
  • IMG_1123small.jpg
    IMG_1123small.jpg
    842.4 KB · Views: 272
Last edited:
last set of shots.

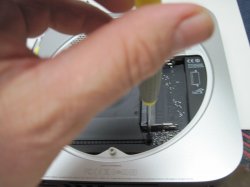
shot one the antenna. the grill is tough to fit back also make sure you seat the antenna cable correctly notice that the second shot shows the grill is not lined up. this was the only part of the job that was fff'd up I had to reseat the ssd twice and then it lined up. also the sata jack popped loose once when i was moving the ssd in place.
 

Attachments

  • IMG_1125small.jpg
    IMG_1125small.jpg
    994.8 KB · Views: 315
  • IMG_1126small.jpg
    IMG_1126small.jpg
    947.1 KB · Views: 277
first shot has the cable on the samsung

second shot has the plastic wrap be careful with it. third shot shows the drive in place it will go in without removing the entire case. fourth shot is the sata jack note the empty one next to it. the fifth shot is more of the same

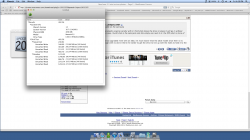
Just want to post that I too upgraded mine with an SSD, it's much easier than the 2010 model since their is no thermal sensors. Although with no dvd in there it's harder to get the drive to line up with the holes to hold it to the chassis. cheers. Attached are my benchies with xbench.
 

Attachments

  • Screen Shot 2011-07-22 at 4.09.28 PM.png
    Screen Shot 2011-07-22 at 4.09.28 PM.png
    362.5 KB · Views: 859
Just want to post that I too upgraded mine with an SSD, it's much easier than the 2010 model since their is no thermal sensors. Although with no dvd in there it's harder to get the drive to line up with the holes to hold it to the chassis. cheers.

yes lining up the ssd and the grill was tough to do. i finally realize that the far outside part of the grill the ears get attached. then the two ssd holes get done the last photo shows it off, but it has a little bit of give. if you do the ssd first the far outside screws don't line up and there is no give. All in all a very nice upgrade and not that hard to do. I did the virgin clone because it gave me an instant recovery hdd just in case. I will cone it again so i have two backups. with out the dvd i fell better have physical backups not a cloud in the sky.
 

Attachments

  • IMG_1127small.jpg
    IMG_1127small.jpg
    913.3 KB · Views: 238
  • IMG_1128small.jpg
    IMG_1128small.jpg
    912.6 KB · Views: 226
  • IMG_1129small.jpg
    IMG_1129small.jpg
    939.5 KB · Views: 236
Last edited:
If I may ask, for those of you who got the dual drive server model; upon opening it up, how did you differentiate which drive had the OS and which was additional storage?
 
If I may ask, for those of you who got the dual drive server model; upon opening it up, how did you differentiate which drive had the OS and which was additional storage?

Looking at the device with the drives farthest away from you it should be OS on the left and Storage on the right. I believe it's sata port 0 on the left and sata port 1 on the right. IIRC.
 
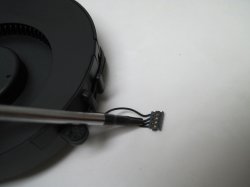
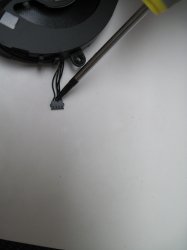
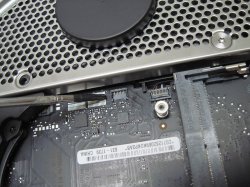
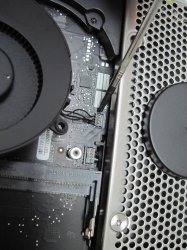
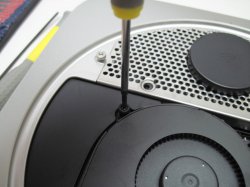
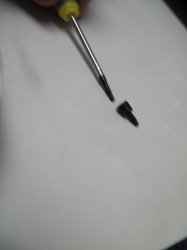
I did not realize I have a few more shots.

the locked in fan screw.
notice the second shot that is the face up part of the fan plug important.
the face down side has the four slots at the end.
the fourth shot has the fan jack with the four copper spikes

fifth shot show correct connection
 

Attachments

  • IMG_1130small.jpg
    IMG_1130small.jpg
    805.5 KB · Views: 236
  • IMG_1131small.jpg
    IMG_1131small.jpg
    847.6 KB · Views: 257
  • IMG_1132small.jpg
    IMG_1132small.jpg
    1.1 MB · Views: 260
  • IMG_1133small.jpg
    IMG_1133small.jpg
    1,012.3 KB · Views: 251
  • IMG_1134small.jpg
    IMG_1134small.jpg
    1 MB · Views: 284
Last edited:
last of the photos

fan attachment. one of two loose fan screws

the second shot on left is the locked -in fan screw

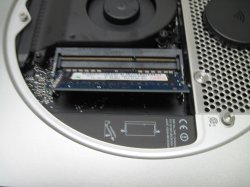
putting back the ram stick note that the angle is correct it need a bit of force to seat correctly.


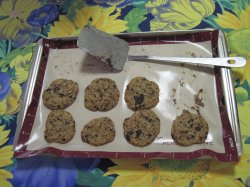
Last shot it was 102f today what is better then baking chocolate chip cookies! eating them!
 

Attachments

  • IMG_1135small.jpg
    IMG_1135small.jpg
    932.4 KB · Views: 252
  • IMG_1136small.jpg
    IMG_1136small.jpg
    795.3 KB · Views: 211
  • IMG_1137small.jpg
    IMG_1137small.jpg
    909 KB · Views: 222
  • IMG_1138small.jpg
    IMG_1138small.jpg
    962.1 KB · Views: 218
  • IMG_1139small.jpg
    IMG_1139small.jpg
    992.1 KB · Views: 248
Last edited:
To handle chips in the old days we used a putty knife, now a spatula...look how far we've come!
great shots and work as always! from the Mini Man.
 
Thanks for sharing all those pics.. Definitely will be helpful when I swap out the drive for an SSD.

Great idea about cloning the drive too. I have on windows machines around, I've cloned drives before, is there anything I should worry about for the file system on an OSX drive?
 
mac mini server ssd upgrade.

Its great, thanks for all the pics. I am thinking of getting a mac server and replace one of the 500 gb with a SSD, i am guessing that will be a easy swap since all the cables will be in place.
 
Long time ago I had two Toshiba Portege laptops and I backed those up to external HDD (running NT 3.51). Long story made short: got a virus and managed to infect both backups and both machines. I prefer to have a CD / DVD install disk and also for my software: first thing I do is to write them all to a single DVD. Moral of the story: do not rely on a HDD for your backups alone, have another means too.
 
Thanks again, I just followed your pictures/info to take apart my new mini. Currently cloning the drive to an SSD using SuperDuper (on a borrowed Mac)! Followed your advice and never booted it, this way can get a nice restore image to keep.

OSX feels so weird to me, I've never really used it much. Question - could Disk Utility in OSX do the same thing? Create an image from disk, and restore it to disk?
 
Thanks for sharing all those pics.. Definitely will be helpful when I swap out the drive for an SSD.

Great idea about cloning the drive too. I have on windows machines around, I've cloned drives before, is there anything I should worry about for the file system on an OSX drive?

No but remember I cloned it as a virgin drive.

if you boot and register set the mac up it is not the same.

Just mark it as a rescue hdd and clone a few more copies of it then it never use the virgin until you run out of clones. Of course to do it you need a second mac.
 
Phill, to make this "Virgin Clone" do you need a two hole toaster like you have, or can you do it with a single hole toaster and another mac. Or could you daisy chain two toaster together, run them with another mac?

tom d
 
Are your fan speeds / temperature sensors OK with the replacement drive?


I don't know I have to install some temp readers

Wow, nice thread.


Cheers


How much did the 256GB Samsung SSD drive cost?
$375 USD on usa ebay


Phill, to make this "Virgin Clone" do you need a two hole toaster like you have, or can you do it with a single hole toaster and another mac. Or could you daisy chain two toaster together, run them with another mac?

tom d


You need a second mac you need to have the second booted to 10.6.8 with super duper

you need 2 empty bays one for a blank hdd

one for the virgin oem you pulled


the low cost thermal take is on ebay for 35 bucks


http://shop.ebay.com/i.html?_from=R...=thermaltake+st0014&_sacat=See-All-Categories


or from thermal take

http://www.thermaltakeusa.com/store/Product.aspx?C=1031&SC=1073&ID=1043


as a complete aside I dropped in 8gb ram today came from new egg works great i am running hand brake and a few more jobs no more page outs.
 
Thank You!! I just ordered one from ebay.

I also ordered a base mini today from Maconnection, $579, no tax, no shipping have been watching your progress on the site, looks like more room than when I did the 2010. I hate the paper on the hard drive.

Keep up the good work and thanks for sharing.

tom d
 
As an Amazon Associate, MacRumors earns a commission from qualifying purchases made through links in this post.
Phillip,

How would I go about Raiding(Raid0) 2 SSD's in the Mac Mini Server Version.

Could I pop 2 (SSDs) in the toaster and RAID them, then install them in my MAC MINI and boot with a USB thumb drive with OSX Lion on board and install? Do you think this would work?
 
Last edited:
Thanks Philip, very helpful thread. Did you get this ram?

http://www.newegg.com/Product/Product.aspx?Item=N82E16820231342

I am thinking of getting this one from Amazon

http://www.amazon.com/Corsair-DDR3-...1333C9/dp/B002YUF8ZG/ref=cm_cr_pr_product_top

- Jay

http://www.newegg.com/Product/Product.aspx?Item=N82E16820220476

I had a mistaken memory and believed I purchased the g skill ram. I purchased this ram

http://www.newegg.com/Product/Product.aspx?Item=N82E16820220476 25 dollars a stick


Phillip,

How would I go about Raiding(Raid0) 2 SSD's in the Mac Mini Server Version.

Would this tutorial help me with this? I have 2 Mac Mini's to do the clone.

don't do it. I could give you a long story right now but i won't.

the short story is lion has had some software raid issues.

Wait a while.

@@@@@@@@@@@@@@@@@@@@@@@@@@@@@@@@@@@@@@@@@@@@@@@@@@@@@@@@@@@@@@@@@
After you have waited and some one has confirmed it can be done below should work::


You have the server the 2010 server had a key to activate the software that was snow leopard. i don't know about lion but if it has a key. pulling the two drives with out ever turning the mini on should work.

don't boot turn the second mini on and make sure it is booted .

plug the thermaltake into it then use a thermaltake to read which one has the software.


take the live oem hdd and mark it. at this point get an empty hdd and copy it with super duper.


you have an empty mini.

you have two osx never used the oem and the copy


you have a blank oem hdd .

you have two ssd's


now put the two ssd's in the empty mini close up everything.


take the oem hdd with the oem osx and stash it in a safe place.

take the themaltake plug it into the mac that has 2 empty ssds.
drop the copy of the virgin oem osx the copy!!!!
put it in the thermaltake
power the thermal take


boot the mini
the mini will go wtf there are no internal sata drives it will look for a boot drive it will find the copy in the thermaltake and boot

(I hope not sure). At this point in time you would activate the server software and then make a software raid with the internal ssds. then go online download superduper to the eternal thermaltake osx. now just clone the external to the raid internal. power down detach the thermal take. leaves you with just a mini that should have a good clone on the raid0


phiberbox

I just read your edit that idea will not work. My longer slower way above should work when the lion raid bug is fixed ( i read a thread on the lion raid bug not sure how true it is)
 
As an Amazon Associate, MacRumors earns a commission from qualifying purchases made through links in this post.
Register on MacRumors! This sidebar will go away, and you'll see fewer ads.