Hi everybody,
With all the precious information here, I managed to get an NVMe SSD work in my MacBook Air mid-2013!
Here's my configuration:
Device: MacBook Air 13" (A1466, mid-2013, MacBook 6,2)
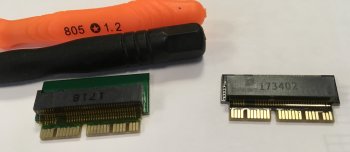
Adapter: Chenyang (I think it looks like a Chenyang)
NVMe Drive: ADATA SX7000NP (256 GB)
OS: macOS High Sierra (11.13.3)
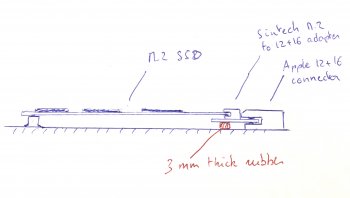
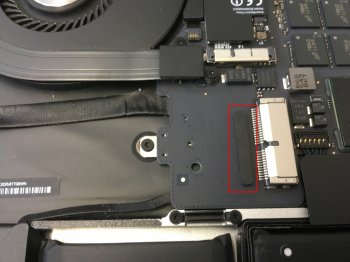
The adapter was bought directly from Taobao with less than USD 4 (for those not familiar with it, it's a Chinese eBay I would say). I did put isolation tape on it as shown in the pictures attached.
The macOS installation went well. The procedures I followed:
0. Make High Sierra installation media and Ubuntu bootable USB.
1. Swap the Apple SSD with ADATA SX7000NP, with the isolation tape applied.
2. Boot with Ubuntu USB.
3. Go to "Disks" and format the new SSD. I chose FAT as the filesystem.
4. Reboot and fire up macOS High Sierra Installation.
5. Upon the menu, choose "Disk Utility" to partition the SSD with proper format and partition table style. Now, I knew GPT is a must; however, I did not know if it's more reasonable to choose APFS over HFS+J. I thought I read something about formatting the SSD with HFS+J would do the job so I also did so. Will explain later.
6. Back to the menu. Just selected install and all went very smoothly.
7. After installation, I restore the system with my Time Machine backup. Again, without any problem.
8. When it finished restoring, I checked the filesystem and it had been converted to APFS as I desired.
I ran some speed tests and got around 750 MB/s write and 1,150 MB/s read. This is an insane improvement from the stock Apple SSD and of course the capacity has been doubled. Total cost is less than USD 100! I'd like to thank all of you contribute to this thread again and cheers to remarkable work of
@gilles_polysoft
The only issue remains the hibernate problem. I have to put standby into 0 to make sure my laptop wake up properly.
Looking forward to future development of the work!


