Become a MacRumors Supporter for $50/year with no ads, ability to filter front page stories, and private forums.
Status
The first post of this thread is a WikiPost and can be edited by anyone with the appropiate permissions. Your edits will be public.
860m will work but must be clevo bios as black screen... need to upload Dell or nvidia Bios... you can install Ubuntu and use terminal NVFASH, or yet to try DOS boot up disk.... even if you revert to 700 series its all about the bios version (Umbuntu will load card in test mode and full install, once nvidia driver is installed you lose the brightness control so reverted install)
I managed to flash all 3 (dell, nvidia, clevio), but I think my card got a short circuit and now it is broken ... I had a dell at the beginning and still had no picture ...i look later to the short circuit...when i install this card ,always slams the fi ( earth leakage circuit breaker ) down
 
Last edited:
I've been used to working on a 2009 27" iMac where the MXM GPU slides out after removing 4 or 5 screws from the "front". Today, I was given (lucky me) a 2011 27" iMac with YET another burned out MXM card. I thought I'd take a quick look at the card, only to discover the entire logic board has to be removed to get the card out because Apple has reversed the heat-sink mounting screw heads to the "back" of the board. The poor Apple service techs must have been pulling their hair out in frustration. What was an easy 30-minute service job is now at least an hour with multiple connectors and opportunities for breakages.
 
Yeah, I've got one of those.

On the bright side, bump it up to a 2600 cpu while you're in there, clean all the heatsinks and it's still pretty snappy for running cool & quiet.

Swap the hd for an 8 or 10TB & run a TB ssd mounted under the dvd & you're all set :)


edit: When you reassemble it you can put the screws in from the front like the 09/10 models. Next video card swap won't require pulling the mb out.
 
Last edited:
Hello everybody,

i managed to replace the old GPU with a K2100m in my 2011 27" imac. I want to create a bootable linux stick from #1 but i cant get a GPT+Fat32 "bootable" with diskutil under High Sierra.
/dev/disk3 (external, physical):


#: TYPE NAME SIZE IDENTIFIER

0: GUID_partition_scheme *16.0 GB disk3

1: EFI EFI 209.7 MB disk3s1

2: Microsoft Basic Data UNTITLED 15.8 GB disk3s2

this is how the stick shows up in terminal after "sudo diskutil partitiondisk disk3 GPT FAT32 UNTITLED 16GB"
But when im copying the filestructure on it, my imac doesnt do anything. Runs up at Fan lvl 100 (all other SSDS disconnected) i cannot ssh to it, the process timedout.
Can anyone help?

greetings from germany!
 
Can anyone help?

greetings from germany!
Guten Morgen!
Try just file system type msdos. FAT32 does not boot, it is clearly an error in the original post. Here the output of the terminal mount command after plugging in my own working linux boot flash stick.
Code:
/dev/disk5s2 on /Volumes/FLASH (msdos, local, nodev, nosuid, noowners)
I guess this particular linux kernel has no support to read fat32 before loading an external module...which cannot be done on boot.
 
Hello to everybody, I'm waiting for my K2100M :


I read a lot this thread before making my first post. I must admit that it is not so straightforward to follow (although I'm quite trained to computer HW modifications and upgrades). I will come back to you soon with more precise questions.

I have a iMac 27inch Mid 2011 with already a few mods and repairs (the most scary I did was removing the smudges between backlight panel and LCD : do not hope to do that again soon...).

I would like to flash my K2100M with the CH341 method (prefer the old school way) : any reference and ebay link in order to choose the correct one with all needed clip / cables ?

Thanks in advance and talk to you soon.
 
I just realised I might not be able to progress today. I am out of K5...
Any reason why I would not use Arctic MX-4 instead on the GPU and the VRAMs?
Also anyone knows a place to get the K5 quickly in Europe?
 
I just realised I might not be able to progress today. I am out of K5...
Any reason why I would not use Arctic MX-4 instead on the GPU and the VRAMs?
Also anyone knows a place to get the K5 quickly in Europe?
You have to take a bath in the Amazonas...
MX-4/MX-2 on the GPU, K5 on the VRAM and other chips as recently described...
 
Hello to everybody, I'm waiting for my K2100M :


I read a lot this thread before making my first post. I must admit that it is not so straightforward to follow (although I'm quite trained to computer HW modifications and upgrades). I will come back to you soon with more precise questions.

I have a iMac 27inch Mid 2011 with already a few mods and repairs (the most scary I did was removing the smudges between backlight panel and LCD : do not hope to do that again soon...).

I would like to flash my K2100M with the CH341 method (prefer the old school way) : any reference and ebay link in order to choose the correct one with all needed clip / cables ?

Thanks in advance and talk to you soon.
hi
this one usb flasher
 
That's where it's gotten weird. I searched for the phrase mentioned upstream, and I got a lot of Dell and Alienware boards, and only two links to mac specific boards, and they were both really low memory. I figure if I'm going to go through this I might as well go big, or just live with what I've got.

What did it come with? AMD Radeon HD 6970M 1G. This website seems to think it's a 'high end' card. *shrug* Maybe I don't need to replace it. I did have some issues with it, and called Apple, and was told they wouldn't do anything for me. It wasn't included in their recall/service plan.

I only know this from reading this form a lot so hopefully I’m not wrong. You see dell and Alienware because these boards weren’t made for an iMac - they are removed from dell and Alienware computers. Certain cards (the ones listed on page 1) work in an iMac when flashed, even though they aren’t made for an iMac.


27” iMacs have 2 heat sinks & yours is the larger one so you can get one of the better cards like gtx 780 but you need to modify the heat sync. If you don’t want to, go for a k2100m. They’re like $40. But yea If you’d rather just go big or keep what you have, you’ll be paying $250-300 for the AMD cards. They’re rare.
 
Last edited:
  • Like
Reactions: NOTNlCE
How to Boot Seamlessly using the OpenCore Bootloader

Many thanks to Nick(D)VB for bringing my iMac back to life!

After spending many hours on a bazillion forums, here are the steps on how to get your iMac to boot using the OpenCore Bootloader with no keyboard manipulations. This works for Catalina 10.15.3 and 10.15.4 on a 2009 2011 iMac (possibly 2010, but I would need someone to confirm). I can't say for other versions or other iMacs.

1. Read the post from Nick here and download the OpenCore Bootloader. The password is: NICK
2. Download BalenaEtcher https://www.balena.io/etcher/. Alternatively, you can use Disk Utility.
3. Using BalenaEtcher copy the Opencore Bootloader.dmg to your USB or SD card. With Disk Utility, you can restore the file to your USB or SD Card. If you use BalenaEtcher, it is normal to get the error message about a missing partition table. Click on Continue.
4. Eject and reinsert your USB or SD card. You should see in Finder "Catalina Loader".
5. Go to Finder, click on Go from the top menu and choose Go to Folder. Put without quotation marks "/Volumes/Catalina Loader/EFI/OC". Hit enter.
6. In this folder, locate config.plist and rename it. For example, configbak.plist.
7. Unzip the appropriate archive: nvidia.zip for Nvidia cards and amd.zip for AMD cards.
8. Double-click the new config.plist that was just extracted. OpenCore Configurator should open. If not, you will have to go to the root of your USB and SD card and open OpenCore Configurator and find your config.plist file.
9. On the left, click on Kernel. Make sure the first 6 kexts are checked. UNLESS, you have a Nvidia card and you installed kexts when setting up your card (namely Sandybridge and Sleep). In this case, uncheck the first two (Lilu.kext and WhateverGreen.kext). If your computer hangs after the OpenCore Bootloader, this is why.
10. Click on Misc on the left. Change External to Builtin. Make sure Show Picker and PollAppleHotKeys are checked.
11. At the top right, click on Security. Make sure AllowSetDefault is checked.
12. Click on File and then Save.
13. Normally, you would go into System Preferences and in the StartUp Manager choose Catalina Loader. This did NOT work for me and caused me a lot of grief trying.
14. Reboot your computer
15. Be ready to hit your Option key, as your iMac reboots.
16. When you are presented with your boot options, use the arrow to select Catalina Loader. Here this is important to hit CTRL + Enter at the same time, You will see an arrow under Catalina Loader indicating that it is the default boot item.
17. You should now see the OpenCore Boot Picker. Use the arrow to select your iMac boot drive. Again, very important to use CTRL + Enter. This will tell the OpenCore boot loader this is your default boot device. It will now boot into your Apple partition.
18. Do a test. Reboot your computer and should boot directly to your Apple partition through the OpenCore Bootloader. Be patient it does sit on the OpenCore Boot Picker for about 10-15 seconds. You can check if you are able to change your brightness settings.
19. If it works correctly, go to Finder. Click on Go from the top menu and choose Go to Folder. Put without quotation marks "/Volumes/Catalina Loader/EFI/OC". Hit enter.
20. Open the config.plist with the OpenCore Configurator again.
21. Click on Misc on the left. Uncheck Show Picker.
22. Click on File and Save again.
23. Reboot again and you should have a slight delay. You will not see the OpenCore Boot Picker then it will go directly to the Apple boot screen.
24. You must leave the USB or SD card in your iMac as it will boot from the OpenCore boot loader.

It should work beautifully now!
 
Last edited:
Have you noticed the raspberry Pi solution lately posted here? I am not a expert on this, but looks to me as it is a 100% replacement. Again, on page one you will find the link or search the thread...or ask the creator @passatgt directly.
Isn't it too greasy to use one computer to control brightness in other? If it's not.. Well, I have some PCs... :)
 
How to Boot Seamlessly using the OpenCore Bootloader

Many thanks to Nick(D)VB for bringing my iMac back to life!

After spending many hours on a bazillion forums, here are the steps on how to get your iMac to boot using the OpenCore Bootloader with no keyboard manipulations. This works for Catalina 10.15.3 on a 2011 iMac. I can't say for other versions or other iMacs.

1. Read the post from Nick here and download the OpenCore Bootloader.
2. Download BalenaEtcher https://www.balena.io/etcher/. Alternatively, you can use Disk Utility.
3. Using BalenaEtcher copy the Opencore Bootloader.dmg to your USB or SD card. With Disk Utility, you can restore the file to your USB or SD Card.
4. Eject and reinsert your USB or SD card. You should see in Finder "Catalina Loader".
5. Go to Finder, click on Go from the top menu and choose Go to Folder. Put without quotation marks "/Volumes/Catalina Loader/EFI/OC". Hit enter.
6. In this folder, locate config.plist and rename it. For example, configbak.plist.
7. Unzip the appropriate archive: nvidia.zip for Nvidia cards and amd.zip for AMD cards.
8. Double-click the new config.plist that was just extracted. OpenCore Configurator should open. If not, you will have to go to the root of your USB and SD card and open OpenCore Configurator and find your config.plist file.
9. On the left, click on Kernel. Make sure the first 6 kexts are checked. UNLESS, you have a Nvidia card and you installed kexts when setting up your card (namely Sandybridge and Sleep). In this case, uncheck the first two (Lilu.kext and WhateverGreen.kext). If your computer hangs after the OpenCore Bootloader, this is why.
10. Click on Misc on the left. Change External to Builtin. Make sure Show Picker and PollAppleHotKeys are checked.
11. At the top right, click on Security. Make sure AllowSetDefault is checked.
12. Click on File and then Save.
13. Normally, you would go into System Preferences and in the StartUp Manager choose Catalina Loader. This did NOT work for me and caused me a lot of grief trying.
14. Reboot your computer
15. Be ready to hit your Option key, as your iMac reboots.
16. When you are presented with your boot options, use the error to select Catalina Loader. Here this is important to hit CTRL + Enter at the same time, You will see an arrow under Catalina Loader indicating that it is the default boot item.
17. You should now see the OpenCore Boot Picker. Use the arrow to select your iMac boot drive. Again, very important to use CTRL + Enter. It will now boot into your Apple partition.
18. Do a test. Reboot your computer and should boot directly to your Apple partition through the OpenCore Bootloader. Be patient it does sit on the OpenCore Boot Picker for about 10-15 seconds. You can check if you are able to change your brightness settings.
19. If it works correctly, go to Finder. Click on Go from the top menu and choose Go to Folder. Put without quotation marks "/Volumes/Catalina Loader/EFI/OC". Hit enter.
20. Open the config.plist with the OpenCore Configurator again.
21. Click on Misc on the left. Uncheck Show Picker.
22. Click on File and Save again.
23. Reboot again and you should have a slight delay. You will not see the OpenCore Boot Picker then it will go directly to the Apple boot screen.

It should work beautifully now!
hi
where do you find > 7. Unzip the appropriate archive: nvidia.zip for Nvidia cards and amd.zip for AMD cards.
thx
 
There is a more easy way to show the hidden files within Finder: Just fire up the Terminal and enter this line:

Code:
defaults write com.apple.finder AppleShowAllFiles TRUE;killall Finder

If your are tired of watching all hidden secrets:

Code:
defaults write com.apple.finder AppleShowAllFiles TRUE;killall Finder

You can also use the Terminal to change the working directory to the

Code:
wolf@WolfsiMac27 OC % cd /Volumes/Catalina\ Loader/EFI/OC
wolf@WolfsiMac27 OC % ls -al
total 768
drwxrwxrwx  13 wolf  staff     442  3 Apr 18:40 .
drwxrwxrwx@  5 wolf  staff     170  2 Mär 05:00 ..
-rw-r--r--@  1 wolf  staff   18436  4 Apr 02:41 .DS_Store
drwxr-xr-x   4 wolf  staff     136  4 Mär 07:36 ACPI
-rw-r--r--@  1 wolf  staff    3623 12 Mär 08:13 AMD config.plist.zip
drwxr-xr-x  17 wolf  staff     578 13 Mär 17:35 Drivers
drwxr-xr-x  34 wolf  staff    1156 13 Mär 18:09 Icons
drwxr-xr-x  18 wolf  staff     612 13 Mär 18:22 Kexts
-rw-r--r--@  1 wolf  staff    3566 12 Mär 08:12 NVIDIA config.plist.zip
-rw-r--r--   1 wolf  staff  346336 13 Mär 17:12 OpenCore.efi
drwxr-xr-x   5 wolf  staff     170 12 Mär 01:50 Resources
drwxr-xr-x  12 wolf  staff     408 13 Mär 17:33 Tools
-rwxr-xr-x@  1 wolf  staff   15777  2 Apr 11:42 config.plist
wolf@WolfsiMac27 OC %

and do everything by hand - what I clearly prefer in any case.
 
K5 is recommended for some time already so that is not new. The main question is why? Why not regular CPU/GPU thermal paste (in higher quantity) for the VRAM?
You asked where to get it not what are the main advantages over a more fluent paste. The K5 can be used easily to level all the edges on a sink. For that reason I prefer it. And I found a short description of an experiment with K4, K5 and Artic MX-2 on the very same GPU (post #34 and #39, probably read the complete page). I would not call it a scientific paper, but you may get an idea.
 
Last edited:
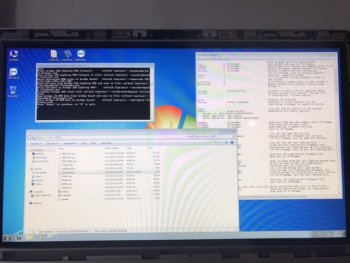
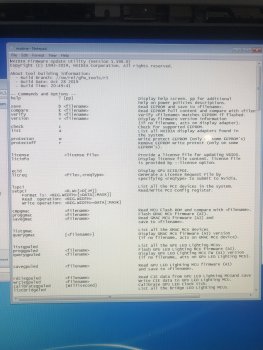
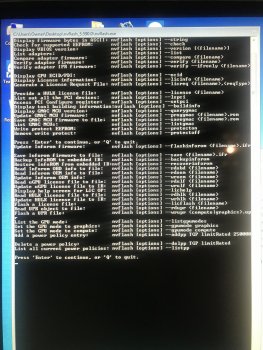
After reading the most important part of the topic I have already made the change from my stock baked gpu to a quadro k1100m, everything went perfectly, now I am going to make the flash using the method of @jowaju but I get stuck in nvflash and what to write there. Any help is welcome, Thanks
 

Attachments

  • 5854444B-3798-47A7-80A1-5505434B927A.jpeg
    5854444B-3798-47A7-80A1-5505434B927A.jpeg
    82.4 KB · Views: 364
After reading the most important part of the topic I have already made the change from my stock baked gpu to a quadro k1100m, everything went perfectly, now I am going to make the flash using the method of @jowaju but I get stuck in nvflash and what to write there. Any help is welcome, Thanks
There is a readme file on the image :)
 
Yes I know, but the readme only show codes like this. Any key that I press show the same think.
Sorry, I thought you go the Linux flash image way - never used Windows myself. The command line will be pretty much the same, I guess. Take a look at this linux commands:
Code:
./nvflash_linux --protectoff
./nvflash_linux -6 yournewbios.rom
./nvflash_linux --verify
yournewbios.rom will be the K1100.rom ....

I think I will try the Linux method, because I think this seems to be missing some info in this method
 
Many thanks for this herrdude. It is EXACTLY what I wanted and works perfectly.

How to Boot Seamlessly using the OpenCore Bootloader

Many thanks to Nick(D)VB for bringing my iMac back to life!

After spending many hours on a bazillion forums, here are the steps on how to get your iMac to boot using the OpenCore Bootloader with no keyboard manipulations. This works for Catalina 10.15.3 on a 2011 iMac. I can't say for other versions or other iMacs.

1. Read the post from Nick here and download the OpenCore Bootloader.
2. Download BalenaEtcher https://www.balena.io/etcher/. Alternatively, you can use Disk Utility.
3. Using BalenaEtcher copy the Opencore Bootloader.dmg to your USB or SD card. With Disk Utility, you can restore the file to your USB or SD Card.
4. Eject and reinsert your USB or SD card. You should see in Finder "Catalina Loader".
5. Go to Finder, click on Go from the top menu and choose Go to Folder. Put without quotation marks "/Volumes/Catalina Loader/EFI/OC". Hit enter.
6. In this folder, locate config.plist and rename it. For example, configbak.plist.
7. Unzip the appropriate archive: nvidia.zip for Nvidia cards and amd.zip for AMD cards.
8. Double-click the new config.plist that was just extracted. OpenCore Configurator should open. If not, you will have to go to the root of your USB and SD card and open OpenCore Configurator and find your config.plist file.
9. On the left, click on Kernel. Make sure the first 6 kexts are checked. UNLESS, you have a Nvidia card and you installed kexts when setting up your card (namely Sandybridge and Sleep). In this case, uncheck the first two (Lilu.kext and WhateverGreen.kext). If your computer hangs after the OpenCore Bootloader, this is why.
10. Click on Misc on the left. Change External to Builtin. Make sure Show Picker and PollAppleHotKeys are checked.
11. At the top right, click on Security. Make sure AllowSetDefault is checked.
12. Click on File and then Save.
13. Normally, you would go into System Preferences and in the StartUp Manager choose Catalina Loader. This did NOT work for me and caused me a lot of grief trying.
14. Reboot your computer
15. Be ready to hit your Option key, as your iMac reboots.
16. When you are presented with your boot options, use the error to select Catalina Loader. Here this is important to hit CTRL + Enter at the same time, You will see an arrow under Catalina Loader indicating that it is the default boot item.
17. You should now see the OpenCore Boot Picker. Use the arrow to select your iMac boot drive. Again, very important to use CTRL + Enter. It will now boot into your Apple partition.
18. Do a test. Reboot your computer and should boot directly to your Apple partition through the OpenCore Bootloader. Be patient it does sit on the OpenCore Boot Picker for about 10-15 seconds. You can check if you are able to change your brightness settings.
19. If it works correctly, go to Finder. Click on Go from the top menu and choose Go to Folder. Put without quotation marks "/Volumes/Catalina Loader/EFI/OC". Hit enter.
20. Open the config.plist with the OpenCore Configurator again.
21. Click on Misc on the left. Uncheck Show Picker.
22. Click on File and Save again.
23. Reboot again and you should have a slight delay. You will not see the OpenCore Boot Picker then it will go directly to the Apple boot screen.

It should work beautifully now!
 
Last edited:
Register on MacRumors! This sidebar will go away, and you'll see fewer ads.