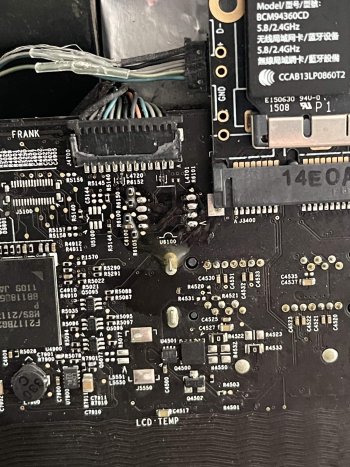
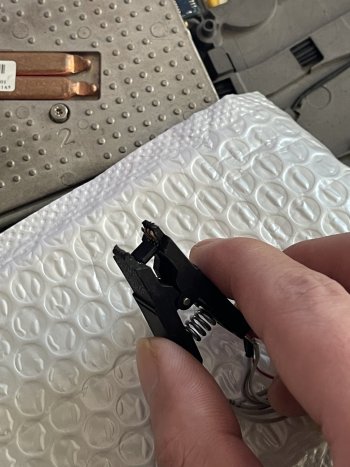
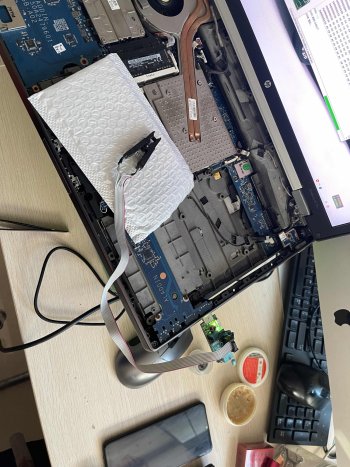
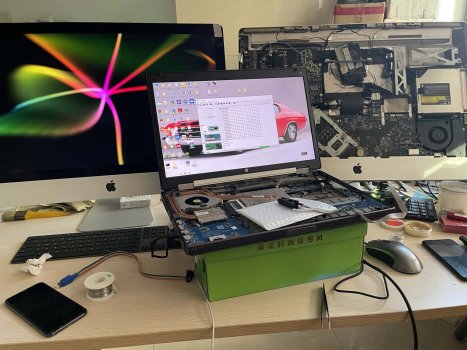
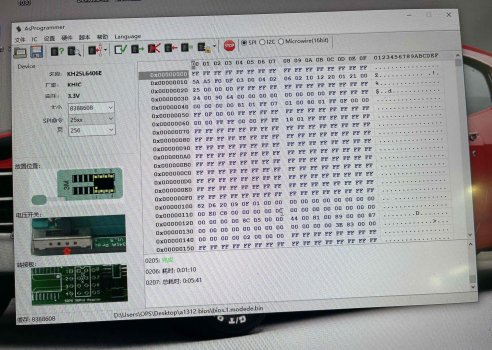
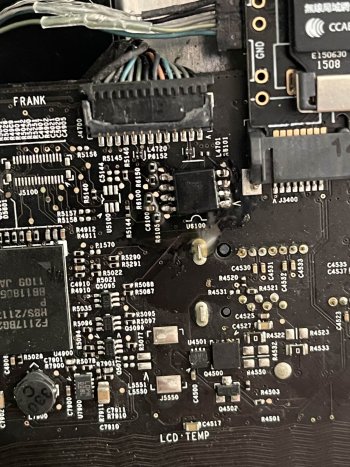
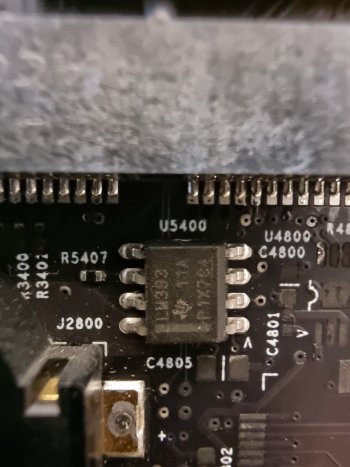
My friend, how did you dump the iMac bootrom? I suppose you used the CH341A, but what software did you use? Is there a software/app for Macos?iMac12,2 added CoreEG2 & EDID firmware to the motherboard refresh m5100 refreshed with EG2 firmware.
It does have efi boot screen and OpenCore supports boot
uefi winodows10 has a boot screen to enter the system on a black screen? What is the problem.
Got a tip for us?
Let us know
Become a MacRumors Supporter for $50/year with no ads, ability to filter front page stories, and private forums.
iM 4,1-14,4 2011 iMac Graphics Card Upgrade
- Thread starter MichaelDT
- WikiPost WikiPost
- Start date
- Sort by reaction score
You are using an out of date browser. It may not display this or other websites correctly.
You should upgrade or use an alternative browser.
You should upgrade or use an alternative browser.
- Status
- The first post of this thread is a WikiPost and can be edited by anyone with the appropiate permissions. Your edits will be public.
You need a clip for the first write - no way around, so there is no real gain for using this software.My friend, how did you dump the iMac bootrom? I suppose you used the CH341A, but what software did you use? Is there a software/app for Macos?
So you can read, modify and write using a clip and a normal MacBook using the brew flashrom package....
I already have the clip. I know that I must use UEFItool to add the CoreEG2 & EDID to the boot rom, but I don't know which program to use to dump the bootrom and then flash back the modded bootrom.You need a clip for the first write - no way around, so there is no real gain for using this software.
I know of a program that I use in Windows called AsProgrammer but I don't know if there is any macos alternative.
Just wrote brew flashrom runs on macOS. The very same flashrom software mentioned on the first post within the FAQ to be used for vBIOS flashing.I already have the clip. I know that I must use UEFItool to add the CoreEG2 & EDID to the boot rom, but I don't know which program to use to dump the bootrom and then flash back the modded bootrom.
I know of a program that I use in Windows called AsProgrammer but I don't know if there is any macos alternative.
Do you believe that this new GOPvBios and modded bootrom will assist and probably solve the nvram corruption and sleep problems of the m5100?Just wrote brew flashrom runs on macOS. The very same flashrom software mentioned on the first post within the FAQ to be used for vBIOS flashing.
And one last thing @Ausdauersportler. I checked again your github and I see that the GOP vbios for my m5100 is named HynixAFS. Is that a typo? My card has HynixAFR memory.
Last edited:
Unfortunately: I do not believe, I know it will not fix it.Do you believe that this new GOPvBios and modded bootrom will assist and probably solve the nvram corruption and sleep problems of the m5100?
Meanwhile we believe it is more some SMC corruption since the PRAM contents never changed, even after a crash on wake.
Thanks. What about the below:Unfortunately: I do not believe, I know it will not fix it.
Meanwhile we believe it is more some SMC corruption since the PRAM contents never changed, even after a crash on wake.
I checked again your github and I see that the GOP vbios for my m5100 is named HynixAFS. Is that a typo? My card has HynixAFR memory.
Yes the issue with the EG2 roms has finally been resolved!About AMD EFI boot screen support
Nearly two years ago I posted here about a method @Nick [D]vB proposed to get EFI boot screen support with AMD Polaris cards. Before he took a sabbatical from this thread he left all knowledge and tools to get such a result. Unfortunately the first generation of EG2 vBIOS versions had some problems, sometimes the boot screen was dark (invisible) and needed a wire mod to switch the display on manually, sometimes the EFI picker showed up only on an external display. Last year @internetzel and I did a first run to solve this, after a break of more than seven months @dfranetic took over and solved using an IDA64 debugger the riddle within some weeks.
The only thing you need in advance is the iMac firmware modification. These BIOS versions offer native brightness control, support external displays without any sync problems. You can also use the same (OCLP) OpenCore setup as with the GOP BIOS versions to enable 4K H.264/HEVC on the GCN4 cards .
Tonga and Saturn cards use an Apple driver from iMacs not fully compatible with our systems. Unfortunately these drivers cannot enable the backlight (at least we failed to achieve this). Again @dfranetic developed a little PCB to install into the iMac which enables backlight on boot automatically. Details about this development (layout will be published) will be added to the same Github repository, too. The longer I write, the more I think he should have written this post.
Download:
In future all GOP and EG2 and other new vBIOS versions will be found in this Github repository.
All EG2 version will be found in the subfolder named EG2, all vBIOS versions will follow the simple naming conventionGPUNAME-EG2_adj.rom, if you need theM4000version the file name will beM4000-EG2_adj.rom.
At the same time I moved all the existing GOP vBIOS version posted here on the individual posts scattered over the thread into the same GitHub repository. All GOP versions are stored in the subfolder named GOP and will follow in general this naming conventionGPUNAME-GOP.rom, if you need theM4000version the file name will beM4000-GOP.rom. There may be more than one file with your GPU name included covering different VRAM support.
You can download and flash as usually using the Linux GRML tool with amdvbflash or flashrom and a clip programmer.
Currently these vBIOS versions are available:
Venus: M4000, M5100, M6000, W5170
Saturn: M6100, W6170 (both needing a PCB)
Tonga: S7100X (needs a PCB)
Polaris: WX4130, WX4150, WX4170
Upcoming:
Ellesmere: W7100, RX480 , RX470
Possible, but not touched so far:
Polaris: WX3200
Saturn: W6150M (needs PCB)
Tonga: W7170M (needs PCB)
The GCN4 / Polaris vBIOS versions will work in the same way as the Venus card, the backlight of the internal LCD will turn on automatically on system boot or when pressing alt/option.
Supported iMacs: iMac11,1 . iMac11 . iMac11,3 . iMac12,1 . iMac12,2
Windows support:
Since the GOP driver needed for UEFI Windows has been replaced within these new vBIOS by an Apple EG2 driver (or name it AppleGOP) version UEFI Windows is mandatory and you need to load and reconnect theAMDGOP.efidriver using OpenCore
Code:<key>ReconnectGraphicsOnConnect</key> <true>
All this would not have been possible without @Nick [D]vB, @nikey22, @dfranetic, and @internetzel. Great team!
Yes read the iMac bootrom backup using AsProgrammer on another widows computer CH341AMy friend, how did you dump the iMac bootrom? I suppose you used the CH341A, but what software did you use? Is there a software/app for Macos?
Use UEFItool to add CoreEG2 and EDID to the backup bootrom and save it
Then use CH341A on a widows computer to flush the iMac's modified bootrom with AsProgrammer.
I would like to be prepared 100% in order to correctly do all tasks and avoid bricking my iMac.
Again, my iMac is the 12.1 model upgraded to i7-2600s and m5100 gpu with HynixAFR memory.
The steps I will follow are the following:
1. Disassemble my iMac.
2. Plug the CH341A clip to the bios chip of the mobo (located under/near the wifi card).
3. Use either flashrom or AsProgrammer to extract/dump the OEM bootrom.
4. Use UEFITool to add the CoreEG2 & EDID files and save the new modded rom.
5. Flash back the modded rom.
6. Use grml Linux USB to flash the new EG2 VBios rom to the GPU.
7. Do a pram reset.
My questions are the following:
Many thanks for your kind replies.
Again, my iMac is the 12.1 model upgraded to i7-2600s and m5100 gpu with HynixAFR memory.
The steps I will follow are the following:
1. Disassemble my iMac.
2. Plug the CH341A clip to the bios chip of the mobo (located under/near the wifi card).
3. Use either flashrom or AsProgrammer to extract/dump the OEM bootrom.
4. Use UEFITool to add the CoreEG2 & EDID files and save the new modded rom.
5. Flash back the modded rom.
6. Use grml Linux USB to flash the new EG2 VBios rom to the GPU.
7. Do a pram reset.
My questions are the following:
- In step 4. which exacts files should I add to the bootrom? Should I use the files found/attached in this post? (CoreEG2.ffs and EDIDParser.ffs).
- In step 6. Which exact VBios should I flash to my GPU? M5100-HynixAFR-EG2_adj.rom , correct?
- I don’t plan to dual boot windows. Do I need AMDGOP.efi at all?
Many thanks for your kind replies.
You can directly use the CH341A programmer AsProgramme to flush the modified bootromI would like to be prepared 100% in order to correctly do all tasks and avoid bricking my iMac.
Again, my iMac is the 12.1 model upgraded to i7-2600s and m5100 gpu with HynixAFR memory.
The steps I will follow are the following:
1. Disassemble my iMac.
2. Plug the CH341A clip to the bios chip of the mobo (located under/near the wifi card).
3. Use either flashrom or AsProgrammer to extract/dump the OEM bootrom.
4. Use UEFITool to add the CoreEG2 & EDID files and save the new modded rom.
5. Flash back the modded rom.
6. Use grml Linux USB to flash the new EG2 VBios rom to the GPU.
7. Do a pram reset.
My questions are the following:
- In step 4. which exacts files should I add to the bootrom? Should I use the files found/attached in this post? (CoreEG2.ffs and EDIDParser.ffs).
- In step 6. Which exact VBios should I flash to my GPU? M5100-HynixAFR-EG2_adj.rom , correct?
- I don’t plan to dual boot windows. Do I need AMDGOP.efi at all?
Many thanks for your kind replies.
Also use CH341A programmer AsProgramme to flush EG2 rom to the card.
Install it back and you're done.
1. Yes. Or the ones on @Ausdauersportler's Github.
- In step 4. which exacts files should I add to the bootrom? Should I use the files found/attached in this post? (CoreEG2.ffs and EDIDParser.ffs).
- In step 6. Which exact VBios should I flash to my GPU? M5100-HynixAFR-EG2_adj.rom , correct?
- I don’t plan to dual boot windows. Do I need AMDGOP.efi at all?
2. That should be self-explanatory.
3. No. (Did you even read previous posts?)
Also: Make two reads of the iMac flash IC and
diff the two files to confirm that you have two exactly equal copies. In my experience, if your (2009-2011) iMac has a flash chip beginning in SST... then you should make 3 reads with CH341a, the first one will be false, the second two should be identical. (Mod one of these two.) Writing these SST... flash ICs is also somewhat strange: first write will fail, then (possibly after repositioning the clip) it will fail again, writing the third time it will report that the flashed image is already identical to the 'on-disk copy'. And the iMac will happily chime. (MXIC brand flash ICs do not have those 'glitches'.)As I don't want to take the GPU out again (in my 21.5" iMac I need to take out the whole motherboard to be able to take out the GPUYou can directly use the CH341A programmer AsProgramme to flush the modified bootrom
Also use CH341A programmer AsProgramme to flush EG2 rom to the card.
Install it back and you're done.
I am mostly concerned for you to confirm that the files that I will use are the correct ones, and that the AMDGOP.efi is not needed as I wi not be installing windows.
Also, did you need to take out the motherboard or did you dump/flash the bootrom whilst it was still installed on the iMac. Did you need to disconnect the PSU?
Very useful info! Thanks!Also: Make two reads of the iMac flash IC anddiffthe two files to confirm that you have two exactly equal copies. In my experience, if your (2009-2011) iMac has a flash chip beginning in SST... then you should make 3 reads with CH341a, the first one will be false, the second two should be identical. (Mod one of these two.) Writing these SST... flash ICs is also somewhat strange: first write will fail, then (possibly after repositioning the clip) it will fail again, writing the third time it will report that the flashed image is already identical to the 'on-disk copy'. And the iMac will happily chime. (MXIC brand flash ICs do not have those 'glitches'.)
Yes, it is recommended to disconnect the power supply, you can refresh without taking off the motherboard directly clip, the time is longer need to keep your hand holding to move a little will fail.As I don't want to take the GPU out again (in my 21.5" iMac I need to take out the whole motherboard to be able to take out the GPU), I prefer to flash the new vBios via the linux USB.
I am mostly concerned for you to confirm that the files that I will use are the correct ones, and that the AMDGOP.efi is not needed as I wi not be installing windows.
Also, did you need to take out the motherboard or did you dump/flash the bootrom whilst it was still installed on the iMac. Did you need to disconnect the PSU?
I am directly remove the bios chip refreshed well soldered back.
Do not install windows does not need AMDGOP.efi
Attachments
In my (short) experience, there is no need to reposition the clip on the SST chips with flashrom, it's just a matter of retrying the write a few times (usually two or three): since flashrom is "smart" and only flashes needed eeprom sectors, it will eventually succeed after a few tries.1. Yes. Or the ones on @Ausdauersportler's Github.
2. That should be self-explanatory.
3. No. (Did you even read previous posts?)
Also: Make two reads of the iMac flash IC anddiffthe two files to confirm that you have two exactly equal copies. In my experience, if your (2009-2011) iMac has a flash chip beginning in SST... then you should make 3 reads with CH341a, the first one will be false, the second two should be identical. (Mod one of these two.) Writing these SST... flash ICs is also somewhat strange: first write will fail, then (possibly after repositioning the clip) it will fail again, writing the third time it will report that the flashed image is already identical to the 'on-disk copy'. And the iMac will happily chime. (MXIC brand flash ICs do not have those 'glitches'.)
Also I found it's impossible to read or write those SST eeproms using AsProgrammer, reading always gives different files, and writing says it'll take some hours to complete (and I doubt it will succeed).
@madvinegar you can check in advance which eeprom chip your board has, just use flashrom from grml linux to read the eeprom and it will tell you what chip model it found. The most common ones seem the MX brand, and they work on the first try.
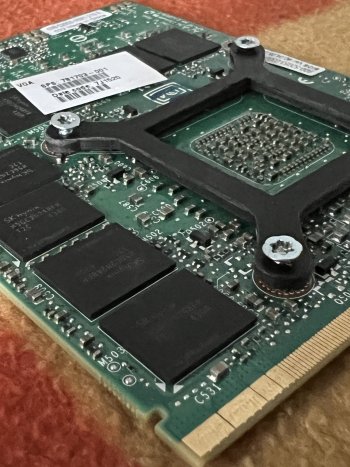
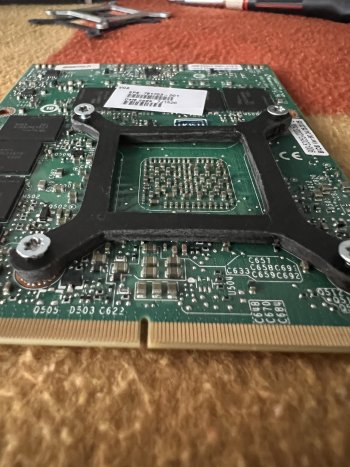
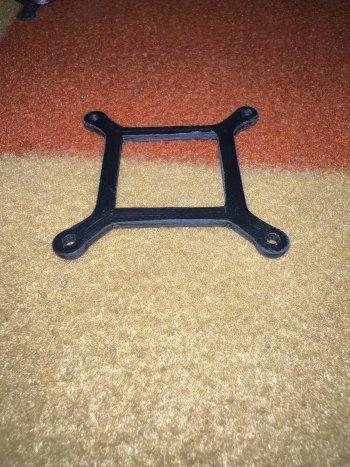
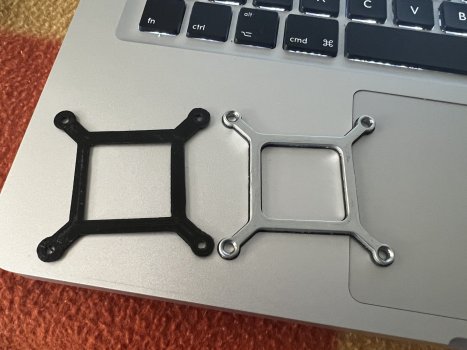
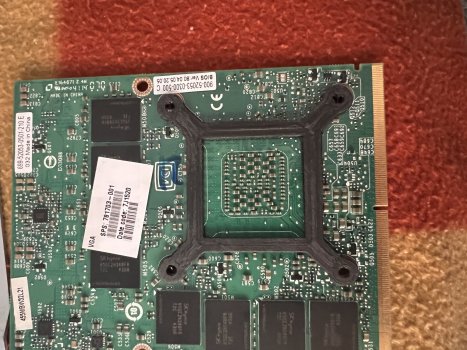
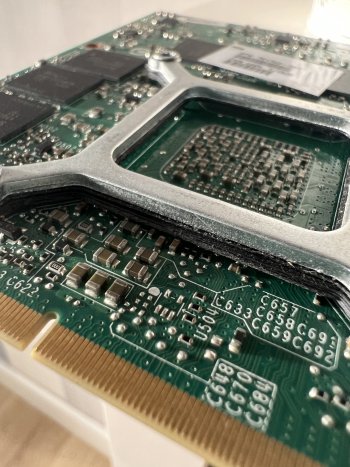
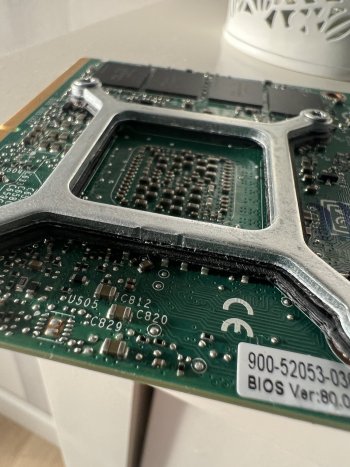
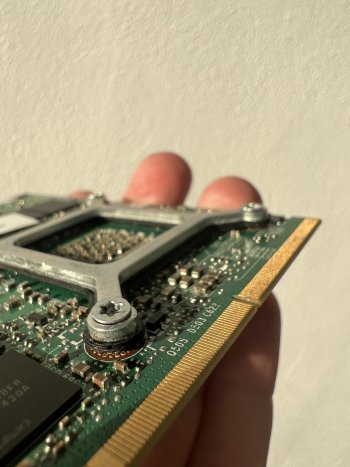
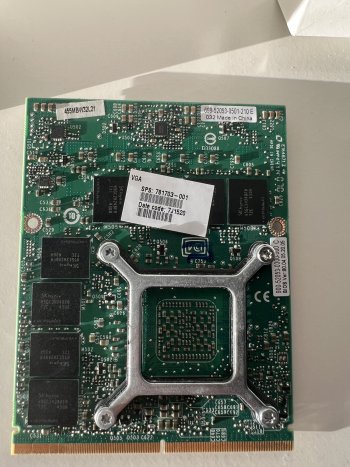
Version 1Have you check the available space between the logicboard and the MXM card?
But anyway, as you already have a 3D printer, printing several pieces with various thickness wouldn't be an issue for you.
Go ahead and try. Just don't tighten the screws too much.
Attachments
-
 5B59698F-F8DF-45D0-B5E5-3BD7031D97DD.jpeg400.7 KB · Views: 150
 -
 354123A8-35FB-42BD-BEC7-4E751EA40523.jpeg583 KB · Views: 148
 -
 738B4302-4891-4192-8E9B-1432D9365AE1.jpeg519.9 KB · Views: 151
 -
 AFFAD71B-6267-4444-BE40-3ACB397F09C7.jpeg465.8 KB · Views: 142
 -
 1A1BF2AE-B6DF-43E2-A4FD-8EF015F962C4.jpeg372 KB · Views: 162
 -
 6593797C-2D29-41A0-B31C-F54B281FE843.jpeg575.6 KB · Views: 154
Thank you my friend. Can you share the terminal linux commands to check the chip?In my (short) experience, there is no need to reposition the clip on the SST chips with flashrom, it's just a matter of retrying the write a few times (usually two or three): since flashrom is "smart" and only flashes needed eeprom sectors, it will eventually succeed after a few tries.
Also I found it's impossible to read or write those SST eeproms using AsProgrammer, reading always gives different files, and writing says it'll take some hours to complete (and I doubt it will succeed).
@madvinegar you can check in advance which eeprom chip your board has, just use flashrom from grml linux to read the eeprom and it will tell you what chip model it found. The most common ones seem the MX brand, and they work on the first try.
thank you very much for your reply, isn't there an Opencore way for catalina? I tried but it seems that the acceleration even adding the kext does not work,big sur I'm afraid it's too much thought, with catalina I'm saferYou cannot get it all. Catalina via @dosdude1 allows you to use the full spectrum of functionality including AirPlay, but the installation is a nightmare for inexperienced users. You can avoid these difficulties and use OCLP for all macOS versions starting with Mojave including the upcoming Ventura. It is your choice.
Think about the BT/WiFi upgrade needed for AirDrop and much more later on...
This is exactly what I meant when writingthank you very much for your reply, isn't there an Opencore way for catalina? I tried but it seems that the acceleration even adding the kext does not work,big sur I'm afraid it's too much thought, with catalina I'm safer
You can avoid these difficulties and use OCLP for all macOS versions starting with Mojave including the upcoming Ventura. It is your choice.
Download OCLP 0.4.11 or older and follow the instructions form the first post. Works pretty well.
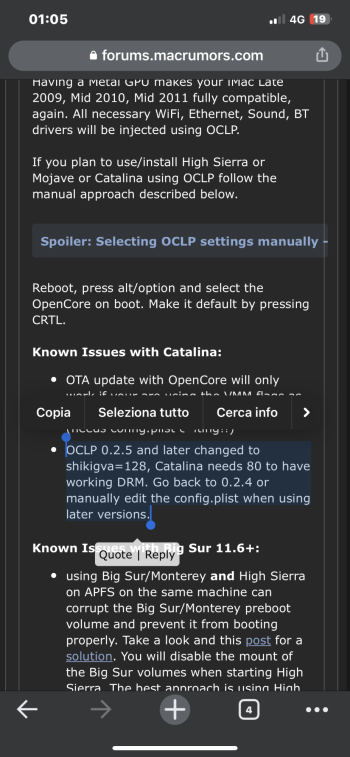
ok thanks a lot I'll try the only thing I don't understand is this I am attaching the screenshootThis is exactly what I meant when writing
You can avoid these difficulties and use OCLP for all macOS versions starting with Mojave including the upcoming Ventura. It is your choice.
Download OCLP 0.4.11 or older and follow the instructions form the first post. Works pretty well.
Attachments
Version 2 with 2,5 mm thickness of Abs plastic
May I suggest a version 3?
2 layers: (to use with the metal X-bracket)
0.5mm lower layer is the small square which match the area without components on the MXM card.
0.5mm upper layer to cover both the small square and the big square to support the X-bracket.
version 4:
2 layers: (to replace the metal X-bracket)
0.5mm lower layer is the small square which match the area without components on the MXM card.
2.0mm upper layer to cover both the small square and the big square to support the X-bracket.
You have a Kepler graphics card, so you can ignore this setting. Would be great if you can add a signature to your account with your hardware description included…ok thanks a lot I'll try the only thing I don't understand is this I am attaching the screenshoot
Register on MacRumors! This sidebar will go away, and you'll see fewer ads.


