Hi sebasq26,
If this is your first attempt at upgrading it is worth checking Page 1 (at top) to read the experience of others with your iMac model. The information is 5 years old but remains a good source for your 2015 model. As chesco says sleep/hibernation will not be a problem. Choose WD Black 7SN770, SN850x or WD Blue NVMe SSD as they are proved compatible with iMac. Read this:
Introduction to NVMe Choices If you have any previous hackintosh experience, you'll know that a limited number of hardware components have native support in macOS. You can't buy just any graphics card and expect it to work. Only certain Broadcom models of Wifi/BT cards have native support etc...

www.tonymacx86.com
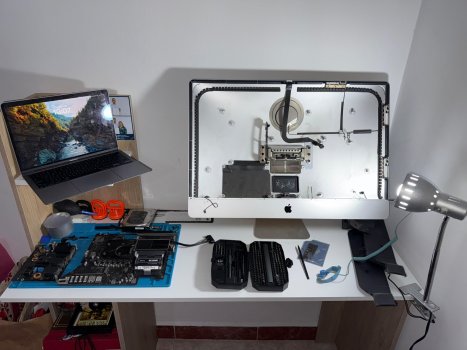
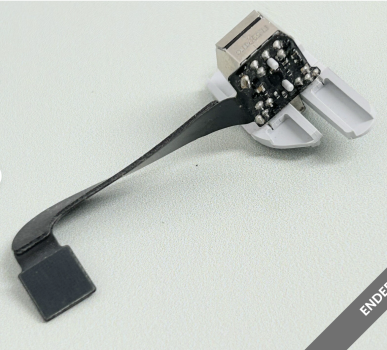
You can keep and use your old HDD or replace it with a SATA SSD.
For SATA SSD I used the Sabrent SATA mount. No additional cables needed as the existing iMac SATA socket goes straight onto the mount. Should you want a second SATA drive another socket is available beneath the motherboard. Of course, you will need a tray for carrying two SATA SSD’s.
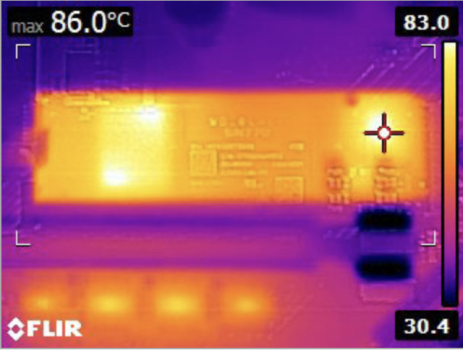
No heat sensor needed either. Like many other upgraders, I installed Macs Fan control, a free application that entirely manages and regulates cooling once your upgrade is finished.
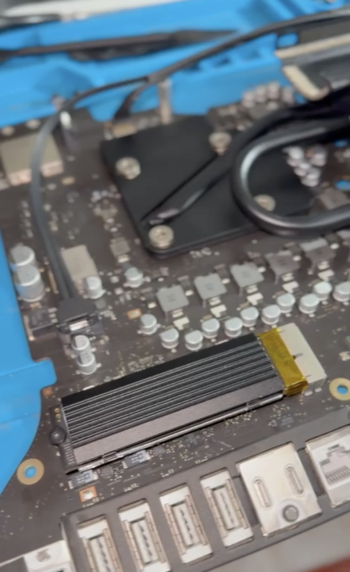
The maximum SSD speed you can achieve with your 2017 iMac is limited to PCIe 3.0 which will give you around 2800MB/ps with a WD Black SN770 SSD. Even though the WD Black 770 is PCIe 4.0, the PCIe slot on the motherboard determines maximum speed at PCIe 3.0. PCIe 3.0 SSD are nearly the same price as PCIe 4.0 SSD’s which suggests it is better insurance to buy a PCIe 4.0. which can run at PCIE 4.0 speeds in a TB4 external drive for a Mac at a future date.
If you have not already done so, go to
rsx0:
https://forums.macrumors.com/thread...d-nvme-ssd-upgrade-pitfalls-and-tips.2177812/ and familiarise yourself with the process. See the Ifixit or OWC video’s but be aware there are traps which the video’s do not reveal.
For example:
1. About static: My studio has a carpeted floor which means it is very difficult to earth myself to eliminate static electricity. Earth to the iMac aluminium is the best I can do. In the past I have blown an iMac power unit
without touching it; due to static electricity jumping from my arm. Now I always wear surgical gloves. They insulate, keep perspiration off sensitive parts and ensure better grip for safer working practice.
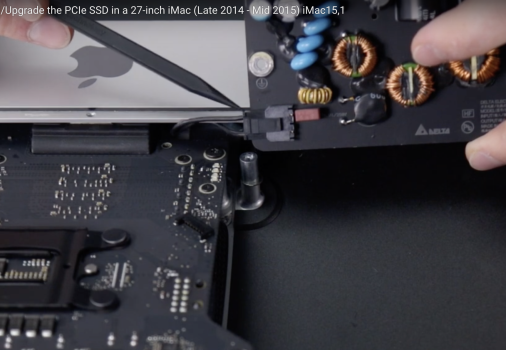
2. The iMac powerboard sits snugly adjacent to the Motherboard and the powerboard must be removed before you can remove the Motherboard. This is a delicate task. After unscrewing the powerboard you must release a tight universal power connector socket carrying several short cables linking the two halves together. To move the power board away from the motherboard you are fighting the pressure of connecting cables which unite the two boards. With experience I have learned to straighten the cables carefully thus enabling me to place the powerboard upright against the computer ‘chin’. Of course all the condenser and soldering is exposed hence need to exercise great care and avoid contact. Hold board by its edges.
To release the socket, press the centre of the short bar, down hard, towards the body of the socket. This should raise the barb upwards - if it is not too tight. While applying this pressure, grip the two halves of the socket one in each hand, and work them apart. Not easy. I used the edge of a nail file first to lift the barb, then to lever the two halves slightly apart. Once they move a little, the separation becomes easier. With experience it becomes easier to lift the entire power unit up and rest it. The socket is then revealed and you can see what you are doing.
All the while you are doing this the power unit and your hand may bump against each other. Now you see the value of surgical gloves for insulation. Nowhere have I read anyone offering a caution regarding this aspect of disassembly and the video’s do not show the actual socket separation process. That the technicians use bare hands leaves me amazed at their cavalier approach.
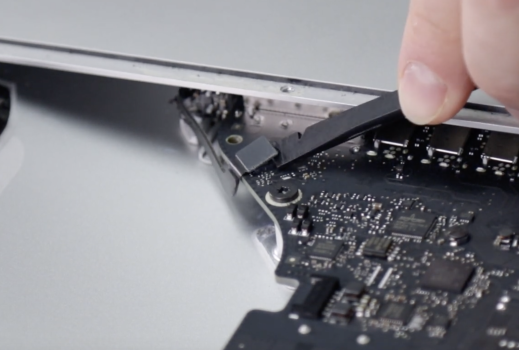
If you feel competent to handle the above you should find the procedure straight forward. First time around, I had the OWC video on the monitor of a second computer while I worked on the first iMac. I prefer to work with the iMac on its back rather than standing. Take care to lift the screen a couple of inches only as you must carefully unplug the screen connector cable from the motherboard and similarly a cable connecting the monitor inverter, before you can remove the screen.
Research, forethought and patience will ensure your success.
May ‘The Force’ be with you.