Become a MacRumors Supporter for $50/year with no ads, ability to filter front page stories, and private forums.
Status
The first post of this thread is a WikiPost and can be edited by anyone with the appropiate permissions. Your edits will be public.
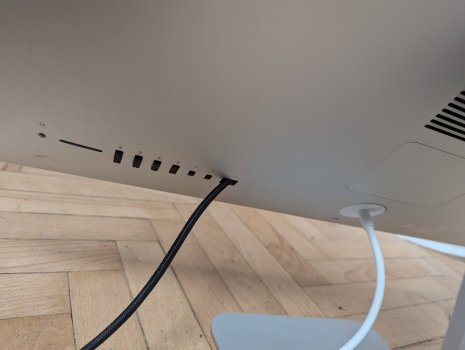
@jorycz ”I bought Crossover, but it sounds terrible and I found out that if I connect speakers directly to driver board in series is sound similar to original 2017 iMac… just with noticeably weaker bass…”

Like all the other crossovers sold on AliExpress, these ones are for 8 ohm speakers, which reduces high frequencies when used with the iMac 4 ohm speakers.

By connecting the drivers in series without a crossover you are wasting half the low frequencies by sending the full audio signal through a tiny speaker.

For 4 ohm iMac hi-frequency speakers you need a 10 microfarad audio capacitor in series with the tweeter, but the crossover you have is only 3 microfarads.

With the bigger speaker you need an inductor of 0.15 milliHenries in series.
The one on the crossover is probably not far off that.

On that crossover both jumpers should be connected, but the component values aren’t right for good audio.
 
  • Like
Reactions: jorycz
Yes I saw your analysis here and mainly here you are referring to and TBH I skipped that, because speakers sounds good to me. But I will buy capacitor and inductor in shop near me and give it a try if it worth 🙂
 
  • Like
Reactions: PaulD-UK
FWIW I was able to to add this 8MP camera to my SA1-based setup very easily: its USB-A cable connects to the SA1 board, and its video signal is then visible on the Mac connected to the SA1 via USB-C. The only minor challenge was aligning the camera with the cutout in the iMac case before fixing it with double-sided tape (the new camera was too big for the part which attached the original camera).

The quality is clearly inferior to the Apple Studio Display webcam, but quite usable. (I didn't bother with a microphone because I always make video calls through Airpods.)

All in all, this was a cheap (€22) and easy addition to an SA1-based monitor conversion.

[EDIT 20/5/25 – I've had the display refuse to come on a couple of times, and not respond to on/off or menu buttons, requiring a disconnect from power to return to operation. It's not clear whether this is related to the camera, but I've not experienced this on my other iMac conversion, which used the same SA1 but has no camera. I'd be interested to hear others' experiences, also with other cameras.]
 
Last edited:
  • Like
Reactions: Aiwi and PaulD-UK
Hello all and sending special thanks to @PaulD-UK and @Aiwi but also others, who contributed. My convert of iMac 2017 all-in-one (mics, camera, speakers) is done and finished without issues.

I spent like 14 evenings reading this thread from post number 1 to the end. I made a lot of notes and took a picture of every step I did during conversion so I can later publish it all probably on github page to make it even easier for the others.

For iMac 2017 I used R1811 with Brightness board and without Crossovers. I bought Crossover, but it sounds terrible and I found out that if I connect speakers directly to driver board in series is sound similar to original 2017 iMac which is sitting next to this one (BTW anyone wants to compare something?), just with noticeably weaker bass which I hope can be improved using eqMac.
Fan of driver board is facing outside of iMac using original Fan exhaust. 3D Print and all modifications will also be included on github later.
I wanted one cable to "do it all" so 4K camera with AF works wonderfully, speakers also, charging M1 and M4 MacBooks without issues and ony issue I have is with double MEMS microphones.

The thing is, it seems to me that they record even sound from Mars. They are SO sensitive! My neighbor whisper to his wife's ear something and I can clearly record it from another room 🤪

They are recording some sound even when I disconnect the power from it and just connect USB sound card (that Ugreen from Ali) with MICs directly to notebook.

So my question is, how did you please @Aiwi managed to insulate them from the surrounding sound?

Nice work!

I stuffed some sound deadening material (mineral wool) that I got with my dishwasher behind the microphone.

You can also try to enable the noise cancellation feature for microphones in macOS.
 
  • Like
Reactions: jorycz
Almost finished with my build, just having a problem with wiring the SA1 board to the imac's power button and the Xarl-Li ram access mod. It won't fit with the the power button sticking out too far. Do I have to desolder the power button off and mod the ram access print to allow the board through? Should I snip the blue wire on the bottom for power and 4th white wire for the ground? Maybe solder the power wires to round copper points, can't really tell which is which though.

Trying to figure out what I need do for both of them. Any help would be appreciated.
Hey Archmage2002

Did you ever get the power button working? I have the SA1 and that's probably the last thing I want to do. Right now, my control strip is hanging outside in the back and it doesn't look good.

I haven't read through these posts in a while, so I can't remember if someone figured it out, but I was able to decrease the tension of the mount by changing the 2 screws I've circled in the photo below. The original screws were roughly 0.8 mm and the new ones are roughly 1.0 mm. The new screws have been repurposed while removing the motherboard.
 

Attachments

  • IMG_9871 Large.jpeg
    IMG_9871 Large.jpeg
    239.3 KB · Views: 17
  • IMG_9864.jpg
    IMG_9864.jpg
    268.1 KB · Views: 19
  • Like
Reactions: PaulD-UK
hi everybody,

I'm new here - using the opportunity I would like to thank all of you for great content and support 👍

I am planning on doing my own monitor based on LM270QQ1 (SD)(E1) to use it with mac mini m4 for stills and video editing purposes and was not sure which board to select: full super duper but expensive R1811 or 8-bit U49 that is more budget friendly solution...

that been said I have found here some info on this board as well: https://www.aliexpress.com/i/4000014899510.html

T18 is fanless, bit less expensive than R1811 and most importantly it supports DP/USB-C 1.4 10-bit... but there are also SA1 and FA1 boards and possibly some others I have not discovered yet 😅

all in all I am now bit confused what to purchase in:
- scenario 1 (budget version but decent image quality): should it be U49?
- scenario 2 (best possible image quality for smallest amount of $): should it be T18?

any advise will be greatly appreciated...
 
@Jack2010 Hi, welcome to the thread. :)
This is a list of available boards:

The U49 is an older board, not used by more than a couple of builders in this long thread, and more recent ones are better.

The T18 has been used by many people in this thread, with great success.
It is a good choice. 👍

The more expensive version of the R1811 has the advantage of a proper HDMI 2.1 implementation which is especially useful if you plan to edit with Final Cut Pro, as FCP can use an HDMI monitor (only HDMI) to view the editing video at full screen while you are editing.
That is a high end feature designed to work with professional monitors, so maybe isn't important for your style of editing...

Another reason to go with the R1811 is that it has the best audio amplifier, if you plan to continue to use the iMac's original speakers.
Other boards can give perfectly usable audio, but don't have as much audio power.
 
Last edited:
Many thx for your prompt reaction ✌️

I went thru the list and it sounds like:
- R1811 V.4 HDMI 2.1 is the best, most reliable, advanced, etc. but also most expensive 😩 (the only disadvantage I can think of is the fan - other boards are fanless) and beyond my current budget capacity
- U49 is best budget solution (less then 1/3 of R1811) but offers only 8bit as well as AA1 with similar price tag (I have found board only/ no cables for about 1/4 the R1811 price) and so I will not be able to utilize full potential of LM270QQ1 (SD)(E1) and m4 mini, consequently it's a no-go for any of them

and than... there is the rest:
- FA1 that is about half the price of R1811 (a little more than 50% to be precise 😉) but no USB-C/ USB-A
- SA1, T18, T19 (similar price tag between them, ca. 2/3 of the R1811 and about 25-30% more than FA1) out of which SA1 seems to be the best deal (T18 missing HDMI 2.1 and T19 missing any USB ports)

having said that are there any significant picture quality differences (including back light performance, color reproduction, etc.) between FA1 or T19 (via DP to USB-C cable) and SA1 or T18 (via USB-C) when using it with my mac mini m4 that I should consider before the final purchase decision?
 
Last edited:
  • Like
Reactions: Pabo49
Many thx for your prompt reaction ✌️

I went thru the list and it sounds like:
- R1811 V.4 HDMI 2.1 is the best, most reliable, advanced, etc. but also most expensive 😩 (the only disadvantage I can think of is the fan - other boards are fanless) and beyond my current budget capacity
- U49 is best budget solution (less then 1/3 of R1811) but offers only 8bit as well as AA1 with similar price tag (I have found board only/ no cables for about 1/4 the R1811 price) and so I will not be able to utilize full potential of LM270QQ1 (SD)(E1) and m4 mini, consequently it's a no-go for any of them

and than... there is the rest:
- FA1 that is about half the price of R1811 (a little more than 50% to be precise 😉) but no USB-C/ USB-A
- SA1, T18, T19 (similar price tag between them, ca. 2/3 of the R1811 and about 25-30% more than FA1) out of which SA1 seems to be the best deal (T18 missing HDMI 2.1 and T19 missing any USB ports)

having said that are there any significant picture quality differences (including back light performance, color reproduction, etc.) between FA1 or T19 (via DP to USB-C cable) and SA1 or T18 (via USB-C) when using it with my mac mini m4 that I should consider before the final purchase decision?
I have the T18, FA1 and AA1 boards and would rate them T18 clear winner by a reasonable margin, then AA1 (despite only 8-bit) then FA1. Using on Mac Mini M4.
 
  • Like
Reactions: Pabo49 and PaulD-UK
Many thx for your prompt reaction ✌️

I went thru the list and it sounds like:
- R1811 V.4 HDMI 2.1 is the best, most reliable, advanced, etc. but also most expensive 😩 (the only disadvantage I can think of is the fan - other boards are fanless) and beyond my current budget capacity
- U49 is best budget solution (less then 1/3 of R1811) but offers only 8bit as well as AA1 with similar price tag (I have found board only/ no cables for about 1/4 the R1811 price) and so I will not be able to utilize full potential of LM270QQ1 (SD)(E1) and m4 mini, consequently it's a no-go for any of them

and than... there is the rest:
- FA1 that is about half the price of R1811 (a little more than 50% to be precise 😉) but no USB-C/ USB-A
- SA1, T18, T19 (similar price tag between them, ca. 2/3 of the R1811 and about 25-30% more than FA1) out of which SA1 seems to be the best deal (T18 missing HDMI 2.1 and T19 missing any USB ports)

having said that are there any significant picture quality differences (including back light performance, color reproduction, etc.) between FA1 or T19 (via DP to USB-C cable) and SA1 or T18 (via USB-C) when using it with my mac mini m4 that I should consider before the final purchase decision?
I have the SA1. Build was smooth and painless; picture quality is excellent (although I dont have anything to compare it to) and VERY bright (actually had to turn it down using the OSD). Connecting the iMac's original power button was very easy (if you know how to solder).Having said that, there are some issues:
  • Audio quality is not (yet) good. This is however (most likely) caused by errors on my side that I hope to remedy in the next weeks: connection to headphone out of the board instead of the on-board audio out, wrong splitter board, no use of additonal capacitors/inductors and finally one of the channels is hooked up the wrong way around. I will report back once I have had time to rectify all of these...
  • It took some fiddling to change the OSD to English. But it can be done ;-)
  • Finally, and this is my main gripe: if both the macMini and the board go to sleep, the status light changes do red and I have not been able to wake it up again. I have to physically unplug the screen to 'restart' the board. Not an issue if I remember to turn of the screen/board (using the power button) but annoying if I do. The board aparently has an update function for the firmware but I have no idea how that works nor whether there are any firmware updates that address this issue. I have raised the question on this board but haven't had any pointers (am I the only one with the problem?).
 
  • Like
Reactions: razmanugget
@adriansp "The board aparently has an update function for the firmware but I have no idea how that works nor whether there are any firmware updates..."

The original function of all JRY boards was to drive 4K high refresh-rate monitors, for various monitor manufacturers.
LINK to a review of one using SA1 board.
Each one uses (I guess) Mediatek's (the video chip maker) SDK (software developer kit) to write their own OSD software and link it to the chip's firmware.

This is the reason all these boards have 'upgradable' firmware. However I don't know if whoever wrote the 5K firmware has done any further revisions.

Since the R9A18/R1811 boards were developed years ago, their developer has used Realtek's SDK to develop the firmware with several upgrades. Since the RealTek RTD2718Q chip is now a decade old, it has been developed to give excellent results.
The T18 chip, doesn't receive firmware updates, but it was developed several years later than the R9A18, and will have benefitted from the experience of the R9A19/R1811 development.

The JRY boards all use more recent MediaTek chips - and both Apple and NVIDIA are partnered with MediaTek in current projects, and it may be the Mediatek MT9801V chip is actually a better chip?

Certainly there is the potential for the JRY--FA1/SA1 boards to be developed further.
The downside of this is that while they remain budget priced, I guess this is unlikely to happen.
 
Last edited:
  • Like
Reactions: razmanugget
I have the SA1. Build was smooth and painless; picture quality is excellent (although I dont have anything to compare it to) and VERY bright (actually had to turn it down using the OSD). Connecting the iMac's original power button was very easy (if you know how to solder).Having said that, there are some issues:
  • Audio quality is not (yet) good. This is however (most likely) caused by errors on my side that I hope to remedy in the next weeks: connection to headphone out of the board instead of the on-board audio out, wrong splitter board, no use of additonal capacitors/inductors and finally one of the channels is hooked up the wrong way around. I will report back once I have had time to rectify all of these...
  • It took some fiddling to change the OSD to English. But it can be done ;-)
  • Finally, and this is my main gripe: if both the macMini and the board go to sleep, the status light changes do red and I have not been able to wake it up again. I have to physically unplug the screen to 'restart' the board. Not an issue if I remember to turn of the screen/board (using the power button) but annoying if I do. The board aparently has an update function for the firmware but I have no idea how that works nor whether there are any firmware updates that address this issue. I have raised the question on this board but haven't had any pointers (am I the only one with the problem?).
Hey Adriansp

I also have the SA1. My status light changes to red when it goes to sleep and I am able to wake the computer and have the screen automatically come back on (MBP). It takes a few seconds. So probably a firmware update is needed. I purchased mine in March.

Also, could you help me with the original power button setup? Which contact points should I solder the wires to? See the photo and let me know the numbers. ie. 1 and 4

I'm tempted to also install a rocker switch, but it seems like a lot more work

My wife now wants one of these monitors and for the next one, I'm going to get an AA1 because the price is just $80 vs $160 for the SA1. We only use these as monitors, so we're not concerned about the extras - Usb PD, audio, USB ports, fan...

Edited to add some extra info:

Oh yeah, I forgot to mention that my PS is a MEAN WELL GST60A12-P1J 12V, 5A and it's working great. You guys might laugh about this, but I used ChatGPT to find it. Double-checked ChatGPT a few times and I'm happy with it.

Also, I noticed that if I use HDR (on both the monitor and the system settings), then I can control the Brightness in the system settings. If I remove HDR, then I lose the option for controlling brightness.

I'm trying to find a cheap SpyderX to calibrate. The reds are a little too saturated for my liking.
 

Attachments

  • IMG_9865 Large.jpeg
    IMG_9865 Large.jpeg
    112.6 KB · Views: 12
Last edited:
@razmanugget The tactile switch pins 1/2, and 3/4 are duplicates, so the iMac switch needs to connect to 1or 2 with one wire, and either 3 or 4 for the other wire.

Or you could connect to the other end of the Control Strip, the Power button is the bottom connection, and the Ground is the 5th pin down from the top (count 4 up starting with the Power line).

You should be able to control brightness (in SDR mode) from the Mac's keyboard using an app like Monitor Control or Better Display, both available from GitHub.

JRY-CScu.jpg
 
Last edited:
@razmanugget The tactile switch pins 1/2, and 3/4 are duplicates, so the iMac switch needs to connect to 1or 2 with one wire, and either 3 or 4 for the other wire.

Or you could connect to the other end of the Control Strip, the Power button is the bottom connection, and the Ground is the 5th pin down from the top (count 4 up starting with the Power line).

You should be able to control brightness (in SDR mode) from the Mac's keyboard using an app like Monitor Control or Better Display, both available from GitHub.

Thank you, PaulD-UK!

You've really helped so many people in this thread, we can't thank you enough 😃
 
Hi! I'm almost done with my project.2019 iMac display, 2013 A1419 case fan and speakers.BP MW LRS-150-24. Super fit 3.0 043640 0300 connector for PSU was used.AA1 BOARD.I turned the board towards the case, I think the air flow will cool it better. And it's convenient to connect cables through the RAM cover.USB4 cable is pulled through the RJ45 hole. The buttons are brought out to the USB ports, and the power button is used. The fan is connected to the USB using the speed control board. Without the fan, the temperature in the assembled case is high.Crossovers will arrive in a week and speakers will be used.I also plan to install an internal USB SATA 2.5 in place of the original power supply.Will be used with a Mac Mini M4.There are also plans to print a 3D printer for the WEIGHT mount and a display mount using neodymium magnets. The tilt angle is fixed normally, I did not add weight, I did not adjust the screws. Perhaps because of the tired spring of the Imac 2013.
 

Attachments

  • PXL_20250520_190821508.jpg
    PXL_20250520_190821508.jpg
    441.6 KB · Views: 24
  • PXL_20250520_190940786.jpg
    PXL_20250520_190940786.jpg
    197.5 KB · Views: 22
Last edited:
So AA1 seems to be not that bad, especially if you want to go budget way as it is so cheap...

But what about T18, T19 and SA1 that are same price level? Which one is the best "golden middle"? Is it SA1 as most versatile? Any drawback apart from sound "issues"?
 
Yes, for the R1811 and R9A18 boards.

The T18 and T19 are each made by different manufacturers.
JRY boards come from another maker.

But I think the companies that designed and commissioned the different boards are not the manufacturers, except probably JRY.

I also think the only boards designed specifically for Macs are the R9A18 and R1811.

They seem to have been originally designed to test repaired iMac 5K screens that had had broken glass front panels replaced.
But that’s a guess…
 
Last edited:
Hey everyone!

I'm working on a 2017 21.5" iMac.

i'm very frustrated. I can't get the inlet out.

I read on here that it's glued down, so I tried using a heat gun. But does that black piece also come off?

Can anyone offer some detailed guidance?

Thanks!

inlet imac.jpg
 
I removed the inlet by using a screwdriver with no bit. I placed the flat (no bit area) against the inside and hit it with the palm of my hand a few times. It's glued in and needs a little force to pop it out.

Hit it from the opposite side shown in the photo
 
Last edited:
I removed the inlet by using a screwdriver with no bit. I placed the flat (no bit area) against the inside and hit it with the palm of my hand a few times. It's glued in and needs a little force to pop it out.

Hit it from the opposite side shown in the photo
Did you remove that black part first?
 
The black part covers an electronic filtering circuit so cannot be separated.

Get the aluminium case nice and warm with a heat gun then do as @razmanugget suggested.
You could try inserting a thin pry tool between the beige plastic and the case to help separate the glue.
 
I am almost decided on a SA1 but one thing is not clear to me: is this 50W Current Board DZ-LP0818 needed or not for SA1 in order to achieve maximum possible brightness?

 
Register on MacRumors! This sidebar will go away, and you'll see fewer ads.