Become a MacRumors Supporter for $50/year with no ads, ability to filter front page stories, and private forums.
Status
The first post of this thread is a WikiPost and can be edited by anyone with the appropiate permissions. Your edits will be public.
Someone one ebay (UK) is selling pre-converted 5K monitors. what do you guys think of the pricing/value here?

£700 + £25 delivery (+£50 to fit a webcam inside)

Pros:
  • No work required
  • 2 year guarantee
Cons:
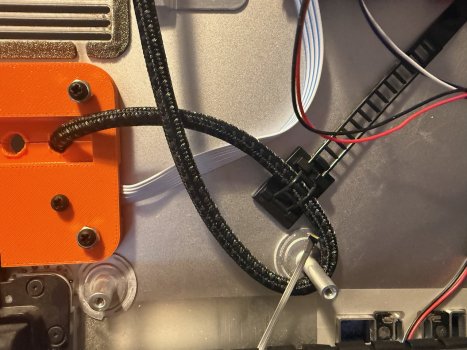
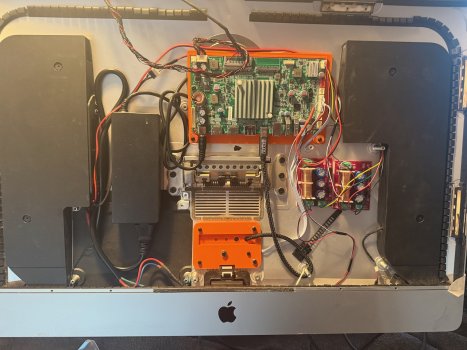
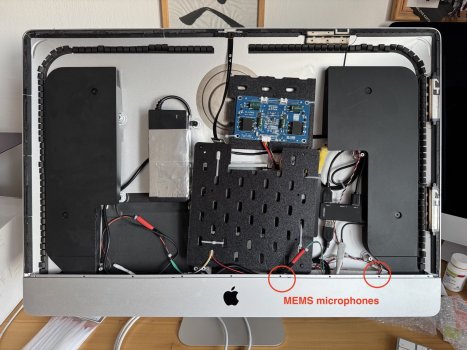
  • Quite a big price premium over doing it yourself? (although I guess the controller board itself is expensive)
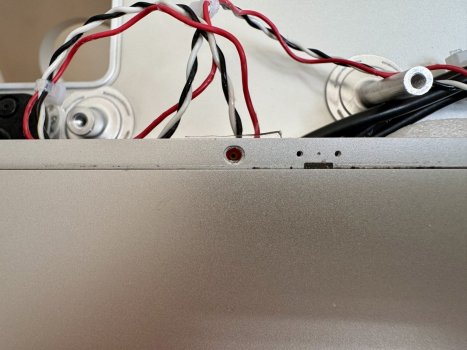
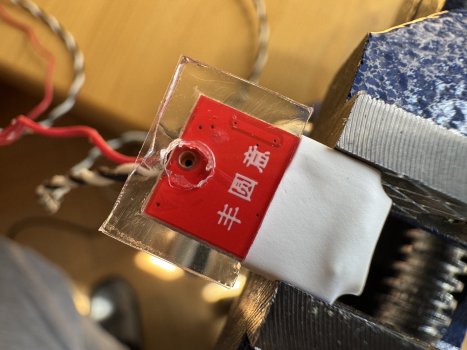
  • No cover over RAM panel at back - it's just left as a hole
 
@tornado99 The one in the advert picture looks to be a 2017 iMac, so worth £300-£450ish and the controller board and crossovers are another ~ £250-£300, so the price isn't too bad.

The interior (on another of his ads) looks quite well done:

There are other's advertising on UK eBay which seem to be using a cheaper JRY controller board, and a 2015 iMac, which woudn't be worth that sort of money...
 
Last edited:
  • Like
Reactions: tornado99
@UniqueUserName1234 Yes. The red wire on the end pin goes into the grey wire on the outside.

Sorry for the late reply, thanks very much! I have wired everything up and am getting a display and my laptop is also charging @ 90w which im super pleased about. However, at the moment I am just using an external power brick to power the SA1 board and want to get an internal supply. From what I have read, the Meanwell LRS-200-24 is a good choice. Just wanted confirmation before I buy. I am looking at https://cpc.farnell.com/mean-well/lrs-200-24/power-supply-ac-dc-24v-88a/dp/PW05311 but it looks longer than ones I have seen used such as in https://media.printables.com/media/...2ad/thumbs/inside/1280x960/jpeg/img_6221.webp. Ideally looking for UK supply for quicker delivery and avoid potential import duties.
 
@UniqueUserName1234
The smaller one looks like a LRS-150-24, or clone, which is only 150 watts so might struggle to give you 90 watts of charging to your laptop.
 
Last edited:
Thanks so much. Sorry for all the questions, but is there any guide about how to wire this up ? Ive tried searching this thread but its got so large cant see the wood for the trees. Ideally, I would like the mac to look stock, so would like power from wall socket to back of mac, and the power button on mac to work, so it turns it on/off.
 
@UniqueUserName1234
The iMac's mains power lead ends in pins 1 and 3 of a Molex Micro-Fit 3-pin plug which connects to the iMac PSU.
You need to connect these two wires to the correct input pins of the LRS-200-24.
It's important that the Live pin on the plug (which has a slightly radiused corner) is connected to the L pin on the new PSU.
The Neutral pin on the plug (which is square) goes to the N pin on the New PSU.
The Earth pin (⏚) on the PSU needs to connect to the aluminium case of the iMac.

Do not disconnect the green Earth wire that is connected from the mains input socket to a nearby stand-off at the bottom of the iMac case.

iMacMolexMicro-FitCU.jpg


To use the iMac power switch you extend the two wires from the switch and solder them to connect across the On/Off tactile switch on the Control Strip.
Or you could connect to the wires in the ribbon cable.
This with is fed by wires 1 (Power. +ve) and 4 (Common ground, needed for all switches) on the ribbon cable from the JRY--SA1 board.

Here is an example from earlier in this thread of connecting to the ribbon cable:

Another example showing a soldered connection to an R1811 Control Strip:

ControlStripSolderCU.jpg


IMPORTANT NOTE:
The iMac power switch is a low voltage switch and is only switching the JRY--SA1 board into stand-by mode.

The new PSU will be power on all the time, and use about 1 watt of power whenever it is connected to mains power.
So you have to unplug the monitor PSU from the mains to switch it off.
 
Last edited:
Thanks so much again! From what I can gather I need a 1xMolex Micro Fit (https://uk.farnell.com/molex/43640-0300/connector-housing-plug-3pos/dp/3076076) and 2xTerminal (https://uk.farnell.com/molex-partner-stock/43031-0001/contact-pin-20-24awg-crimp/dp/4234081). Im probably over-thinking this but I get a little concerned when working with electrics as im inexperienced.I believe this connector can only accept upto 20AWG, but 20AWG can only safely supply upto 5 amps?, but the LRS-200-24 could potentially draw upto 8 amps? Are there any pre-made or do I have to buy all these parts separately including crimp tool etc?
 
@UniqueUserName1234 “I believe this connector can only accept upto 20AWG, but 20AWG can only safely supply upto 5 amps?, but the LRS-200-24 could potentially draw upto 8 amps?”

This is the mains voltage input circuit so the current is much less.
From the data sheet: 'AC CURRENT (Typ.): 4A/115VAC 2.2A/230VAC'
 
Last edited:
Hi everyone!

First off, big thanks to @PaulD-UK and everyone else here for sharing your valuable insights, advice, and the effort you've put into this thread.

I have a 27" 5K iMac (2017, model A1419), and I’ve decided to go with the JRY-W9RQHD-FA1 display driver since I'm on a budget and the A1811 board is a bit out of reach for me. I'm also planning to use the crossover you recommended later in this thread (and will be swapping out the capacitors from electrolytic to polypropylene film as you suggested) so I can run it with the iMac’s built-in speakers.

I do have a few questions, if you don’t mind:
  • For the JRY-W9RQHD-FA1, what power supply would you recommend to avoid any issues? I saw mentions of a 24V supply earlier in the thread, but should I go for 5A or 6A?
  • Is there any way to improve the built-in amplifier on the JRY-W9RQHD-FA1? Maybe a mod or an external amp I can add to get crisper audio output?
  • Lastly, does this driver handle brightness control properly? Will I be able to fully take advantage of the display’s 500 nits brightness?
Thank you!
 
@m0hc1n3
A 24V 5A PSU should be fine, since the JRY--FA1 doesn't charge a laptop.

An external amp will probably improve the audio quality, but it will add additional cost to get a good quality one.

The JRY--FA1/SA1 seems to allow brightness control from the Mac's keyboard using a DDC app like Monitor Control or Better Display.
However audio volume control meeds a different app, like eqMac.

@jag001 has reported that their FA1 isn't as bright as the T18 board, but that this might be because it has better colour quality.
However the FA1/SA1 are reported as having sufficient brightness to be a good monitor to use with a Mac.
 
  • Like
Reactions: m0hc1n3
Don't know if someone else mentioned this or tested this already but the JRY--SA1 has KVM functionality.

With an USB-B cable connected to the board in combination with display port input the USB-hub is connected to the computer through the USB-B cable. If I instead switch to the USB-C input the USB-hub becomes connected to the computer via the USB-C cable. I haven't tested in combination with HDMI but probably the USB-B is still active in that case.

With USB-B the USB-hub in the board still reports as Genesys Logic, Inc. USB2.1 Hub.
 
  • Like
Reactions: m0hc1n3
@m0hc1n3
A 24V 5A PSU should be fine, since the JRY--FA1 doesn't charge a laptop.

An external amp will probably improve the audio quality, but it will add additional cost to get a good quality one.

The JRY--FA1/SA1 seems to allow brightness control from the Mac's keyboard using a DDC app like Monitor Control or Better Display.
However audio volume control meeds a different app, like eqMac.

@jag001 has reported that their FA1 isn't as bright as the T18 board, but that this might be because it has better colour quality.
However the FA1/SA1 are reported as having sufficient brightness to be a good monitor to use with a Mac.
Thank you very much for your response, sir!

If you don’t mind me asking, what is the purpose of the USB-C port on the JRY--SA1 board? Is it just for charging devices, or can it also transmit display signals like the DP and HDMI ports?
 
@m0hc1n3 "...what is the purpose of the USB-C port on the JRY--SA1 board?"

It's another input, to connect direct between a Mac's USB-C (Thunderbolt) ports.
So yes: "can it also transmit display signals like the DP and HDMI ports?" It can, using DP alt-mode signals.
It can also charge a MacBook Pro/Air if you connect USB-C to USB-C.
You have to have a bigger monitor 24v PSU to allow charging.
 
  • Like
Reactions: m0hc1n3
@jonatans "If I instead switch to the USB-C input the USB-hub becomes connected to the computer via the USB-C cable."

If you don't connect a USB 3.x USB cable from the computer to the JRY--SA1's USB-B input, and use a USB-C cable to drive the monitor's video, then the USB hub output ports are only going to be USB 2 - enough for keyboard and mouse but not for SSDs etc.
 
  • Like
Reactions: jonatans
Hi everyone!

First off, big thanks to @PaulD-UK and everyone else here for sharing your valuable insights, advice, and the effort you've put into this thread.

I have a 27" 5K iMac (2017, model A1419), and I’ve decided to go with the JRY-W9RQHD-FA1 display driver since I'm on a budget and the A1811 board is a bit out of reach for me. I'm also planning to use the crossover you recommended later in this thread (and will be swapping out the capacitors from electrolytic to polypropylene film as you suggested) so I can run it with the iMac’s built-in speakers.

I do have a few questions, if you don’t mind:
  • For the JRY-W9RQHD-FA1, what power supply would you recommend to avoid any issues? I saw mentions of a 24V supply earlier in the thread, but should I go for 5A or 6A?
  • Is there any way to improve the built-in amplifier on the JRY-W9RQHD-FA1? Maybe a mod or an external amp I can add to get crisper audio output?
  • Lastly, does this driver handle brightness control properly? Will I be able to fully take advantage of the display’s 500 nits brightness?
Thank you!
Not sure whether the brightness is the same between the SA1 and the FA1 but the SA1 is plenty bright ;-)
 
Hello! The display of 2019 is an AA1 board. The power supply is 12V 8A (not expensive, Chinese). According to type C, with a MacBook Air M1 it works perfectly: it wakes up quickly, turns on immediately after connecting the cable,MacBook is charging. I connected a Mac Mini M4: it does not turn on, the green LED blinks. If you press the buttons for a long time, the monitor turns on and works - until the next sleep. It works via HDMI, but it wakes up after about 5 seconds. I temporarily connected a 24V 4A UPS, it seems to wake up and turn on normally. What is the problem, in the UPS or the board or in 12V?
 
Almost finished with my build, just having a problem with wiring the SA1 board to the imac's power button and the Xarl-Li ram access mod. It won't fit with the the power button sticking out too far. Do I have to desolder the power button off and mod the ram access print to allow the board through? Should I snip the blue wire on the bottom for power and 4th white wire for the ground? Maybe solder the power wires to round copper points, can't really tell which is which though.

Trying to figure out what I need do for both of them. Any help would be appreciated.
 

Attachments

  • IMG_2068.jpeg
    IMG_2068.jpeg
    443.1 KB · Views: 30
  • IMG_2069.jpeg
    IMG_2069.jpeg
    431.4 KB · Views: 27
  • IMG_2067.jpeg
    IMG_2067.jpeg
    543.3 KB · Views: 29
  • IMG_2070.jpeg
    IMG_2070.jpeg
    375.6 KB · Views: 28
Last edited:
Almost finished with my build, just having a problem with wiring the SA1 board to the imac's power button and the Xarl-Li ram access mod. It won't fit with the the power button sticking out too far. Do I have to desolder the power button off and mod the ram access print to allow the board through? Should I snip the blue wire on the bottom for power and 4th white wire for the ground? Maybe solder the power wires to round copper points, can't really tell which is which though.

Trying to figure out what I need do for both of them. Any help would be appreciated.
YMMV and others may have better ideas, but I simply used pincers to snap off the last part of the control strip containing the power button, and connected the wires from the iMac's power button to wires 5 (GND) and 8 (PWR) on the control strip. It's fiddly, but it works, and everything fits. The only downside is you obviously lose the power indicator LED – there is no external indicator of whether the board is on, off or even powered.
 

Attachments

  • IMG_1544.jpeg
    IMG_1544.jpeg
    1.5 MB · Views: 42
  • IMG_1542.jpeg
    IMG_1542.jpeg
    1.4 MB · Views: 43
  • IMG_1546.jpeg
    IMG_1546.jpeg
    1.4 MB · Views: 39
Last edited:
  • Like
Reactions: Xarl-li
I also included the fan and logic boards of an Apple TV 4K inside the iMac as well before zipping it up. Fortunately as I was gutting that iMac I thought to leave the original airport antennas alone, so I’ve plugged them into the Apple TV logic board and they work great!!
This is a brilliant idea! Would you mind sharing some more details (and maybe images) of how you did this?
 
Almost finished with my build, just having a problem with wiring the SA1 board to the imac's power button and the Xarl-Li ram access mod. It won't fit with the the power button sticking out too far. Do I have to desolder the power button off and mod the ram access print to allow the board through? Should I snip the blue wire on the bottom for power and 4th white wire for the ground? Maybe solder the power wires to round copper points, can't really tell which is which though.

Trying to figure out what I need do for both of them. Any help would be appreciated.
🙏 You have to cut the PCB, you will use the original ON/OFF button of the iMac and…..I finished the camera mount. I'm going to try adding space for the RGB On/Off LED in place of the light sensor that used to be next to the camera. (I'm testing it now.)

I'll upload the file in a few days 🙏
 
This is a brilliant idea! Would you mind sharing some more details (and maybe images) of how you did this?
Unfortunately this time I was rushing to finish this for a camping trip so I didn't take any photos as I went - it all came together pretty luckily in the end... the Apple TV 4K was a $10 bargain one of my kids found at the op shop, the wall mount was a $4 special from the tip shop, the iMac was $75 and I think I managed around $100 for the AA1 board as well (all $AUD).

With the iMac I gutted everything except the Airport antennas and the factory power button - I had the presence of mind to not cut the cables off the antennas on this occasion. I took the whole stand assembly out as well and then VERY carefully drilled holes and used rivnuts to create a 100x100mm VESA mounting pattern in the iMac shell itself - I wasn't too worried about doing this in that I knew I was taking a LOT of the weight out of the iMac itself... so far its travelled pretty well and the mounting seems more than sturdy enough.

For the Apple TV I disassembled it, took the top fan board, the logic board and interior heatsink layer and reassembled those together with the screws to match. The key to the 12v power injection is circled in green on the below image - those posts screw into the logic board and carry the power from the power supply through the heatsink layer - so I soldered a 12v fly lead onto those and joined it to the same fly lead I ran from my new DC power port in the existing 240v location on the iMac to the socket on the AA1 board.

I also drilled a hole (yellow +) through the heatsink layer to give me a solid mounting point onto one of the iMac standoffs on the right side of the case about middle of the way up. Combine this with some 3mm adhesive foam on the aluminium iMac body to help with insulating, and then 2 3d printed arms to other fixing points and the appletv is very snug and secure in the iMac case. Connect 3 of the 4 airport antennas to it and then find a spot for the AA1 board over on the left of the iMac with more foam insulation against the case - also helps with any vibrations caused by movement in the van... being mindful of making sure its not anywhere that will get too warm from the chips.

Pop in a short right angle to right angle HDMI lead from the Apple TV to the AA1 board, and also a short DP fly lead out the rear of the iMac case and stick it all together and magically it managed to work :p Ignore the bit on the image below where it has the fan disassembled... I may not need it but I left it intact and in place anyways. The reality is if you're not trying to retain the speakers etc or mount an internal power supply it's pretty easy to get enough ventilation into the iMac case for fans to not be an issue. Although I live in the southernmost capital city in Australia so its not usually that hot here... but even travelling in hotter places these boards don;t seem to have had any overheating issues with the power supply external.

Sorry that's the best I can do... I am a shocker for getting my head into a project and neglecting to document the journey....

Screenshot 2025-05-13 at 12.08.20 am.png
 
Last edited:
Been a minute since I posted my first build on this (here). I have since built another one, same specs, just different audio crossovers (noticeably worse quality, try for the amazon ones from original post).

I have also come into possession of a third 2017 5k iMac, I am going for 3 for 3 fully working displays :)

Attached is an image of my setup

(Yes that is a FrameworkLaptop,and yes, the displays still work when dual booting Ubuntu)
20250303_114127(1).jpg
 
Hello all and sending special thanks to @PaulD-UK and @Aiwi but also others, who contributed. My convert of iMac 2017 all-in-one (mics, camera, speakers) is done and finished without issues.

I spent like 14 evenings reading this thread from post number 1 to the end. I made a lot of notes and took a picture of every step I did during conversion so I can later publish it all probably on github page to make it even easier for the others.

For iMac 2017 I used R1811 with Brightness board and without Crossovers. I bought Crossover, but it sounds terrible and I found out that if I connect speakers directly to driver board in series is sound similar to original 2017 iMac which is sitting next to this one (BTW anyone wants to compare something?), just with noticeably weaker bass which I hope can be improved using eqMac.
Fan of driver board is facing outside of iMac using original Fan exhaust. 3D Print and all modifications will also be included on github later.
I wanted one cable to "do it all" so 4K camera with AF works wonderfully, speakers also, charging M1 and M4 MacBooks without issues and ony issue I have is with double MEMS microphones.

The thing is, it seems to me that they record even sound from Mars. They are SO sensitive! My neighbor whisper to his wife's ear something and I can clearly record it from another room 🤪

They are recording some sound even when I disconnect the power from it and just connect USB sound card (that Ugreen from Ali) with MICs directly to notebook.

So my question is, how did you please @Aiwi managed to insulate them from the surrounding sound?
 

Attachments

  • IMG_9891-2.jpeg
    IMG_9891-2.jpeg
    482.2 KB · Views: 33
  • IMG_9900-2.jpeg
    IMG_9900-2.jpeg
    514 KB · Views: 23
  • IMG_9895-2.jpeg
    IMG_9895-2.jpeg
    381 KB · Views: 33
  • IMG_9997-2-2.jpeg
    IMG_9997-2-2.jpeg
    455.9 KB · Views: 33
Register on MacRumors! This sidebar will go away, and you'll see fewer ads.