Become a MacRumors Supporter for $50/year with no ads, ability to filter front page stories, and private forums.
Status
The first post of this thread is a WikiPost and can be edited by anyone with the appropiate permissions. Your edits will be public.
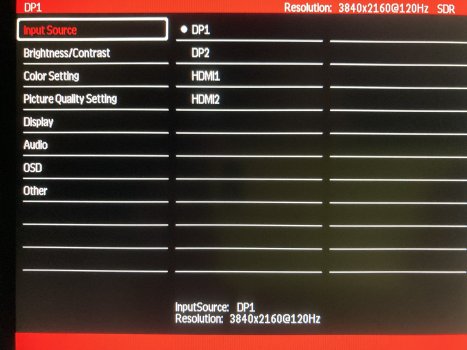
Some more tests with JRY-W9RQUHD-FA1 board ($102 from GIVIFENI Store):
- I can confirm that it supports 4K 10-bit 120Hz. 120Hz looks really nice and smooth and makes huge difference in visual and motion perception.
- 10-bit test gradient that i posted earlier seems don't works. I recommend to use test images and videos from https://github.com/jursonovicst/gradient and from https://www.avsforum.com/threads/10-bit-gradient-test-patterns.2269338/ In some situations 8-bit vs 10-bit difference may be minimal or not visible at all, because not all macOS apps render viewport to honest 10-bit. From apps that i use the cleanest output was in PhotoLine image editor.
UPDATE: Also note that all those 10-bit tests highly depend of UI scaling. For example Photoshop show true 10-bit gradient only if display set to native 3840x2160 and everything is tiny. If set UI to "looks like 1920x1080", gradient start to look like smoothed 8-bit.
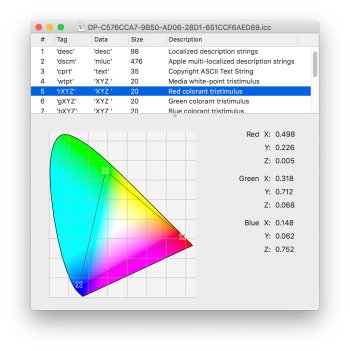
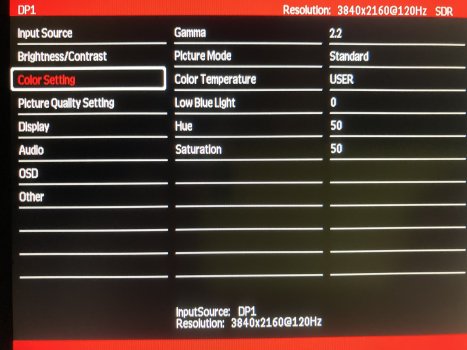
- Board generates and uploads to system wide gamut ICC profile with gamut close to P3. Matrix data in EDID file is slightly different from data sheet for my panel, so i have no idea where it came from. Overall colors looks very nice and i don't feel that it needs some additional custom calibration. Also because it is 8-bit+FRC panel, my custom made ICC profile adds some banding artifacts to the gradients. So i only set color temperature using RGB sliders to 5500K R50 G49 B49 (my personal preferred) based on calibrator measurements.
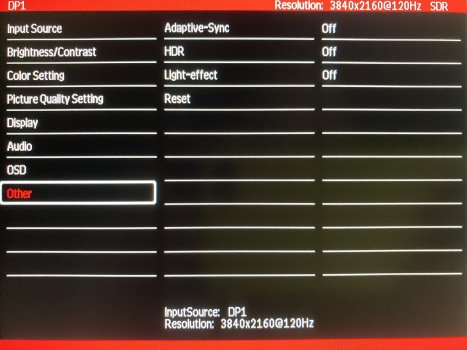
- Adaptive Sync don't works on my system, probably because it is not supported on Mojave.
- Didn't tested HDR mode yet because i don't use it.
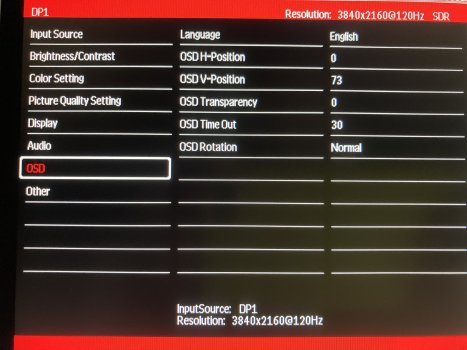
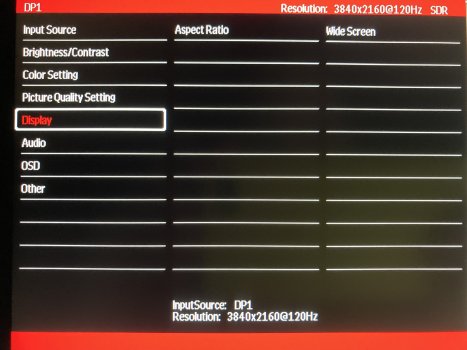
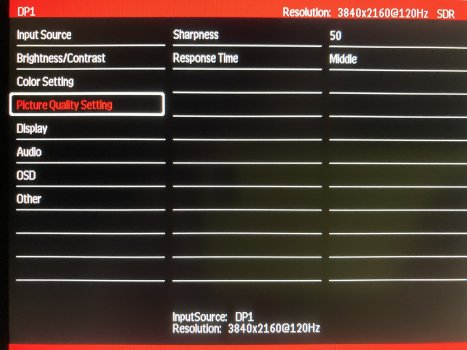
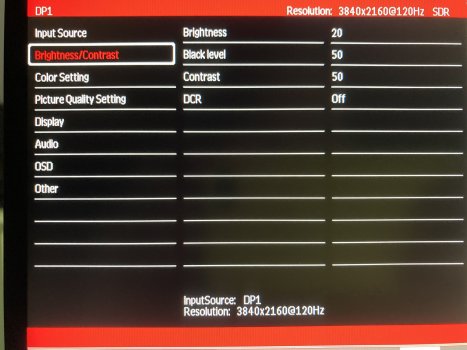
- Can't see any other special settings like Picture in Picture or Display Stream Compression.
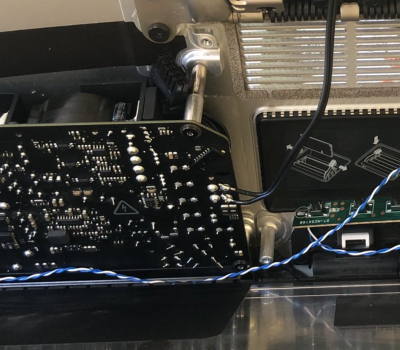
- Heatsink feels hot if put finger on it, so it needs decent airflow.
 

Attachments

  • Screen Shot 2025-07-05 at 4.45.13 PM.jpg
    Screen Shot 2025-07-05 at 4.45.13 PM.jpg
    362.1 KB · Views: 15
  • IMG_0535.JPG
    IMG_0535.JPG
    428.9 KB · Views: 14
  • IMG_0534.JPG
    IMG_0534.JPG
    409.6 KB · Views: 14
  • IMG_0533.JPG
    IMG_0533.JPG
    404.8 KB · Views: 13
  • IMG_0532.JPG
    IMG_0532.JPG
    385.5 KB · Views: 14
  • IMG_0531.JPG
    IMG_0531.JPG
    408.9 KB · Views: 14
  • IMG_0530.JPG
    IMG_0530.JPG
    418.4 KB · Views: 14
  • IMG_0529.JPG
    IMG_0529.JPG
    419.6 KB · Views: 11
  • IMG_0528.JPG
    IMG_0528.JPG
    498.6 KB · Views: 14
Last edited:
@ItsAShaunParty
The main problem with using the methods described in your linked video is that everything in the video requires a Mac laptop to control the second screen, because the laptop has it's own boot screen.

Your M4 mini would be booting without a display attached unless you already have proper external monitor attached to it to show boot options and login screen.

I would think that you would only get Luna Display to display 5K at a reduced Hz rate, and with increased latency.
All this throws away the main advantage of using an iMac screen panel as an external monitor – 5K sharpness with no latency....

Your choice. 😉

"What is that dongle? Man, I'm so cheap."

In order to use software to drive an external monitor, the Mac has to be connected to a 'dummy display' dongle, which tricks the Mac's GPU into outputting a display signal at the correct resolution. This signal is then sent to the external monitor using software over USB or a WiFi/ethernet network, rather than a DP or HDMI video cable.
I suspected this!

So the $90 Luna display dongle isn'y any different than the $3 8k dummy HDMI I bought on Amazon? You can get 5 5-pack of these dummy HDMI things for, like, $10-20 on Amazon.

Ha, that's a very good point about the 5k thing. My current daily driver is a 2020 27" iMac. I keep it as 2560x1440. I guess I'll give this a whirl and see how I like it. I can use my 2020 to test.

I wonder if I can use Luna with my dummy from Amazon. Only one way to find out....
 
Last edited:
@Klaazz The JRY-W9CUHD-AA1 is sold by some vendors with a 24V PSU, so like all JRY 5K boards that is the best voltage to use, but it will work with 12V.
What do you mean that 24V is the best to use? What would be worse with 12V? I was planning on using 12V with the FA1.
 
@benqo These boards may get hotter because of the extra current in the input circuit when running on 12V.
They are built to use less current when running with a 24V supply.

But the ones without USB-C all seem to work with 12V, if that is what you want to use.
 
  • Like
Reactions: benqo
Thanks @PaulD-UK, makes sense. Will try to run 12V from the Mac PSU to start or add a MeanWell 24V later. Is it OK to use these two points for 12V instead of from the molex connector?
 

Attachments

  • Screenshot 2025-07-05 at 23.31.02.png
    Screenshot 2025-07-05 at 23.31.02.png
    2.8 MB · Views: 21
Some more tests with JRY-W9RQUHD-FA1 board ($102 from GIVIFENI Store):
- I can confirm that it supports 4K 10-bit 120Hz. 120Hz looks really nice and smooth and makes huge difference in visual and motion perception.
I looked at the 8-bit versus the 10-bit grayscale photo.
The R1811 looks the same as my Pro Display XDR. Very smooth on the 10-bit, and clear banding on the 8-bit.
Both displays at native resolutions (5k and 6k) @60Hz
 
@benqo Exactly the same. Just the back of the socket.
Great, thanks! I saw a post by @Kaeslin where he used all 12 molex pins - but I'm guessing 4 pins (2 lines) should be enough for 6A on this FA1 board?

Also, how does the original iMac power button work exactly on the PSU? Is it ok to disconnect it from the PSU, the PSU still works? Or if you keep it connected to the PSU, can you use it to shut off the PSU completely?
 
@benqo
The iMac’s power switch connects to the PSU, but the on/off signal is passed straight through to the logic board. So without the logic board it has no control function over the PSU, which will be fully on the moment it is connected to mains power.

So without a mains rated switch in the 115/230V circuit you have to unplug the cable to turn it off…
 
  • Like
Reactions: benqo
hey RDCh, when you connected to wires 5 and 8, how did you go about doing this? Presumably I can just cut wire 8 and solder directly to it, but for the ground / wire 5, did you splice in the iMac power button wire? Read elsewhere in the forum the ground has to remain connected for the other buttons to work since the entire board shares the same ground connection? I might see if I can track down a quick splice or vampire connector so I can leave wire 5 in tact before I cut the end of the board off. Any idea what gauge these little SA1 control board wires are?
Hi, I spliced both wires using heat shrink tubing – though now that you mention it that probably wasn't needed for the power wire. See the picture. The control board wires were very thin.
 

Attachments

  • IMG_1542 (1).jpeg
    IMG_1542 (1).jpeg
    1.4 MB · Views: 37
  • Like
Reactions: marshes
With different modifications, like using the rear port outlets. This company, PCBWay looks promising.
They can manufacture PCB cards and 3D print parts.

Is anyone skilled to create a card that will fit with USB-C outlet etc, with a 3D printed plate that ensure a stable and secure fit?
I assume many of us would purchase such an item, if it was available. To recreate the look and functions of the iMac. Without the cable(s) connected directly to the built in cards.

What are your thoughts on this?
Hi all,

still working me trough the mountain (page 61 post 1504 now) of info (again) here, while I am searching for parts to use.

I have found this USB 3.2 hub (4 ports or 3 with SD/TF) The seller said that the distance between the ports are 8mm, just as the original ports of the case. So, it must fit.... however I dont know how to fasten it (hot glue?) Also dont know what space it takes and other ports will be block.
I am still in brainstorm faze ... using the SD/3 port hub (only the print plate) transform the 4th USB to a HDMI, 1USB c to DP and 1 USB c as C. And use the connectors as AIWI has; 90º. and female female... there are special one for HDMI DP and C
3,2 hub
connectors see the shop of ugourd. they have various.

I think there is space.... but I have not started this dream yet....and you all are say it will be just USB 2 from the boards (even JRY W9RQUHD-SA1 which says 3.0)

At the end I want a 1 cable system but I think I will end up with an USB A (3.2 hope) and USB c
 
Hi all,

still working me trough the mountain (page 61 post 1504 now) of info (again) here, while I am searching for parts to use.
It is a lot to go through, but worthwhile I believe.
I have not modified my DIY any further yet. And the display panel is still taped to the body with tape. So it is easy to open again.
Still reading what solutions other people come up with :)

The fan on the R1811 is sometimes annoying me a little. I don't notice it all the time, though.
But it is louder than my iMac Pro. Perhaps even louder than my Mac Pro 7,1 with the Promise Pegasus R4i. Which blocks the airflow more than MPX cards do. Making it a bit louder as well.
 
Hey Archmage2002

Did you ever get the power button working? I have the SA1 and that's probably the last thing I want to do. Right now, my control strip is hanging outside in the back and it doesn't look good.

I haven't read through these posts in a while, so I can't remember if someone figured it out, but I was able to decrease the tension of the mount by changing the 2 screws I've circled in the photo below. The original screws were roughly 0.8 mm and the new ones are roughly 1.0 mm. The new screws have been repurposed while removing the motherboard.
Hey razmanugget, how did you manage to compress the spring well enough to reattach the screw? I undid one, and have since launched that metal piece across my dining room twice.
 
@PaulD-UK. My 21.5 4K conversion is a little dim using a R9153 and 12v. Do you know of any way I can get a bit more brightness from the backlight? I did wonder whether switching to 15v would help but I don't want to risk damaging the board. Perhaps a separate backlight driver?
 
@marshes "...how did you manage to compress the spring well enough to reattach the screw?"

@razmanugget replaced the original screw with one of the ones used to retain the speakers.

As you can see in his picture, the thread pitch TPI of the original bolt is unusual, as it is an M3 fine pitch screw.
The speaker screw is a normal M3, so it doesn't fit into the iMac stand spring's threaded socket without cross-threading - which will take extra force...

It needs quite a bit of force to compress the spring - as you have discovered. 😉
It needs some clamping tool to get it compressed, which is easier to do it the hinge is removed from the stand.
It doesn't need to be fully dismantled, like in this picture.

iMacHingeScrewCU.jpg
 
  • Like
Reactions: marshes
@kevinherring "My 21.5 4K conversion is a little dim using a R9153..."

This is a problem that has happened with conversion boards for iMac 27" 2009-2014. ☹️

That threads solution is to use the backlight driver Apple used in 2009-11.

Basically it was found that the Chinese LCD driver boards were producing too high a backlight voltage, at a completely different PWM frequency than Apple panels need - 36KHz instead of 13.3KHz...

Increase the backlight voltage wasn't the right thing to solve it, but changing the PWM frequency and using the original Apple backlight panel gave a much improved performance.

Because these 2K/4K boards were designed to drive existing (cheaper) screen panels before Apple reinvented the wheel with their hi-spec 4K/5K iMac panels, I suspect the PWM parameters of the R9513 are as different from Apple's requirement as the earlier 2K driver boards.
But that is a guess, and requires considerable diagnostic skills with an oscilloscope to determine...

Looking at the pictures of the R9513 board, they do not seem to have a 6-pin external backlight board socket soldered in place?
The R9516 (and the R9A18/R1811) have a red JST PH socket, which might support an external backlight board, but if the R9513 doesn't have it, then it's firmware may not support this function?

R9513NoSocket.jpg
 
  • Like
Reactions: kevinherring
Hi all,

Finally I not only finished my conversion based on R1811 but also document what I can and I uploaded it all here https://github.com/jorycz/iMac-5K-display-convert

There is also settings of the display so colours are as close as to my second iMac 2017 sitting next to this one converted and also settings of BetterDisplay (free version) so volume and brightness works on apple keyboard as before on iMac. Also all files for 3D printing are uploaded.

Everything is working out of the box - camera, speakers, microphone, charging, mouse connected to USB, ... I just plug usb-c/thunderbolt cable from my MacBook and display wakes up in couple of seconds. No issues so far. Behaves like Apple Studio Display (except quality of audio of course) for half of the price.

If anyone wants to compare anything from this build with original iMac, send me a message before I start second conversion that will start in a month probably.
 
It is a lot to go through, but worthwhile I believe.
I have not modified my DIY any further yet. And the display panel is still taped to the body with tape. So it is easy to open again.
Still reading what solutions other people come up with :)

The fan on the R1811 is sometimes annoying me a little. I don't notice it all the time, though.
But it is louder than my iMac Pro. Perhaps even louder than my Mac Pro 7,1 with the Promise Pegasus R4i. Which blocks the airflow more than MPX cards do. Making it a bit louder as well.

Stock fan noise was exactly the reason for me to put 180 Ohm rezistor on +ve as I described in my conversion. It is completely silent and temperature never reached 40°C so far even during hot summer days.
 
Hey everyone!

So, I just updated the GPT and it's pretty helpful.

The only issue so far is that the links will direct you to the correct page within the thread but not the specific post.

Here's a link:


----------

Personal Update

I just finished my 21.5" “just get the display working with this $30 board” experiment, and it went smoothly.

That said, I really hate the idea of dropping over $250 on an R1811 board. I’m hoping to find a used one for cheap on eBay. But honestly, it seems like I’ll have to bite the bullet and spend the $280. If anyone has an R1811 board to sell for around $100, let me know!

What else, what else....

Nothing like procrastination, right?

ItsAShaunParty - what is the exact/specific resolution that your 21.5 4k is running at?​

 
Last edited:
Hey razmanugget, how did you manage to compress the spring well enough to reattach the screw? I undid one, and have since launched that metal piece across my dining room twice.
Hey marshes

I know exactly what you are talking about. I've had those suckers fly all over the place 😄 If you remove the hinge from the stand, you can squeeze it together by hand.

I recently tried just removing 1 screw completely, but there isn't enough tension to keep the monitor in place and the bottom edge slowly sinks. I've since purchased some mounting arms so I don't have to worry about it
 
  • Like
Reactions: marshes
Hey marshes

I know exactly what you are talking about. I've had those suckers fly all over the place 😄 If you remove the hinge from the stand, you can squeeze it together by hand.

I recently tried just removing 1 screw completely, but there isn't enough tension to keep the monitor in place and the bottom edge slowly sinks. I've since purchased some mounting arms so I don't have to worry about it
Awesome. Thank you for the reply, and thank you too @PaulD-UK for the now multiple replies -fun thread. When I finally button up my 2017 conversion I’ll add a mini summary post in here to add the specific parts I bought and steps I took to complete mine, though there’s nothing new as you all have done it all before, but figure another success story with slight variations can’t hurt.

Anyway, I’m nearly done. Have the OEM power button and cable functioning, and nearly ready to seal it up for good -just need to fix the stand tension. I gutted everything and put in the SA1 board and a 24v PSU sold with the board. I bought 4ish lb of plate weights until I decided to screw (no pun intended) around with the tension screws.

Do you know if the longer screws sufficiently alleviate the tension? Or am I better off putting the orig screws back on and adding weights to offset what I gutted and get the pivot of the stand to work close to normal?
 
Will the JRY-W9RQUHD-SA1 give me the same video results as the R1811 V4?

If so, then I would just need the JRY-W9RQUHD-SA1, a DZ-LP0818 and a TB3/4 or 8K USB-C cable?

I don't need the I/R remote or an audio amplifier - I've never needed a remote on my current monitor, and all of my audio stuff is handled by outboard equipment.

Thank you!
doing a little "bump" on this one as I either did not get an answer or I missed it in the flurry of activity since I've posted :)

I also got cold feet, but I only spent $50 on the iMac and I can't return it so I am taking that as a sign to forge ahead.
 
@marshes
Longer M3 x 0.35mm thread fine pitch ~10-12mm bolts are available on my country’s eBay.
But you have to search to find them…
 
Register on MacRumors! This sidebar will go away, and you'll see fewer ads.