Greetings

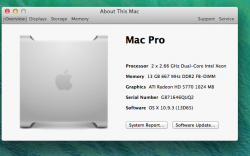
I'm incredibly happy to say that OSX 10.9.3 has been successfully installed on my 2006 Mac Pro1,1.
Here's what I did:
- Read through this thread (head spins, stomach in knots, break out in a cold sweat...)
- Downloaded OSX 10.9.3 from the App Store using my Snow Leopard drive in an i5 MacBook Pro. Put the installer aside.
- Backed up my MacPro 1,1 10.7.5 system drive. Tested the backup It started up on the MBP no problem.
- Removed the MacPro system drive. Put it in a newertech Voyager, hooked it up to the MBP. Erased it and created a single partition GUID.
- Installed Mavericks from the MBP to the MacPro system drive in the Voyager.
- Twisted stomach and loss of sleep and appetite.
- With Tiamos graph boot.efi on a thumb drive, I located the System/Library/CoreServices folder. Could not copy the boot.efi file. Moved on to the next step
- Located the /usr/standalone folder and successfully copied Tiamos boot.efi. While there, I made an alias of the
usr folder and placed it my desk top.
- Switched
Startup disks to the MBP system drive. Navigated to the MacPro drive still in the Voyager, located the System/CoreServices folder and successfully replaced the boot.efi with Tiamos file.
- Put the MacPro drive back into MacPro1,1, started up and... it worked!!!
As others have said before, the easiest way to accomplish this is to install Mavericks from another Mac to the Mac Pro system drive. The Voyager or similar will make this very easy. Copy Tiamos boot.efi file into the System/CoreSystem folder and /usr/standalone folder. Put the drive in the Mac Pro, Start Up and smile!!!
https://forums.macrumors.com/showthread.php?p=18411621#post18411621
I'm currently downloading previously purchased apps from the App Store.
(Double-click the ? thumbnail below to see a screen shot.)