So glad I found this thread. Made a bootable backup of my MacPro 1,1 got a windows GeForce 210, created the USB and installed right overtop of my backup (Unpluged all my other drives to be safe) and it booted up as if was a perfect upgrade. All my apps are there and everything seems to be working very well so far. Still have to test everything to make sure but worst case I will do a fresh install.
Got a tip for us?
Let us know
Become a MacRumors Supporter for $50/year with no ads, ability to filter front page stories, and private forums.
Mac Pro 2,1 and OS X Mavericks
- Thread starter 5050
- Start date
- Sort by reaction score
You are using an out of date browser. It may not display this or other websites correctly.
You should upgrade or use an alternative browser.
You should upgrade or use an alternative browser.
OS X 10.9 on Mac Pro 2,1
Just to report that it works great on Mac Pro 2,1 - Tiamo you are the king!
Also, I have to report that Radeon HD 7970 works great in that combo and without external power supply. You only need one 6 to 8-pin adapter.
Just to report that it works great on Mac Pro 2,1 - Tiamo you are the king!
Also, I have to report that Radeon HD 7970 works great in that combo and without external power supply. You only need one 6 to 8-pin adapter.
10.9 on 1,1...some sleep:wake issues
stock 1,1; 5150x2; 9GB; BT(trackpad)/WIFI; 10.9 on SSD (tiamo mod)
For the past two days--upon wake-from-sleep--FFx, TBird and Somafm apps basically unresponsive to input on-wake.
Native apps (finder, textedit, et al.). respond to trackpad input on-wake.
I'll try teh usb mousie for a few days on further assessment.
Created USB FLASH I unable get to pass grey apple logo screen. It was still spinning. I have tried make another sun flash but same result.
I did following instruction and replaced boot.efi in 2 locations.
I'm running Mac Pro 1.1 with ATi 5770
Any idea ? Does USB flash need to be bless?
Updated after i pulled out all drives leave one blank drive
Just boot off USB flashed drive Now i see flashing blink folder question mark loop
I realize missing something?
Last edited:
Confused
I'm totally confused. First, when you say "install drive" is that the drive I'm installing too or from?
Then, in these steps -
3c: in Finder navigate to the Drive you've just mounted
4c: locate BaseSystem.dmg -> drop it to the lower Disk Utility side pane
5c: select your previously created install partition (not drive!) -> restore tab -> drop the image from the side pane to the source field
6c: restore
When I - "select your previously created install partition (not drive!) -> restore tab" That drive is now in the source field. If I drop the BaseSystem.dmg into the source field, then nothing is in the destination field. I'm sure the install partition should be the destination, but I want to be assured.
Later, in all of the system modifying, is it the system on the USB install disk that I copy all of the different files, or is it the install partition I made?
I feel like this should be simple, but I'm making it difficult....whew!
Thanks for any help,
GA
- Install drive: as you only need to prepare one drive* I refer to this drive.
* you can set up another empty drive/partition as The destination, but usuell this is not neccessary
- 3c: you double-clicked the InstallESD.dmg previously. As this is a drive image it's available in the Finder the same way like a USB drive.
- 4c: on the "drive" you mounted there is another dmg. The BaseSystem.dmg. Drop this file to the window of the disk utility. (Lower left.)
- 5c: you made the install partition priviously (see "Install drive") you may need to drop the partition to the destination field additionally
- 6c: there will be a button named restore - Click this
Which system to mod: The partition you restored the BaseSystem.dmg to.
Have this wonderful hack running for almost two weeks now, rock solid and stable! It's amazing how these "old" machines give so much even 7-8 years later!
Small question for everyone with genuine Mac or flashed graphics cards, do you have boot screen on MacPro1,1 / 2,1? I'm referring to the cards with EFI64, not EFI32.
Tiamo rocks!
Cheers!
Small question for everyone with genuine Mac or flashed graphics cards, do you have boot screen on MacPro1,1 / 2,1? I'm referring to the cards with EFI64, not EFI32.
Tiamo rocks!
Cheers!
Sixty Four On Thirty Two (SFOTT)
I successfully installed on MacMini2,1 and MacPro1,1.
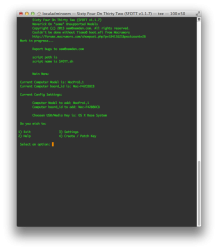
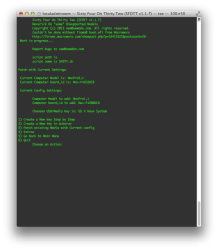
this is great I made a small app to automate all this.
Tiamo's did a super great Job
Just input your board_id, your model and the USB key to use and click.
fully automated or step by step. you can even then patch "again" the key to add other computer Boards.
works great. was a personnal challenge to code and as it works fine I though I'd post it in here.
Tiamo thanks again.
If any of you are interested : go there http://oemden.com/?p=556
I've called this little app (shell script bundled in an Applescript App)
SFOTT aka Sixty Four On Thirty Two.
Enjoy as I did.
This is an ongoing Work, but I've tested again and again and it works OK.
Attachments
- Install drive: as you only need to prepare one drive* I refer to this drive.
* you can set up another empty drive/partition as The destination, but usuell this is not neccessary
- 3c: you double-clicked the InstallESD.dmg previously. As this is a drive image it's available in the Finder the same way like a USB drive.
- 4c: on the "drive" you mounted there is another dmg. The BaseSystem.dmg. Drop this file to the window of the disk utility. (Lower left.)
- 5c: you made the install partition priviously (see "Install drive") you may need to drop the partition to the destination field additionally
- 6c: there will be a button named restore - Click this
Which system to mod: The partition you restored the BaseSystem.dmg to.
Thanks so much for your reply, I've got it.
Another problem, though. When I try to copy the boot file to CoreSrevices, I get this error message - "The finder can't complete the operation because some data in "boot.efi" can't be read or written. (Error code - 36)"
I've tried changing permissions to no avail.
Any help??
GA
Tiamo is the man!
I feel that my Mac Pro has been given a new lease on life. If this keeps working, I'll be able to live through the whole 10.9.x family with this machine!
No more sleep problems, no more audio problems - my Chameleon days are finally over and I have a real Mac again.
Thank you, thank you, thank you. Where can I donate?
----------
I have an official ATI 5770 from Apple, which is EFI32/64 agnostic. So yes, I have a boot screen. My machine (MacPro1,1) has been indistinguishable from an officially supported machine thanks to this hack by tiamo.
I feel that my Mac Pro has been given a new lease on life. If this keeps working, I'll be able to live through the whole 10.9.x family with this machine!
No more sleep problems, no more audio problems - my Chameleon days are finally over and I have a real Mac again.

Thank you, thank you, thank you. Where can I donate?
----------
Small question for everyone with genuine Mac or flashed graphics cards, do you have boot screen on MacPro1,1 / 2,1? I'm referring to the cards with EFI64, not EFI32.
I have an official ATI 5770 from Apple, which is EFI32/64 agnostic. So yes, I have a boot screen. My machine (MacPro1,1) has been indistinguishable from an officially supported machine thanks to this hack by tiamo.
sorry, I'm not sure vs13 express works or not, just have a try
Yup; it works.
This would just kill R. Stallman . . . .
@Rastafabi, I've tried to rewrite some of your instructions to make them a little clearer. This doesn't include some of your apps as I've found I don't need those to install a MacPro1,1. What do you think?
Feel free to do so! It helpfully helps people having trouble. (Some might dislike having to use the terminal).
However there is no reason anymore to use my guide (or modifications) as oemden just released a patching tool, which automates the processes being done manually beforehand.
I just read the source code and it's far more advanced than what's being described in my guide. (e.g. the OSInstall.mpkg is patched rather than illegally being redistributed slightly modified)
I would strongly recommend using his tool. (It seems to work with Mountain Lion, too.)
(Of course you still can use parts of my guide such as the Mavericks download enabler.)
Last edited:
Thanks so much for your reply, I've got it.
Another problem, though. When I try to copy the boot file to CoreSrevices, I get this error message - "The finder can't complete the operation because some data in "boot.efi" can't be read or written. (Error code - 36)"
I've tried changing permissions to no avail.
Any help??
GA
There is already a boot.efi file present. Delete this before copying the new one.
If you aren't ready preparing your install drive you might want to test this tool instead as it automates the process.
There is already a boot.efi file present. Delete this before copying the new one.
If you aren't ready preparing your install drive you might want to test this tool instead as it automates the process.
Thanks so much to both of you, I finally got it!!
GA
Confirmation that the simple text instructions do work 
Hi,
Just upgraded a standard Mac Pro 1,1 with the HD5770 card using the text instructions supplied. I was going to offer to update them but somebody has beat me to it
No major issues, there are a couple of typos in the docs, but nothing serious.
I used a 16GB USB Flash Voyager stick and it worked well.
I have a multiple monitor setup, a 23" Philips in the centre and a 17" LG to the right. The first time Mavericks ran, I got an odd sliding logon page where it was half way across the screen. After the first time it doesn't seem to have happened again. Could be a Mavericks problem but seems to have gone away now.
So far everything seems to be working fine. I'm still not used to having two menu bars on two screens but I'll get used to it. I like the idea of dumping Chameleon and reducing the complexity and number of things to go wrong.
Did an upgrade through the Apple Store and that had no issues. Final Cut Pro seems to work just as well.
I was looking for an excuse to buy a new Mac Pro but thats seems to have gone now. Oh well, save me £3,300
Thanks for the hard work on this. If there is a PayPal donation point I'll send something to somebody.
Rob
Last edited:
I feel that my Mac Pro has been given a new lease on life. If this keeps working, I'll be able to live through the whole 10.9.x family with this machine!
No more sleep problems, no more audio problems - my Chameleon days are finally over and I have a real Mac again.
Thank you, thank you, thank you. Where can I donate?
----------
I have an official ATI 5770 from Apple, which is EFI32/64 agnostic. So yes, I have a boot screen. My machine (MacPro1,1) has been indistinguishable from an officially supported machine thanks to this hack by tiamo.
Nice, thanks for GPU info, I actually wanted to get 5770
Upgrade or Fresh Install?
Success! I've installed Mavericks on my Mac pro 1,1 using an external HD partition (instead of a USB key), and a spare HD that I had. Everything works great except for the lame graphics coming from the stock ATI X1900XT (new video card is en route).
Many thanks to Tiamo for his awesome work in managing this, and to oemden for automating the process. This Mac Pro has been an awesome machine for me since 2007, and I'm glad it's going to get a few more years of useful life.
One final question: when it comes time to install Mavericks on my main drive (which is a three-drive SSD RAID array), will the main drive be overwritten, or will Mavericks be installed over top of my Lion installation? I'm not sure how the installer handles this, given the installation is coming from an external USB drive.
Thanks.
One final question: when it comes time to install Mavericks on my main drive (which is a three-drive SSD RAID array)
May I ask, what is the reason for having a three drive SSD RAID array? Is there really any benefit for this in a MacPro1,1 with its 3.0 Gbps SATA controllers?
Another question (for everyone): will it work to use a PC graphics card (ATI Radeon 4890) if I use the method in this thread or does it have to be a Mac graphics card? I've managed to get things to work with Chameleon, but I have problems when waking from sleep *everything freezes requiring a hard restart.
May I ask, what is the reason for having a three drive SSD RAID array? Is there really any benefit for this in a MacPro1,1 with its 3.0 Gbps SATA controllers?
Yes. It's a RAID 0 array. The data is striped across the three drives. The performance benefits are significant.
Yes. It's a RAID 0 array. The data is striped across the three drives. The performance benefits are significant.
You can also get SATA3 adapter and have full speed ; ) But any modern SSD on SATA2 is still pretty fast ; )
Another question (for everyone): will it work to use a PC graphics card (ATI Radeon 4890) if I use the method in this thread or does it have to be a Mac graphics card? I've managed to get things to work with Chameleon, but I have problems when waking from sleep *everything freezes requiring a hard restart.
you can use PC graphics card that are supported in Mavericks but you will not see boot screen.
I am using a GT 240 in mine, I use this machine for music and editing wav files so this card is more then enough. others will work too but the best options are NVidia cards. do you have wifi and bluetooth card in your Mac. I have no problems with sleep but I do not have a wifi/bluetooth card and I am thinking those older ones may be the cuase of sleep issues
Register on MacRumors! This sidebar will go away, and you'll see fewer ads.


