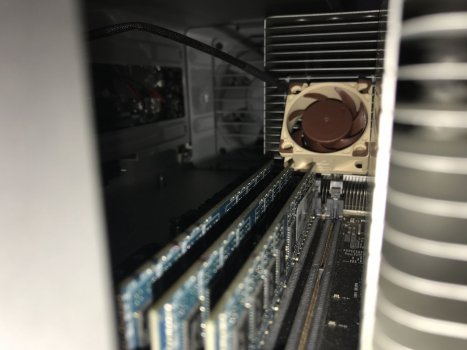
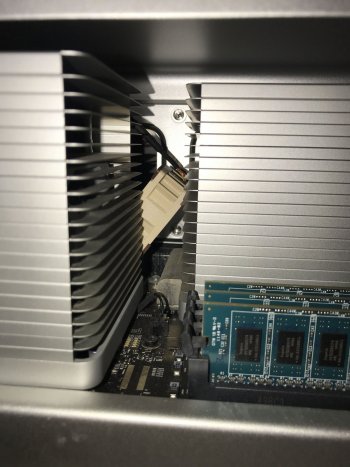
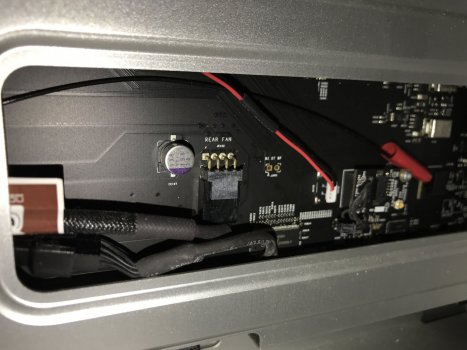
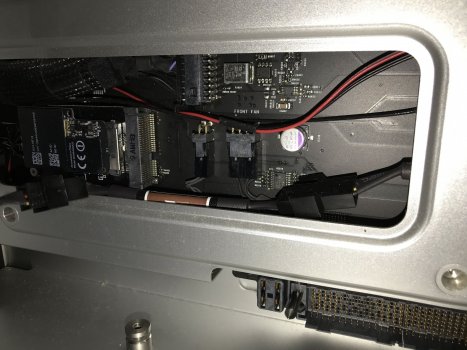
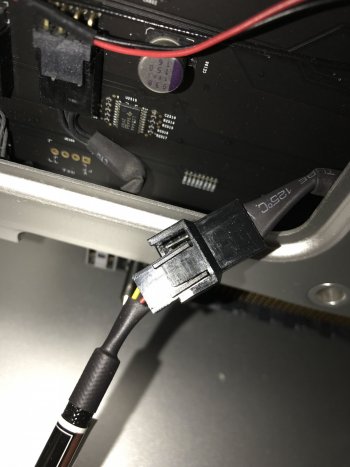
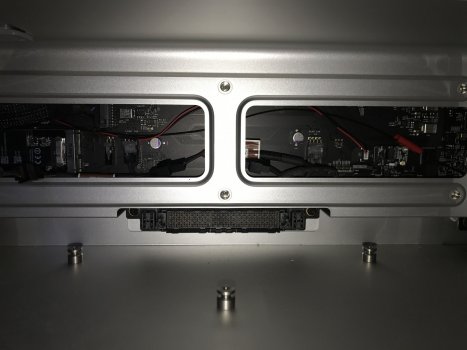
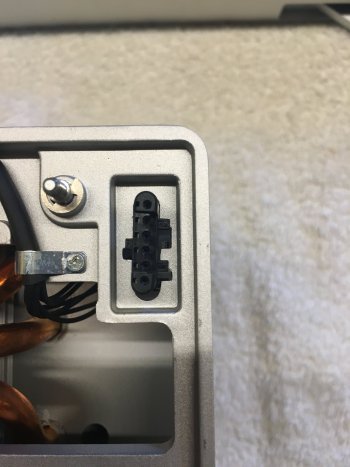
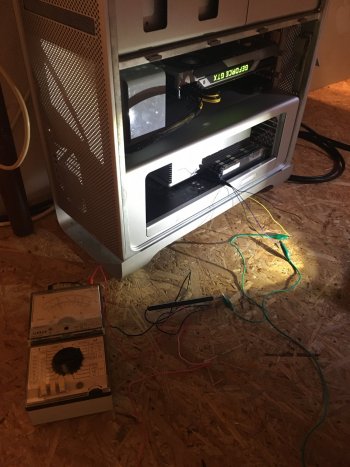
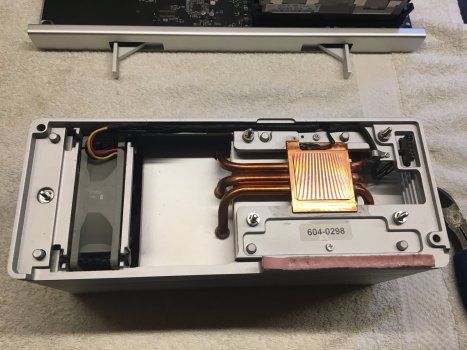
I have replaced intake and exhaust fans and the difference is ... audible. The pin swapping wasnt that easy but it was a success in the end. next up is the psu fan with rerouting of the cable. Then I’ll see where I stand. But I’m happy already. Thanks for your support and hard work put into this thread !
Got a tip for us?
Let us know
Become a MacRumors Supporter for $50/year with no ads, ability to filter front page stories, and private forums.
MP 1,1-5,1 Mac Pro (4.1/5.1) aftermarket fans WITH automatic SMC control
- Thread starter amedias
- Start date
- Sort by reaction score
You are using an out of date browser. It may not display this or other websites correctly.
You should upgrade or use an alternative browser.
You should upgrade or use an alternative browser.
hello goose169,Hi Remedylane,
I saw your post re the NF-A4x20 for the NB and it inspired me to do the same. I registered an account here to report it!
I wanted to see if I could achieve the same result using the built in fan headers on the motherboard for a cleaner look.
I purchased an NF-A4x20 as well as the NA-SYC1 y split cable and plugged it into the rear exhaust fan header. I decided on the rear header as the airport card doesn’t allow much room for cable management. It also allows to store much of the cable slack behind the backplate. All of this can be done by simply removing the CPU tray. No additional disassembly is required. The left notch on the y split plug needs to be cut off with a knife in order to fit into the exhaust fan header. The exhaust fan uses the 4 pin socket while the NF-A4x20 uses the 3 pin socket. Due to the pin layout the NF-A4x20 only gets 12V and ground which isn’t too much of an issue as it will run at a constant rate. I found that after removing the exhaust fan cable it was easier to plug in the split cable, then plug in the exhaust fan and tuck the cables behind the metal back plate. The other end of the cable is routed from the exhaust fan, behind the centre beam and loops back to the NB. The length of the y split cable, the low noise adapter and the cable on the fan has enough slack to put the fan in position while the CPU board is out of the case.
When reinserting the CPU tray just ensure that the cable is either tucked along the bottom of the back plate or arched so that it doesn’t interfere with the tray.
So far there doesn’t appear to be any issues sharing the exhaust fan header.
thanks for sharing what you did.
So if using the NA-SYC1 y split cable in the arrangement that you described, I'm assuming no pin-swap is needed on the split cable itself connecting to the board's header (aside from the removal of the left notch), but the pin swap is still needed on the connecting end of the exhaust fan. Correct?
And which of the low noise adapter cables did you end up using for the small NB fan? the NA-RC10 or the even lower NA-RC12?
Hi smallwonder,hello goose169,
thanks for sharing what you did.
So if using the NA-SYC1 y split cable in the arrangement that you described, I'm assuming no pin-swap is needed on the split cable itself connecting to the board's header (aside from the removal of the left notch), but the pin swap is still needed on the connecting end of the exhaust fan. Correct?
And which of the low noise adapter cables did you end up using for the small NB fan? the NA-RC10 or the even lower NA-RC12?
No pin swap is required on either end of the y split cable. The y split adapter terminates to one 4 pin which is used by the Mac Pro fan and the other is a 4 pin which the Northbridge fan uses. As the NF-A4x20 and low noise adapter is a 3 PIN, all it receives is GND, VCC and Tacho. For the Mac Pro fan, the y split adapter just passes through the proprietary PWM signal. I am currently using the NA-RC10 over the NA-RC12 as it unsurprisingly yielded cooler temperatures. I haven't noticed any difference in fan noise between the two but my Mac is under my desk. I haven't tried it without a low noise adapter but I'm happy with its current performance.
I realised I never included images so I have attached some to this post for reference.
Hope this helps!
Thanks,
goose169
Attachments
goose169,
thanks for clarifying, along with the pics.
With regard to my pin swap question though, sounds like you're using the stock mac exhaust fan, and did not swap to the Noctua A12x25 ULN.
I was mistaken, and under the impression that you did the same as "Remedylane" swapping out all the fans he mentioned (including the exhaust), based on your original post of "it inspired me to do the same."
So it seems you only meant with regard to the smaller A4 fan for the North Bridge.
In my case, I believe I will still need to do the pin swap on the Noctua ULN (3-pin) fan for the exhaust, if I'm swapping out the stock exhaust fan (and using the y cable).
I hope that's correct.
Hey guys I'm interested in doing the reverse - using a Mac Pro fan on a PC motherboard. I tried to follow OP but got a bit lost in square waves and pin swaps. I came into a bulk lot of like 100 Mac Pro fans and they're excellent, but I just wonder how I can make them controllable on PC.
Edit: I came across this article about running them on PC with a "fan pwm controller", but I wonder if there's a simpler way that doesn't require an external pot.
Edit: I came across this article about running them on PC with a "fan pwm controller", but I wonder if there's a simpler way that doesn't require an external pot.
Last edited:
You should put them up for sale at Marketplace or eBay!Hey guys I'm interested in doing the reverse - using a Mac Pro fan on a PC. I tried to follow OP but got a bit lost in square waves and pin swaps. I came into a liquidation lot of like 100 Mac Pro fans and they work great, I just wonder how I can make them controllable on PC.
I agree.
I'd love to change my noisy fan (can't remember which one) and I understand that non-original replacement solutions are quite complicated and you don't get an exact replacement anyway.
It would be nice to just swap the old fan with a new one.
Bpars: Are these brand new, unused fans, original Apple part numbers and did you get all the different fan types? (if I'm not mistaken, the CMP has 4 or 5 fans).
I've found out that most likely my cMP 5,1 (mid-2010) single-processor CPU fan (BOOSTA) is the one making a racket and needs replacing (apparently this fan is confirmed noisy by the OP as well). I've read through most of this thread a couple of times, but among all the information and discussions and the specific fan models spread all over the place I find it hard to conclude on the specifics of what to buy and possible modifications etc.
I have no problems disassembling, soldering or whatever just as long as I get hold of the information.
OK, I understand that choosing a non-Apple replacement fan is a matter of determining the use of the computer (light, heavy or something in between) as replacement fans don't cool as efficiently.
I'd say "light use" (email, web browsing etc.) for the time being, but as I've just installed Logic Pro X for making music that might increase (hard to say at the moment, but others reading might know more about that).
Here are my computer specs:
- Mac Pro 5,1 (mid-2010)
- Single 3.46 GHz six-core CPU (upgraded from single quad-core 2.8 GHz)
- 24 GB (3 x 8 GB DDR ECC 1333 MHz)
- 10 TB/7200 RPM SATA HDD (Seagate ST10000NM0016) main drive
- 12 TB/7200 RPM SATA HDD (Toshiba MG07ACA12TE) Time Machine backup
- 128 GB Samsung 830 SSD (2.5" SATA) MacOS/apps (MacOS 10.13 High Sierra) -will likely upgrade to a 1TB SSD (also 2.5" SATA) soon
- ATI Radeon HD 5870 (1024 MB) graphic PCIe card
- Sonnet Allegro 4-port USB 3.1 gen 2 USB-C PCIe card
So I've been told that the single processor cMP 5,1 uses a 80mm CPU-fan, and from what I've read all the cMP fans are 12V, 4-pin PWM types. Noctua replacements are apparently the top choice because of their low noise levels and quality. I've picked up from this thread and other places the following fans being used to replace the "BOOSTA" (single processor heatsink 80mm CPU fan):
- Sunon KD1208PTB3 (rewired, posted here, but this isn't a PWM fan, is it?)
- Noctua NF-R8 Redux-1800 (posted here and here)
I believe I read somewhere about using the Noctua NF-A8 PWM as well (forgot where. EDIT: found it in this Youtube video). According to Noctua that model flows more air and spins faster than the "Redux-1800" above. Is there a reason I shouldn't choose the NF-A8 PWM?
I noticed that the video shows that "Macs fan control" displays the fan with a speed of "0 RPM" because it apparently doesn't work as a direct replacement for the original fan and he had to use a Noctua fan controller. Is this because the fan isn't actually a fully compatible replacement, or did he do things differently from what is described in this thread (i.e. pin swapping)? I definitely don't want to "babysit" the computer and manually change fan speeds with that additional controller.

What about mounting the fan?
I didn't pay attention to the fan when I replaced my CPU, but according to online photos of the CPU heatsink it looks like there are some type of rubber fastening there. Does anyone know the details of what I need to buy as a new replacement? I don't mind modifying the rubber fasteners (but I'd rather not do any irreversable modifications to the computer itself).
According to the Youtube video (linked above) it looks like Noctua mounts were used, like the ones pictured below, but there was no mention of this, and I don't know if they were included with the fan or purchased separately. Anyone know the details of that?


(source: Noctua NA-SAV2 and Noctua NA-SAVP5 anti vibration mounts)
An interesting thing I read about the source for fan noise:
vibrations from multiple fans can in summary cause beat frequencies, resonance etc. I think this might be occuring here, in addition to the CPU fan itself being noisy on its own (I've tried to determine the noise source(s) by running my cMP with the side-door removed, as well as the DVD cage removed (so I can access the power supply fan). That way I could poke my finger (carefully!) into each fan and for a few seconds listen for any change in noise levels. I also tried various combinations of two fans at once (alas I only have two hands to allow for this ), but didn't notice any change with any of them, so it must be the CPU fan (which I didn't have access to).
An exception is the ATI Radeon 5870 graphic card fan which I replaced recently (the old fan was very noisy and I broke it when trying to disassemble it in order to try cleaning it -unfortunately the new fan (bought on eBay from China as I couldn't find any high quality (Noctua etc.) replacement) isn't exactly silent either, but is more like a "whisper" type sound and not the rather more irritating deep noise the CPU fan makes.
Finally (I really mean it this time 😆), I understand that some sort of SMC fan control software is needed in order to compensate for the lacking cooling abilities of non-Apple replacements.
If I've understood it right this software lets you adjust the threshold of when to have the fans speed up to compensate for this, and once set up you can forget about it.
But which software should I go for?
I already have a license for iStat menus (commercial) but as far as I can see you can only set the fans at specific manual settings (i.e. 1100 RPM). SMC fan control is free and appears to do the same thing while Macs fan control is also free but appears to have more advanced "sensor based value" options for each fan. Is this the kind of feature I need with a non-Apple fan replacement? There's a "Pro" version (commercial) which has the ability to save custom fan presets -I suppose this would be essential with non-Apple fan replacements given that each fan is different?
Finally there's TG Pro (commercial, but at 50% now) which appears to be the most complex of them all. Is this the one to go for?
I have no problems disassembling, soldering or whatever just as long as I get hold of the information.
OK, I understand that choosing a non-Apple replacement fan is a matter of determining the use of the computer (light, heavy or something in between) as replacement fans don't cool as efficiently.
I'd say "light use" (email, web browsing etc.) for the time being, but as I've just installed Logic Pro X for making music that might increase (hard to say at the moment, but others reading might know more about that).
Here are my computer specs:
- Mac Pro 5,1 (mid-2010)
- Single 3.46 GHz six-core CPU (upgraded from single quad-core 2.8 GHz)
- 24 GB (3 x 8 GB DDR ECC 1333 MHz)
- 10 TB/7200 RPM SATA HDD (Seagate ST10000NM0016) main drive
- 12 TB/7200 RPM SATA HDD (Toshiba MG07ACA12TE) Time Machine backup
- 128 GB Samsung 830 SSD (2.5" SATA) MacOS/apps (MacOS 10.13 High Sierra) -will likely upgrade to a 1TB SSD (also 2.5" SATA) soon
- ATI Radeon HD 5870 (1024 MB) graphic PCIe card
- Sonnet Allegro 4-port USB 3.1 gen 2 USB-C PCIe card
So I've been told that the single processor cMP 5,1 uses a 80mm CPU-fan, and from what I've read all the cMP fans are 12V, 4-pin PWM types. Noctua replacements are apparently the top choice because of their low noise levels and quality. I've picked up from this thread and other places the following fans being used to replace the "BOOSTA" (single processor heatsink 80mm CPU fan):
- Sunon KD1208PTB3 (rewired, posted here, but this isn't a PWM fan, is it?)
- Noctua NF-R8 Redux-1800 (posted here and here)
I believe I read somewhere about using the Noctua NF-A8 PWM as well (forgot where. EDIT: found it in this Youtube video). According to Noctua that model flows more air and spins faster than the "Redux-1800" above. Is there a reason I shouldn't choose the NF-A8 PWM?
I noticed that the video shows that "Macs fan control" displays the fan with a speed of "0 RPM" because it apparently doesn't work as a direct replacement for the original fan and he had to use a Noctua fan controller. Is this because the fan isn't actually a fully compatible replacement, or did he do things differently from what is described in this thread (i.e. pin swapping)? I definitely don't want to "babysit" the computer and manually change fan speeds with that additional controller.
What about mounting the fan?
I didn't pay attention to the fan when I replaced my CPU, but according to online photos of the CPU heatsink it looks like there are some type of rubber fastening there. Does anyone know the details of what I need to buy as a new replacement? I don't mind modifying the rubber fasteners (but I'd rather not do any irreversable modifications to the computer itself).
According to the Youtube video (linked above) it looks like Noctua mounts were used, like the ones pictured below, but there was no mention of this, and I don't know if they were included with the fan or purchased separately. Anyone know the details of that?


(source: Noctua NA-SAV2 and Noctua NA-SAVP5 anti vibration mounts)
An interesting thing I read about the source for fan noise:
vibrations from multiple fans can in summary cause beat frequencies, resonance etc. I think this might be occuring here, in addition to the CPU fan itself being noisy on its own (I've tried to determine the noise source(s) by running my cMP with the side-door removed, as well as the DVD cage removed (so I can access the power supply fan). That way I could poke my finger (carefully!) into each fan and for a few seconds listen for any change in noise levels. I also tried various combinations of two fans at once (alas I only have two hands to allow for this
An exception is the ATI Radeon 5870 graphic card fan which I replaced recently (the old fan was very noisy and I broke it when trying to disassemble it in order to try cleaning it -unfortunately the new fan (bought on eBay from China as I couldn't find any high quality (Noctua etc.) replacement) isn't exactly silent either, but is more like a "whisper" type sound and not the rather more irritating deep noise the CPU fan makes.
Finally (I really mean it this time 😆), I understand that some sort of SMC fan control software is needed in order to compensate for the lacking cooling abilities of non-Apple replacements.
If I've understood it right this software lets you adjust the threshold of when to have the fans speed up to compensate for this, and once set up you can forget about it.
But which software should I go for?
I already have a license for iStat menus (commercial) but as far as I can see you can only set the fans at specific manual settings (i.e. 1100 RPM). SMC fan control is free and appears to do the same thing while Macs fan control is also free but appears to have more advanced "sensor based value" options for each fan. Is this the kind of feature I need with a non-Apple fan replacement? There's a "Pro" version (commercial) which has the ability to save custom fan presets -I suppose this would be essential with non-Apple fan replacements given that each fan is different?
Finally there's TG Pro (commercial, but at 50% now) which appears to be the most complex of them all. Is this the one to go for?
Last edited:
This thread is exactly what I was looking for but I had one lingering question. Sorry if the answer to this is buried in the pages.
Swapping the PINs on a 3 PIN fan seems to be the only real modification needed but thats while in the macOS. If using Bootcamp and running Windows, will Windows 10 be able to understand the PIN swap?
Swapping the PINs on a 3 PIN fan seems to be the only real modification needed but thats while in the macOS. If using Bootcamp and running Windows, will Windows 10 be able to understand the PIN swap?
Last edited:
If the pin swap makes the Mac hardware fan controller think it manages a genuine Apple fan in MacOS, why would the same hardware controller think otherwise in Windows?
Fair course of logic, and was my initial thought as well. But lacking a full understanding exactly what Bootcamp does for the Windows OS is why I asked.If the pin swap makes the Mac hardware fan controller think it manages a genuine Apple fan in MacOS, why would the same hardware controller think otherwise in Windows?
I think PC fans with modified pins supposed to be read correctly under Windows, since they still within same sensor from Mac Pro logic board.
Mac Fans control have their Windows version intended for Bootcamp use. As the SMC sensor reading stay same, should be controllable as well, but this is just my assumption.
Mac Fans control have their Windows version intended for Bootcamp use. As the SMC sensor reading stay same, should be controllable as well, but this is just my assumption.
Only one way to find out. Heh. All this work to only discover that wasn't the case would suck. Just trying to do some homework. =)I think PC fans with modified pins supposed to be read correctly under Windows, since they still within same sensor from Mac Pro logic board.
Mac Fans control have their Windows version intended for Bootcamp use. As the SMC sensor reading stay same, should be controllable as well, but this is just my assumption.
I'm a little confused...
Having re-read parts of the thread yet again (I must have been through it 4 or 5 times by now), is it correct that although the original fans are of the PWM type with a 4-pin connector I should go for a 3-pin non-PWM type and not a 4-pin PWM type from for instance Noctua? The 3 pins should be rewired into the old 4-pin connector as explained in post #1.
As I wrote in post #160 I need to replace my (single) CPU boost fan (BOOSTA) and was hoping the Noctua NF-A8 PWM would work (it's the most powerful one of the 80mm types with 2200 RPM), but if only 3-pin type fans work I assume I would have to go for the NF-A8 FLX (2000 RPM).
or.... can I go with the Noctua PWM 4-pin type and re-arrange those 4 pins in another way (leaving out pin 4 "PWM control signal", then re-arrange the other 3 pins as described in that first post to make it work equally well as a 3-pin fan?
Last edited:
Yes, this is the correct procedure.is it correct that although the original fans are of the PWM type with a 4-pin connector I should go for a 3-pin non-PWM type and not a 4-pin PWM type from for instance Noctua? The 3 pins should be rewired into the old 4-pin connector as explained in post #1.
if only 3-pin type fans work I assume I would have to go for the NF-A8 FLX (2000 RPM).
As long as it's a 3-pin non-PWM fan it will work as expected *
Note that identifying the pinout for the fan connector in the heatsink , soldering it in and route the cable without being in the way for the heatsink to make perfect contact to the CPU as before, might be a challenge.
No, this will not work.can I go with the Noctua PWM 4-pin type and re-arrange those 4 pins in another way (leaving out pin 4 "PWM control signal", then re-arrange the other 3 pins as described in that first post to make it work equally well as a 3-pin fan?
The problem with a non-OEM CPU fan is to find one with a max. RPM limit safely beyond the max.RPM under heavy load on your MP ...
This is something you may have to test first.
*= One more thing to test before replacing the Delta fan is to check if the desired fan runs fine at the min RPM .
Lots of (non-PWM) fans can reach high RPM , but with a penalty of not running/ not running regular at the min RPM (in this case :800 RPM)....
Last edited:
Thanks for your comments.
So the 2200 RPM model (Noctua NF-A8 PWM) is out of the question then, regardless of how I connect the wires?
I'll have to go with the 2000 RPM model then (Noctua NF-A8 FLX), unless someone has a better suggestion of a powerful enough fan that is silent.
So the fan is soldered directly to a mounting point (a PCB?) inside the CPU heatsink, and doesn't have a regular 4-pin connector as the other fans in the cMP do?
Is there any reference material out there to figure out which wire goes where?
Obviously I want to have all the information figured out before disassembling the CPU heatsink, cleaning the thermal paste, replacing (if needed) the thermal pads around the heatsink etc. before I actually replace the fan. Has anyone reading this been through the procedure before and can give some pointers?
I purchased TG Pro as it was on sale and appeared like a good tool for this sort of thing. I now have it set up to show the BOOSTA fan speed (currently at 856 RPM) but not sure which sensor to check for the CPU and which temperature is OK or not.
So the 2200 RPM model (Noctua NF-A8 PWM) is out of the question then, regardless of how I connect the wires?
I'll have to go with the 2000 RPM model then (Noctua NF-A8 FLX), unless someone has a better suggestion of a powerful enough fan that is silent.
So the fan is soldered directly to a mounting point (a PCB?) inside the CPU heatsink, and doesn't have a regular 4-pin connector as the other fans in the cMP do?
Is there any reference material out there to figure out which wire goes where?
Obviously I want to have all the information figured out before disassembling the CPU heatsink, cleaning the thermal paste, replacing (if needed) the thermal pads around the heatsink etc. before I actually replace the fan. Has anyone reading this been through the procedure before and can give some pointers?
By this you mean to use the computer in various situations (especially the most demanding ones) while keeping track of the BOOSTA fan speed and CPU temperatures?The problem with a non-OEM CPU fan is to find one with a max. RPM limit safely beyond the max.RPM under heavy load on your MP ...
This is something you may have to test first.
I purchased TG Pro as it was on sale and appeared like a good tool for this sort of thing. I now have it set up to show the BOOSTA fan speed (currently at 856 RPM) but not sure which sensor to check for the CPU and which temperature is OK or not.
Your welcome!
If I remember well, there are a few reports in this thread of people replacing the CPU fan(s).
This way you could stay on the safe side choosing a proven fan.
The connector is fixed in the heatsink , but can be removed to solder etc.
It's not the same type as the headers on the LogicBoard.
To test the CPU fan RPM range under demanding situations, you only have to check the RPM with the fans setup on "auto/default".
Hi,Had an hour or so spar this morning, made a couple of fan adapter cables up for pin swap method to make my testing easier and reduce stress on the LoBo connectors from all the plugging and unplugging. So now this adapter cable does the pin swap and no need to mod each fan to test.
Also.... my Voltage -> PWM converter boards arrived from China, had a preliminary play and.... SUCCESS!! I can use 4-pin PWM fans with SMC control. And you get the full RPM range of whatever fan you fit, so you can use fans with a min RPM above the SMC min default. Need to test more fan models obviously as I only hd 4 PWM fans here to play with but they all worked fine on initial testing. Need to do some more sleep/wake tests etc. to make sure it all still works as expected there.
The converter boards aren't big or difficult to wire up but they are bulkier than a pin swap so I'll probably keep using the pin-swapped 3-pin fans on my own machines but this is an option for people who want to use un-modified 4-pin PWM fans, the boards cost under $5 each. These could be the solution for those of you wanting to use the higher RPM Noctuas.
I'll do some more testing once I get my hands on some of those fans, just waiting till I have some spare cash as they're not cheap fans!
do you sell the adapter cables?
I just replaced the CPU fan in a MP 4,1/5,1 single CPU for a Noctua NF-R8 redux 1800.
As confirmed by others , this fan works perfectly and ,indeed, is more silent than the stock Delta.
I took some time to check the pinout of the connector, looking at it as in the picture attached, in order from above downwards:
pin1= Vc
pin2= Tacho sensor
pin3= +12V *
pin4= ground
pin5= Temp sensor
pin6= Temp sensor
*= not connected in case of a 3-pin fan replacement.
Attachments
Last edited:
Sorry for dragging this up but could I forego the low noise adapter for the little noctua fan and just connect it directly to the splitter cable?Hi smallwonder,
No pin swap is required on either end of the y split cable. The y split adapter terminates to one 4 pin which is used by the Mac Pro fan and the other is a 4 pin which the Northbridge fan uses. As the NF-A4x20 and low noise adapter is a 3 PIN, all it receives is GND, VCC and Tacho. For the Mac Pro fan, the y split adapter just passes through the proprietary PWM signal. I am currently using the NA-RC10 over the NA-RC12 as it unsurprisingly yielded cooler temperatures. I haven't noticed any difference in fan noise between the two but my Mac is under my desk. I haven't tried it without a low noise adapter but I'm happy with its current performance.
I realised I never included images so I have attached some to this post for reference.
Hope this helps!
Thanks,
goose169
I have mine connected to a SATA port routed back into the pci-e bay but would prefer the hidden cables like your method.
Sorry for answering, although you adressed someone elseSorry for dragging this up but could I forego the low noise adapter for the little noctua fan and just connect it directly to the splitter cable?
I have mine connected to a SATA port routed back into the pci-e bay but would prefer the hidden cables like your method.
Yes you can connect the smaller fan to a splitter cable like goose169 did, the only question is if the small fan will run smooth with the same low voltage as the Exhaust fan does at 600rpm...
TBH i doubt it.
EDIT: If you meant because of cablesalad ,yes you can: the y cable and the sata both provide the same 12V, but then it will run at full speed, so you could also connect the LN adapter to the Ysplitter to free up a SATA port .
Last edited:
Thanks for answeringSorry for answering, although you adressed someone else
Yes you can connect the smaller fan to a splitter cable like goose169 did, the only question is if the small fan will run smooth with the same low voltage as the Exhaust fan does at 600rpm...
TBH i doubt it.
EDIT: If you meant because of cablesalad ,yes you can: the y cable and the sata both provide the same 12V, but then it will run at full speed, so you could also connect the LN adapter to the Ysplitter to free up a SATA port .
At the moment my tiny NB fan has the cable routed out to the side panel and it just runs at full speed (which I wanted). If it's going to be affected by the exhaust then I guess I'll leave it as is
The 4-pin fan connectors in the MP 4,1/5,1 provide a + 12V (pin2) and a V variable(pin4) controlling the fanspeed.At the moment my tiny NB fan has the cable routed out to the side panel and it just runs at full speed (which I wanted). If it's going to be affected by the exhaust then I guess I'll leave it as is
So , you could connect the tiny NB fan through a 4-pin Y-cable to e.g. the Exhaust header on the PCB.
If you connect the NB fan to pin1 (gnd) and pin 2 (12V) it will work exactly like now (constant max rpm).
The Exhaust fan can be plugged in the Y-cable too and will behave the same as now.
Register on MacRumors! This sidebar will go away, and you'll see fewer ads.


