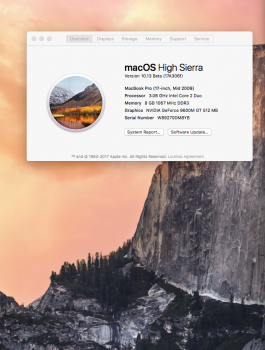
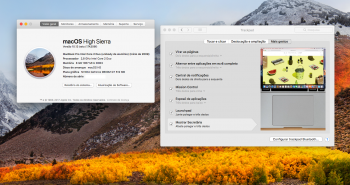
Successfully installed High Sierra developer Beta 3 on 2009, 17 Inch, MacBook Pro 5,2
Words of caution: my writeup worked on my machine, but it may have unforeseen effect on other users' computers. Please back-up your data to assure it is not lost in experimentation. In addition, if you use Little Snitch, make sure that you have the latest *nightly* Little Snitch installed; failure to do so will result in a runaway CPU usage by Little Snitch.app upon boot to High Sierra Beta 3.
Process did require additional steps to those described in Foxlet’s and Dosdude’s instructions. This method also required both: Foxlet’s NewCore Installer an Dosdude’s post-install patcher.
I re-used a flash drive (USB), which was previously used to install original 10.13 on my computer, (via dosdude's method). Hence, that flash drive still contained original installation files for High Sierra 10.13. (Note, that I used both foxlet’s and dosdue’s methods to test their installation capability, and both worked for *original* 10.13)
It also meant, that dosdude’s post-install patch was present on that original 10.13 install setup (USB drive); it becomes important in latter part of installation. If your flash drive dose not contain dosdude’s post-install patcher file, then manually copy it to that drive, AFTER installing Foxlet’s NewCore installer (my flash drive was not erased, so it was there by serendipity - see below).
I used Foxlet’s FetchMacOS utility to download the Beta3 files. Keep in mind that Python needs to be installed on your machine (at least it was in my case).
Unzip FetchMacOS zipfile —> open folder—>double click on file titled “RunMe.command” to start the process. It will launch Terminal and present you with request for password; enter your administrator password and press return. If all works, a terminal window will open, and let you follow download progress. In the end, there should be a folder on your drive with High Sierra Beta3 installation components.
While download proceeded without problems, the downloaded components were still in “Stab” format i.e. there was no OSXinstall.app, just packages.
Since dosdude’s patcher works with actual installer.app, I could not use that method.
I used Foxlet’s NewCore-installer application to initiate the process. Check his instructions as to which files (packages) need to be copied into “what” folders in the NewCore-installer.
While following Foxlet’s instructions, I noticed that a “file” titled InstallESD.dmg needed to be copied to NewCore-Installer, but it was not visible in folder containing the FetchMacOS-downloaded packages, dmgs, and files. I used ==> *Pacifist*<== to open each package (.pkg) and check whether it contained the “InstallESD.dmg.” I found it in one of the packages, but at this point in time (a while after) I don’t recall in which .pkg it was “hidden.”
I copied that file, installESD.dmg, into appropriate folder in CoreInstall (see folxlet’s instructions)
To initiate process of flash drive installer formation, launch the script in CoreInstall folder named “createdisk.sh.” ==>Click to highlight that script file, than drag-and-drop its icon onto the open terminal window. A direct path to the createdisk.sh file will be displayed in the terminal, just press return to execute the file and follow further instructions. It is assumed that you have a flash drive already in your USB port.
I did run into problems in this process. The CoreInstall script was supposed to erase the flash drive, before installing the new Beta3 files, but it did not erase the drive (I had original High Sierra 10.13 installed on that flash drive - this may be important.) While the script executed to completion, the terminal window displayed several run-time errors.
When I checked contents of the flash drive, I realized that it [flash drive] was not totally erased prior to Beta3 files transfer, but the Beta3 files were actually transferred into proper folders. I checked “Info” on those files and it displayed “today” under date of formation, and size of files matched the new Beta3 installation files.
Next, boot into the flash drive, by rebooting computer while holding option key; you will be presented with choices of drives capable of booting your machine; choose the flash drive.
If all went well, you should see standard OS X installer window. Follow instructions on screen.
Once installation is completed, computer has to be rebooted back into flash drive; again use option key while rebooting to be able to select the flash drive.
Here I run into problems: I tried to run Foxlet's necessary post install “system-patcher-sh” script, and while it did run, the terminal window showed multiple run-time errors, with message: “sudo command not found,.” I tired to boot into main operating system, but it failed with “Do-Not-Enter” sign - circle with line across it.
I tried to run “sudo” command directly in terminal to test terminal response, and also was greeted with “no sudo command found.” That was first time I have seen this error message.
I booted back into the Flash Drive (using option key method), which greeted me with OSX installer screen. I clicked randomly on the window (not installer icon window) to change focus, then accessed dropdown menu in menubar, clicking on utilities. There I found Dosudue’s post-install patcher listed in menubar’s drop down menu. [Note that I suggested to make sure dosdude’s post-install patcher is copied onto flash drive manually (see above.)]
I launched Dosdue’s post-install patch, by double clicking on its icon, and followed the instructions, choosing appropriate modification for my machine. Rebooted again, with option key on to get boot choices, selected main drive with High Sierra Beta3 installed and ... I was greeted with standard installation messages and process completed without a hitch.
I have a fully operational Beta3, other than no track-pad configuration (a known issue).
Many, many thanks to everyone involved in this project.
Hope this is of help.