This is a preliminary account of how to use the excellent
OpenCore (OC) bootloader on a Mac Pro 5,1 to install, run, and update macOS Catalina, resulting in a clean, unpatched operating system no different than what you would find on a supported Mac.
This documentation is an ongoing process. The steps here are subject to change as more testing gets done.
1. Test Setup
Variations of this setup are likely possible:
Disk A. Newly APFS-formatted drive (GUID scheme)
This is where OC and a clean install of Catalina will go.
Disk B. macOS Mojave
Installation and configuration will be done from here.
C. Non-bootscreen graphics card
Of course, a flashed card can't hurt.
2. Materials
A. The application "Install macOS Catalina" (the full installer)
B. OpenCore
See the
releases page of the project site. Download OpenCore-0.5.2-RELEASE.zip. The uncompressed folder will be referred to here as "OpenCore."
C. Support files
See the
releases page of the project site. Download AppleSupport-2.1.2-RELEASE.zip. The uncompressed folder will be referred to here as "AppleSupport."
D. Configuration file
Provided in this post. Download config.zip. The uncompressed file is "config.plist".
Most important is the
manual located at OpenCore/Docs/Configuration.pdf. By reading the manual you will be able to better understand the settings in the configuration file. For a sustainable use of OC, it is important that you read the manual.
The configuration described in this guide should be safe, but please be aware of the following:
WARNING!
Using OpenCore without extensive knowledge of the configuration options
may lead to a bricked Mac.
Because OC is in active development, the configuration file for the current version (0.5.2) will likely be incompatible with future versions.
3. Installing OC
a) Mount the EFI partition of Disk A: To find the identifier of the partition, enter the following in terminal:
The identifier will be something like "disk0s1;" the next step will assume that this is the case.
Code:
sudo diskutil mount /dev/disk0s1
You may need to authorize this. The partition should mount as /Volumes/EFI and appear as "EFI" in Finder.
b) Copy the OpenCore/EFI folder to the EFI partition. The resulting folder, /Volumes/EFI/EFI, should contain the folders OC and BOOT.
c) Copy AppleSupport/Drivers/FwRuntimeServices.efi to /Volumes/EFI/EFI/OC/Drivers.
d) Copy config.plist to /Volumes/EFI/EFI/OC.
4. Configuration
The file config.plist can be edited with any plist editor and even with TextEdit; the following steps will assume TextEdit.
a) Open config.plist with TextEdit.
b) Enable the VMM flag: Find the Cpuid1Mask entry, and carefully change AAAAAAAAAAAAAAAAAAAAAA== to AAAAAAAAAAAAAACAAAAAAA==. The value should now be the same as for Cpuid1Data.
c) Enable boot entry preservation: Find the RequestBootVarRouting entry, and change false to true.
d) Close the file. It should be saved automatically (select OK if informed about there being no permanent version storage).
The purpose of doing these steps explicitly is to be able to reverse them if desired.
5. Booting
a) Reboot into recovery mode by entering
Code:
sudo nvram "recovery-boot-mode=unused" && sudo reboot recovery
You may need to authorize this. Be patient. Mac Pro boot times can be long, especially when booting into recovery mode.
b) Carry out step 3a (sudo is not needed in recovery).
c) Set the partition for booting:
Code:
bless --mount /Volumes/EFI --setBoot
d) Shut down the Mac and do an SMC reset (unplug the power cord, wait 15 seconds, plug the power cord back in, wait 5 seconds, and then press the power button).
Remark: Being installed on Disk A, OC can have trouble seeing Disk B. Doing an SMC reset helps ensure that Disk B is seen when OC starts.
e) Power up the machine. OC should boot Disk B (currently the only macOS system).
Be patient. Mac Pro boot times can be long. If it seems that the machine is not booting up. Hold the power button to shut down the machine. Do an NVRAM reset on the next power up (immediately press and hold Option, Command, P, and R, and release after 20 seconds or after you hear the second startup chime). The Mac should boot without OC. Recheck all the steps above.
f) Booted into the system on Disk B, verify that it is indeed OC that has booted the system by entering this in terminal:
Code:
nvram 4D1FDA02-38C7-4A6A-9CC6-4BCCA8B30102:opencore-version
You should see REL-052-2019-10-30.
You can also verify that the VMM flag is present by entering
Code:
sysctl machdep.cpu.features
Congratulations for making it this far! The hard part is done.
6. Installing Catalina
a) Booted into the system on Disk B, run Install macOS Catalina. Install to Disk A.
The machine will reboot and eventually you should see the installation progress bar.
b) Complete the installation.
From now on, OC should boot Catalina on Disk A by default. In any case, OC will respect the selection in Startup Disk; however, be mindful of the remark in step 5d. Also, by carrying out step 5a, OC should boot the recovery mode corresponding to the system currently booted into.
7. Updates
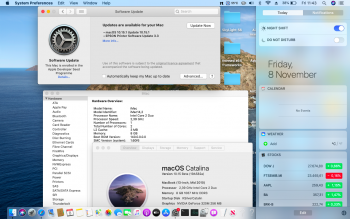
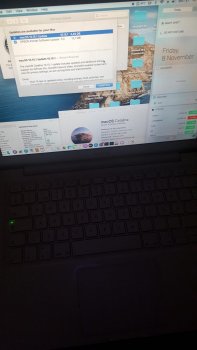
As long as the VMM flag is present, Software Update should just work.
8. Post Install
To make the system as native as possible while still using OC, the VMM flag can be disabled by reversing step 4b. This might be a good idea until the long term effects of having the VMM flag enabled on a non-virtualized system are clarified.
9. Platform Information
It is possible to use OC to customize platform information. You may want to preserve some of the original identifiers.
The MLB can be obtained by entering the following in terminal:
Code:
nvram 4D1EDE05-38C7-4A6A-9CC6-4BCCA8B38C14:MLB | awk '{ print $NF }'
There is also the serial number of the processor tray:
Code:
ioreg -l -p IODeviceTree | awk '/"processor-memory-board-serial-number"/ {gsub(/\"/,""); print $NF}'
The ROM (in Base64, suitable for entry using TextEdit) can be obtained with
Code:
nvram 4D1EDE05-38C7-4A6A-9CC6-4BCCA8B38C14:ROM | awk '{split($NF,chars,""); for(n=0;n<256;n++){ord[sprintf("%c",n)]=n}; i=1; j=0; while(i<=length($NF)){if(substr($NF,i,1)=="%"){printf "%s",toupper(substr($NF,i+1,2)); i=i+2} else {printf "%x",toupper(ord[chars[i]])} j=j+2; i++} print("")}' | xxd -r -p | base64
The SSN can be obtained with
Code:
ioreg -l -p IODeviceTree | awk '/"IOPlatformSerialNumber"/ {gsub(/\"/,""); print $NF}'
and the system UUID with
Code:
ioreg -l -p IODeviceTree | awk '/"system-id"/ {print toupper(substr($NF,2,8)"-"substr($NF,10,4)"-"substr($NF,14,4)"-"substr($NF,18,4)"-"substr($NF,22,12))}'
10. Disabling OC
a) Carry out step 3a.
b) Open config.plist with TextEdit.
c) Reverse step 4c.
d) Reboot.
e) Select the desired entry in Startup Disk.
f) Reboot.
It is also possible to boot Catalina natively, after using recovery to add the "-no_compat_check" boot argument. In this case replace step c above by 5a. In recovery, enter
Code:
nvram boot-args="-no_compat_check"
and then carry out steps d and e in recovery. Catalina should boot without OC.
Failure to add the "-no_compat_check" boot argument may result in the machine suddenly shutting down when booting into Catalina. Although OC adds this argument, booting without OC does not guarantee that the argument will be there, unless it is added as described above.
11. Uninstalling OC
a) Disable OC (see 10).
b) Carry out step 3a.
c) Delete the /Volumes/EFI/EFI folder.
Acknowledgements
A big thank you to the talented developers of OpenCore for making all of this possible.


