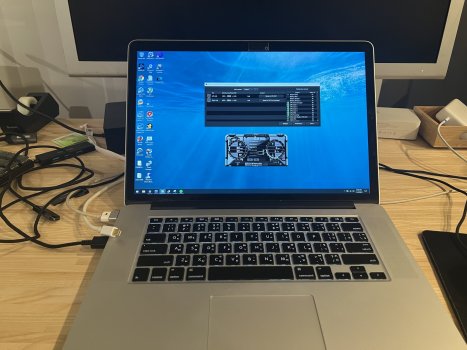
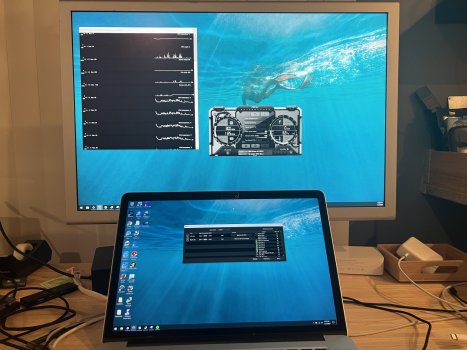
Quick question to those who are using the M Pro or Max MBPs. Have you checked what data transfer rate you can get with external SSDs? The M1 MBA and Mac Mini have lower transfer rate than intel MBPs (on the same SSD) even via a hub.
Got a tip for us?
Let us know
Become a MacRumors Supporter for $50/year with no ads, ability to filter front page stories, and private forums.
(2019) 16" is HOT & NOISY with an external monitor! :(
- Thread starter Appledoesnotlisten
- Start date
- Sort by reaction score
You are using an out of date browser. It may not display this or other websites correctly.
You should upgrade or use an alternative browser.
You should upgrade or use an alternative browser.
You mean between the external displays or between all including the macbook pro display? My external displays are exactly the same model so this "should be" easyYou also need to make sure the color bit rate is identical between monitors. Refresh rate should be same as well
If you open lid it is going to be hard.You mean between the external displays or between all including the macbook pro display? My external displays are exactly the same model so this "should be" easy
Try close lid with two external monitors first. Once you get it working, try to add the build-in monitor
These photos beg you differ. Vram clocks are maxed. And they have similar problems in PC world forPeople keep saying "it's a hardware issue" - simply not true, switch to bootcamp and observe <20W usage - Apple is intentionally screwing us so we spend more money and jump to Arm Macbook's when they arrive, does it work? Obviously it does, their "high mind" is an expert at milking us
If you are going to YOLO and just keep using Apple products (most of us are locked in), best to just buy a refurbuished 5300M for 2k$ - then selling it later on for an upgrade (for $1600 I assume) - the 2019 has a multitude of other issues, the display is slow: https://forums.macrumors.com/threads/16-macbook-pro-ghosting-smearing.2212842/ - the Internal GPU fails and makes devices crash etc. - even without these issues, most workhorse Macbook's just experience swollen batteries after a year
I suspect they'll just come up with a 16" ARM with a new higher refresh rate monitor, if it has working x86 virtual machines too, probably just be a "smart sucker" and switch to the cheapest option of that machine - that's what I'll do, I'm a sucker but I'm slightly smart at it at this point - I buy a new one, and sell the old one fast
Best strategy for Apple: Pay them as less as you can (If you can, None), otherwise, you're just making all of us suffer more
If you just buy the cheapest option, it becomes a subscription service for around $100/mo - otherwise, it's $200+/mo
Edit: All in all, I love the machine anyway, the sound is just phenomenal, it's a joy to use as an actual portable device, I think the best suggestion one could give here is to just ignore the heat/sound and other issues and just enjoy the device, I can't describe how much of a productivity hit I got just to overcome this heating issue, at this point, I just decided to ignore and enjoy, if the device gets swollen before a year, I'll probably buy a 512GB - 2020 13" as a temporary device, get this one fixed, sell this one, and wait for the next generation
Both desktops and laptops running AMD GPUs
Sure this is on r9 m370x 2015 model that I use as daily,But the 5500m I got for experimentation. (except ones that have HBM2) should have similar result
I haven’t put bootcamp on the 16” yet but one user here already reported same behavior.
To be fair, the reason some of us are getting M1 based macbooks are just that we got tired of loud fans under heavy load/light load when plugged into monitors. (I tried my hand on the M1 Air last year, and was delighted with how silent it is, well sure it has no fan, but the 13” M1 MBP was also quiet)
Attachments
Last edited:
Update:
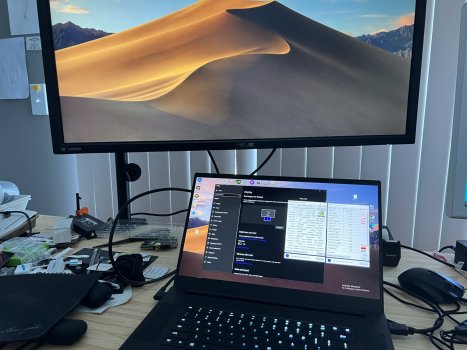
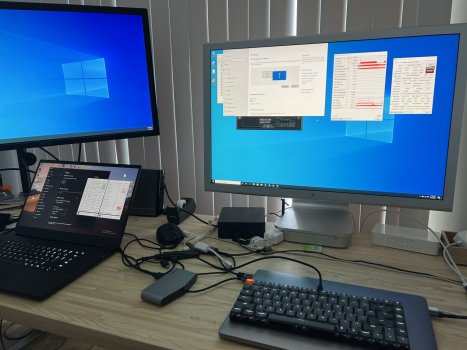
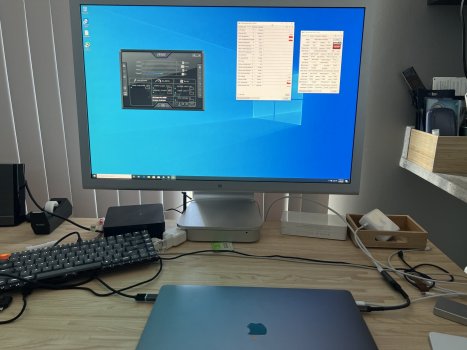
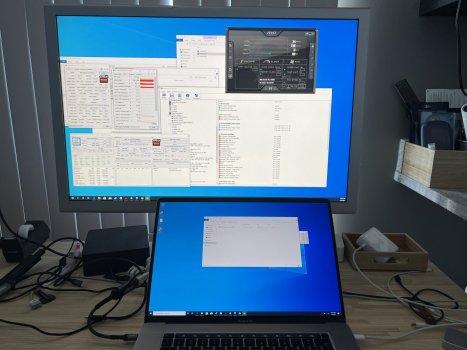
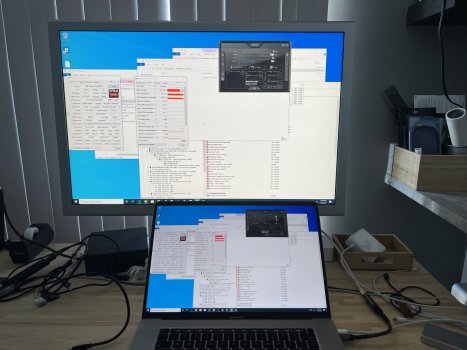
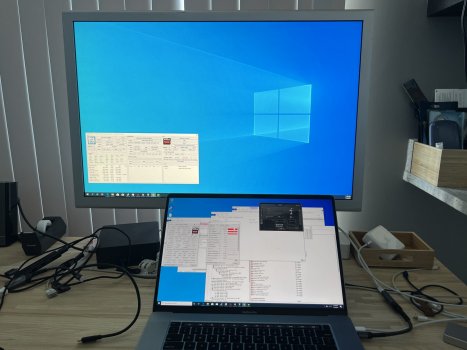
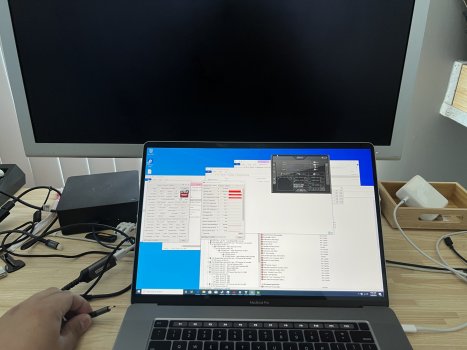
Finally got some time to put Bootcamp on this 5500m.
vram clock would always idle at 736 mhz when GPU sees multiple monitors regardless of configuration (headless or not)
This would put the chip at 15W idle at all times.
And fans would start to kick in after a while.
With Clamshell mode GPU vram clocks normally, (same with no monitor)
Contrast and compare to RTX 2080 Super Max Q next to it.
In other news: I discovered last night that it was not exactly possible (without some soldering at least) to dump vbios for r9 m370x for me to fiddle with (The GPU was wired to load its vbios from EFI, confirmed in schematics) also it was dated 2015.
However, in this 5500m, you can indeed dump vbios.
Good news for those looking into modding vbios power tables (to flash permanently)
Alternatively, one can look into how the Hackintosh community inject soft power table (using either kext or opencore) on their compatible GPUs. Should work the same way.
Attachments
-
 DDDE45A8-AC5E-473D-85D7-6BFE0A2B6D69.jpeg397.7 KB · Views: 169
 -
 83CBDE22-1D93-4A69-8747-D23426873CA2.jpeg357.1 KB · Views: 167
 -
 FEB57893-39ED-40D2-8FD2-B181EE176CD4.jpeg358.8 KB · Views: 157
 -
 DF6BBBAF-BD86-4CFA-AB76-66BB24AAF24F.jpeg366.1 KB · Views: 158
 -
 E8178942-4EA0-447C-A20F-3815C811B4B9.jpeg375.7 KB · Views: 167
 -
 3ADDBAE8-4183-40A9-9A6B-97B3ACDF2FEE.jpeg330.8 KB · Views: 156
 -
 584DD6E9-190B-439F-9757-DE2EB5999F66.jpeg396 KB · Views: 165
Last edited:
ThanksIf you open lid it is going to be hard.
Try close lid with two external monitors first. Once you get it working, try to add the build-in monitor
I was trying to achieve that but at the moment i had to postpone because this is my working machine and i'm in the middle of a project so i can't risk spending a full day restoring the OS because some dumb error. But that seems the way. Trying to patch a custom kext. I need to read a little more docs abouts kext files and i think i can do it.Update:
Finally got some time to put Bootcamp on this 5500m.
vram clock would always idle at 736 mhz when GPU sees multiple monitors regardless of configuration (headless or not)
This would put the chip at 15W idle at all times.
And fans would start to kick in after a while.
With Clamshell mode GPU vram clocks normally, (same with no monitor)
Contrast and compare to RTX 2080 Super Max Q next to it.
In other news: I discovered last night that it was not exactly possible (without some soldering at least) to dump vbios for r9 m370x for me to fiddle with (The GPU was wired to load its vbios from EFI, confirmed in schematics) also it was dated 2015.
However, in this 5500m, you can indeed dump vbios.
Good news for those looking into modding vbios power tables (to flash permanently)
Alternatively, one can look into how the Hackintosh community inject soft power table (using either kext or opencore) on their compatible GPUs. Should work the same way.
PS: This is not a benchmark but it's just for the people understand the difference between >=15W and ~5W. My project with the lid open (>=15W) takes 380s to do a clean build. With the lid closed (now 5W thanks to @kelvincht ) takes 301s to do a clean build, thats more than 1 minute difference. This not seems much but we do a lot of builds around the day and if i multiply this by a year it's a lot of time.
Last edited:
Does it mean you are able to run 2 external monitors in clamshell mode WITHOUT LPM on 5watts GPU? Can you please share the SwitchResX settings for both external monitors?Thankswith the lid closed i was able to achieve the 5w. now the problem it's trying to get working with lid open
I've some luck because my 2 monitors are the same model so it was easier.Does it mean you are able to run 2 external monitors in clamshell mode WITHOUT LPM on 5watts GPU? Can you please share the SwitchResX settings for both external monitors?
The settings was what i had post before https://forums..com/attachments/screenshot-2021-11-07-at-17-34-15-png.1904839/
But this settings will not fit for your monitor.
What i've done:
- In switchResX daemon: change all monitors to million colors instead of billions (i don't know if this matters you can try)
- Lid closed
- Put the same color profile for both monitors (This was what i was missing)
- Keep lowering your pixel clock to the min supported for both of your monitors ( less pixelClock = less refreshRate)
- Try to find a common ground for both of your displays

EDIT2: The trick is every monitor in the lowest refresh rate (Hz) and all in the same resolution. It's no easy with the lid open and not achievable in my case because my external monitor to this works had to be at 1920x1080 - 50Hz and i can't a find a resolution in mac internal display which worked at 1920x1080 - 50Hz
Last edited:
How can you drop the memory clock to 736mhz?Update:
Finally got some time to put Bootcamp on this 5500m.
vram clock would always idle at 736 mhz when GPU sees multiple monitors regardless of configuration (headless or not)
This would put the chip at 15W idle at all times.
And fans would start to kick in after a while.
With Clamshell mode GPU vram clocks normally, (same with no monitor)
Contrast and compare to RTX 2080 Super Max Q next to it.
In other news: I discovered last night that it was not exactly possible (without some soldering at least) to dump vbios for r9 m370x for me to fiddle with (The GPU was wired to load its vbios from EFI, confirmed in schematics) also it was dated 2015.
However, in this 5500m, you can indeed dump vbios.
Good news for those looking into modding vbios power tables (to flash permanently)
Alternatively, one can look into how the Hackintosh community inject soft power table (using either kext or opencore) on their compatible GPUs. Should work the same way.
My 5500m runs at 1464mhz as soon as multiple monitor is used.
Are you using the bootcamp offical driver, or unoffical driver?
Multiple external monitor:
Single monitor (build-in)
Not sure, but I think I noticed that there might be a firmware update for Monterey Install. (So I did an “install” to usb external drive, and it seemed to be installing firmware - black screen, multiple reboots)How can you drop the memory clock to 736mhz?
My 5500m runs at 1464mhz as soon as multiple monitor is used.
Are you using the bootcamp offical driver, or unoffical driver?
Multiple external monitor:
View attachment 1906165
Single monitor (build-in)
View attachment 1906167
As for bootcamp drivers. I use w/e windows update gave me.
Did you remember before Monterey did you used to get 1400mhz memory clock as well?Not sure, but I think I noticed that there might be a firmware update for Monterey Install. (So I did an “install” to usb external drive, and it seemed to be installing firmware - black screen, multiple reboots)
As for bootcamp drivers. I use w/e windows update gave me.
By Usb install you mean fresh/clean macos install by booting into a usb installer image?
Also what is w/e windows update driver?
Did you remember before Monterey did you used to get 1400mhz memory clock as well?
By Usb install you mean fresh/clean macos install by booting into a usb installer image?
Also what is w/e windows update driver?
I look at your GPU-Z and I noticed your GPU is 8gb with Samsung memory. Mine is 4gb. The 8gb model may half the frequency but double the capacity. So in the end it consumes same amount power.Did you remember before Monterey did you used to get 1400mhz memory clock as well?
By Usb install you mean fresh/clean macos install by booting into a usb installer image?
Also what is w/e windows update driver?
1. I never tried before. I just assumed that it was the same. Thanks for pointing this out.Did you remember before Monterey did you used to get 1400mhz memory clock as well?
By Usb install you mean fresh/clean macos install by booting into a usb installer image?
Also what is w/e windows update driver?
2. Yes. I use createinstallmedia to flash a usb drive. But I also install Monterey to external usb drive (because I still intend to use Catalina, and the install is just for firmware update to be triggered. There are alternatives around triggering this but I was too lazy atm)
3. All driver that was installed was provided by bootcamp driver installer and whatever windows auto auto installs. (I want to know the baseline) However, you can try downloading new drivers from AMD site or bootcampdrivers.
Right now I’m looking into finding a way to unlock undervolt all the things. GPU undervolt in vbios should be straightforward. But for CPU it’s complicated.1. I never tried before. I just assumed that it was the same. Thanks for pointing this out.
2. Yes. I use createinstallmedia to flash a usb drive. But I also install Monterey to external usb drive (because I still intend to use Catalina, and the install is just for firmware update to be triggered. There are alternatives around triggering this but I was too lazy atm)
3. All driver that was installed was provided by bootcamp driver installer and whatever windows auto auto installs. (I want to know the baseline) However, you can try downloading new drivers from AMD site or bootcampdrivers.
In T2 Macs, the UEFI are stored as image files and it is served to the PCH as part of the T2 chip initialiation process (search T2 boot process, SAF and eSPI)
Note that this is not the X86 part of the boot process.
T2 chips on these macs turns on as soon as it has power l, and will stay on even when machine (x86 parts and others) is “off”.
I also tried dumping the UEFI from windows using FPT
But I found no Overclock menu or setup variables for now.
Tried RU.efi doesn’t load. Will try virtualBiosMod next
Would be nice if someone can look at the UEFI image.
And if we solve this, next step would be making T2 loading this image instead of normal image, which might be possible given T2 jailbreak. There might be a built in utility for this on T2 shell itself if we have root access.
But for now, best currently course is X86 platform frequency modification to limit maximum multiplier the CPU can turbo to without having to turn off turboboost completely in combination of planned GPU undervolt.
In windows, I can change the CPU parameters using ThrottleStopRight now I’m looking into finding a way to unlock undervolt all the things. GPU undervolt in vbios should be straightforward. But for CPU it’s complicated.
In T2 Macs, the UEFI are stored as image files and it is served to the PCH as part of the T2 chip initialiation process (search T2 boot process, SAF and eSPI)
Note that this is not the X86 part of the boot process.
T2 chips on these macs turns on as soon as it has power l, and will stay on even when machine (x86 parts and others) is “off”.
I also tried dumping the UEFI from windows using FPT
But I found no Overclock menu or setup variables for now.
Tried RU.efi doesn’t load. Will try virtualBiosMod next
Would be nice if someone can look at the UEFI image.
And if we solve this, next step would be making T2 loading this image instead of normal image, which might be possible given T2 jailbreak. There might be a built in utility for this on T2 shell itself if we have root access.
But for now, best currently course is X86 platform frequency modification to limit maximum multiplier the CPU can turbo to without having to turn off turboboost completely in combination of planned GPU undervolt.
If you just want a cooler running CPU this is the best way in windows.
You can fine tune how many power your cpu can consume after how many seconds of load. Also you can change the throttle temperature.
I tuned my cpu to run at max performance full turbo boost max power for short burst, then gradually cut power and boost
This maximize system responsiveness for burst CPU load, without overheating the machine for sustained load.
Another trick is setting PROCHOT (CPU throttle temperature) to 93c stops fan from ramping up
Last edited:
As it stands now, the Voltage control under FIVR menus are still disabled. Once unlocked, it would allow CPU undervolting, so it will take less power at same frequency and multiplier (which you can adjust to taste on top of), allowing less compromise with performance and fan noise.In windows, I can change the CPU parameters using ThrottleStop
If you just want a cooler running CPU this is the best way in windows.
You can fine tune how many power your cpu can consume after how many seconds of load. Also you can change the throttle temperature.
I tuned my cpu to run at max performance full turbo boost max power for short burst, then gradually cut power and boost
This ensure long sustained CPU load will keep the CPU cool enough to not ramp up fan.
Another trick is setting PHOT to 93c stops fan from ramping up
View attachment 1906915
Recently Apple, and other PC manufacturers turned this feature off due to “plundervolt exploit” that allows exploit code to put in invalid voltage value (such as + 20 V to the CPU, killing it)
Working finding the way to enable this again, so I can run it faster at same power.
Have you managed to get VoltageShift working in Monterey?As it stands now, the Voltage control under FIVR menus are still disabled. Once unlocked, it would allow CPU undervolting, so it will take less power at same frequency and multiplier (which you can adjust to taste on top of), allowing less compromise with performance and fan noise.
Recently Apple, and other PC manufacturers turned this feature off due to “plundervolt exploit” that allows exploit code to put in invalid voltage value (such as + 20 V to the CPU, killing it)
Working finding the way to enable this again, so I can run it faster at same power.
Im not on Monterey since I don’t like the idea of Signed System Volumes.Have you managed to get VoltageShift working in Monterey?
Quick googling reported one that got this resolved?
From:
“Small problem. I got it working, and i set my cpu igpu and cache too -80 offset (same as in windows, where i already have stresstested etc) and if i boot my macos it crashes. I can get it running by going to revovery and enable SIP, but then i cant change voltage shift. EDIT: Boot with csrutil enabled, go to /Library/Application Support/ and delete the voltageshift folder. Restart disable SIP and try again.”
Note that on T2 Macs, voltage controls are locked due to firmware as explained in earlier comments
This needs to be advertised more. Only 25 signatures?! We have thouands of posts in this thread. I hope everyone can sign this petition.A guy from hungary already did it. Lets help with this. https://www.change.org/p/apple-fix-apple-macbook-pro-16-model-2019-overheat-problem or share link here https://chng.it/6rPpBHq4S9
So, guys, 220+ pages. Sorry, one question. Will eGPU solve that noise+heat problem? If I will use eGPU anything will change? I'm ready to buy but if it will be solved.
I have 16" i9/64Gb and with any monitor I got noise.
I have 16" i9/64Gb and with any monitor I got noise.
Egpu will solve this…or close the lid and use only ext monitor..and if you need 2 monitors, just buy a second one for 100$ and close the lid.
And in recent osx update you can use so called Low power mode, which decrease the gpu power consumption
And in recent osx update you can use so called Low power mode, which decrease the gpu power consumption
I'd like to use a touchpad. Many virtual desktops. With ext keyboards it's too difficult.Egpu will solve this…or close the lid and use only ext monitor
But thanks for the answer!! 👍🤝
I'm gone be banned if i mark everybody (from this discussion) here to see the link? I can do it quicklyThis needs to be advertised more. Only 25 signatures?! We have thouands of posts in this thread. I hope everyone can sign this petition.
Last edited:
I'd like to use a touchpad. Many virtual desktops. With ext keyboards it's too difficult.
But thanks for the answer!! 👍🤝
You can also buy external Apple Magictrack for that. 😅
Register on MacRumors! This sidebar will go away, and you'll see fewer ads.


