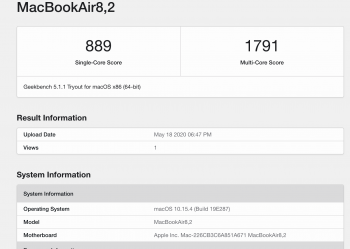
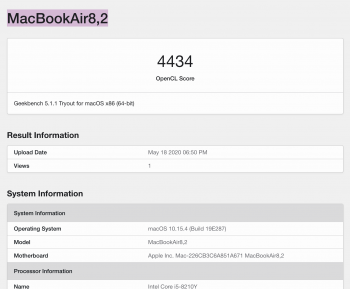
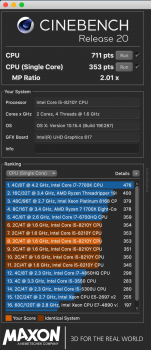
Not sure what I am looking at here, but given that the MacBook Air is also designed to last a long time on battery, the ability to dissipate heat, is only part of the story[automerge]1589781551[/automerge]
I agree in part with you, but look at my results and they are much higher than the factory.
Got a tip for us?
Let us know
Become a MacRumors Supporter for $50/year with no ads, ability to filter front page stories, and private forums.
2020 Air Heatsink Modification Thread
- Thread starter ilikewhey
- Start date
- Sort by reaction score
You are using an out of date browser. It may not display this or other websites correctly.
You should upgrade or use an alternative browser.
You should upgrade or use an alternative browser.
I agree in part with you, but look at my results and they are much higher than the factory.
I get that this is a hobby for you and as long as you're enjoying yourself, that's awesome. But from 632 on a benchmark to 711 on a bechmark is a 12.5% increase. The heat sink design isn't holding back the performance of Apple's Y series or U series chips - it's hard coded.
I stated that the best 'these modifications are able to add maybe 10-15% performance', so you seem to have achieved right in the middle of that.
We've seen one 2018 model that got similar results to your Cinebench scores, and most others have achieved a 10-15% performance gain on 2020 i5/i7 models. The sample size is getting pretty large now. They've achieved a modest increase in performance just using copper shims and thermal paste, but the main results have been temperature reductions under load. Using the copper shim/repaste approach is reversible, and much easier.
Again, trying to keep the thread on topic, the Ice Lake processors in 2020's MBAs have a hard coded limit (just like your 2019, and the 2019 I'm typing from) that no amount of home engineering will overcome. Comparing modded 2019 temps to modded 2020 temps is kinda off topic for the 2020 air heatsink thread, as the 2019 already idles at 45c and doesn't turbo boost rapidly up to 100c in the first place.
Last edited:
You did well, and achieved a more sustained Turbo Boost performance. Your base frequency is 1.6GHz, and running at 2.6GHz under load is great. But I agree with @RiaKoobcam, there's no secret ingredient or a magic. Y-chips (and 2020 U-chips) are designed that way, and Apple chose them for exactly that reason — longer battery life with a performance that is good enough for the majority of people for regular tasks.I agree in part with you, but look at my results and they are much higher than the factory.
Last edited:
Dear all, that's quite interesting to monitor your research.
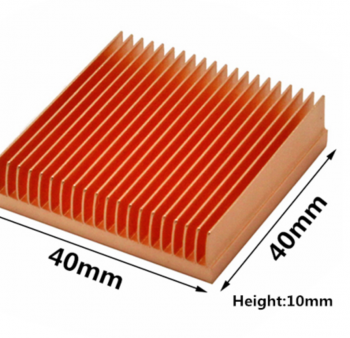
As far as I understood, the simplest way to reach maximal performance of CPU looks like that: remove heat sink, remove original thermal interface, put additional copper shim between CPU & heat sink with good thermal compound applied, install heat sink back, add additional "piece" on the top of the heat sink.
I thinking about what kind of ribbed "piece" made of copper can be installed on the top of heat sink? I have MBA 2020 i5 on my hands, but pentalobe screwdriver still on the way to me, and I cannot open my Air.
So, the question is: what is the distance between i5/i7 heat sink and bottom cover?
And one more question. What is the temperature of VRM? Is the reason to install additional heat sink on VRM?
Thanks in advance.
Last edited:
I thinking about what kind of ribbed "piece" made of copper can be installed on the top of heat sink? I have MBA 2020 i5 on my hands, but pentalobe screwdriver still on the way to me, and I cannot open my Air.
So, the question is: what is the distance between i5/i7 heat sink and bottom cover?
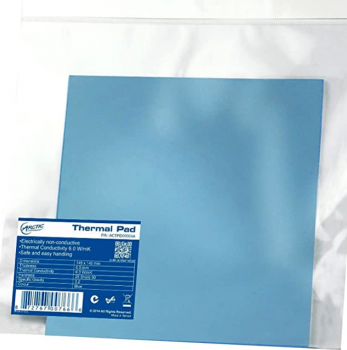
I wouldn't put there anything that can conduct electricity. Just put a 2mm thermal pad on top and that's it.
Thanks a lot, but I do not see any problem for additional conductive parts usage on heat sink, because:I wouldn't put there anything that can conduct electricity. Just put a 2mm thermal pad on top and that's it.
1. I do not planning to arrange contact between additional heat sink & bottom cover on the first stage of my test.
2. Srkirt already tested heat bridge made of metal from original heat sink to bottom cover.
By the way, I was quite impressed with your result when you used thermal pad. But I afraid that thermal pad partly blocking space above heat sink for free air passage. You redistributed air flows inside of case near CPU area. Actually I cannot say that I happy with that. I believe not solid surface but ribbed surface with better thermal conductivity than thermal pad could be more effective.
Last edited:
Thanks a lot, but I do not see any problem for additional conductive parts usage on heat sink, because:
1. I do not planning to arrange contact between additional heat sink & bottom cover on the first stage of my test.
2. Srkirt already tested heat bridge made of metal from original heat sink to bottom cover.
By the way, I was quite impressed with your result when you used thermal pad. But I afraid that thermal pad partly blocking space above heat sink for free air passage. You redistributed air flows inside of case near CPU area. Actually I cannot say that I happy with that. I believe not solid surface but ribbed surface with better thermal conductivity than thermal pad could be more effective.
I think that here you are debating the very fine details, that will probably make little difference overall. The major gain appears to be with filling the gap under the heatsink with copper shim and better paste.
It's always a pleasure reading this thread seeing the results and handiwork performed. Admittedly, I took the lazy route and just paid for a MBP 😂. An interesting thing to note is, while the CPU with these mods haven't really caught up to the pros (even the base pro scores 1600 in CB), the metal score for the G7 graphics is within a few % of the G7 powered in the 4 port MBP (both roughly 9-10k), and above the base model graphics which has a metal score of like 6500.
Is the hardcoded ~1.8ghz limit due to binning?
Is the hardcoded ~1.8ghz limit due to binning?
It's always a pleasure reading this thread seeing the results and handiwork performed. Admittedly, I took the lazy route and just paid for a MBP 😂. An interesting thing to note is, while the CPU with these mods haven't really caught up to the pros (even the base pro scores 1600 in CB), the metal score for the G7 graphics is within a few % of the G7 powered in the 4 port MBP (both roughly 9-10k), and above the base model graphics which has a metal score of like 6500.
Is the hardcoded ~1.8ghz limit due to binning?
I mean geekbench scores are not far from the MBP. I wonder though why Cinebench scores are so much worse in comparison to the MBP.
Regardless, the real world comparisons are far off and more closely track with the CB scores than the GB ones. By real world I mean things you'll actually do with your laptop (see Everyday Dad on youtube for actual work comparisons). GB is not a functional thing you do that performs work, nor is CB but at least it somewhat mimics the results from an actual workload. By that I mean like exporting many images at a time, merging photos, working with multiple layers, etc. People cling to the SC scores in GB. The new i3 MBA has the same or higher SC scores as the 16MBP, but the latter is infinitely better in almost any task, ironically, including real world SC tasks.I mean geekbench scores are not far from the MBP. I wonder though why Cinebench scores are so much worse in comparison to the MBP.
I don't want to detract from this thread, just wanted to give my props and move on.
Last edited:
No, that's the whole idea. The new heatsink is hollow inside and allows air passage through, thus cooling the CPU more. The thermal pad on top makes more air go through the heatsink.By the way, I was quite impressed with your result when you used thermal pad. But I afraid that thermal pad partly blocking space above heat sink for free air passage.
No, that's the whole idea. The new heatsink is hollow inside and allows air passage through, thus cooling the CPU more. The thermal pad on top makes more air go through the heatsink.
Sorry, but just to confirm, you only added a thermal pad between the heatsink and the CPU? Did you add more paste as well between thermal pad/CPU and/or thermal pad/heatsink? Thanks.
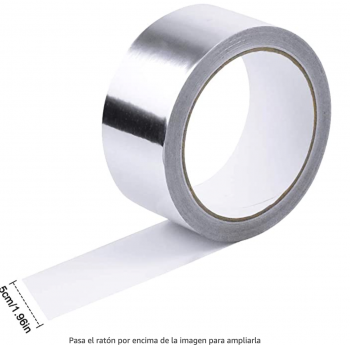
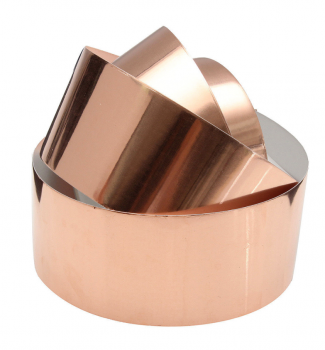
I continue with my plan... to bring the heat over the turbine with copper or aluminium adhesive. I just found a way to insulate the heat from the cpu to the cover. I thought I'd try an Iphone gorilla glass protector that's glued between the aluminum and the housing...
I think we have to define what our goals are here, and I realize they're different for each person. From my point of view the realistic expectations via these improvements would be:
1. With whatever benchmarks, hit the current hardware limits fairly consistently without being held back constantly by thermals.
2. Improve temperatures overall, helping hot-to-touch issues, longevity, and fan noise.
1. With whatever benchmarks, hit the current hardware limits fairly consistently without being held back constantly by thermals.
2. Improve temperatures overall, helping hot-to-touch issues, longevity, and fan noise.
Thermal pad lies on top of the heatsink, between the heatsink and the back cover.Sorry, but just to confirm, you only added a thermal pad between the heatsink and the CPU? Did you add more paste as well between thermal pad/CPU and/or thermal pad/heatsink? Thanks.
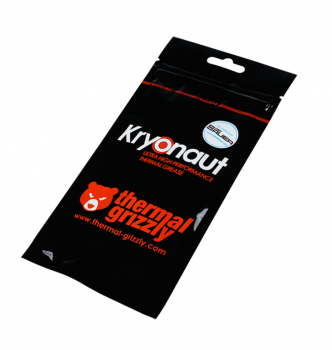
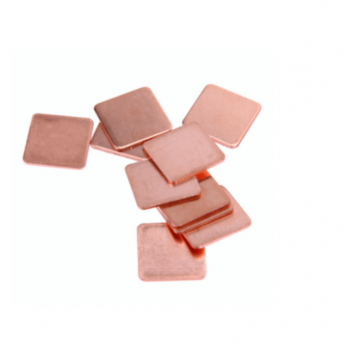
For the CPU I've cleaned the original thermal paste, applied a thin layer of Arctic Silver on top of both dies. Then I've applied a thin layer of Arctic Silver on top of the copper shim and placed that shim on the heatsink, gluing the shim to the heatsink. And then I've placed the heatsink with the copper shim on top of the CPU. The whole sandwich bottom to top looks like this:
1. CPU
2. Thin layer of thermal paste
3. Copper shim 0.3mm
4. Thin layer of thermal paste
5. Heatsink
6. Thermal pad
7. Heat insulating foam (part of the back cover)
8. Back cover
I've just helped my friend with MacBook Air 2018 to make this mod. Below are the results. The rules are the same — wait for the CPU to cool down to 40°C then run the test.
And here are the load/thermal curves for both tests.

The aluminium heatsink surface that connects to the CPU is rough and not smooth. One of the things that's easy to do is polish it with a fine sandpaper to improve heat conductivity. It would be great, of course, to replace the heatsink itself with a copper one, but I don't think that's doable. Other than that the mod is fairly simple, reversible, and leads to a cooler, quieter system and 10% performance gain for MBA 2018.
| Before | After | |
| Geekbench | 661 / 1559 | 797(+21%) / 1693(+9%) |
| Cinebench R20 | 611 | 672 (+10%) |
And here are the load/thermal curves for both tests.
The aluminium heatsink surface that connects to the CPU is rough and not smooth. One of the things that's easy to do is polish it with a fine sandpaper to improve heat conductivity. It would be great, of course, to replace the heatsink itself with a copper one, but I don't think that's doable. Other than that the mod is fairly simple, reversible, and leads to a cooler, quieter system and 10% performance gain for MBA 2018.
I've just helped my friend with MacBook Air 2018 to make this mod. Below are the results. The rules are the same — wait for the CPU to cool down to 40°C then run the test.
Before After Geekbench 661 / 1559 797(+21%) / 1693(+9%) Cinebench R20 611 672 (+10%)
And here are the load/thermal curves for both tests.
View attachment 916407
The aluminium heatsink surface that connects to the CPU is rough and not smooth. One of the things that's easy to do is polish it with a fine sandpaper to improve heat conductivity. It would be great, of course, to replace the heatsink itself with a copper one, but I don't think that's doable. Other than that the mod is fairly simple, reversible, and leads to a cooler, quieter system and 10% performance gain for MBA 2018.
Awesome - that Cinebench score improvement is around about the increase @Loog got modding his 2018.
So for those of you playing along at home, the copper mod is great for:
1. Cooling, first and foremost. The idea is to improve thermal performance.
2. Probably a 10-15% improvement on benchmarks, which may or may not be noticeable in real world use, depending on what you do.
3. Possibly a decrease in fan noise/intensity, as the fan governor will encounter proscribed temperatures less frequently and more gradually.
For those reading this thread and chasing the performance dragon, multiple users of the 2020 MBA (@KPOM was the first) have run their MBA's on cooling pads now and also improved their performance by 10-15%. That seems to be the hard coded limit for the U-series chips in this year's model.
The Macbook Air 2020 Copper Mod - it's like an invisible cooling pad you can take with you everywhere, and it won't chill your desk OR your reproductive organs!™
We have tested this with my friend's VMWare Fusion Windows 10 virtual machine. He uses it to view some heavy AutoDesk files, and he told me the MBA 2018 blasted the fan on almost full speed before almost immediately after VM start. During our tests after the mod it stayed practically silent for half an hour.3. Possibly a decrease in fan noise/intensity, as the fan governor will encounter proscribed temperatures less frequently and more gradually.
Last edited:
Excuse me ... the first to remove the heatsink and put a wedge, it was me in 2019 and in this thread ...Awesome - that Cinebench score improvement is around about the increase @Loog got modding his 2018.
So for those of you playing along at home, the copper mod is great for:
1. Cooling, first and foremost. The idea is to improve thermal performance.
2. Probably a 10-15% improvement on benchmarks, which may or may not be noticeable in real world use, depending on what you do.
3. Possibly a decrease in fan noise/intensity, as the fan governor will encounter proscribed temperatures less frequently and more gradually.
For those reading this thread and chasing the performance dragon, multiple users of the 2020 MBA (@KPOM was the first) have run their MBA's on cooling pads now and also improved their performance by 10-15%. That seems to be the hard coded limit for the U-series chips in this year's model.
The Macbook Air 2020 Copper Mod - it's like an invisible cooling pad you can take with you everywhere, and it won't chill your desk OR your reproductive organs!™
It is in case your memory fails and you want to review the entire thread from page one ... be very careful ...
[automerge]1589841106[/automerge]
I've just helped my friend with MacBook Air 2018 to make this mod. Below are the results. The rules are the same — wait for the CPU to cool down to 40°C then run the test.
Before After Geekbench 661 / 1559 797(+21%) / 1693(+9%) Cinebench R20 611 672 (+10%)
And here are the load/thermal curves for both tests.
View attachment 916407
The aluminium heatsink surface that connects to the CPU is rough and not smooth. One of the things that's easy to do is polish it with a fine sandpaper to improve heat conductivity. It would be great, of course, to replace the heatsink itself with a copper one, but I don't think that's doable. Other than that the mod is fairly simple, reversible, and leads to a cooler, quieter system and 10% performance gain for MBA 2018.
711.I've just helped my friend with MacBook Air 2018 to make this mod. Below are the results. The rules are the same — wait for the CPU to cool down to 40°C then run the test.
Before After Geekbench 661 / 1559 797(+21%) / 1693(+9%) Cinebench R20 611 672 (+10%)
And here are the load/thermal curves for both tests.
View attachment 916407
The aluminium heatsink surface that connects to the CPU is rough and not smooth. One of the things that's easy to do is polish it with a fine sandpaper to improve heat conductivity. It would be great, of course, to replace the heatsink itself with a copper one, but I don't think that's doable. Other than that the mod is fairly simple, reversible, and leads to a cooler, quieter system and 10% performance gain for MBA 2018.
Attachments
Last edited:
Excuse me ... the first to remove the heatsink and put a wedge, it was me in 2019 and in this thread ...
It is in case your memory fails and you want to review the entire thread from page one ... be very careful ...
I'm not trying to argue with you dude.
Dan Silov's post was about a copper shim and repaste on a 2018 MBA, Loog was the first to do a similar mod to a 2018 MBA in this thread. You've got a 2019. Comparing Loog's results to the ones Dan just posted makes sense - same model, very similar modding technique, and as such, very similar results.
You can happily claim to be the first person to do a lot of stuff to your 2019 Macbook Air (wind channels, Euro coins, finned heat sinks, the works), but you didn't invent CPU shims. Others have tried to point this out to you so there doesn't seem like much point derailing the thread again.
All this material has to reach me ... now I am in Standby ... By the way the Gorilla Gloss glass does not avoid transmitting heat ... It has to be like the protectors of the car glass in summer, aluminum foil and foam .
Attachments
-
 Captura de pantalla 2020-05-19 a las 0.46.05.png387.5 KB · Views: 157
 -
 Captura de pantalla 2020-05-19 a las 0.45.23.png516.8 KB · Views: 146
 -
 Captura de pantalla 2020-05-19 a las 0.43.18.png821.5 KB · Views: 164
 -
 Captura de pantalla 2020-05-19 a las 0.43.45.png856 KB · Views: 170
 -
 Captura de pantalla 2020-05-19 a las 0.44.17.png320 KB · Views: 166
 -
 Captura de pantalla 2020-05-19 a las 0.48.10.png486.4 KB · Views: 157
 -
 Captura de pantalla 2020-05-19 a las 0.47.32.png258 KB · Views: 161
FYI in case anyone cares I did an Apple support chat today (on a different work model) asking about replacing thermal paste. The rep said it could void the warranty but was being a bit coy and legalese on me. My guess is if this mod can be easily undone for sending in for warranty (which most of yours can be so far) then it shouldn't be an issue. My only concern is if something else happened in/around the CPU and they could tell new paste was used or something else, they might refuse it just because they can.
Just a heads up to those trying this. Does anyone know the specific terrible paste they use? My thought would be if I were to send this in for warranty I'd just throw on their crap black paste so they wouldn't notice.
Just a heads up to those trying this. Does anyone know the specific terrible paste they use? My thought would be if I were to send this in for warranty I'd just throw on their crap black paste so they wouldn't notice.
Register on MacRumors! This sidebar will go away, and you'll see fewer ads.


