DISCLAIMER: This guide is provided with the hope that it will prove useful and has been tested for a handful of G3s, several G4s, and most G5s. Overall, your millage may vary.
This is a WikiPost, so if anyone has any contributions, feel free to contribute. @z970mp deserves all of the credit for keeping this information up to date. I'll continue to eye the thread and help out as much as I can.
NOTICE: As Sid = unstable, the installer may at times prove to be unpredictable and may fail for any reason at any point along the way. These instructions are not guaranteed to make your installation a success, and remember to always back up your data before making any changes to your hard disk and its partitions.
Thank you.
////////////////////////////////////////////////////////////////////////////////////////////////////////////////////////
Installing Debian Sid on PowerPC Macs - Updated: July 30, 2019
1. Download the newest netinstall CD image from:
(http://cdimage.debian.org/cdimage/ports/)
1a. Note: The 'powerpc' ISOs will work across G3s, G4s, and G5s. The 'ppc64' ISOs will only work on G5s, and will take the most advantage of the G5 hardware, making both the kernel and userspace fully 64-bit, as opposed to the 32-bit userspace powerpc variants. The catch is that as of May 2019 (last checked), the ppc64 environments are fairly buggier than their powerpc counterparts, so you'll need to be prepared to file a couple simple bug reports with the 'reportbug' package. Otherwise, choose the powerpc ISO.
------------------------------------------------------------------------------------------
2 (On A Linux System). Open a terminal and copy / paste the following text, then edit according to how many HDs you have installed:
sudo dd if=~/Downloads/debian-10.0-powerpc-NETINST-1.iso of=/dev/sdx
(use sdb if one HD is installed, use sdc if two HDs installed, etc.)
Once sdx has been correctly edited, hit Enter, and wait for it to finish, which should usually take around 5 minutes.
2a. Alternatively, you may boot from a CD, but this method can be wasteful, and installation will be slower.
------------------------------------------------------------------------------------------
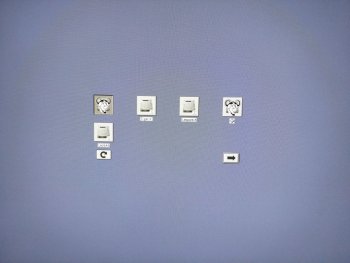
3. Reboot, and hold Cmd + Opt + O + F at the chime (or Caps Lock light). Usually, you're going to be giving Open Firmware the same command:
boot usb0/disk@1:,\\grub.elf
If 'usb0' doesn't work, try 'usb1', then 'usb2', 'usb3', etc.
------------------------------------------------------------------------------------------
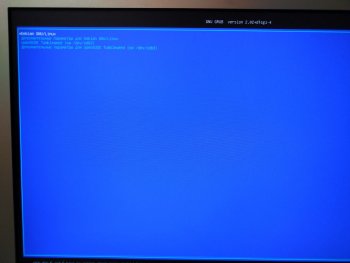
4. The GRUB bootloader will come up. Hit Enter for a default install.
------------------------------------------------------------------------------------------
5. Connect your Mac to your network via Ethernet, then follow the very straightforward prompts. For partitioning, use 'Guided - use entire disk' and 'All files in one partition' for easiest installation. Note that this will destroy any previous system installs on the selected disk, so be sure that you want to do this before proceeding.
------------------------------------------------------------------------------------------
6. When you're prompted to choose an archive mirror, scroll all the way up to the top of the list, choose 'enter information manually', then enter 'ftp.ports.debian.org' for the mirror, and '/debian-ports/' for the directory. When manual package selection comes up, install 'Standard System Utilities' and 'SSH server' when prompted (An asterisk will be present next to the Standard System Utilities choice. If it isn't, press the Space Bar to select it, then Tab to move to the Continue prompt), and make sure nothing else is selected for now. Choose 'yes' when you are asked if you want to install Popularity Contest, because we want the developers to know that the powerpc / ppc64 port is actively used.
6a. If you are on a G3 / G4, there is a chance that GRUB installation may fail. If this is the case, press Esc after you are told GRUB installation has failed. Choose 'Continue without bootloader', confirm, and once you are given the dialog to remove your install medium and reboot, do not hit Enter. Instead, press Alt + F2 (Alt + Fn + F2 on some keyboards), and input the following commands in order:
Code:
1. chroot /target
2. mount -t sysfs none /sys
3. apt install hfsutils
4. yabootconfig -b /dev/sda2
5. ybin
6. Alt + F1
------------------------------------------------------------------------------------------
7. Once installation is complete, your disc (if you used one) will eject, and you will be told to remove your installation medium. Do so, and select 'continue' to reboot your system.
------------------------------------------------------------------------------------------
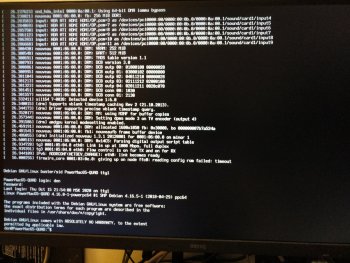
8. Once your system reboots, log in with your credentials.
------------------------------------------------------------------------------------------
9. Type ‘sudo apt edit-sources’ and press Return. Enter your password if necessary.
------------------------------------------------------------------------------------------
10. Delete the CD line (hold Ctrl +K). Now add the Ports repositories:
Code:
# Sources
deb http://ftp.ports.debian.org/debian-ports/ unstable main
deb http://ftp.ports.debian.org/debian-ports/ unreleased main
deb http://incoming.ports.debian.org/buildd/ unstable main

# Non-Free (add this if you have an ATI GPU)
deb [arch=all] http://ftp.debian.org/debian/ unstable main contrib non-free
------------------------------------------------------------------------------------------
11. Press Control-X, answer Y, and press Return.
------------------------------------------------------------------------------------------
12. Type 'sudo apt update' and let the repos update.
------------------------------------------------------------------------------------------
13. If you've got an ATI GPU, install the non-free firmware by typing 'sudo apt install firmware-linux-nonfree'. If you have an Nvidia GPU, you are now finished with installation.
------------------------------------------------------------------------------------------
14. Type 'sudo reboot' and let your machine reboot to be sure everything is stable with the non-free video firmware. You'll find yourself back at your login prompt. Log in with your username and password.
////////////////////////////////////////////////////////////////////////////////////////////////////////////////////////
Congratulations! This covers the installation of a base system with most everything needed.
You can now drop by The PowerPC Linux Wiki to grab a desktop environment, enable Wi-Fi, get some awesome speed tweaks, and follow easy configuration pointers so you can get settled in to your new system.
Hi
@swamprock and thank you for this awesome tutorial... I'll admit I have been a bit lazy in these last weeks... With this I would be finally able to get Debian Ports on my iBook G4. I don't have a modern Mac, so I was wondering, Step 11: it is possible to do it with a PowerPC Mac or with a Windows PC?
I wish Step 13 was true. I have a G4 with an Nvidia Geforce4 MX 420 Rev a3. My install used Yaboot and went very well. Rebooting with nomodeset got me to a terminal screen where I was able to edit the source repos (using [trusted=yes] on all of them), DID NOT use the source for ATI GPUs per instructions you provided. Once the update/upgrade was completed, I rebooted, no boot parameters entered, and it booted to a black screen with no access to terminals (or anything for that matter). I am having a devil of a time trying to figure out what's needed to get to a functional GUI.
Are there boot parameters I can enter to trigger the required frame buffer?
I've tried video=ofonly, video=offb

ff with a fb such as nouveau, riva, nvidia and working toward using nv next. I have had other distros run on this machine successfully, granted they were older and not as functional as Debian. There has to be some sort of clue to that being the case.
Can a GUI be launched from a terminal screen?
I figure if this is true, I can get to a terminal and launch the GUI from there. Not the worst workaround I've ever encountered. One of the reasons I need access to the GUI desktop is to see if it can be manipulated (if necessary) to be as sharp as possible.
Understand the Nvidia card is driving an Apple cinema display and does have a DVI port I have not tried since this most recent install. I will try that later today, this may be a viable option but not the one I'd prefer.
Any ideas?
MacMav855
(yes, you and wicknix have been helping me A LOT)


